Note
Access to this page requires authorization. You can try signing in or changing directories.
Access to this page requires authorization. You can try changing directories.
Microsoft Discovery supports agent creation across two offerings: Microsoft Discovery for team collaboration and Discovery app for individual experimentation. You can author prompt agents through the Discovery Studio UI, copy them from other projects, or start locally in Discovery app before promoting to Microsoft Discovery.
This article walks you through each authoring method. Choose the approach that best fits your workflow and team needs.
Prerequisites
- An active Azure subscription.
- A deployed Microsoft Discovery workspace with at least one project. For setup instructions, see Get started with Microsoft Discovery infrastructure.
- A chat model deployment configured at the workspace level. For details, see Create a chat model deployment.
Create a prompt agent in Discovery Studio
A prompt agent is a declaratively defined agent that combines model configuration, instructions, tools, and natural language prompts to drive behavior. You can configure a prompt agent with knowledge bases for retrieval-augmented grounding and attach tools such as Microsoft discovery tool, code interpreter or Model Context Protocol (MCP) tools. Use the form-based experience in Discovery Studio to create one.
Sign in to Microsoft Discovery Studio.
Select the Projects tab in the left navigation pane and open your project.
In the Resources pane, select the + button next to Agents, then select Create new agent.
In the New Agent dialog, select Agent as the type.
Enter a Name and Description for the agent. The name serves as the agent's unique identifier within the project. Other agents and workflows reference it by this name.
Under Chat model, select your workspace-level model deployment.
Enter the agent Instructions. Instructions are natural language prompts that define the agent's behavior, persona, and reasoning approach.
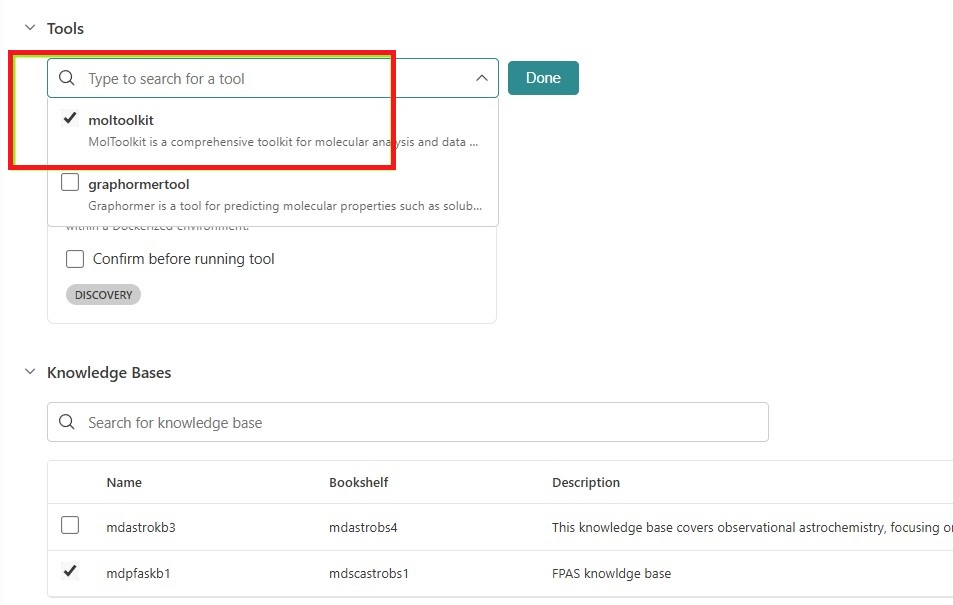
(Optional) Attach tools to give the agent access to external capabilities:
Expand the Tools section and select the search box. A dropdown list shows all available tools in your workspace. Select the checkbox next to each tool you want to attach.
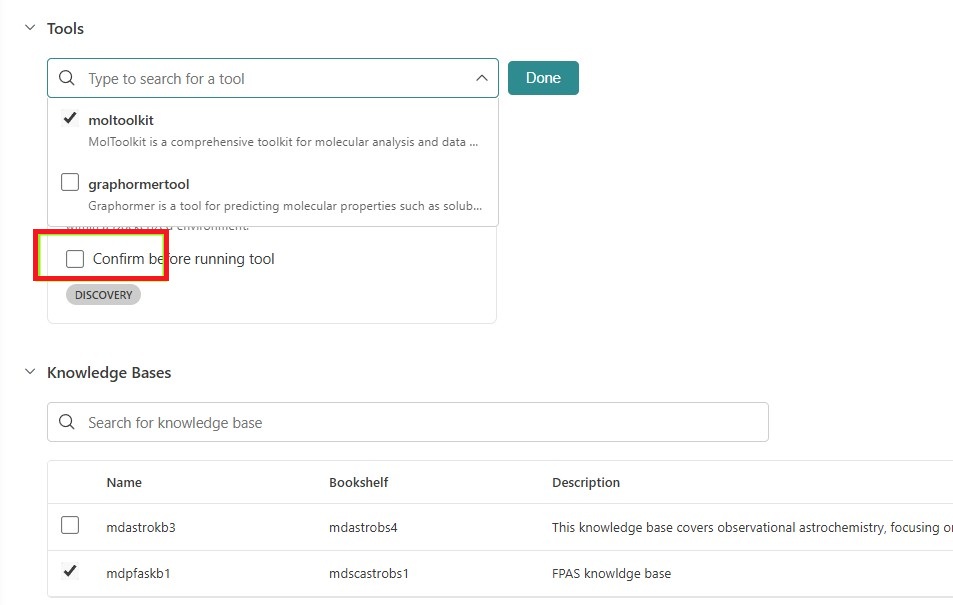
(Optional) If you want the agent to ask for user approval before running a tool, select the Confirm before running tool checkbox. When this option is enabled, the agent pauses and prompts the user for confirmation each time it invokes the tool during a conversation.
Select Done to save your tool selections.
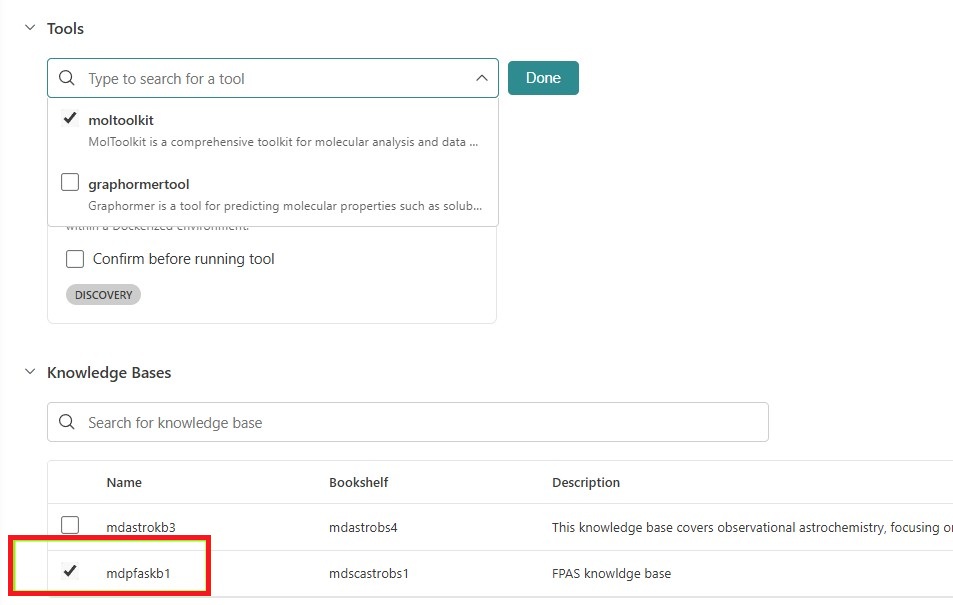
(Optional) Connect knowledge bases for retrieval-augmented grounding:
Expand the Knowledge Bases section. A table lists all available knowledge bases with their name, associated bookshelf, and description. Select the checkbox next to each knowledge base you want the agent to use for grounding its responses.
Select Create agent.


Each save creates a new immutable version with full history. You can test the agent by typing @AgentName in an investigation chat.
Copy a prompt agent from another project
You can reuse prompt agents across projects by copying them from an existing project.
Sign in to Microsoft Discovery Studio.
Select the Projects tab and open the target project where you want to add the agent.
In the Resources pane, select the + button next to Agents, then select Copy from project.
Select the source project that contains the agent you want to copy.
Select the agent to copy and confirm the operation.
The copied agent appears as a new agent in your target project. You can edit its instructions, tools, and settings independently of the original.
Create agents in Discovery app
Discovery app is a local experience built on GitHub Copilot where individual users can create, test, and validate custom agents before promoting them to Microsoft Discovery for team use.
Prerequisites for Discovery app
- GitHub Copilot installed and configured
- Familiarity with GitHub Copilot extensibility
Create a custom agent with Copilot skills
In Discovery app, you define agents using skills following the GitHub Copilot extensibility model.
Open Discovery app in your local environment.
Create a new custom agent by defining its skills. Skills follow the patterns and documentation from GitHub Copilot.
Configure the agent's instructions, capabilities, and any tool integrations.
(Optional) Attach a local knowledge base to enable the agent to retrieve private knowledge for grounded responses. Discovery app supports a local version of bookshelf that allows agents to access domain-specific information stored on your machine.
Test the agent locally by interacting with it in Discovery app.
Iterate on the agent design, instructions, and knowledge configuration until the agent performs reliably.
Promote agents from Discovery app to Microsoft Discovery
Discovery app serves as a local platform where you can experiment with and validate agent designs before making them available to your team. The promotion path works as follows:
Validate locally—Use Discovery app to test your agent design, prompts, and tool configurations. Confirm that the agent produces reliable, high-quality results.
Adapt for Microsoft Discovery—Once validated, adapt your agent design for Microsoft Discovery. This involves:
- Creating a prompt agent in Discovery Studio with equivalent instructions
- Configuring workspace-level model deployments
- Attaching shared knowledge bases (bookshelves) for team access
- Connecting Discovery tools appropriate for the service environment
Deploy to Microsoft Discovery—Create the agent in your Microsoft Discovery project following the prompt agent creation steps described earlier in this article.
Collaborate with your team—Once in Microsoft Discovery, the agent is available to all project members. Team members can invoke the agent using
@AgentNamein investigations and leverage the Discovery Engine for multi-agent orchestration.
Tip
Start in Discovery app for rapid prototyping and individual experimentation. Move to Microsoft Discovery when you need team collaboration, shared knowledge bases, enterprise governance, or autonomous multi-agent orchestration via the Discovery Engine.