Note
Access to this page requires authorization. You can try signing in or changing directories.
Access to this page requires authorization. You can try changing directories.
This article demonstrates how to boost the performance of an Azure Database for MySQL Flexible Server instance using Azure Cache for Redis. Azure Cache for Redis is a secure data cache and messaging broker that provides high throughput and low-latency access to data for applications.
Prerequisites
For this quickstart you need:
- An Azure account with an active subscription.
If you don't have an Azure subscription, create an Azure free account before you begin. Currently, with an Azure free account, you can try Azure Database for MySQL - Flexible Server free for 12 months. For more information, see Use an Azure free account to try Azure Database for MySQL - Flexible Server for free.
- Create an Azure Database for MySQL Flexible Server instance using Quickstart: Create an instance of Azure Database for MySQL with the Azure portal
or Quickstart: Create an instance of Azure Database for MySQL - Flexible Server by using the Azure CLI if you don't have one. - Configure networking settings of the Azure Database for MySQL Flexible Server instance to make sure your IP has access to it. If you're using Azure App Service or Azure Kubernetes service, enable Allow public access from any Azure service within Azure to this server setting in the Azure portal.
Populate the MySQL database
Connect to Use MySQL Workbench with Azure Database for MySQL - Flexible Server and run the following query to populate the database.
CREATE DATABASE tododb;

CREATE TABLE tasks
(
    id int NOT NULL AUTO_INCREMENT PRIMARY KEY,
    title nvarchar(100) NOT NULL,
    completed TINYINT(1) NOT NULL
);

INSERT INTO tasks (id,title, completed) VALUES
(1,'Task1', 0),
(2,'Task2', 0),
(3,'Task3', 1),
(4,'Task4', 1),
(5,'Task5', 0);
Create a Redis cache
In the Azure portal, search for and select Azure Cache for Redis.
On the Azure Cache for Redis page, select Create > Azure Cache for Redis.
On the Basics tab of the New Redis Cache page, configure the following settings:
- Subscription: Select the subscription to use.
- Resource group: Select a resource group, or select Create new and enter a new resource group name. Putting all your app resources in the same resource group lets you easily manage or delete them together.
- Name: Enter a cache name that's unique in the region. The name must:
- Be a string of 1 to 63 characters.
- Contain only numbers, letters, and hyphens.
- Start and end with a number or letter.
- Not contain consecutive hyphens.
- Region: Select an Azure region near other services that use your cache.
- Cache SKU: Select a SKU to determine the available sizes, performance, and features for your cache.
- Cache size: Select a cache size. For more information, see Azure Cache for Redis overview.

Select the Networking tab, or select Next: Networking.
On the Networking tab, select a connectivity method to use for the cache. Private Endpoint is recommended for security. If you select Private Endpoint, select Add private endpoint and create the private endpoint.
Select the Advanced tab, or select Next: Advanced.
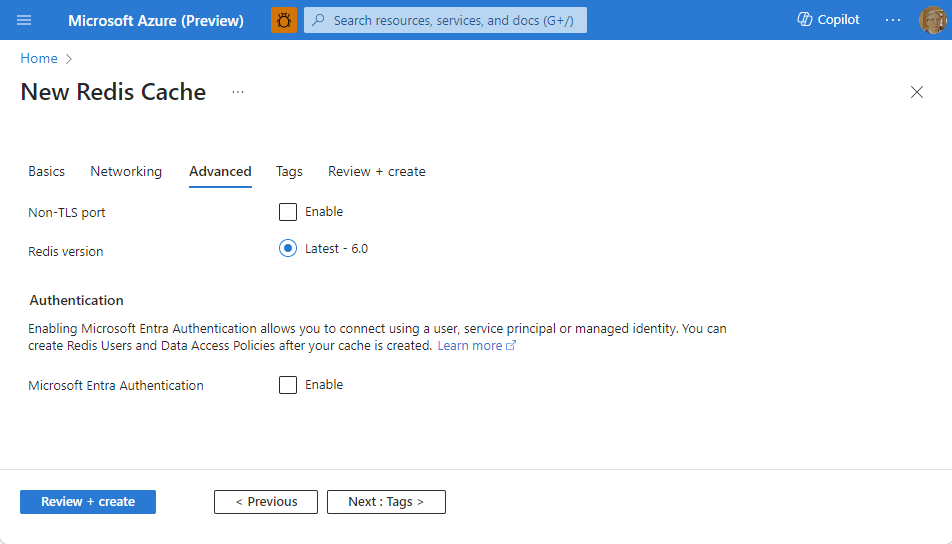
On the Advanced pane, configure the following options:
- Select Microsoft Entra Authentication or Access Keys Authentication. Microsoft Entra Authentication is enabled by default.
- Choose whether to Enable the non-TLS port.
- For a Premium cache, you can configure or disable Availability zones. You can't disable availability zones after the cache is created. For a Standard cache, availability zones are allocated automatically. Availability zones aren't available for Basic SKU.
- For a Premium cache, configure the settings for Replica count, Clustering and Shard count, System-assigned managed identity, and Data persistence.
The following image shows the Advanced tab for the Standard SKU.
Important
Use Microsoft Entra ID with managed identities to authorize requests against your cache if possible. Authorization using Microsoft Entra ID and managed identity provides better security and is easier to use than shared access key authorization. For more information about using managed identities with your cache, see Use Microsoft Entra ID for cache authentication.
Optionally, select the Tags tab or select Next: Tags, and enter tag names and values to categorize your cache resources.
Select Review + create, and once validation passes, select Create.
The new cache deployment takes several minutes. You can monitor deployment progress on the portal Azure Cache for Redis page. When the cache Status displays Running, the cache is ready to use.
Use Redis with Python
Install the latest version of Python on your local environment or on an Azure virtual machine or Azure App Service. Use pip to install redis-py.
pip install redis
The following code creates a connection to Azure Cache for Redis instance using redis-py, stores the query result into the Azure Cache for Redis and fetches the value from the cache.
import redis
import mysql.connector

r = redis.Redis(
    host='your-azure-redis-instance-name.redis.cache.windows.net',
    port=6379,
    password='azure-redis-primary-access-key')

mysqlcnx = mysql.connector.connect(user='your-admin-username', password='<password>',
                              host='database-servername.mysql.database.azure.com',
                              database='your-databsae-name')

mycursor = mysqlcnx.cursor()
mycursor.execute("SELECT * FROM tasks where completed=1")
myresult = mycursor.fetchall()

#Set the result of query in a key
if result:
          cache.hmset(mykey, myresult)
          cache.expire(mykey, 3600)
      return result

#Get value of mykey
getkeyvalue= cache.hgetall(mykey)

#close mysql connection
mysqlcnx.close()
Use Redis with PHP
Install PHP on your local environment. Follow the steps below to write a PHP script that caches a SQL query from the Azure Database for MySQL Flexible Server database. Here are a few prerequisites before running the script:
- Install and enable Redis PECL extension to use Azure Cache for Redis with your PHP script. See how to install the extension locally
- Install and enable MySQL PDO extension
<?php

$redis = new Redis();
$redis->connect('azure-redis-instance-ame.redis.cache.windows.net', 6379);
$redis->auth('azure-redis-primary-access-key');

$key = 'tasks';

if (!$redis->get($key)) {
    /*Pulling data from MySQL database*/
    $database_name     = 'database-name';
    $database_user     = 'your-database-user';
    $database_password = 'your-database-password';
    $mysql_host        = 'database-servername.mysql.database.azure.com';

    $pdo = new PDO('mysql:host=' . $mysql_host . '; dbname=' . $database_name, $database_user, $database_password);
    $pdo->setAttribute(PDO::ATTR_ERRMODE, PDO::ERRMODE_EXCEPTION);

    $sql  = "SELECT * FROM tasks";
    $stmt = $pdo->prepare($sql);
    $stmt->execute();

    while ($row = $stmt->fetch(PDO::FETCH_ASSOC)) {
       $tasks[] = $row;
    }

    $redis->set($key, serialize($tasks));
    $redis->expire($key, 10);

} else {
     /*Pulling data from Azure Cache for Redis*/
     $tasks = unserialize($redis->get($key));

}

echo $source . ': <br>';
print_r($tasks);
Use Redis with WordPress
The benefit of enabling Azure Cache for Redis instance to your WordPress application will allow you to deliver content faster since all of the WordPress content is stored in the database. You can cache content that is mostly read only from WordPress database to make the query lookups faster. You can use either of these plugins to setup Redis. Install and enable Redis PECL extension. See how to install the extension locally or how to install the extension in Azure App Service.
Install Redis Object cache and activate this plugin on our WordPress application. Now update the wp-config.php file right above the statement / That's all, stop editing! Happy blogging. /*
define( 'WP_REDIS_HOST', 'azure-redis-servername.redis.cache.windows.net' );
define( 'WP_REDIS_PORT', 6379 );
define( 'WP_REDIS_PASSWORD', 'azure-redis-primary-access-key' );
define( 'WP_REDIS_TIMEOUT', 1 );
define( 'WP_REDIS_READ_TIMEOUT', 1 );

// change the database for each site to avoid cache collisions
// values 0-15 are valid in a default redis config.
define( 'WP_REDIS_DATABASE', 0 );

// automatically delete cache keys after 7 days
define( 'WP_REDIS_MAXTTL', 60 * 60 * 24 * 7 );

// bypass the object cache, useful for debugging
// define( 'WP_REDIS_DISABLED', true );

/* That's all, stop editing! Happy blogging. */
Go to the Wordpress admin dashboard and select the Redis settings page on the menu. Now select enable Object Cache. Plugin will read the Azure Cache for Redis instance information from wp-config.php file.
You might also use W3 Total cache to configure Azure Cache for Redis on your WordPress app. You can evaluate the performance improvements using Query Monitor plugin, which allows you to debug database queries and it also shows total database queries grouped by a plugin.