Note
Access to this page requires authorization. You can try signing in or changing directories.
Access to this page requires authorization. You can try changing directories.
This quickstart contains the prerequisite tasks for Operator and Virtualized Network Function (VNF). While it's possible to automate these tasks within your NSD (Network Service Definition), in this quickstart, the actions are performed manually.
Deploy prerequisites for Virtual Machine (VM)
Follow the actions to Create resource groups for the prerequisites in the same region as your Publisher resources.
az loginSelect active subscription using the subscription ID.
az account set --subscription "xxxxxxxx-xxxx-xxxx-xxxx-xxxxxxxxxxxx"Create the Resource Group.
az group create --name OperatorResourceGroup --location uksouthNote
The Resource Group you create here is used for further deployment.
Save the following Bicep script locally as prerequisites.bicep.
param location string = resourceGroup().location
param vnetName string = 'ubuntu-vm-vnet'
param vnetAddressPrefixes string
param subnetName string = 'ubuntu-vm-subnet'
param subnetAddressPrefix string
param identityName string = 'identity-for-ubuntu-vm-sns'

resource networkSecurityGroup 'Microsoft.Network/networkSecurityGroups@2022-05-01' ={
  name: '${vnetName}-nsg'
  location: location
}

resource virtualNetwork 'Microsoft.Network/virtualNetworks@2019-11-01' = {
  name: vnetName
  location: location
  properties: {

    addressSpace: {
      addressPrefixes: [vnetAddressPrefixes]
    }
    subnets: [
      {
        name: subnetName
        properties: {
          addressPrefix: subnetAddressPrefix
          networkSecurityGroup: {
            id:networkSecurityGroup.id
          }
        }
      }
    ]
  }
}

resource managedIdentity 'Microsoft.ManagedIdentity/userAssignedIdentities@2018-11-30' = {
  name: identityName
  location: location
}

output managedIdentityId string = managedIdentity.id
output vnetId string = virtualNetwork.id
Save the following json template locally as prerequisites.parameters.json.
{
  "$schema": "https://schema.management.azure.com/schemas/2015-01-01/deploymentParameters.json#",
  "contentVersion": "1.0.0.0",
  "parameters": {
    "vnetAddressPrefixes": {
      "value": "10.0.0.0/24"
    },
    "subnetAddressPrefix": {
      "value": "10.0.0.0/28"
    }
  }
}
Ensure the scripts are saved locally.
Deploy Virtual Network
Start the deployment of the Virtual Network. Issue the following command:
az deployment group create --name prerequisites --resource-group OperatorResourceGroup --template-file prerequisites.bicep --parameters prerequisites.parameters.jsonThe script creates a Virtual Network, a Network Security Group and the Managed Identity.
Locate Resource ID for managed identity
Login to Azure portal: Open a web browser and sign in to the Azure portal (https://portal.azure.com/) using your Azure account credentials.
Navigate to All Services: Under Identity select Managed identities.
Locate the Managed Identity: In the list of managed identities, find and select the one named identity-for-ubuntu-vm-sns within your resource group. You should now be on the overview page for that managed identity.
Locate ID: Select the properties section of the managed identity. You should see various information about the identity. Look for the ID field.
Copy to clipboard: Select the Copy button or icon next to the Resource ID.
Save copied Resource ID: Save the copied Resource ID as this information is required for the Config Group Values when creating the Site Network Service.
Locate Resource ID for Virtual Network
Login to Azure portal: Open a web browser and sign in to the Azure portal (https://portal.azure.com/) using your Azure account credentials.
Navigate to Virtual Networks: In the left-hand navigation pane, select Virtual networks.
Search for Virtual Networks: In the list of virtual networks, you can either scroll through the list or use the search bar to find the ubuntu-vm-vnet virtual network.
Access Virtual Network: Select the name of the ubuntu-vm-vnet virtual network. You should now be on the overview page for that virtual network.
Locate ID: Select the properties section of the Virtual Network. You should see various information about the identity. Look for the Resource ID field.
Copy to clipboard: Select the Copy button or icon next to the Resource ID to copy it to your clipboard.
Save copied Resource ID: Save the copied Resource ID as this information is required for the Config Group Values when creating the Site Network Service.
Update Site Network Service (SNS) permissions
To perform this task, you need the 'User Access Administrator' role over the respective Resource Group. In prior steps, you created a Managed Identity labeled identity-for-ubuntu-vm-sns inside your reference resource group. This identity plays a crucial role in deploying the Site Network Service. (SNS). Grant the identity 'Contributor' permissions for relevant resources. These actions facilitate the connection of the Virtual Machine (VM) to the Virtual Network (VNET). Through this identity, the Site Network Service (SNS) attains the required permissions.
In prior steps, you created a Managed Identity labeled identity-for-ubuntu-vm-sns inside your reference resource group. This identity plays a crucial role in deploying the Site Network Service (SNS). Grant the identity 'Contributor' permissions for relevant resources. These actions facilitate the deployment of the Virtual Network Function and the connection of the Virtual Machine (VM) to the Virtual Network (VNET). Through this identity, the Site Network Service (SNS) attains the required permissions.
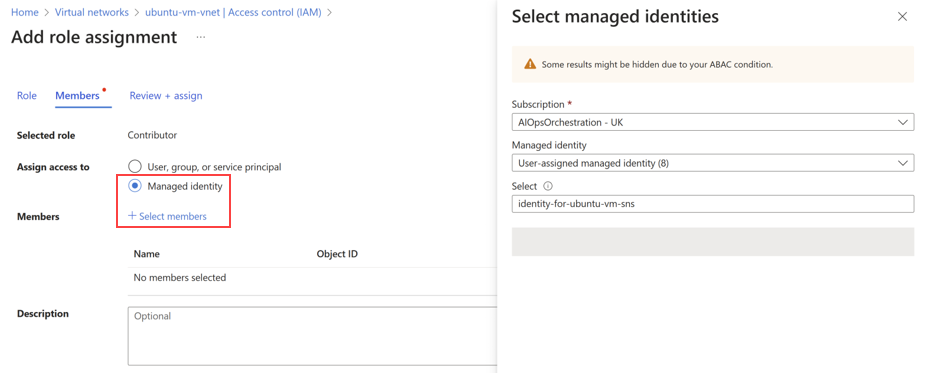
Grant Contributor role over Virtual Network to Managed Identity
Access the Azure portal and open the Resource Group created earlier in this case OperatorResourceGroup.
Locate and select the Virtual Network named ubuntu-vm-vnet.
In the side menu of the Virtual Network, select Access Control (IAM).
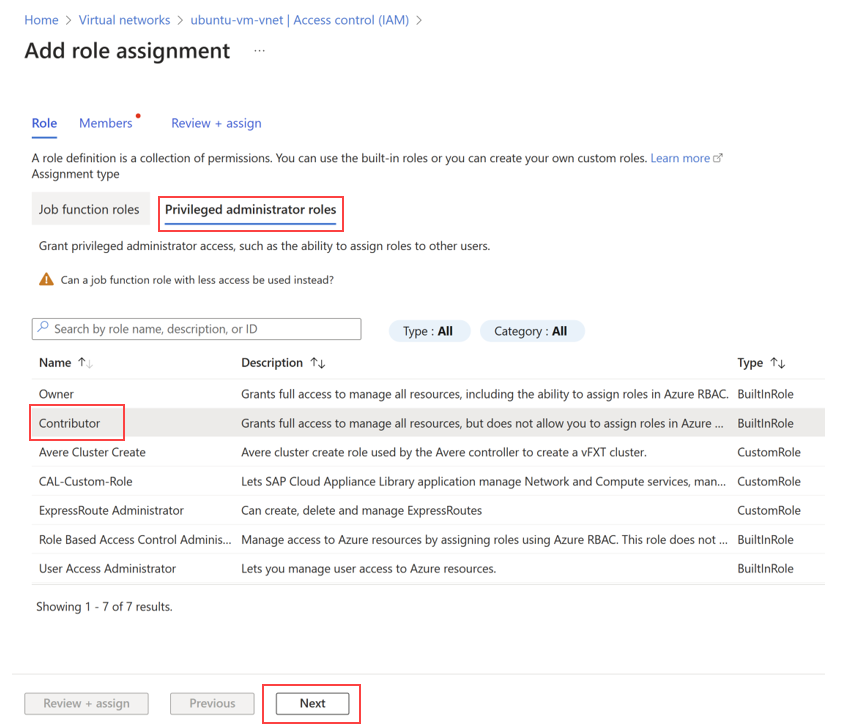
Choose Add Role Assignment.
Under the Privileged administrator roles, category pick Contributor then proceed with Next.
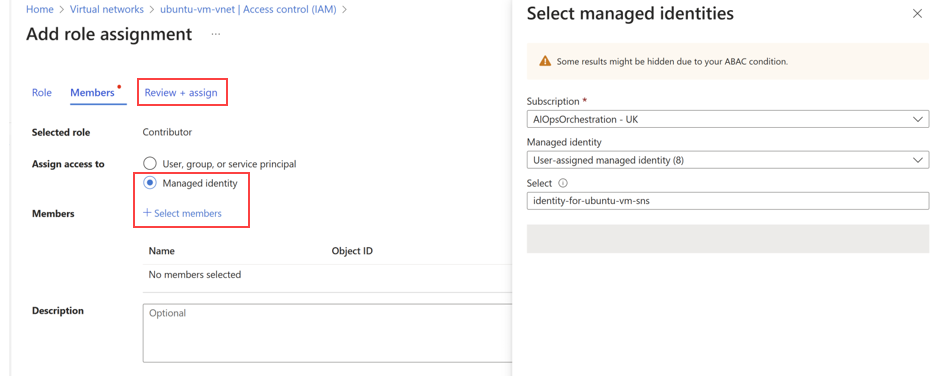
Select Managed identity.
Choose + Select members then find and choose the user-assigned managed identity identity-for-ubuntu-vm-sns.
Select Review and assign.
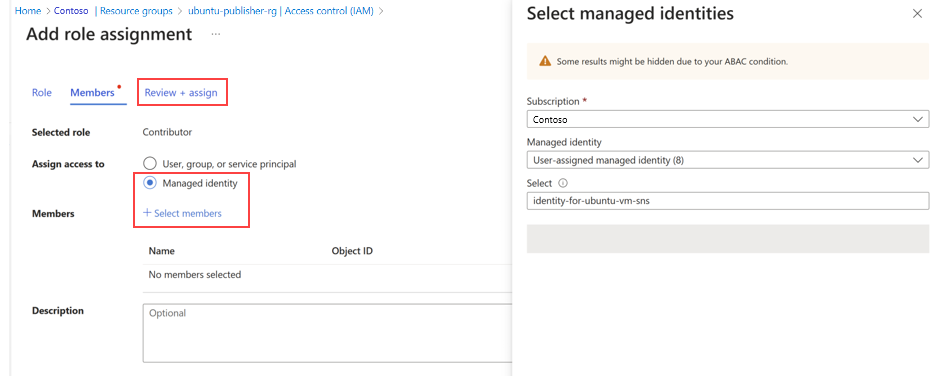
Grant Contributor role over publisher Resource Group to Managed Identity
Access the Azure portal and open the Publisher Resource Group created when publishing the Network Function Definition in this case ubuntu-publisher-rg.
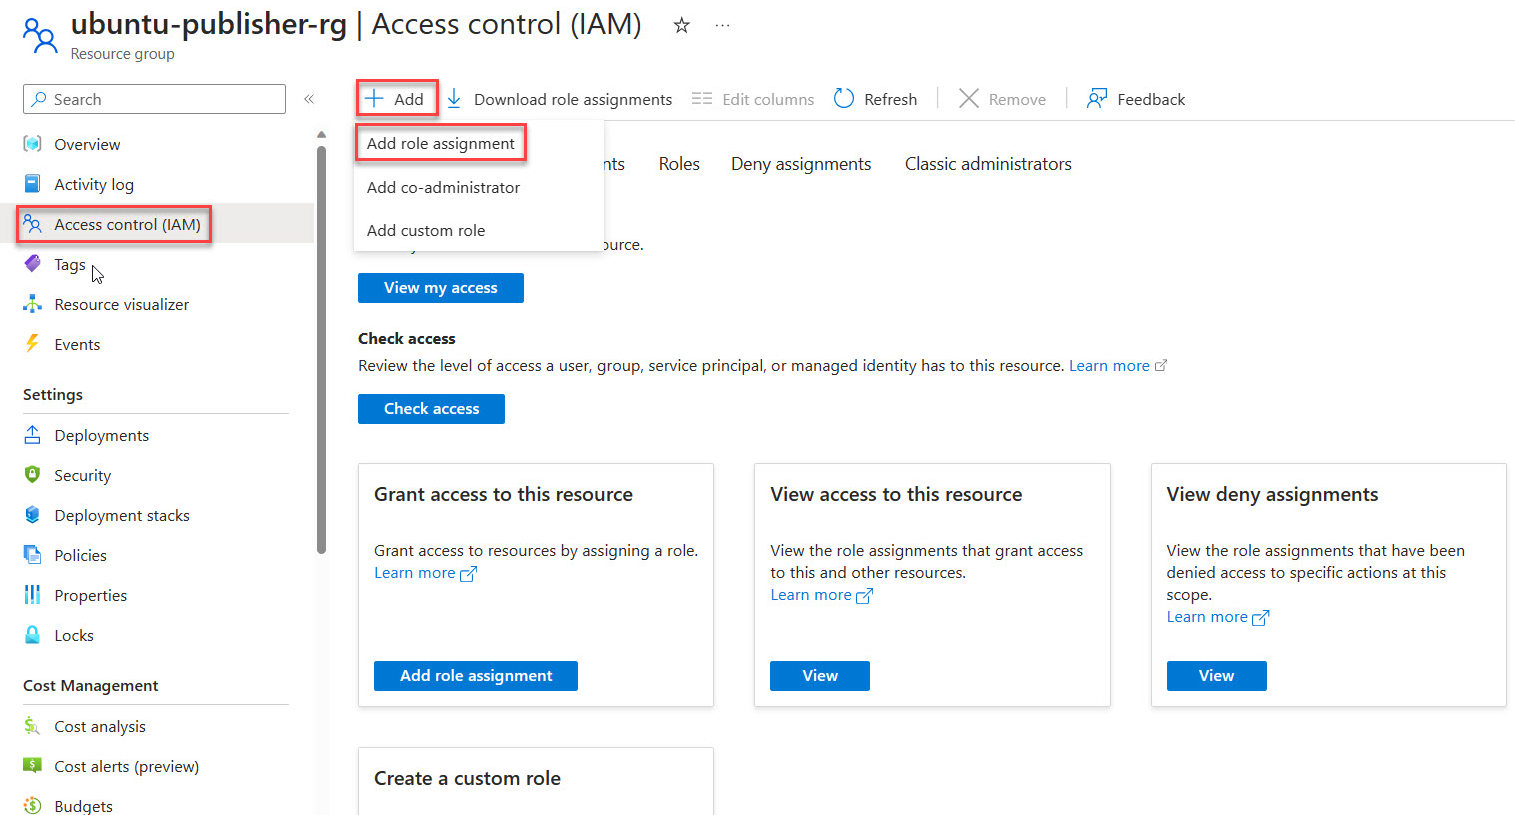
In the side menu of the Resource Group, select Access Control (IAM).
Choose Add Role Assignment.
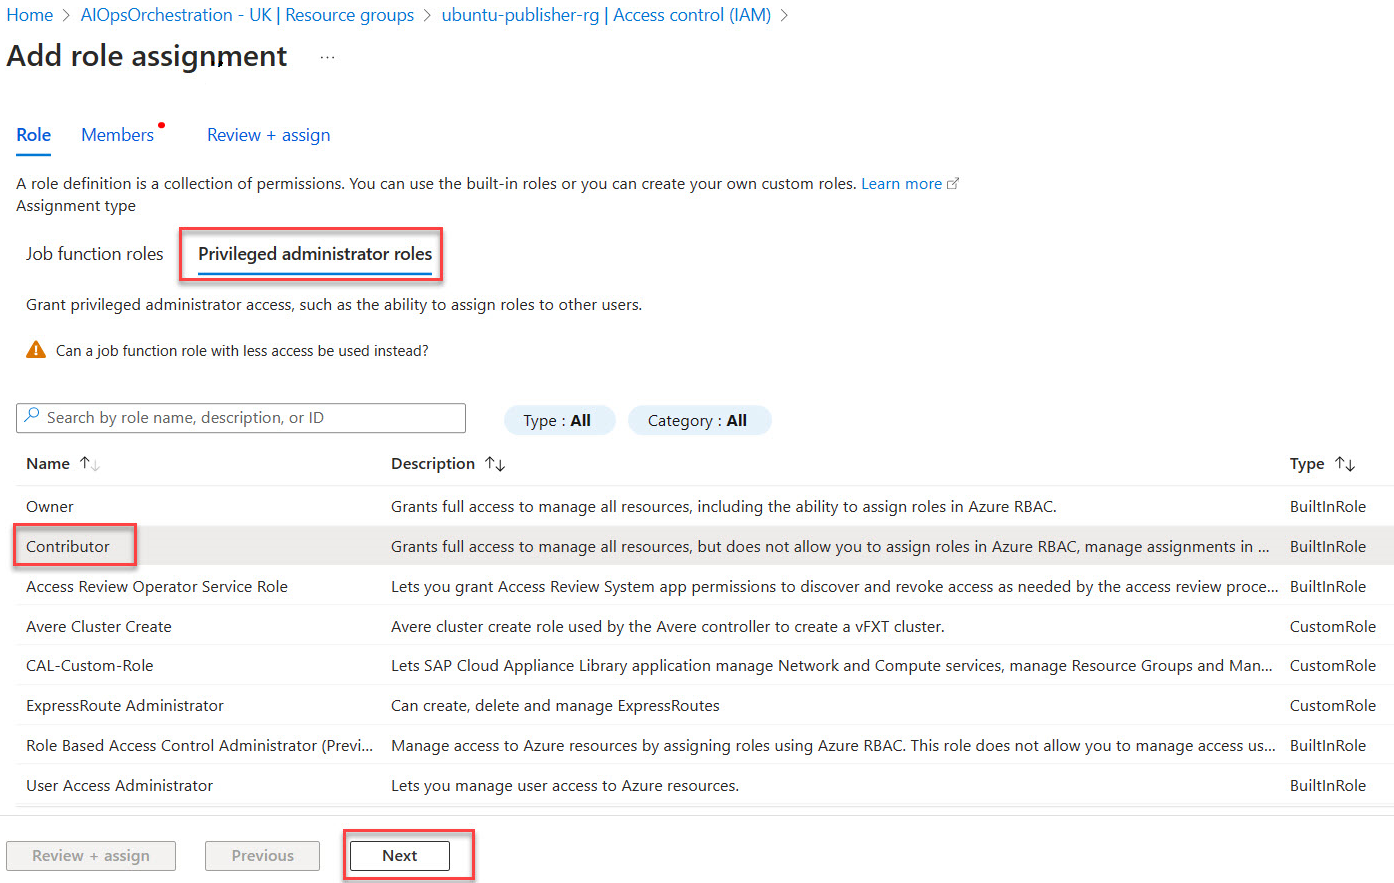
Under the Privileged administrator roles, category pick Contributor then proceed with Next.
Select Managed identity.
Choose + Select members then find and choose the user-assigned managed identity identity-for-ubuntu-vm-sns.
Select Review and assign.
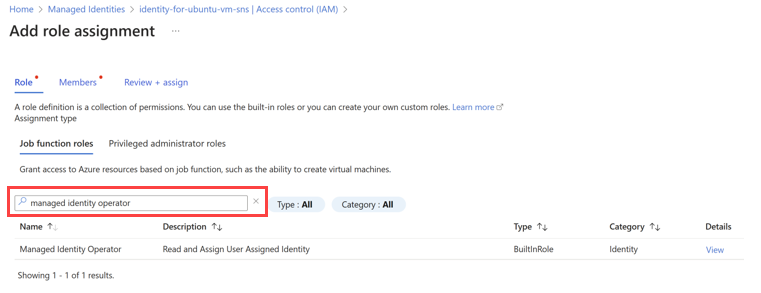
Grant Managed Identity Operator role to itself
Go to the Azure portal and search for Managed Identities.
Select identity-for-ubuntu-vm-sns from the list of Managed Identities.
On the side menu, select Access Control (IAM).
Choose Add Role Assignment.
Select the Managed Identity Operator role then proceed with Next.
Select Managed identity.
Select + Select members and navigate to the user-assigned managed identity called identity-for-ubuntu-vm-sns and proceed with the assignment.
Select Review and assign.
Completion of all the tasks outlined in this article ensures that the Site Network Service (SNS) has the necessary permissions to function effectively within the specified Azure environment.


