Note
Access to this page requires authorization. You can try signing in or changing directories.
Access to this page requires authorization. You can try changing directories.
In this quickstart, you create an instance of Napster Companion API in the Azure portal. You complete the Basics, Tags, and Review + create tabs to provision the resource in your Azure subscription and associate it with your Napster organization.
Prerequisites
- An Azure account with an active subscription is required. If you don't have one, create an account for free.
- The Owner or Contributor role for your Azure subscription. Only users who are assigned one of these roles can set up the partner service integration for your Azure subscription. Before you begin, verify that you have the appropriate access.
- You must subscribe to Napster Companion API.
Create a Napster Companion API resource
Begin by signing in to the Azure portal.
In the Azure portal, in the search box, enter the name of the service.
In the Services search results, select the service.
Select the Create option.
Basics tab
The Basics tab has three sections:
- Project details
- Azure resource details
- Napster organization details
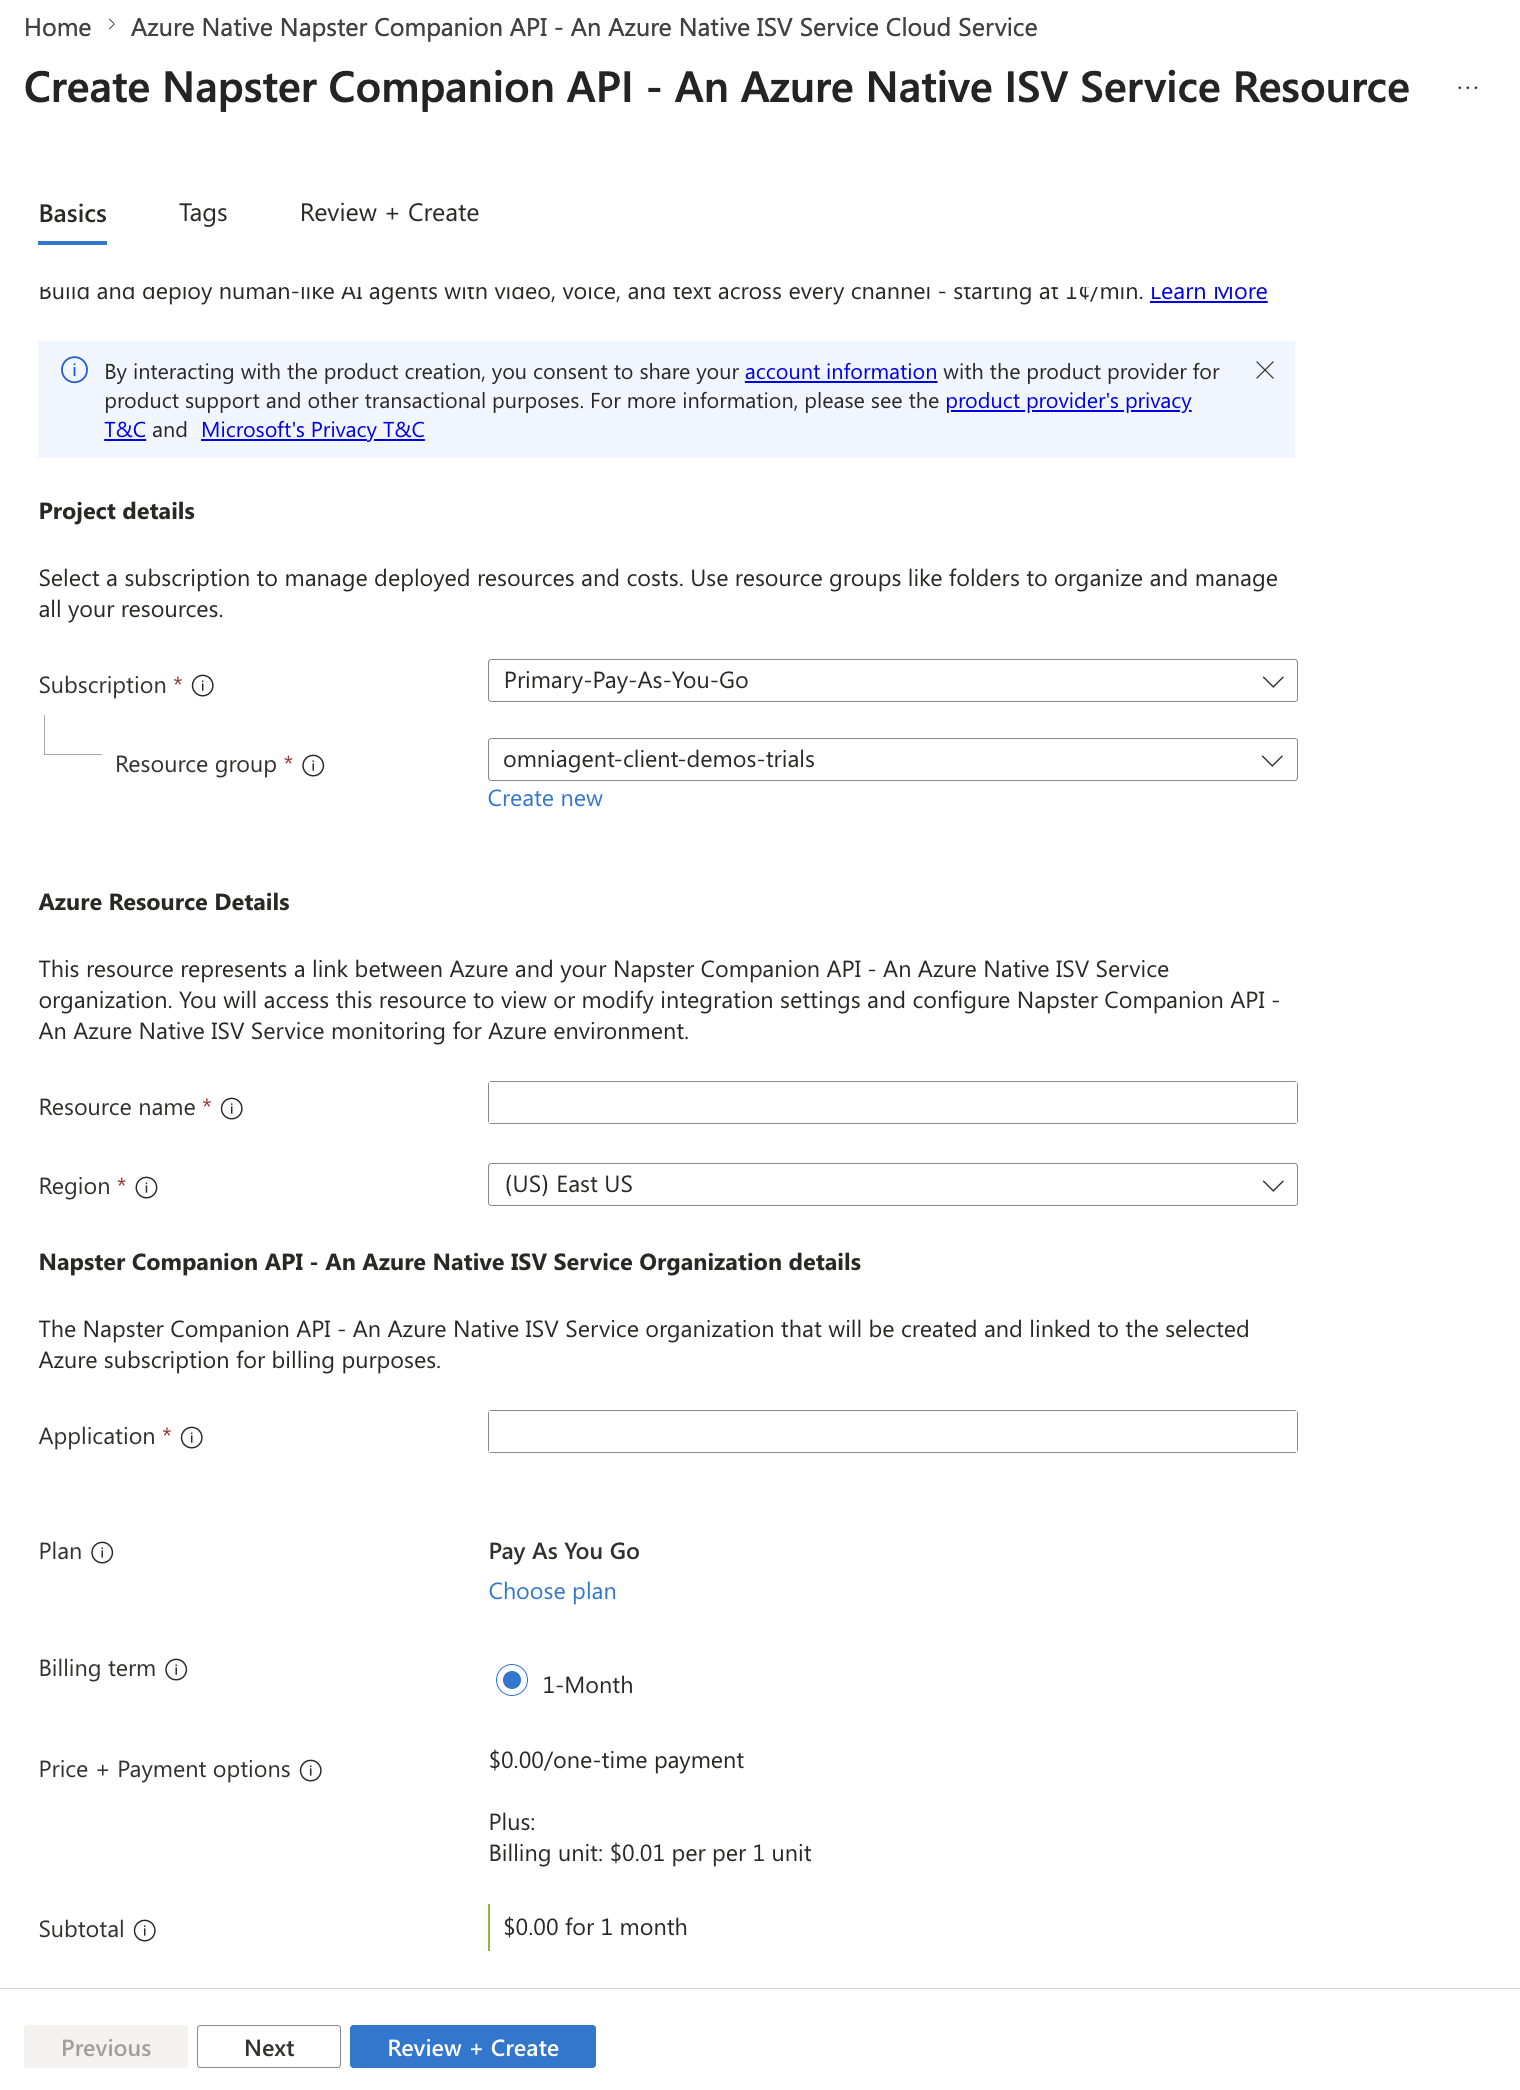
There are required fields (identified with a red asterisk) in each section that you need to fill out.
Enter the values for each required setting under Project details.
Field Action Subscription Select a subscription from your existing subscriptions. Resource group Use an existing resource group or create a new one. Enter the values for each required setting under Azure resource details.
Field Action Resource name Specify a unique name for the resource. Region Select a region to deploy your resource. Enter the values for each required setting under Napster organization details.
Field Action Organization Provide the name of the organization. This organization is created automatically on the Napster side. The remaining fields update to reflect the details of the plan you selected for this new organization.
Select the Next button at the bottom of the page.
Tags tab (optional)
Optionally, you can create tags for your resource. Then select Review + create.
Review + create tab
If the review finds no errors, the Create button becomes active. Select Create.
If the review identifies errors, a red dot appears next to each section where errors exist. To fix errors:
Open each section that has errors and fix the errors.
Fields with errors are highlighted in red.
Select Review + create again.
Select Create.
The message "Deployment is in progress" appears. When the deployment is complete, the message "Your deployment is complete" appears on the upper-right corner of the Azure portal.
After the resource is created, select Go to resource to view your resource.