Note
Access to this page requires authorization. You can try signing in or changing directories.
Access to this page requires authorization. You can try changing directories.
Azure Payment HSM v2 is a highly available, single-tenant payment hardware security module (HSM) service for payment processing, credential issuance, PIN processing, key management, and authentication data protection. You can create a Payment HSM v2 by using Azure PowerShell or the Azure portal. This quickstart guides you through creating a Payment HSM v2 in the Azure portal, uploading its client trust certificates, and connecting it to your virtual network through private endpoints.
Prerequisites
- An Azure subscription that's enabled for Azure Payment HSM v2. During preview, Azure Payment HSM v2 uses a gated onboarding model. To have your subscription registered and enabled, engage your Microsoft account manager or Microsoft Customer Support.
- An active Utimaco account and the Azure Payment HSM v2 onboarding welcome package, which includes the Secure Configuration Assistant (SCA) application, the C3 Key Loading Device (KLD), and smart cards. For more information, see Establish Azure and Utimaco accounts and Receive and verify the onboarding welcome package.
- An identity that has permission to create resource groups, Payment HSM v2 resources, private endpoints, and private Domain Name System (DNS) zones in your subscription.
- The
AllowPrivateEndpointsfeature registered for theMicrosoft.Networkresource provider on each subscription where you create private endpoints. This feature doesn't appear on the Preview features page in the Azure portal, so register it by using Azure Cloud Shell. For the commands, see Register the AllowPrivateEndpoints feature. - A virtual network and subnet for the private endpoints. For the lowest latency, use a virtual network in the same region as your Payment HSM v2. Cross-region private endpoints are also supported, for example to connect your applications to a second Payment HSM v2 in another region for failover. You can place the management and application private endpoints in separate subnets. To create a virtual network, see Quickstart: Use the Azure portal to create a virtual network.
- OpenSSL 3.0 or later, to create the client trust certificates.
Note
If you don't have a virtual network ready, you can create the HSM first and add private endpoints later, as described in Add private endpoints after deployment. Azure Payment HSM v2 is reachable only through private endpoints, so you can't connect to the HSM until you create them.
Create client trust certificates
Azure Payment HSM v2 uses mutual TLS on its management and application ports. When you create the HSM, you upload a separate root certification authority (CA) certificate for each port. Clients that connect to a port must present a certificate issued by that port's CA. For more information about this trust model, see Authentication and access control for Azure Payment HSM v2.
Each CA certificate that you upload must meet the following requirements:
- It's a self-signed root CA certificate. Intermediate CA certificates aren't supported.
- It uses an elliptic curve (EC) public key on the National Institute of Standards and Technology (NIST) P-256 (
prime256v1) curve. - It asserts the basic constraint
CA:TRUE. If it includes a key usage extension, the extension includeskeyCertSign. - It's currently valid.
- It's a single DER-encoded X.509 certificate in a
.cer,.crt, or.derfile, and it doesn't include a private key. - Its base64-encoded value is 5 KB or less.
On a secure workstation that has OpenSSL 3.0 or later installed, run the following commands. The commands create a key pair and a self-signed root CA certificate for each port, and then convert each certificate to the DER format that the Azure portal requires.
Important
To check your OpenSSL version, run openssl version. With OpenSSL 1.1.1 and its default configuration file, these commands create certificates that contain a duplicate basicConstraints extension, and those certificates fail certificate chain verification.
# Create the management port CA key and self-signed root CA certificate
openssl ecparam -genkey -name prime256v1 -out management-ca.key
openssl req -x509 -new -sha384 -nodes -key management-ca.key -days 3650 \
    -subj "/CN=Contoso Payment HSM v2 management CA" \
    -addext "basicConstraints=critical,CA:TRUE" \
    -addext "keyUsage=critical,keyCertSign,cRLSign" \
    -out management-trusted-ca.pem

# Create the application port CA key and self-signed root CA certificate
openssl ecparam -genkey -name prime256v1 -out application-ca.key
openssl req -x509 -new -sha384 -nodes -key application-ca.key -days 3650 \
    -subj "/CN=Contoso Payment HSM v2 application CA" \
    -addext "basicConstraints=critical,CA:TRUE" \
    -addext "keyUsage=critical,keyCertSign,cRLSign" \
    -out application-trusted-ca.pem

# Convert both certificates to DER format for upload in the Azure portal
openssl x509 -in management-trusted-ca.pem -outform DER -out management-trusted-ca.cer
openssl x509 -in application-trusted-ca.pem -outform DER -out application-trusted-ca.cer
Note
If you run these commands in Git Bash on Windows, first run export MSYS_NO_PATHCONV=1. Otherwise, Git Bash converts each -subj value to a file path, and the openssl req commands fail.
Important
Store the CA private keys (management-ca.key and application-ca.key) securely. You need them to issue the client certificates that the SCA and your payment applications present when they connect.
Create an Azure Payment HSM v2 resource
To create an Azure Payment HSM v2 resource in the Azure portal:
Sign in to the Azure portal.
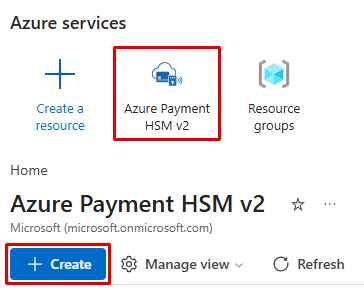
Under Azure services, select Azure Payment HSM v2. If it isn't listed, search for and select Azure Payment HSM v2.
Select Create.
Configure basic settings
On the Basics tab:
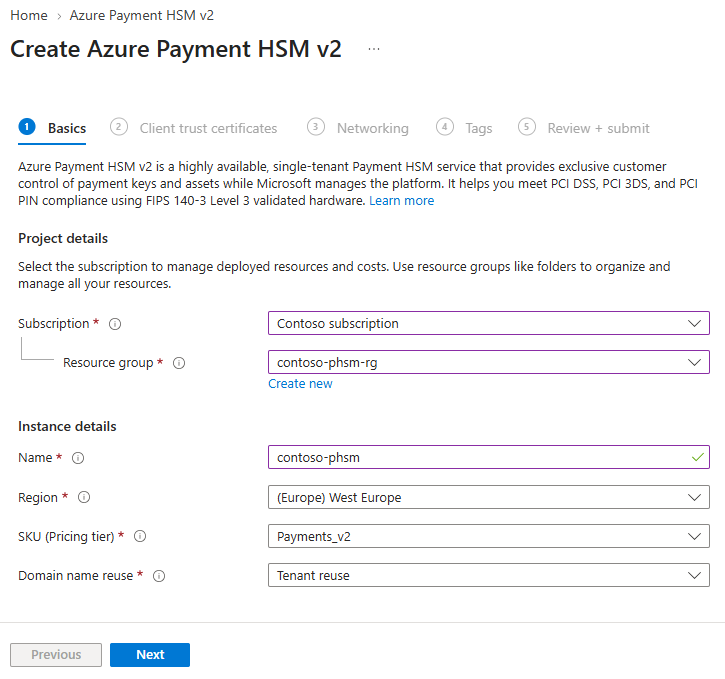
Select your Azure subscription. Use the subscription that's enabled for Azure Payment HSM v2.
Choose an existing resource group or create a new one.
Deploy your Payment HSM v2 resources in a separate resource group from your related client virtual network and virtual machine (VM) resources. This separation provides better management and security isolation.
Enter a Name for your HSM. The name must be 3 to 23 characters long and contain only letters, numbers, and hyphens. It must start and end with a letter or number, and it can't contain consecutive hyphens.
The HSM's DNS name comes from its name and the Domain name reuse setting, not from its region. With the default Tenant reuse setting, choose a name that's unique within your Microsoft Entra tenant, including HSMs in other regions. Otherwise, your deployment fails.
Select a Region. During preview, deploy Payment HSM v2 only in the West US or West Europe region.
Keep the default SKU (Pricing tier) value, Payments_v2. It's the only SKU for Azure Payment HSM v2.
Keep the default Domain name reuse setting, Tenant reuse. This setting helps prevent malicious subdomain takeover and ensures that the fully qualified domain name (FQDN) can be reused only within your tenant. To use a name that another Payment HSM v2 in your tenant already uses, select a different option, such as No reuse, which generates a unique DNS name for every deployment.
Upload client trust certificates
On the Client trust certificates tab:
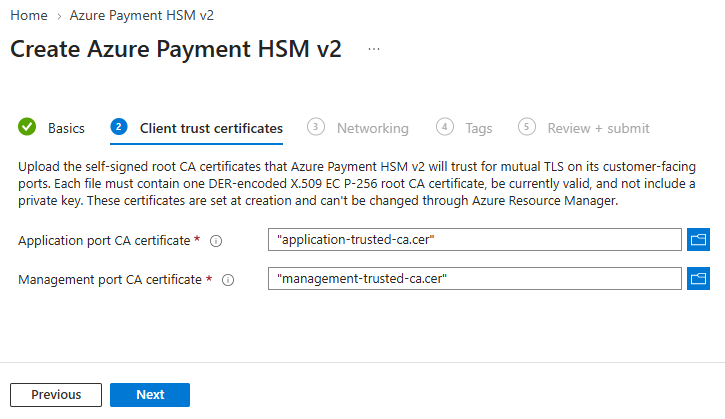
For Application port CA certificate, upload
application-trusted-ca.cer.For Management port CA certificate, upload
management-trusted-ca.cer.
Ensure that you upload each certificate for the correct port. Clients that connect to the management port, such as the SCA, present certificates issued by the management port CA. Payment applications that connect to the application port present certificates issued by the application port CA.
Important
You can't change the client trust certificates through Azure after you create the HSM. To rotate a trust CA later, update it directly on the HSM's management port by using the SCA. For SCA procedures, see the Utimaco documents listed in Perform Azure Payment HSM v2 operations.
Set up networking
You can reach Azure Payment HSM v2 only through private endpoints, so the portal creates the HSM with public network access disabled. The HSM has two private endpoint target subresources: management for administrative operations on port 7005, and application for payment cryptographic operations on port 2200. Create a private endpoint for each one. If you need only administrative access, such as for the Utimaco KLD, you can create only the management endpoint. This task requires an existing virtual network, preferably in the same region as the HSM for the lowest latency.
On the Networking tab:
Under Private endpoints, select Add private endpoint.
In the Create private endpoint pane, enter or select the following values for the management endpoint, and then select OK.
Setting Value Subscription Select the subscription that contains your virtual network. Resource group Select the resource group that contains your virtual network. Location Select the region of your virtual network. The default is the region of your HSM. Name Enter a name for the private endpoint, for example contoso-phsm-management-pe. Target sub-resources Keep the default, management. Virtual network Select your virtual network. Subnet Select the subnet for the management endpoint. Integrate with private DNS zone Keep the default, Yes. Private DNS Zone Select (New) privatelink.phsm.azure.net. If you already use aprivatelink.phsm.azure.netzone, select Discard instead, and add private endpoints after deployment so that you can select your existing zone.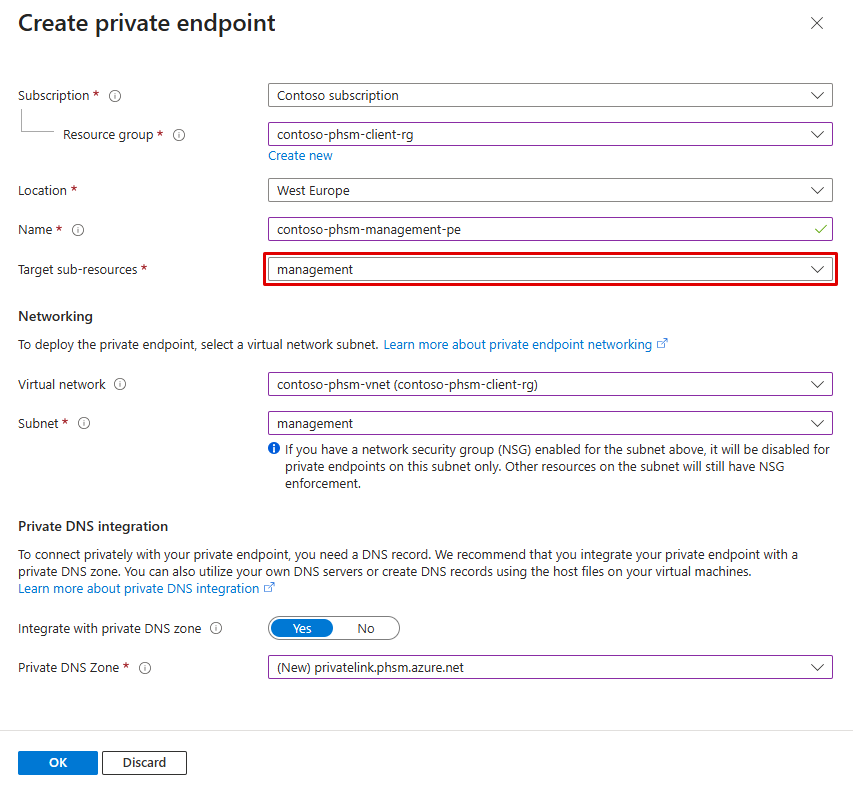
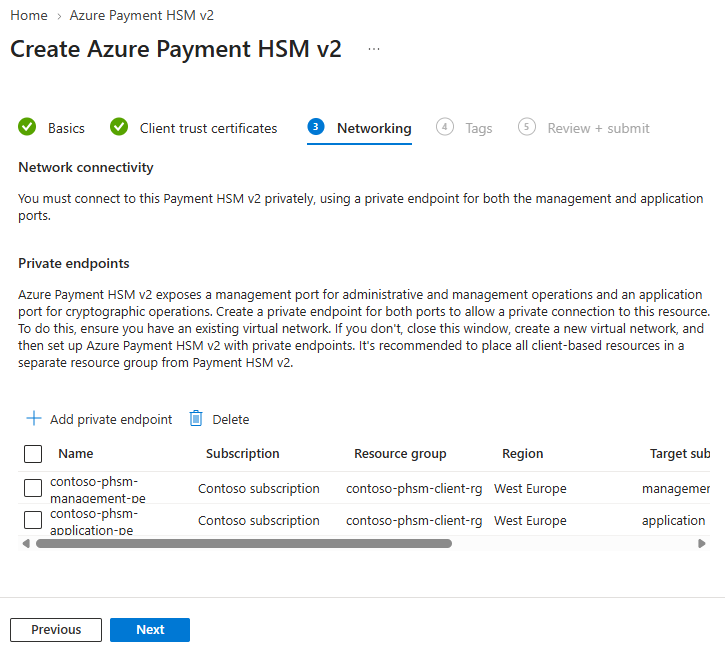
Select Add private endpoint again, and create the application endpoint the same way. For Target sub-resources, select application, and select the subnet for the application endpoint.
When you finish, the Private endpoints list shows both endpoints.
Tip
Private endpoints connect your virtual network to Azure Payment HSM v2 through Azure Private Link. Traffic between your virtual network and the service stays on the Microsoft network, which reduces exposure to the public internet. For more information, see Network security for Azure Payment HSM v2.
Add tags (optional)
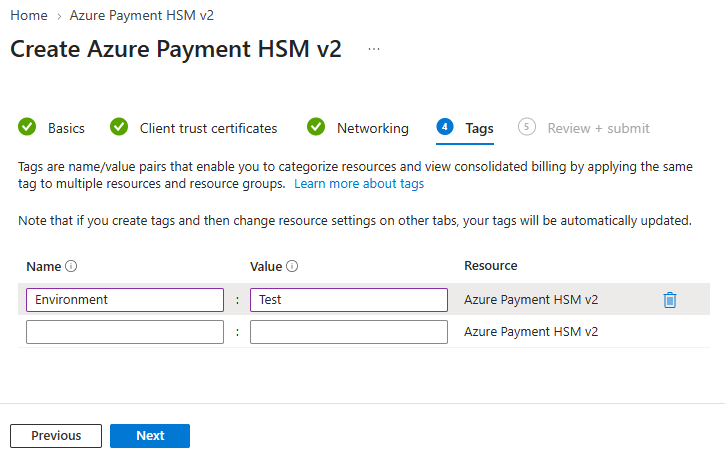
Tags are name/value pairs that help you organize and categorize resources for management and reporting. On the Tags tab, enter details to create tags. This step is optional but recommended for resource organization, especially in enterprise environments.
Deploy your Payment HSM v2 resource
On the Review + submit tab:
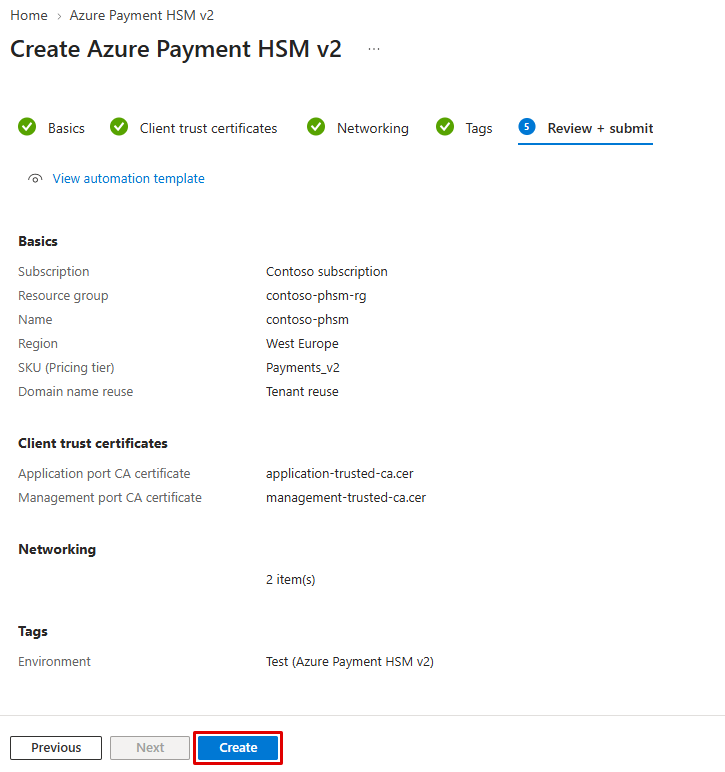
Review the HSM details, including the client trust certificates and private endpoints.
Select Create to begin provisioning your Payment HSM v2 resource.
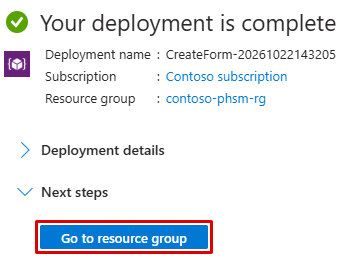
The portal displays Deployment is in progress while it creates the resource. The deployment creates the HSM first, and then creates the private endpoints one at a time. When the deployment finishes, the portal displays Your deployment is complete.
Verify your Payment HSM v2
Select Go to resource group, and then select your Payment HSM v2 resource.
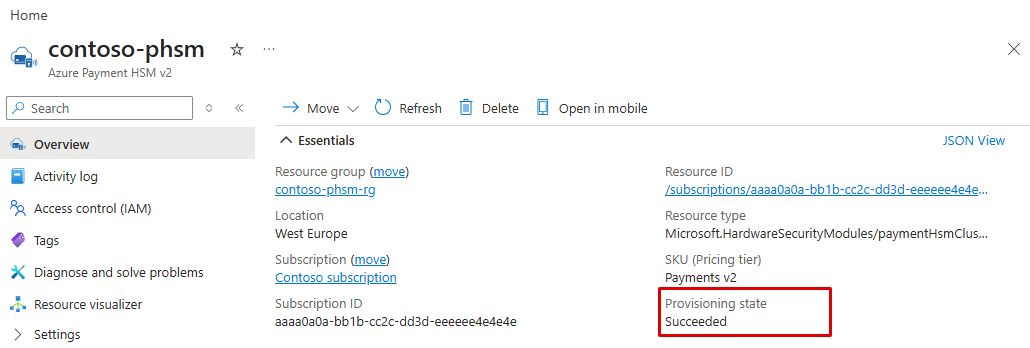
On the Overview page, under Essentials, confirm that Provisioning state is Succeeded.
Note
Activation state doesn't change to Active when the deployment finishes. It changes to Active after you create a security association on the HSM by using the SCA, as described in Connect to and configure your HSM.
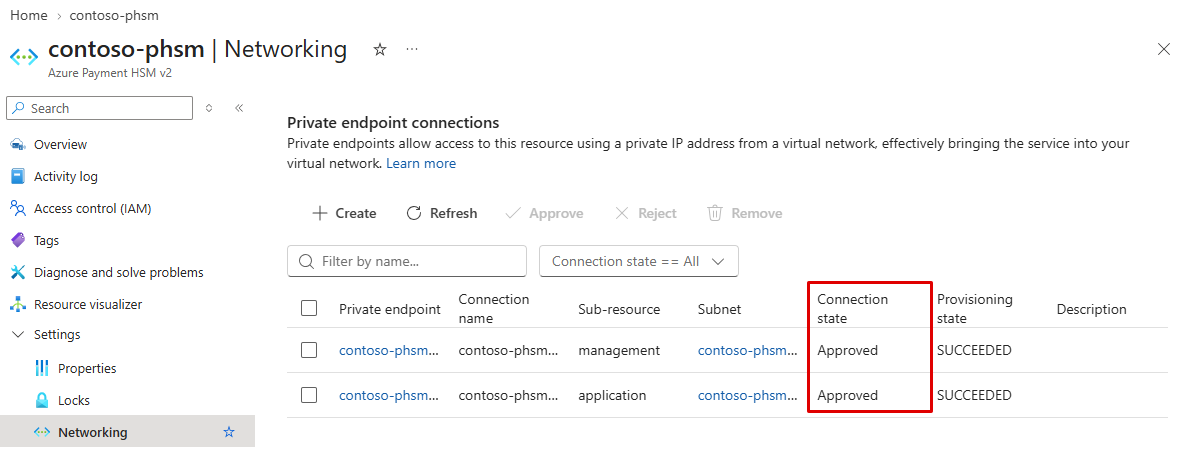
If you created private endpoints, under Settings, select Networking. For each private endpoint that you created, confirm that its connection appears in the Private endpoint connections list with a Connection state of Approved. If a connection is Pending, select it, and then select Approve.
Add private endpoints after deployment
If you skipped the Networking tab when you created the HSM, or you need another private endpoint, add private endpoints from the HSM's Networking page:
On your Payment HSM v2 resource, under Settings, select Networking.
Select Create. The Create a private endpoint wizard opens with your HSM already selected as the target resource.
On the Basics tab, select the subscription and the resource group that contains your virtual network. Enter a name for the private endpoint, and select the region of your virtual network. The Network Interface Name value fills in automatically from the name.
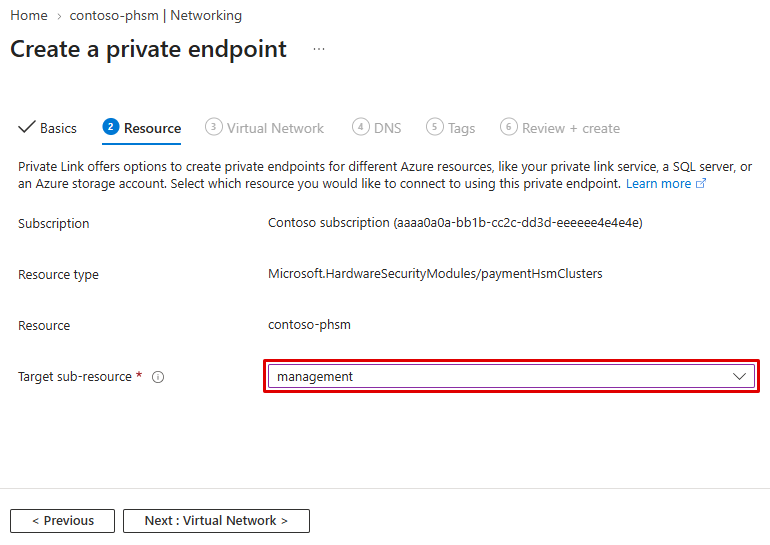
On the Resource tab, for Target sub-resource, select management.
On the Virtual Network tab, select your virtual network and subnet.
On the DNS tab, keep Integrate with private DNS zone set to Yes. If the
privatelink.phsm.azure.netprivate DNS zone already exists, select the subscription and resource group that contain it.Select Review + create, and then select Create.
After the deployment finishes, repeat these steps for the application target sub-resource.
Important
Create one private endpoint at a time. Azure Payment HSM v2 processes one change at a time, so a request that starts while another change is in progress fails with an OperationInProgress error.
The new connection appears on the HSM's Networking page. If it doesn't appear, select Refresh. If the connection is Pending, select it, and then select Approve.
Connect to and configure your HSM
You can't initialize or configure Azure Payment HSM v2 through the Azure portal. You administer the HSM by using the Utimaco SCA, the C3 KLD, and your smart cards over the management port. Your payment applications use the application port.
Important
Azure Payment HSM v2 accepts only TLS 1.3 connections on its management and application ports. It doesn't accept TLS 1.2. Ensure that every client that connects to the HSM, including your payment applications, supports TLS 1.3.
After you deploy your Payment HSM v2 resource, follow these steps:
Find the private IP address and FQDN of each HSM node. On the HSM's Networking page, select a private endpoint, and then select Settings > DNS configuration. Clients connect to the HSM nodes by using the following FQDNs, where
<node-number>is1,2, or3:- Management port (7005):
mgmt<node-number>.<pool-name>-<unique-string>.phsm.azure.net - Application port (2200):
app<node-number>.<pool-name>-<unique-string>.phsm.azure.net
Each FQDN has a CNAME record that resolves to the matching record in the
privatelink.phsm.azure.netprivate DNS zone. Connect by using these FQDNs rather than theprivatelink.phsm.azure.netnames, because the HSM's TLS certificate doesn't include theprivatelink.phsm.azure.netnames.- Management port (7005):
Deploy or use an Azure VM in a virtual network that can reach the management private endpoint. For more information, see Deploy an Azure virtual machine within an Azure virtual network.
To connect from an on-premises network or workstation, set up a VPN or Secure Shell (SSH) port forwarding. For more information, see Configure VPN or SSH port forwarding to connect to your Payment HSM v2.
Issue client certificates from the CAs that you uploaded, and connect to the management interface by using the SCA with your administrator smart cards and the C3 KLD. For SCA certificate configuration, see the Configuring SCA TLS Certificates for Azure Payments HSM v2 Guide in the Utimaco portal.
Initialize the HSM, create security associations and use policies, and load your Master File Key (MFK), as described in Perform Azure Payment HSM v2 operations.
After you create the security association, go to the HSM's Overview page in the Azure portal and select Refresh. Confirm that Activation state is Active. It can take several minutes for Activation state to update.
Connect your payment applications to the application interface, and verify connectivity by using test transactions.
Clean up resources
If you created resource groups solely for this quickstart and you don't need to keep these resources, delete them:
In the Azure portal, go to the resource group that contains your Payment HSM v2 resource.
Select Delete resource group.
Enter the resource group name to confirm the deletion, and then select Delete.
If you created the virtual network, private endpoints, and private DNS zone in a separate resource group, repeat these steps for that resource group.
Caution
When you delete a Payment HSM v2 resource, the customer data in the HSM cluster is zeroized and erased. You can't recover it.
Troubleshoot common deployment problems
If you encounter problems during deployment:
- Resource name conflicts: If deployment fails with a
PaymentHsmAlreadyExistserror, another Payment HSM v2 already uses the DNS name that's generated for your HSM. With Tenant reuse, HSM names must be unique within your Microsoft Entra tenant, including HSMs in other regions. Choose a different name, or select a different Domain name reuse option, such as No reuse. - Subscription not enabled: If deployment fails with a
SubscriptionNotRegisterederror, confirm that your subscription is enabled for Azure Payment HSM v2. If your subscription was enabled after theMicrosoft.HardwareSecurityModulesresource provider was registered, register the provider again by runningaz provider register --namespace Microsoft.HardwareSecurityModulesin Azure Cloud Shell. - Client trust certificate errors: If deployment fails with an error code that starts with
InvalidClientTrustCa, the error message names the certificate that failed validation. Ensure that you uploaded a DER-encoded file rather than a PEM file, and that the certificate meets the requirements in Create client trust certificates. - Private endpoint failures: Confirm that the
AllowPrivateEndpointsfeature is registered and that your virtual network is in the same region as the private endpoint. If a request fails with anOperationInProgresserror, wait for the current operation to finish, and then try again. - Name resolution problems: Confirm that the
privatelink.phsm.azure.netprivate DNS zone is linked to each virtual network that contains your clients. For on-premises clients, see On-premises connectivity. - Client connection errors: Confirm that your network security group (NSG) rules allow outbound traffic to ports 7005 and 2200, as described in NSG rules. Confirm that each client presents a certificate issued by the CA that you uploaded for that port, as described in Client authentication with mutual TLS. Confirm that each client connects by using the HSM node FQDNs in the
phsm.azure.netdomain, as described in Connect to and configure your HSM, because the HSM's TLS certificate doesn't include theprivatelink.phsm.azure.netnames. Confirm that your client supports TLS 1.3. The HSM doesn't accept TLS 1.2. If a client offers only TLS 1.2, the HSM closes the connection immediately after the client's first handshake message without sending a TLS alert, so the failure can look like a network or certificate problem.