Deploy a private mobile network through Azure Private 5G Core - Azure portal
Private mobile networks provide high performance, low latency, and secure connectivity for 5G Internet of Things (IoT) devices. In this how-to guide, you'll use the Azure portal to deploy a private mobile network to match your enterprise's requirements.
Prerequisites
Complete all of the steps in Complete the prerequisite tasks for deploying a private mobile network and Commission the AKS cluster.
Ensure you can sign in to the Azure portal using an account with access to the active subscription you identified in Complete the prerequisite tasks for deploying a private mobile network. This account must have the built-in Contributor or Owner role at the subscription scope.
Collect all of the information listed in Collect the required information to deploy a private mobile network. You may also need to take the following steps based on the decisions you made when collecting this information.
- If you decided you want to provision SIMs using a JSON file, ensure you've prepared this file and made it available on the machine you'll use to access the Azure portal. For more information on the file format, see JSON file format for provisioning SIMs or Encrypted JSON file format for provisioning vendor provided SIMs.
- If you decided you want to use the default service and allow-all SIM policy, identify the name of the data network to which you want to assign the policy.
Deploy your private mobile network
In this step, you'll create the Mobile Network resource representing your private mobile network as a whole. You can also provision one or more SIMs, and / or create the default service and allow-all SIM policy.
Sign in to the Azure portal.
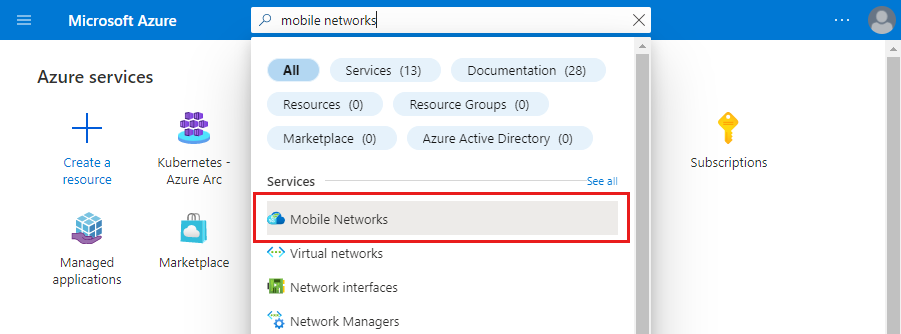
In the Search bar, type mobile networks and then select the Mobile Networks service from the results that appear.
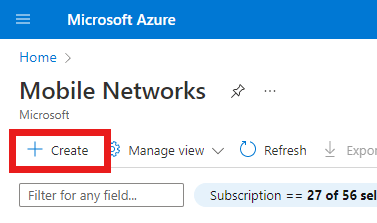
On the Mobile Networks page, select Create.
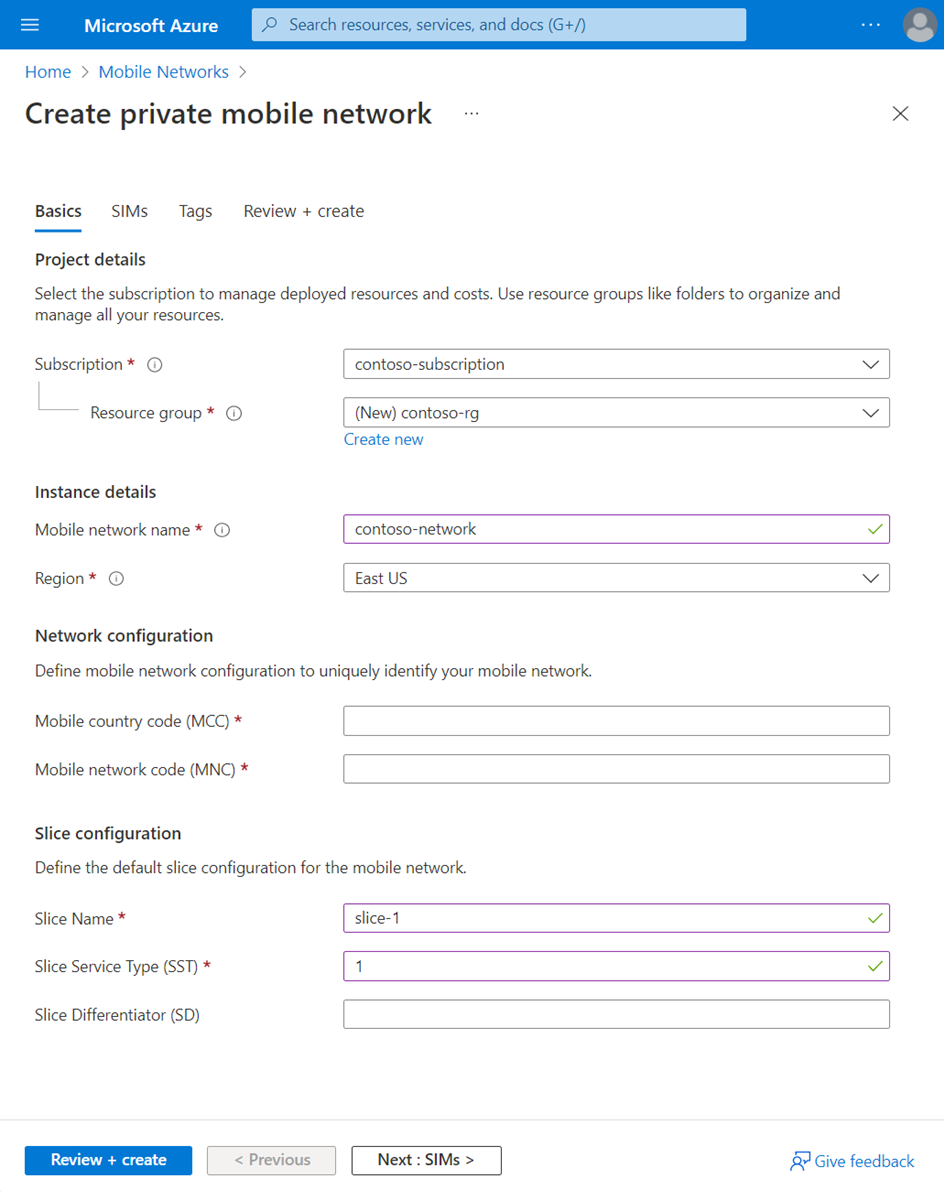
Use the information you collected in Collect private mobile network resource values to fill out the fields on the Basics configuration tab, then select Next : SIMs >.
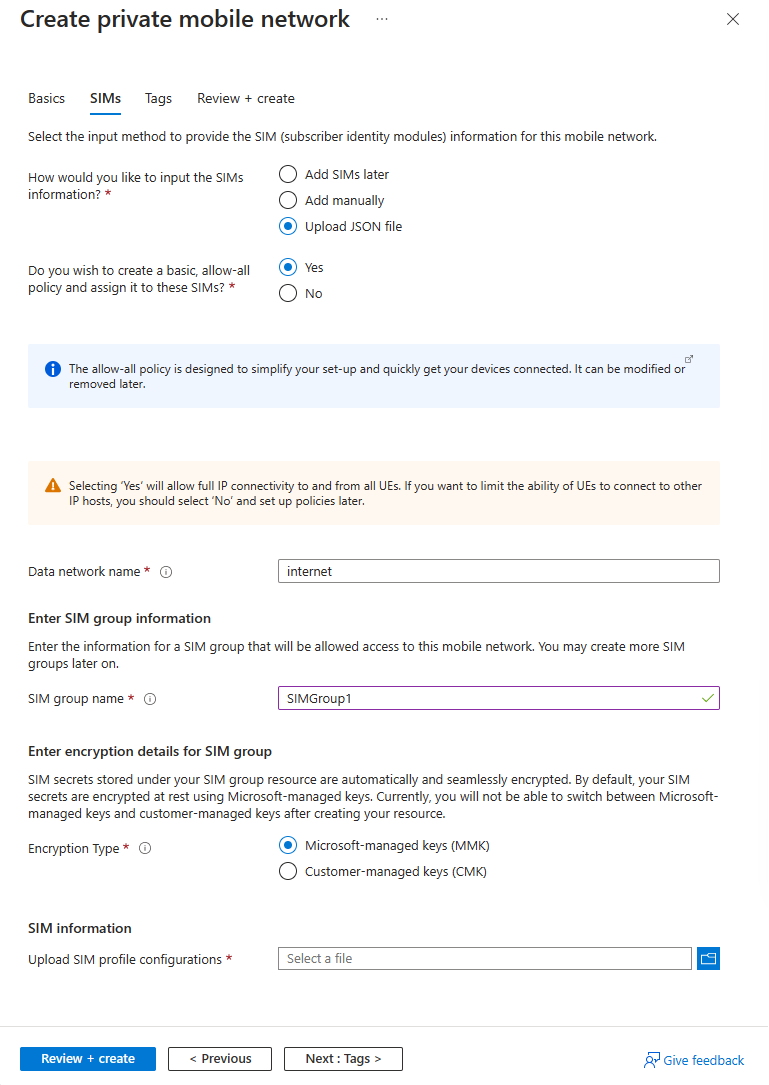
On the SIMs configuration tab, select your chosen input method by selecting the appropriate option next to How would you like to input the SIMs information?. You can then input the information you collected in Collect SIM and SIM Group values.
- If you decided that you don't want to provision any SIMs at this point, select Add SIMs later.
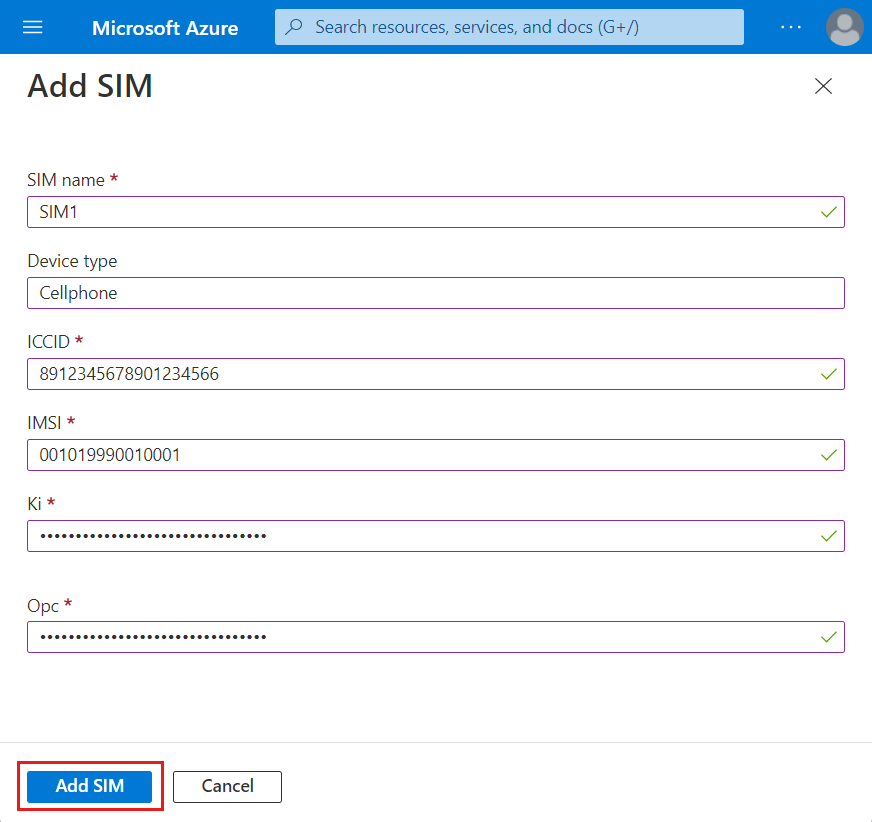
- If you select Add manually, a new Add SIM button will appear under Enter SIM profile configurations. Select it, fill out the fields with the correct settings for the first SIM you want to provision, and select Add SIM. Repeat this process for every additional SIM you want to provision.
- If you select Upload JSON file, the Upload SIM profile configurations field will appear. Use this field to upload your chosen JSON file.
- If you select Upload Encrypted JSON file, the following notice will appear.

If you're provisioning SIMs at this point, you'll need to take the following additional steps.
- If you want to use the default service and allow-all SIM policy, set Do you wish to create a basic, allow-all SIM policy and assign it to these SIMs? to Yes, and then enter the name of the data network into the Data network name field that appears.
- Under Enter SIM group information, set SIM group name to your chosen name for the SIM group to which your SIMs will be added.
- Under Enter encryption details for SIM group, set Encryption type to your chosen encryption type. Once the SIM group is created, you can't change the encryption type.
- If you selected Customer-managed keys (CMK), set the Key URI and User-assigned identity to those the SIM group will use for encryption.
Select Review + create.
Azure will now validate the configuration values you've entered. You should see a message indicating that your values have passed validation.
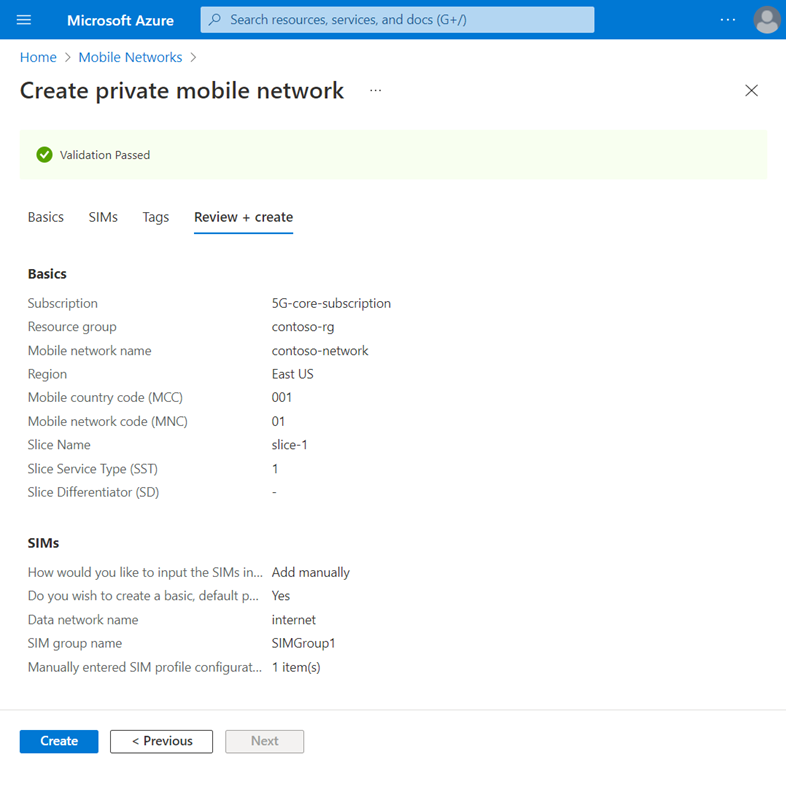
If the validation fails, you'll see an error message, and the configuration tab or tabs containing the invalid configuration will be flagged with red dots. Select the flagged tabs and use the error messages to correct invalid configuration before returning to the Review + create tab.
Once the configuration has been validated, select Create to create the Mobile Network, slice, and any SIM resources.
The Azure portal will now deploy the resources into your chosen resource group. You'll see the following confirmation screen when your deployment is complete.
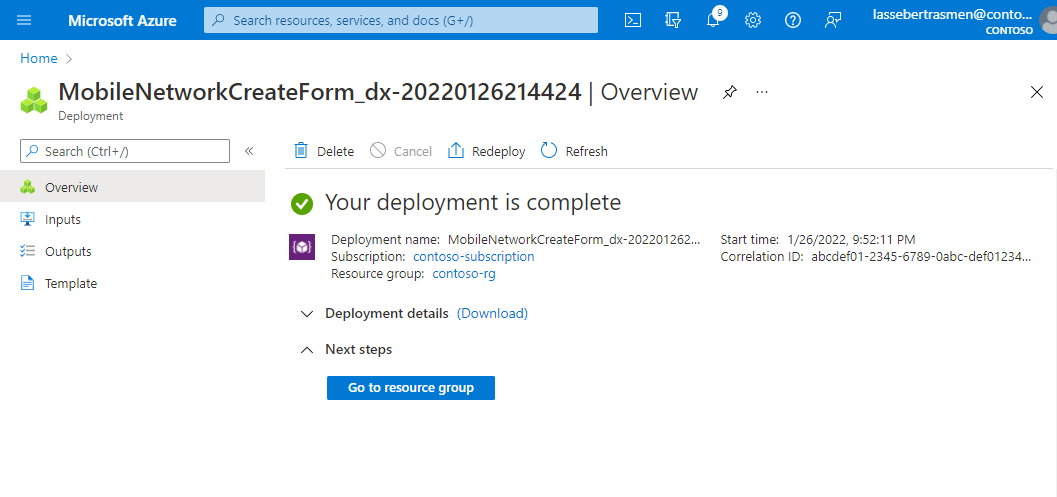
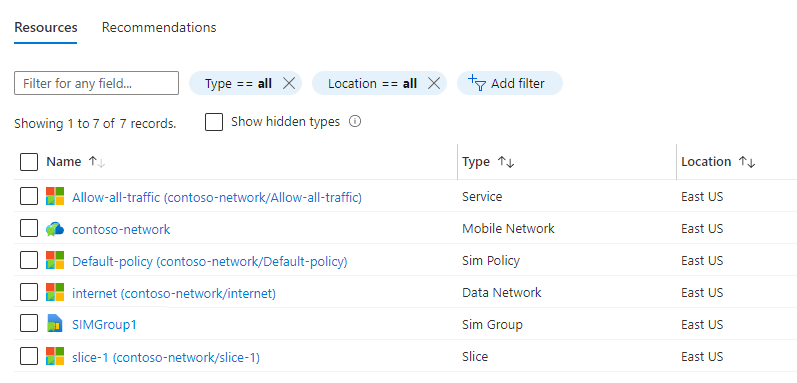
Select Go to resource group, and then check that your new resource group contains the correct Mobile Network and Slice resources. It may also contain the following, depending on the choices you made during the procedure.
- A SIM group resource (if you provisioned SIMs).
- Service, SIM Policy, and Data Network resources (if you decided to use the default service and allow-all SIM policy).
Modify a private mobile network
You can change the public land mobile network (PLMN) identifier, comprising a Mobile Country Code (MCC) and Mobile Network Code (MNC), using the Modify mobile network button on the Mobile Network resource.
Sign in to the Azure portal.
Search for and select the Mobile Network resource representing the private mobile network.
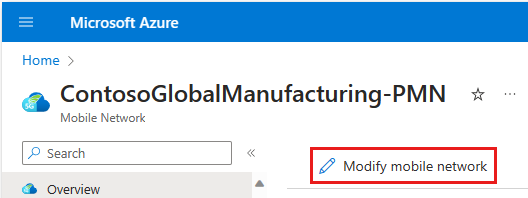
Select Modify mobile network.
Update the MCC and/or MNC as required.
Select Modify.
Reinstall the packet core to apply the change. If you have multiple packet cores in this mobile network, you'll need to reinstall all of them.
Next steps
You can begin designing policy control to determine how your private mobile network will handle traffic, create more network slices, enable SUPI concealment, or start adding sites to your private mobile network.
Feedback
Coming soon: Throughout 2024 we will be phasing out GitHub Issues as the feedback mechanism for content and replacing it with a new feedback system. For more information see: https://aka.ms/ContentUserFeedback.
Submit and view feedback for