Tutorial: Create a private endpoint DNS infrastructure with Azure Private Resolver for an on-premises workload
Article
When an Azure Private Endpoint is created, it uses Azure Private DNS Zones for name resolution by default. For on-premises workloads to access the endpoint, a forwarder to a virtual machine in Azure hosting DNS or on-premises DNS records for the private endpoint were required. Azure Private Resolver alleviates the need to deploy a VM in Azure for DNS or manage the private endpoint DNS records on an on-premises DNS server.
In this tutorial, you learn how to:
Create an Azure Virtual Network for the cloud network and a simulated on-premises network with virtual network peering.
Create a Azure Web App to simulate a cloud resource.
Create an Azure Private Endpoint for the web app in the Azure Virtual Network.
Create an Azure Private Resolver in the cloud network.
Create an Azure Virtual Machine in the simulated on-premises network to test the DNS resolution to the web app.
Note
An Azure Virtual Network with peering is used to simulate an on-premises network for the purposes of this tutorial. In a production scenario, an Express Route or site to site VPN is required to connect to the Azure Virtual Network to access the private endpoint.
The simulated network is configured with the Azure Private Resolver as the virtual network's DNS server. In a production scenario, the on-premises resources will use a local DNS server for name resolution. A conditional forwarder to the Azure Private Resolver is used on the on-premises DNS server to resolve the private endpoint DNS records. For more information about the configuration of conditional forwarders for your DNS server, see your provider's documentation.
Sign in to the Azure portal with your Azure account.
Overview
A virtual network for the Azure Web App and simulated on-premises network is used for the resources in the tutorial. You create two virtual networks and peer them to simulate an Express Route or VPN connection between on-premises and Azure. An Azure Bastion host is deployed in the simulated on-premises network to connect to the test virtual machine. The test virtual machine is used to test the private endpoint connection to the web app and DNS resolution.
The following resources are used in this tutorial to simulate an on-premises and cloud network infrastructure:
Resource
Name
Description
Simulated on-premises virtual network
vnet-1
The virtual network that simulates an on-premises network.
Cloud virtual network
vnet-2
The virtual network where the Azure Web App is deployed.
Bastion host
bastion
Bastion host used to connect to the virtual machine in the simulated on-premises network.
Test virtual machine
vm-1
Virtual machine used to test the private endpoint connection to the web app and DNS resolution.
Virtual network peer
vnet-1-to-vnet-2
Virtual network peer between the simulated on-premises network and cloud virtual network.
Virtual network peer
vnet-2-to-vnet-1
Virtual network peer between the cloud virtual network and simulated on-premises network.
Create a virtual network and an Azure Bastion host
The following procedure creates a virtual network with a resource subnet, an Azure Bastion subnet, and a Bastion host:
In the portal, search for and select Virtual networks.
On the Virtual networks page, select + Create.
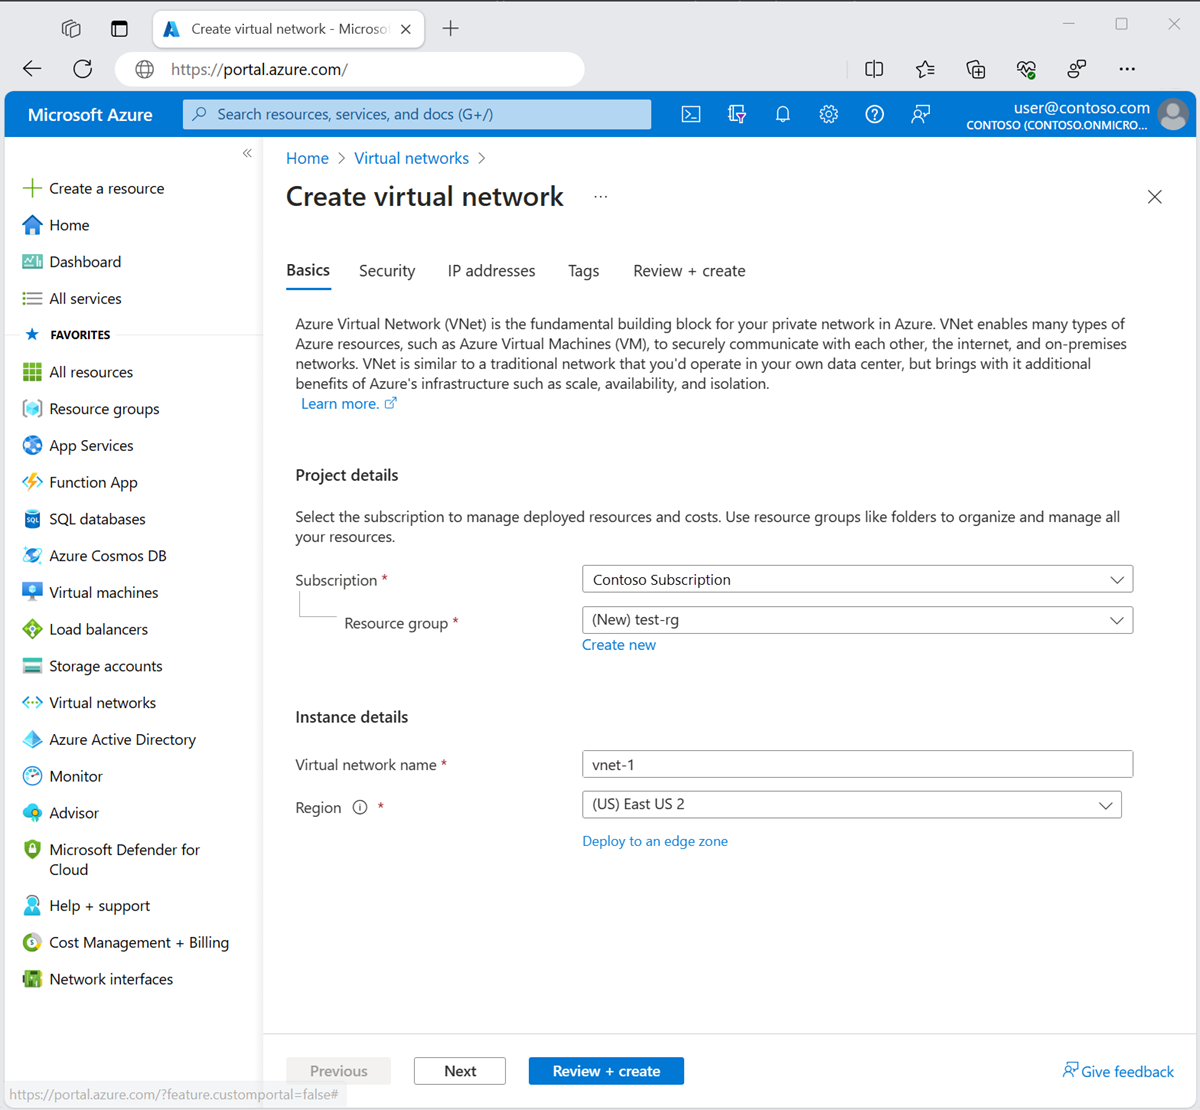
On the Basics tab of Create virtual network, enter, or select the following information:
Setting
Value
Project details
Subscription
Select your subscription.
Resource group
Select Create new. Enter test-rg for the name. Select OK.
Instance details
Name
Enter vnet-1.
Region
Select East US 2.
Select Next to proceed to the Security tab.
In the Azure Bastion section, select Enable Azure Bastion.
Bastion uses your browser to connect to VMs in your virtual network over Secure Shell (SSH) or Remote Desktop Protocol (RDP) by using their private IP addresses. The VMs don't need public IP addresses, client software, or special configuration. For more information, see What is Azure Bastion?.
Note
Hourly pricing starts from the moment that Bastion is deployed, regardless of outbound data usage. For more information, see Pricing and SKUs. If you're deploying Bastion as part of a tutorial or test, we recommend that you delete this resource after you finish using it.
In Azure Bastion, enter or select the following information:
Setting
Value
Azure Bastion host name
Enter bastion.
Azure Bastion public IP address
Select Create a public IP address. Enter public-ip-bastion in Name. Select OK.
Select Next to proceed to the IP Addresses tab.
In the address space box in Subnets, select the default subnet.
In Edit subnet, enter or select the following information:
Setting
Value
Subnet purpose
Leave the default of Default.
Name
Enter subnet-1.
IPv4
IPv4 address range
Leave the default of 10.0.0.0/16.
Starting address
Leave the default of 10.0.0.0.
Size
Leave the default of /24 (256 addresses).
Select Save.
Select Review + create at the bottom of the window. When validation passes, select Create.
It takes a few minutes for the Bastion host deployment to complete. The Bastion host is used later in the tutorial to connect to the "on-premises" virtual machine to test the private endpoint. You can proceed to the next steps when the virtual network is created.
Create cloud virtual network
Repeat the previous steps to create a cloud virtual network for the Azure Web App private endpoint. Replace the values with the following values for the cloud virtual network:
Note
The Azure Bastion deployment section can be skipped for the cloud virtual network. The Bastion host is only required for the simulated on-premises network.
Setting
Value
Name
vnet-2
Location
East US 2
Address space
10.1.0.0/16
Subnet name
subnet-1
Subnet address range
10.1.0.0/24
Create virtual network peer
Use the following steps to create a two way network peer between vnet1 and vnet2.
In the search box at the top of the portal, enter Virtual network. Select Virtual networks in the search results.
Select vnet-1.
In Settings select Peerings.
Select + Add.
Enter or select the following information in Add peering:
Setting
Value
Remote virtual network summary
Peering link name
Enter vnet-2-to-vnet-1.
Virtual network deployment model
Leave the default of Resource Manager.
Subscription
Select your subscription.
Virtual network
Select vnet-2.
Remote virtual network peering settings
Allow 'vnet-2' to access 'vnet-1'
Leave the default of selected.
Allow 'vnet-2' to receive forwarded traffic from 'vnet-1'
Select the checkbox.
Allow gateway or route server in 'vnet-2' to forward traffic to 'vnet-1'
Leave the default of cleared.
Enable 'vnet-2' to use 'vnet-1's' remote gateway or route server
Leave the default of cleared.
Local virtual network peering summary
Peering link name
Enter vnet-1-to-vnet-2.
Local virtual network peering settings
Allow 'vnet-1' to access 'vnet-2'
Leave the default of selected.
Allow 'vnet-1' to receive forwarded traffic from 'vnet-2'
Select the checkbox.
Allow gateway or route server in 'vnet-1' to forward traffic to 'vnet-2'
Leave the default of cleared.
Enable 'vnet-1' to use 'vnet-2's' remote gateway or route server
Leave the default of cleared.
Select Add.
Create web app
In the search box at the top of the portal, enter App Service. Select App Services in the search results.
Select + Create.
Enter or select the following information in the Basics tab of Create Web App.
Setting
Value
Project details
Subscription
Select your subscription.
Resource Group
Select test-rg.
Instance details
Name
Enter a unique name for the web app. The name webapp8675 is used for the examples in this tutorial.
Publish
Select Code.
Runtime stack
Select .NET 6 (LTS).
Operating System
Select Windows.
Region
Select East US 2.
Pricing plans
Windows Plan (West US 2)
Leave the default name.
Pricing plan
Select Change size.
In Spec Picker, select Production for the workload.
In Recommended pricing tiers, select P1V2.
Select Apply.
Select Next: Deployment.
Select Next: Networking.
Change 'Enable public access' to false.
Select Review + create.
Select Create.
Create private endpoint
An Azure private endpoint creates a network interface for a supported Azure service in your virtual network. The private endpoint enables the Azure service to be accessed from a private connection in your Azure Virtual Network or on-premises network.
You create a private endpoint for the web app you created previously.
In the search box at the top of the portal, enter Private endpoint. Select Private endpoints in the search results.
Select + Create.
Enter or select the following information in the Basics tab of Create a private endpoint:
Setting
Value
Project details
Subscription
Select your subscription
Resource group
Select test-rg.
Instance details
Name
Enter private-endpoint.
Network Interface Name
Leave the default name.
Region
Select East US 2.
Select Next: Resource.
Enter or select the following information in the Resource tab:
Setting
Value
Connection method
Select Connect to an Azure resource in my directory.
Subscription
Select your subscription.
Resource type
Select Microsoft.Web/sites.
Resource
Select your webapp. The name webapp8675 is used for the examples in this tutorial.
Target subresource
Select sites.
Select Next: Virtual Network.
Enter or select the following information in the Virtual Network tab:
Setting
Value
Networking
Virtual network
Select vnet-2 (test-rg).
Subnet
Select subnet-1.
Network policy for private endpoints
Leave the default of Disabled.
Private IP configuration
Select Statically allocate IP address.
Name
Enter ipconfig-1.
Private IP
Enter 10.1.0.10.
Select Next: DNS.
Leave the defaults in the DNS tab.
Select Next: Tags, then Next: Review + create.
Select Create.
Create a private resolver
You create a private resolver in the virtual network where the private endpoint resides. The resolver receives DNS requests from the simulated on-premises workload. Those requests are forwarded to the Azure provided DNS. The Azure provided DNS resolves the Azure Private DNS zone for the private endpoint and return the IP address to the on-premises workload.
In the search box at the top of the portal, enter DNS private resolver. Select DNS private resolvers in the search results.
Select + Create.
Enter or select the following information in the Basics tab of Create a DNS private resolver:
Setting
Value
Project details
Subscription
Select your subscription.
Resource group
Select test-rg
Instance details
Name
Enter private-resolver.
Region
Select (US) East US 2.
Virtual Network
Virtual Network
Select vnet-2.
Select Next: Inbound Endpoints.
In Inbound Endpoints, select + Add an endpoint.
Enter or select the following information in Add an inbound endpoint:
Setting
Value
Endpoint name
Enter inbound-endpoint.
Subnet
Select Create new. Enter subnet-resolver in Name. Leave the default Subnet address range. Select Create.
Select Save.
Select Review + create.
Select Create.
When the private resolver deployment is complete, continue to the next steps.
Set up DNS for simulated network
The following steps set the private resolver as the primary DNS server for the simulated on-premises network vnet-1.
In a production environment, these steps aren't needed and are only to simulate the DNS resolution for the private endpoint. Your local DNS server has a conditional forwarder to this IP address to resolve the private endpoint DNS records from the on-premises network.
In the search box at the top of the portal, enter DNS private resolver. Select DNS private resolvers in the search results.
Select private-resolver.
Select Inbound endpoints in Settings.
Make note of the IP address of the endpoint named inbound-endpoint. In the example for this tutorial, the IP address is 10.1.1.4.
In the search box at the top of the portal, enter Virtual network. Select Virtual networks in the search results.
Select vnet-1.
Select DNS servers in Settings.
Select Custom in DNS servers.
Enter the IP address you noted previously. In the example for this tutorial, the IP address is 10.1.1.4.
Select Save.
Create test virtual machine
The following procedure creates a test virtual machine (VM) named vm-1 in the virtual network.
In the portal, search for and select Virtual machines.
In Virtual machines, select + Create, then Azure virtual machine.
On the Basics tab of Create a virtual machine, enter or select the following information:
Setting
Value
Project details
Subscription
Select your subscription.
Resource group
Select test-rg.
Instance details
Virtual machine name
Enter vm-1.
Region
Select East US 2.
Availability options
Select No infrastructure redundancy required.
Security type
Leave the default of Standard.
Image
Select Windows Server 2022 Datacenter - x64 Gen2.
VM architecture
Leave the default of x64.
Size
Select a size.
Administrator account
Authentication type
Select Password.
Username
Enter azureuser.
Password
Enter a password.
Confirm password
Reenter the password.
Inbound port rules
Public inbound ports
Select None.
Select the Networking tab at the top of the page.
Enter or select the following information in the Networking tab:
Setting
Value
Network interface
Virtual network
Select vnet-1.
Subnet
Select subnet-1 (10.0.0.0/24).
Public IP
Select None.
NIC network security group
Select Advanced.
Configure network security group
Select Create new. Enter nsg-1 for the name. Leave the rest at the defaults and select OK.
Leave the rest of the settings at the defaults and select Review + create.
Review the settings and select Create.
Note
Virtual machines in a virtual network with a bastion host don't need public IP addresses. Bastion provides the public IP, and the VMs use private IPs to communicate within the network. You can remove the public IPs from any VMs in bastion hosted virtual networks. For more information, see Dissociate a public IP address from an Azure VM.
Note
Azure provides a default outbound access IP for VMs that either aren't assigned a public IP address or are in the backend pool of an internal basic Azure load balancer. The default outbound access IP mechanism provides an outbound IP address that isn't configurable.
The default outbound access IP is disabled when one of the following events happens:
A public IP address is assigned to the VM.
The VM is placed in the backend pool of a standard load balancer, with or without outbound rules.
In this section, you use the virtual machine you created in the previous step to connect to the web app across the private endpoint.
In the search box at the top of the portal, enter Virtual machine. Select Virtual machines in the search results.
Select vm-1.
On the overview page for vm-1, select Connect then Bastion.
Enter the username and password that you entered during the virtual machine creation.
Select Connect button.
Open Windows PowerShell on the server after you connect.
Enter nslookup <webapp-name>.azurewebsites.net. Replace <webapp-name> with the name of the web app you created in the previous steps. You receive a message similar to the following output:
A private IP address of 10.1.0.10 is returned for the web app name. This address is in subnet-1 subnet of vnet-2 virtual network you created previously.
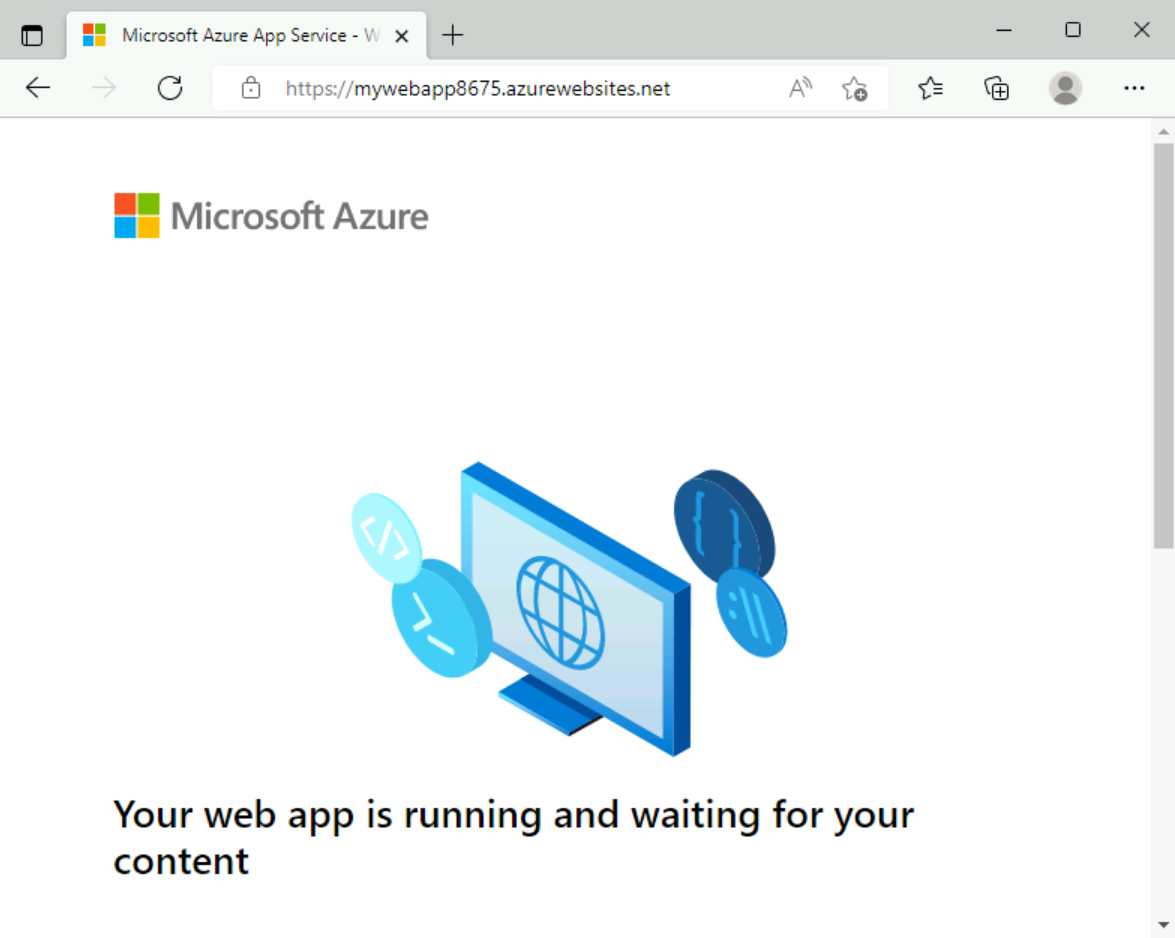
Open Microsoft Edge, and enter the URL of your web app, https://<webapp-name>.azurewebsites.net.
Verify you receive the default web app page.
Close the connection to vm-1.
Open a web browser on your local computer and enter the URL of your web app, https://<webapp-name>.azurewebsites.net.
Verify that you receive a 403 page. This page indicates that the web app isn't accessible externally.
When you finish using the resources that you created, you can delete the resource group and all its resources.
In the Azure portal, search for and select Resource groups.
On the Resource groups page, select the test-rg resource group.
On the test-rg page, select Delete resource group.
Enter test-rg in Enter resource group name to confirm deletion, and then select Delete.
Next steps
In this tutorial, you learned how to deploy a private resolver and private endpoint. You tested the connection to the private endpoint from a simulated on-premises network.