Training
Module
Choose the best Azure Quantum option for your needs - Training
Learn how to get started with Azure Quantum and choose the best service for your needs.
This browser is no longer supported.
Upgrade to Microsoft Edge to take advantage of the latest features, security updates, and technical support.
Once you have created an Azure Quantum workspace, you can connect to it and submit your code using the azure-quantum Python package. The azure-quantum package provides a Workspace class that represents an Azure Quantum workspace.
An Azure account with an active subscription. If you don’t have an Azure account, register for free and sign up for a pay-as-you-go subscription.
An Azure Quantum workspace. See Create an Azure Quantum workspace.
The latest version of the Azure Quantum azure-quantum package.
!pip install --upgrade azure-quantum
If you use Azure CLI, you must have the latest version. For the installation instructions, see:
You can use a connection string to specify the connection parameters to an Azure Quantum Workspace. You might use a connection string in the following scenarios:
Tip
Every Azure Quantum workspace has primary and secondary keys, and their corresponding connection strings. If you want to allow access to your workspace to others, you can share your secondary key and you use your primary for your own services. This way, you can replace the secondary key as needed without having downtime in your own services. For more information about sharing your workspace access, see Share your workspace access.
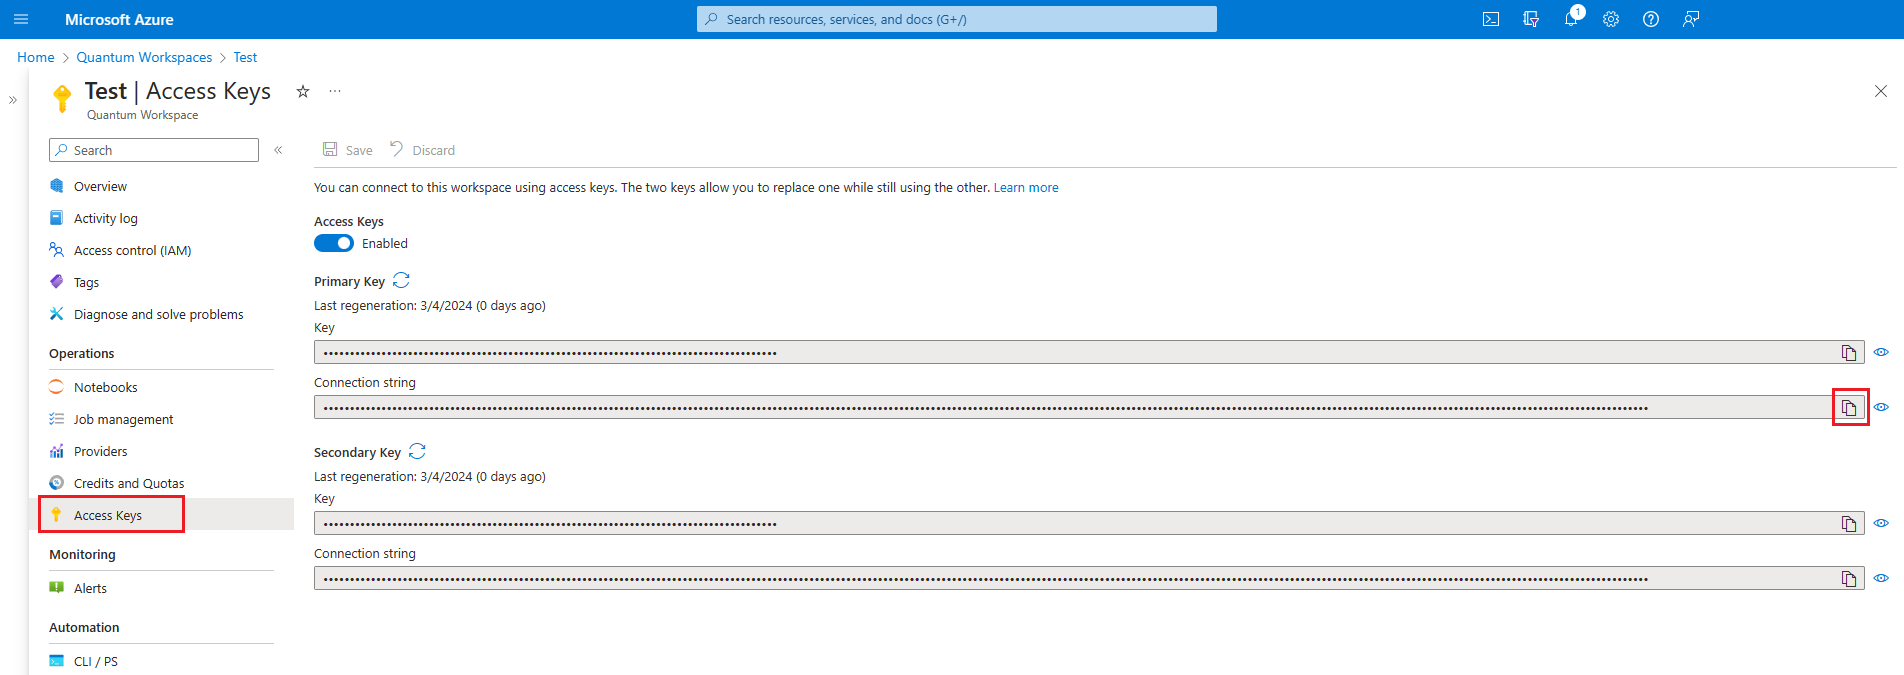
Log in to the Azure portal and select your Azure Quantum workspace.
On the left panel, navigate to Operations > Access keys.
Access Keys have to be enabled. If Access Keys are disabled, you need to enable them first. See how to do it in Manage your Access Keys.
Click on the Copy icon to copy the connection string. You can select either the primary or secondary connection string.
Warning
Storing your account access keys or connection string in clear text presents a security risk and is not recommended. Store your account keys in an encrypted format, or migrate your applications to use Microsoft Entra authorization for access to your Azure Quantum workspace.
Once you copied the connection string, you can use it to connect to your Azure Quantum workspace.
If you're working with a Python environment, you can create a Workspace object to connect to your Azure Quantum workspace. When creating a Workspace object, you have two options for identifying your Azure Quantum workspace.
You can create a Workspace object by calling from_connection_string.
# Creating a new Workspace object from a connection string
from azure.quantum import Workspace

connection_string = "[Copy connection string]"
workspace = Workspace.from_connection_string(connection_string)

print(workspace.get_targets())
If you don't want to copy your connection string in the code, you can also store your connection string in an environment variable and use Workspace().
# Using environment variable to connect with  connection string

connection_string = "[Copy connection string]"

import os

os.environ["AZURE_QUANTUM_CONNECTION_STRING"] = connection_string

from azure.quantum import Workspace

workspace = Workspace()
print(workspace.get_targets())
For more information about how to enable/disable and regenerate your keys, see Manage your Access Keys.
Important
When Access Keys are disabled, all request using connection strings or access keys are unauthorized. You can still use the workspace parameters to connect to your workspace.
Every Azure Quantum workspace has a unique set of parameters that you can use to connect to it. You can use the following parameters to connect to your Azure Quantum workspace:
| Parameter | Description |
|---|---|
subscription_id |
The Azure subscription ID. |
resource_group |
The Azure resource group name. |
name |
The name of your Azure Quantum workspace. |
location |
The Azure region where the Azure Quantum workspace is provisioned. This may be specified as a region name such as "East US" or a location name such as "eastus". |
resource_id |
The Azure resource ID of the Azure Quantum workspace. |
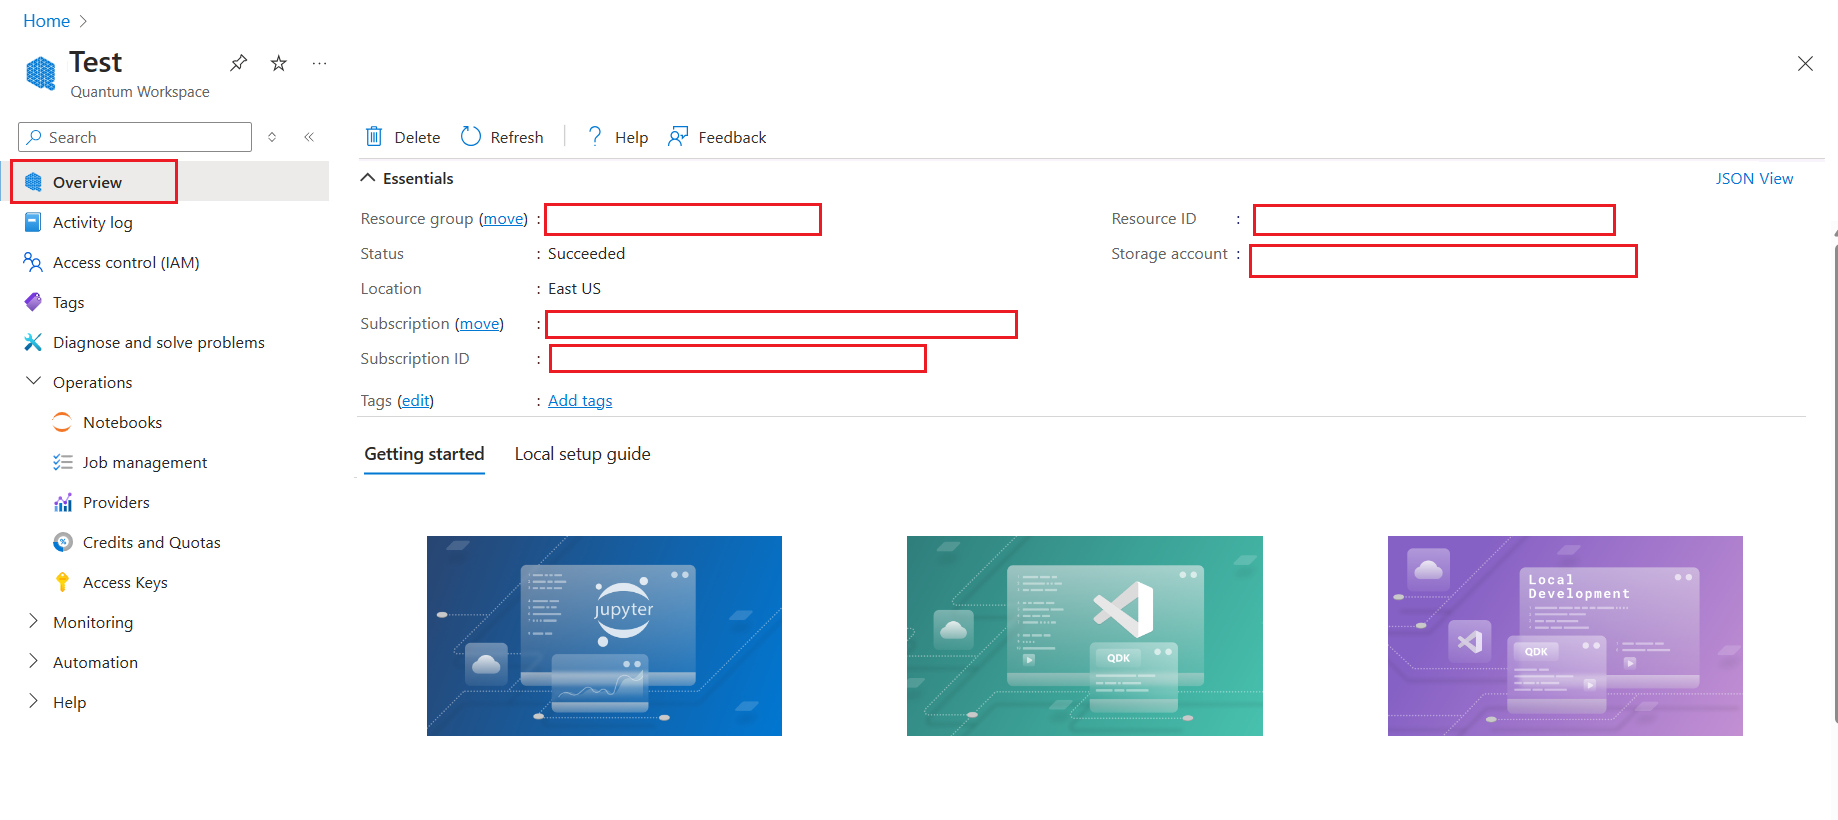
You can find the workspace parameters in the overview of your Azure Quantum workspace in Azure portal.
Log in to your Azure account, https://portal.azure.com,
Select your Azure Quantum workspace, and navigate to Overview.
Copy the parameters in the fields.
Create a Workspace object to connect to your Azure Quantum workspace. When creating a Workspace object, you have two options for identifying your Azure Quantum workspace.
You can specify the location and resource ID (recommended):
from azure.quantum import Workspace

workspace = Workspace(
    resource_id = "", # Add the resource ID of your workspace
    location = "" # Add the location of your workspace (for example "westus")
    )
You can specify the location, subscription ID, resource group, and workspace name:
from azure.quantum import Workspace

workspace = Workspace(
    subscription_id = "", # Add the subscription ID of your workspace
    resource_group = "", # Add the resource group of your workspace
    workspace_name = "", # Add the name of your workspace
    location = "" # Add the location of your workspace (for example "westus")
    )
Training
Module
Choose the best Azure Quantum option for your needs - Training
Learn how to get started with Azure Quantum and choose the best service for your needs.