Register existing SAP system
In this how-to guide, you learn how to register an existing SAP system with Azure Center for SAP solutions. After you register an SAP system with Azure Center for SAP solutions, you can use its visualization, management and monitoring capabilities through the Azure portal. For example, you can:
- View and track the SAP system as an Azure resource, called the Virtual Instance for SAP solutions (VIS).
- Get recommendations for your SAP infrastructure, Operating System configurations etc. based on quality checks that evaluate best practices for SAP on Azure.
- Get health and status information about your SAP system.
- Start and Stop SAP application tier.
- Start and Stop individual instances of ASCS, App server and HANA Database.
- Monitor the Azure infrastructure metrics for the SAP system resources.
- View Cost Analysis for the SAP system.
When you register a system with Azure Center for SAP solutions, the following resources are created in your Subscription:
- Virtual Instance for SAP solutions, Central service instance for SAP solutions, App server instance for SAP solutions and Database for SAP solutions. These resource types are created to represent the SAP system on Azure. These resources do not have any billing or cost associated with them.
- A managed resource group that is used by Azure Center for SAP solutions service.
- A Storage account within the managed resource group that contains blobs. These blobs are scripts and logs necessary for the service to provide various capabilities that include discovering and registering all components of SAP system.
Note
You can customize the names of the Managed resource group and the Storage account which get deployed as part of the registration process by using Azure Portal, Azure PowerShell or Azure CLI interfaces, when you register your systems.
Note
You can now enable secure access from specific virtual networks to the ACSS managed storage account using the new option in the registration experience.
Prerequisites
Azure infrastructure level pre-requisites
- Check that you're trying to register a supported SAP system configuration
- Grant access to Azure Storage accounts, Azure resource manager (ARM) and Microsoft Entra services from the virtual network where the SAP system exists. Use one of these options:
- Allow outbound internet connectivity for the VMs.
- Use a Service tags to allow connectivity
- Use a Service tags with regional scope to allow connectivity to resources in the same region as the VMs.
- Allowlist the region-specific IP addresses for Azure Storage, ARM and Microsoft Entra ID.
- ACSS deploys a managed storage account into your subscription, for each SAP system being registered. You have the option to choose network access setting for the storage account.
- If you choose network access from specific Virtual Networks option, then you need to make sure Microsoft.Storage service endpoint is enabled on all subnets in which the SAP system Virtual Machines exist. This service endpoint is used to enable access from the SAP virtual machine to the managed storage account, to access the scripts that ACSS runs on the VM extension.
- If you choose public network access option, then you need to grant access to Azure Storage accounts from the virtual network where the SAP system exists.
- Register the Microsoft.Workloads Resource Provider in the subscription where you have the SAP system.
- Check that your Azure account has Azure Center for SAP solutions administrator and Managed Identity Operator or equivalent role access on the subscription or resource groups where you have the SAP system resources.
- A User-assigned managed identity which has Azure Center for SAP solutions service role access on the Compute resource group and Reader role access on the Virtual Network resource group of the SAP system. Azure Center for SAP solutions service uses this identity to discover your SAP system resources and register the system as a VIS resource.
- Make sure ASCS, Application Server and Database virtual machines of the SAP system are in Running state.
SAP system level pre-requisites
- sapcontrol and saphostctrl exe files must exist on ASCS, App server and Database.
- File path on Linux VMs: /usr/sap/hostctrl/exe
- File path on Windows VMs: C:\Program Files\SAP\hostctrl\exe\
- Make sure the sapstartsrv process is running on all SAP instances and for SAP hostctrl agent on all the VMs in the SAP system.
- To start hostctrl sapstartsrv, use this command for Linux VMs: 'hostexecstart -start'
- To start instance sapstartsrv, use the command: 'sapcontrol -nr 'instanceNr' -function StartService S0S'
- To check status of hostctrl sapstartsrv use this command for Windows VMs: C:\Program Files\SAP\hostctrl\exe\saphostexec –status
- For successful discovery and registration of the SAP system, ensure there is network connectivity between ASCS, App and DB VMs. 'ping' command for App instance hostname must be successful from ASCS VM. 'ping' for Database hostname must be successful from App server VM.
- On App server profile, SAPDBHOST, DBTYPE, DBID parameters must have the right values configured for the discovery and registration of Database instance details.
Supported systems
You can register SAP systems with Azure Center for SAP solutions that run on the following configurations:
- SAP NetWeaver or ABAP stacks
- Windows, SUSE and RHEL Linux operating systems
- HANA, DB2, SQL Server, Oracle, Max DB, and SAP ASE databases
- SAP system with multiple Application Server Instances on a single Virtual Machine
- SAP system with clustered Application Server architecture
The following SAP system configurations aren't supported in Azure Center for SAP solutions:
- HANA Large Instance (HLI)
- Systems with HANA Scale-out, MCOS and MCOD configurations
- Java stack
- Dual stack (ABAP and Java)
- Systems distributed across peered virtual networks
- Systems using IPv6 addresses
- Multiple SIDs running on same set of Virtual Machines. For example, two or more SIDs sharing a single VM for ASCS instance.
Enable resource permissions
When you register an existing SAP system as a VIS, Azure Center for SAP solutions service needs a User-assigned managed identity that has Azure Center for SAP solutions service role access on the Compute (VMs, Disks, Load balancers) resource group and Reader role access on the Virtual Network resource group of the SAP system. Before you register an SAP system with Azure Center for SAP solutions, either create a new user-assigned managed identity or update role access for an existing managed identity.
Azure Center for SAP solutions uses this user-assigned managed identity to install VM extensions on the ASCS, Application Server and DB VMs. This step allows Azure Center for SAP solutions to discover the SAP system components, and other SAP system metadata. User-assigned managed identity is required to enable SAP system monitoring and management capabilities.
Setup User-assigned managed identity
To provide permissions to the SAP system resources to a user-assigned managed identity:
- Create a new user-assigned managed identity if needed or use an existing one.
- Assign Azure Center for SAP solutions service role role access to the user-assigned managed identity on the resource group(s) that have the Virtual Machines, Disks and Load Balancers of the SAP system and Reader role on the resource group(s) which have the Virtual Network components of the SAP system.
- Once the permissions are assigned, this managed identity can be used in Azure Center for SAP solutions to register and manage SAP systems.
Managed storage account network access settings
ACSS deploys a managed storage account into your subscription, for each SAP system being registered. When you register your SAP system using Azure Portal, PowerShell or REST API, you have the option to choose network access setting for the storage account. You can choose either public network access or access from specific virtual networks.
To secure the managed storage account and limit access to only the virtual network that has your SAP virtual machines, you can choose the network access setting as Enable access from specific Virtual Networks. You can learn more about storage account network security in this documentation.
Important
When you limit storage account network access to specific virtual networks, you have to configure Microsoft.Storage service endpoint on all subnets related to the SAP system that you are registering. Without the service endpoint enabled, you will not be able to successfully register the system. Private endpoint on managed storage account is not currently supported in this scenario.
When you choose to limit network access to specific virtual networks, Azure Center for SAP solutions service accesses this storage account using trusted access based on the managed identity associated with the VIS resource.
Register SAP system
To register an existing SAP system in Azure Center for SAP solutions:
Sign in to the Azure portal. Make sure to sign in with an Azure account that has Azure Center for SAP solutions administrator and Managed Identity Operator role access to the subscription or resource groups where the SAP system exists. For more information, see the resource permissions explanation.
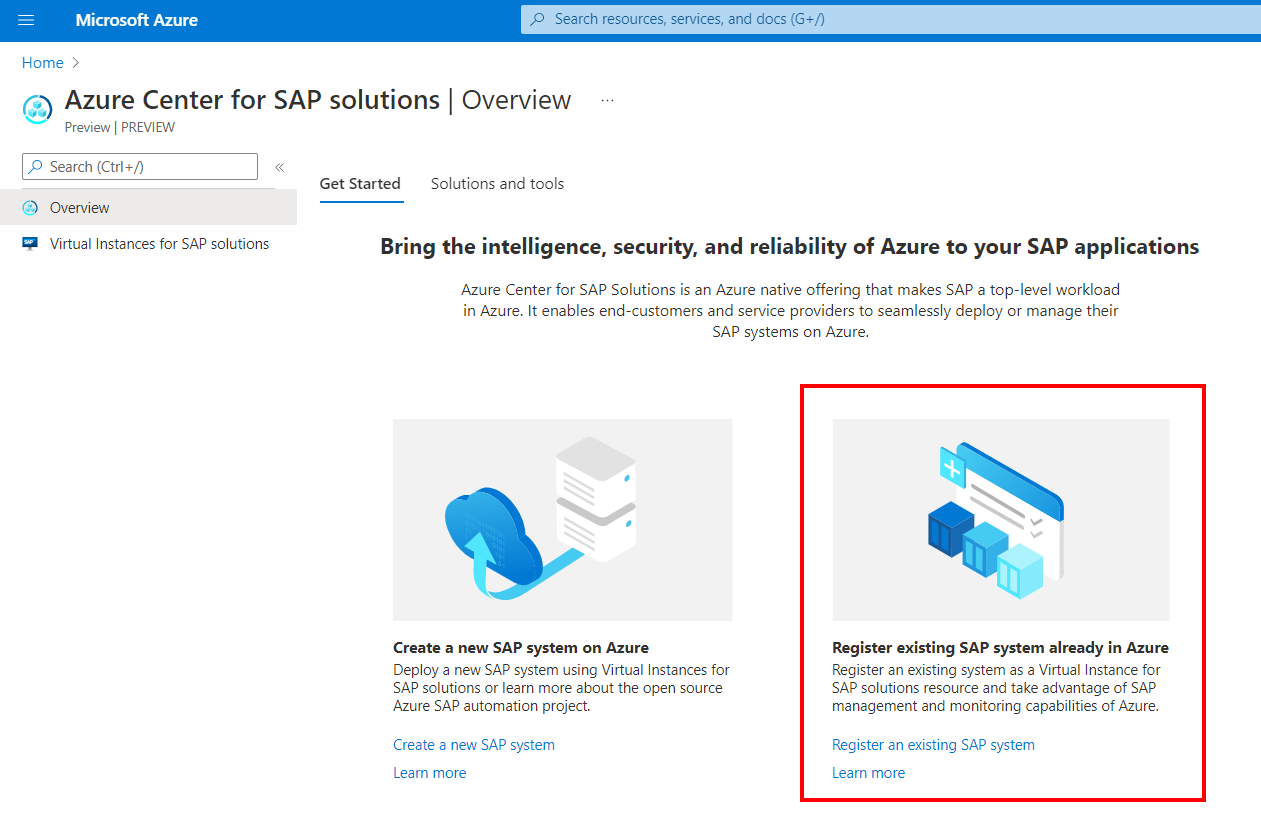
Search for and select Azure Center for SAP solutions in the Azure portal's search bar.
On the Azure Center for SAP solutions page, select Register an existing SAP system.
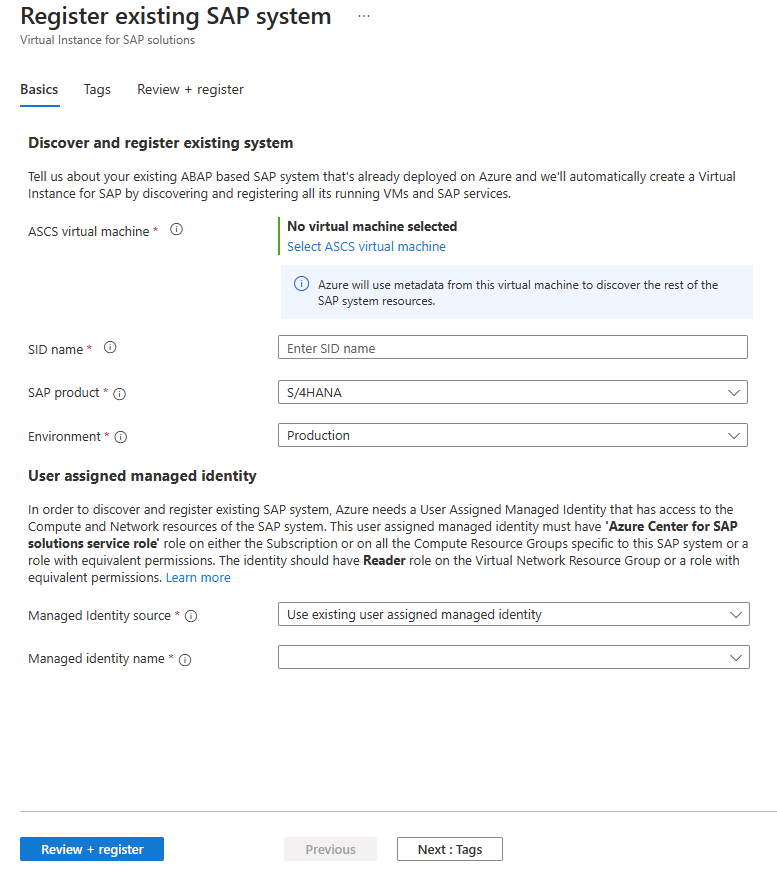
On the Basics tab of the Register existing SAP system page, provide information about the SAP system.
For ASCS virtual machine, select Select ASCS virtual machine and select the ASCS VM resource.
For SID name, enter the SID name.
For SAP product, select the SAP system product from the drop-down menu.
For Environment, select the environment type from the drop-down menu. For example, production or non-production environments.
For Managed identity source, select Use existing user-assigned managed identity option.
For Managed identity name, select a User-assigned managed identity which has Azure Center for SAP solutions service role and Reader role access to the respective resources of this SAP system.
For Managed resource group name, optionally enter a resource group name as per your organization's naming policies. This resource group is managed by ACSS service.
For Managed storage account name, optionally enter a storage account name as per your organization's naming policies. This storage account is managed by ACSS service.
For Storage account network access, select Enable access from specific virtual network for enhanced network security access for the managed storage account.
Select Review + register to discover the SAP system and begin the registration process.
On the Review + register pane, make sure your settings are correct. Then, select Register.
Wait for the VIS resource to be created. The VIS name is the same as the SID name. The VIS deployment finishes after all SAP system components are discovered from the ASCS VM that you selected.


You can now review the VIS resource in the Azure portal. The resource page shows the SAP system resources, and information about the system.
If the registration doesn't succeed, see what to do when an SAP system registration fails in Azure Center for SAP solutions. Once you have fixed the configuration causing the issue, retry registration using the Retry action available on the VIS resource page on Azure portal.
Fix registration failure
- The process of registering an SAP system with Azure Center for SAP solutions might fail when any of the pre-requisites are not met.
- Review the pre-requisites and ensure the configurations are as suggested.
- Review any error messages displayed on the VIS resource on Azure portal. Follow any recommended actions.
- Once you have fixed the configuration causing the issue, retry registration using the Retry action available on the Virtual Instance for SAP solutions page on Azure portal.
Error - Failed to discover details from the DB VM
This error happens when the Database identifier is incorrectly configured on the SAP system. One possible cause is that the Application Server profile parameter rsdb/dbid has an incorrect identifier for the HANA Database. To fix the error:
Stop the Application Server instance:
sapcontrol -nr <instance number> -function StopStop the ASCS instance:
sapcontrol -nr <instance number> -function StopOpen the Application Server profile.
Add the profile parameter for the HANA Database:
rsdb/dbid = <SID of HANA Database>Restart the Application Server instance:
sapcontrol -nr <instance number> -function StartRestart the ASCS instance:
sapcontrol -nr <instance number> -function StartDelete the VIS resource whose registration failed.
Register the SAP system again.
Error - Azure VM Agent not in desired provisioning state
Cause: This issue occurs when Azure VM agent's provisioning state is not as expected on the specified Virtual Machine. Expected state is Ready. Verify the agent status by checking the properties section in the VM overview page.
Solution: To fix the Linux VM Agent,
- Login to the VM using bastion or serial console.
- If the VM agent exists and is not running, then restart the waagent.
- sudo systemctl status waagent.
- If the service is not running then restart this service. To restart use the following steps:
- sudo systemctl stop waagent
- sudo systemctl start waagent
- If this does not solve the issue, try updating the VM Agent using this document
- If the VM agent does not exist or needs to be re-installed, then follow this documentation.
To fix the Windows VM Agent, follow Troubleshooting Azure Windows VM Agent.