Note
Access to this page requires authorization. You can try signing in or changing directories.
Access to this page requires authorization. You can try changing directories.
This tutorial shows you how to create a web app that queries and returns results from a search index using Azure Cognitive Search and Visual Studio.
In this tutorial, you'll learn how to:
- Set up a development environment
- Model data structures
- Create a web page to collect query inputs and display results
- Define a search method
- Test the app
You'll also learn how straightforward a search call is. The key statements in the code are encapsulated in the following few lines:
var options = new SearchOptions()
{
    // The Select option specifies fields for the result set
    options.Select.Add("HotelName");
    options.Select.Add("Description");
};

var searchResult = await _searchClient.SearchAsync<Hotel>(model.searchText, options).ConfigureAwait(false);
model.resultList = searchResult.Value.GetResults().ToList();
Just one call queries the search index and returns results.
Overview
This tutorial uses the hotels-sample-index, which you can create quickly on your own search service by stepping through the Import data quickstart. The index contains fictitious hotel data, available as a built-in data source in every search service.
The first lesson in this tutorial creates a basic query structure and search page, which you'll enhance in subsequent lessons to include paging, facets, and a type-ahead experience.
A finished version of the code can be found in the following project:
Prerequisites
Sample index (hotels-sample-index), hosted on your search service.
Install and run the project from GitHub
If you want to jump ahead to a working app, follow the steps below to download and run the finished code.
Locate the sample on GitHub: Create first app.
At the root folder, select Code, followed by Clone or Download ZIP to make your private local copy of the project.
Using Visual Studio, navigate to, and open the solution for the basic search page ("1-basic-search-page"), and select Start without debugging (or press F5) to build and run the program.
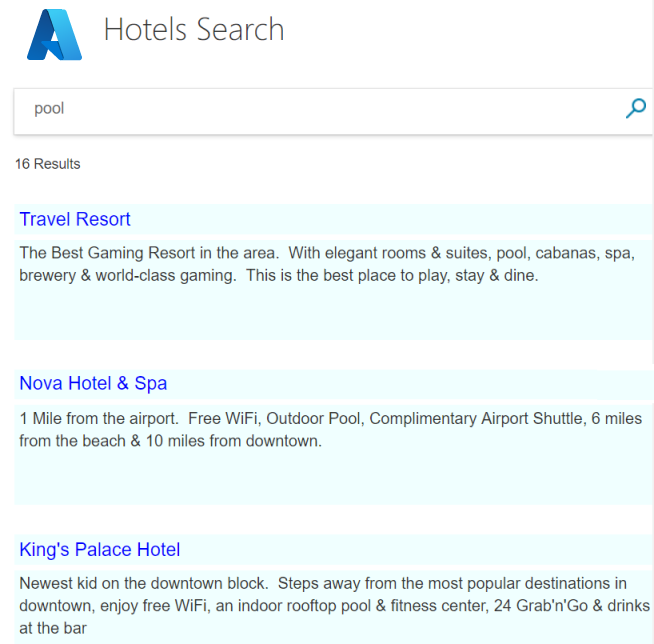
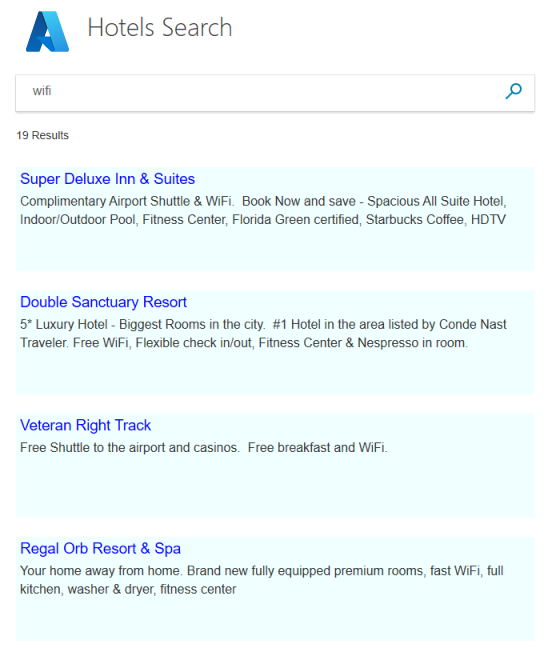
This is a hotels index, so type in some words that you might use to search for hotels (for example, "wifi", "view", "bar", "parking"). Examine the results.
The essential components for more sophisticated searches are included in this one app. If you're new to search development, you can recreate this app step by step to learn the workflow. The following sections show you how.
Set up a development environment
To create this project from scratch, and thus reinforce the concepts of Azure Cognitive Search, start with a Visual Studio project.
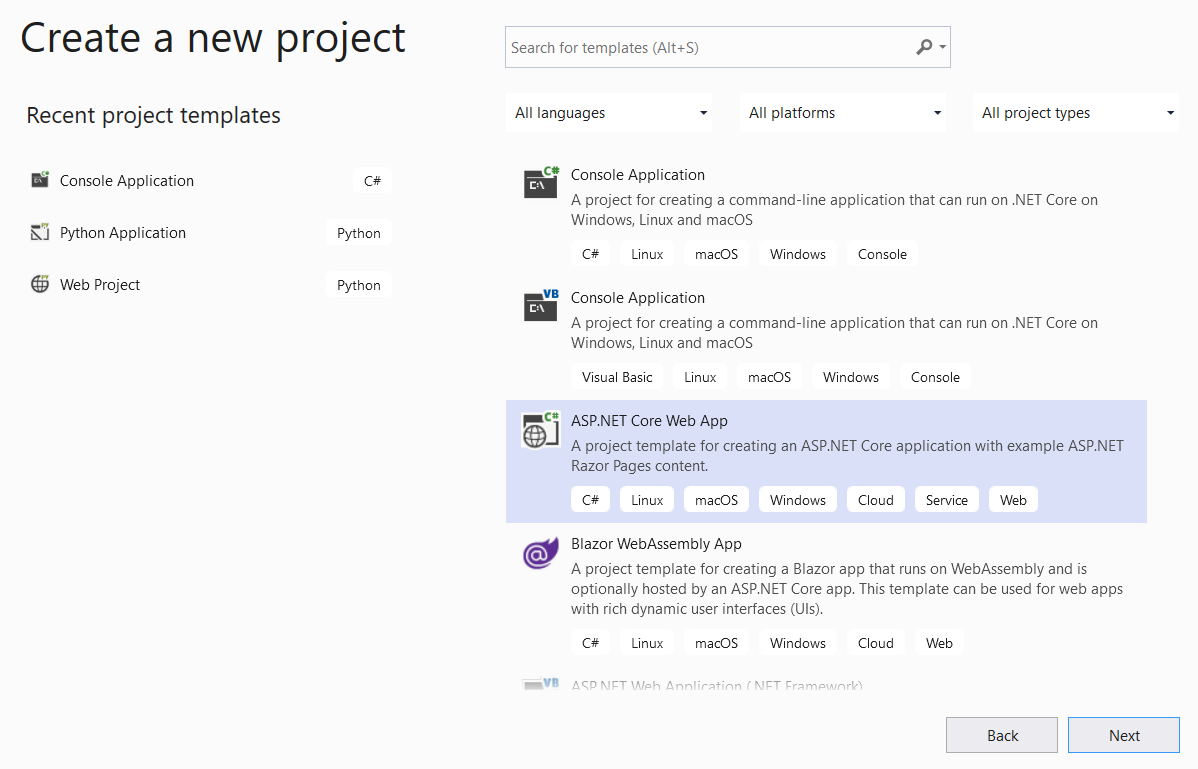
In Visual Studio, select New > Project, then ASP.NET Core Web App (Model-View-Controller).
Give the project a name such as "FirstSearchApp" and set the location. Select Next.
Accept the defaults for target framework, authentication type, and HTTPS. Select Create.
Install the client library. In Tools > NuGet Package Manager > Manage NuGet Packages for Solution..., select Browse and then search for "azure.search.documents". Install Azure.Search.Documents (version 11 or later), accepting the license agreements and dependencies.

Initialize Azure Cognitive Search
In this step, set the endpoint and access key for connecting to the search service that provides the hotels sample index.
Open appsettings.json and replace the default lines with the search service URL (in the format
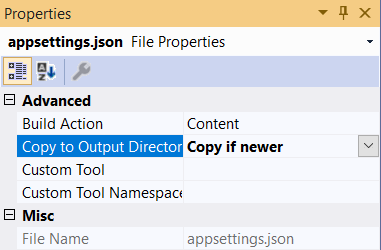
https://<service-name>.search.windows.net) and an admin or query API key of your search service. Since you don't need to create or update an index, you can use the query key for this tutorial.{ "SearchServiceUri": "<YOUR-SEARCH-SERVICE-URI>", "SearchServiceQueryApiKey": "<YOUR-SEARCH-SERVICE-API-KEY>" }In Solution Explorer, select the file, and in Properties, change the Copy to Output Directory setting to Copy if newer.
Model data structures
Models (C# classes) are used to communicate data between the client (the view), the server (the controller), and also the Azure cloud using the MVC (model, view, controller) architecture. Typically, these models reflect the structure of the data that is being accessed.
In this step, you'll model the data structures of the search index, as well as the search string used in view/controller communications. In the hotels index, each hotel has many rooms, and each hotel has a multi-part address. Altogether, the full representation of a hotel is a hierarchical and nested data structure. You'll need three classes to create each component.
The set of Hotel, Address, and Room classes are known as complex types, an important feature of Azure Cognitive Search. Complex types can be many levels deep of classes and subclasses, and enable far more complex data structures to be represented than using simple types (a class containing only primitive members).
In Solution Explorer, right-click Models > Add > New Item.
Select Class and name the item Hotel.cs. Replace all the contents of Hotel.cs with the following code. Notice the Address and Room members of the class, these fields are classes themselves so you'll need models for them too.
using Azure.Search.Documents.Indexes;
using Azure.Search.Documents.Indexes.Models;
using Microsoft.Spatial;
using System;
using System.Text.Json.Serialization;

namespace FirstAzureSearchApp.Models
{
    public partial class Hotel
    {
        [SimpleField(IsFilterable = true, IsKey = true)]
        public string HotelId { get; set; }

        [SearchableField(IsSortable = true)]
        public string HotelName { get; set; }

        [SearchableField(AnalyzerName = LexicalAnalyzerName.Values.EnLucene)]
        public string Description { get; set; }

        [SearchableField(AnalyzerName = LexicalAnalyzerName.Values.FrLucene)]
        [JsonPropertyName("Description_fr")]
        public string DescriptionFr { get; set; }

        [SearchableField(IsFilterable = true, IsSortable = true, IsFacetable = true)]
        public string Category { get; set; }

        [SearchableField(IsFilterable = true, IsFacetable = true)]
        public string[] Tags { get; set; }

        [SimpleField(IsFilterable = true, IsSortable = true, IsFacetable = true)]
        public bool? ParkingIncluded { get; set; }

        [SimpleField(IsFilterable = true, IsSortable = true, IsFacetable = true)]
        public DateTimeOffset? LastRenovationDate { get; set; }

        [SimpleField(IsFilterable = true, IsSortable = true, IsFacetable = true)]
        public double? Rating { get; set; }

        public Address Address { get; set; }

        [SimpleField(IsFilterable = true, IsSortable = true)]
        public GeographyPoint Location { get; set; }

        public Room[] Rooms { get; set; }
    }
}
Repeat the same process of creating a model for the Address class, naming the file Address.cs. Replace the contents with the following.
using Azure.Search.Documents.Indexes;

namespace FirstAzureSearchApp.Models
{
    public partial class Address
    {
        [SearchableField]
        public string StreetAddress { get; set; }

        [SearchableField(IsFilterable = true, IsSortable = true, IsFacetable = true)]
        public string City { get; set; }

        [SearchableField(IsFilterable = true, IsSortable = true, IsFacetable = true)]
        public string StateProvince { get; set; }

        [SearchableField(IsFilterable = true, IsSortable = true, IsFacetable = true)]
        public string PostalCode { get; set; }

        [SearchableField(IsFilterable = true, IsSortable = true, IsFacetable = true)]
        public string Country { get; set; }
    }
}
And again, follow the same process to create the Room class, naming the file Room.cs.
using Azure.Search.Documents.Indexes;
using Azure.Search.Documents.Indexes.Models;
using System.Text.Json.Serialization;

namespace FirstAzureSearchApp.Models
{
    public partial class Room
    {
        [SearchableField(AnalyzerName = LexicalAnalyzerName.Values.EnMicrosoft)]
        public string Description { get; set; }

        [SearchableField(AnalyzerName = LexicalAnalyzerName.Values.FrMicrosoft)]
        [JsonPropertyName("Description_fr")]
        public string DescriptionFr { get; set; }

        [SearchableField(IsFilterable = true, IsFacetable = true)]
        public string Type { get; set; }

        [SimpleField(IsFilterable = true, IsFacetable = true)]
        public double? BaseRate { get; set; }

        [SearchableField(IsFilterable = true, IsFacetable = true)]
        public string BedOptions { get; set; }

        [SimpleField(IsFilterable = true, IsFacetable = true)]
        public int SleepsCount { get; set; }

        [SimpleField(IsFilterable = true, IsFacetable = true)]
        public bool? SmokingAllowed { get; set; }

        [SearchableField(IsFilterable = true, IsFacetable = true)]
        public string[] Tags { get; set; }
    }
}
The last model you'll create in this tutorial is a class named SearchData and it represents the user's input (searchText), and the search's output (resultList). The type of the output is critical, SearchResults<Hotel>, as this type exactly matches the results from the search, and you need to pass this reference through to the view. Replace the default template with the following code.
using Azure.Search.Documents.Models;

namespace FirstAzureSearchApp.Models
{
    public class SearchData
    {
        // The text to search for.
        public string searchText { get; set; }

        // The list of results.
        public SearchResults<Hotel> resultList;
    }
}
Create a web page
Project templates come with a number of client views located in the Views folder. The exact views depend on the version of Core .NET you're using (3.1 is used in this sample). For this tutorial, you'll modify Index.cshtml to include the elements of a search page.
Delete the content of Index.cshtml in its entirety, and rebuild the file in the following steps.
The tutorial uses two small images in the view: an Azure logo and a search magnifier icon (azure-logo.png and search.png). Copy across the images from the GitHub project to the wwwroot/images folder in your project.
The first line of Index.cshtml should reference the model used to communicate data between the client (the view) and the server (the controller), which is the SearchData model previously created. Add this line to the Index.cshtml file.
@model FirstAzureSearchApp.Models.SearchDataIt's standard practice to enter a title for the view, so the next lines should be:
@{
    ViewData["Title"] = "Home Page";
}
Following the title, enter a reference to an HTML stylesheet, which you'll create shortly.
<head>
    <link rel="stylesheet" href="~/css/hotels.css" />
</head>
The body of the view handles two use cases. First, it must provide an empty page on first use, before any search text is entered. Secondly, it must handle results, in addition to the search text box, for repeated queries.
To handle both cases, you need to check whether the model provided to the view is null. A null model indicates the first use case (the initial running of the app). Add the following to the Index.cshtml file and read through the comments.
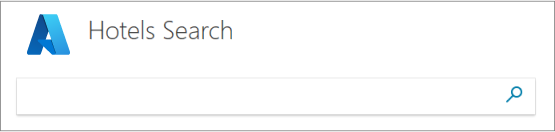
<body>
<h1 class="sampleTitle">
    <img src="~/images/azure-logo.png" width="80" />
    Hotels Search
</h1>

@using (Html.BeginForm("Index", "Home", FormMethod.Post))
{
    // Display the search text box, with the search icon to the right of it.
    <div class="searchBoxForm">
        @Html.TextBoxFor(m => m.searchText, new { @class = "searchBox" }) <input class="searchBoxSubmit" type="submit" value="">
    </div>

    @if (Model != null)
    {
        // Show the result count.
        <p class="sampleText">
            @Model.resultList.TotalCount Results
        </p>

        var results = Model.resultList.GetResults().ToList();

        @for (var i = 0; i < results.Count; i++)
        {
            // Display the hotel name and description.
            @Html.TextAreaFor(m => results[i].Document.HotelName, new { @class = "box1" })
            @Html.TextArea($"desc{i}", results[i].Document.Description, new { @class = "box2" })
        }
    }
}
</body>
Add the stylesheet. In Visual Studio, in File> New > File, select Style Sheet (with General highlighted).
Replace the default code with the following. We won't be going into this file in any more detail, the styles are standard HTML.
textarea.box1 {
    width: 648px;
    height: 30px;
    border: none;
    background-color: azure;
    font-size: 14pt;
    color: blue;
    padding-left: 5px;
}

textarea.box2 {
    width: 648px;
    height: 100px;
    border: none;
    background-color: azure;
    font-size: 12pt;
    padding-left: 5px;
    margin-bottom: 24px;
}

.sampleTitle {
    font: 32px/normal 'Segoe UI Light',Arial,Helvetica,Sans-Serif;
    margin: 20px 0;
    font-size: 32px;
    text-align: left;
}

.sampleText {
    font: 16px/bold 'Segoe UI Light',Arial,Helvetica,Sans-Serif;
    margin: 20px 0;
    font-size: 14px;
    text-align: left;
    height: 30px;
}

.searchBoxForm {
    width: 648px;
    box-shadow: 0 0 0 1px rgba(0,0,0,.1), 0 2px 4px 0 rgba(0,0,0,.16);
    background-color: #fff;
    display: inline-block;
    border-collapse: collapse;
    border-spacing: 0;
    list-style: none;
    color: #666;
}

.searchBox {
    width: 568px;
    font-size: 16px;
    margin: 5px 0 1px 20px;
    padding: 0 10px 0 0;
    border: 0;
    max-height: 30px;
    outline: none;
    box-sizing: content-box;
    height: 35px;
    vertical-align: top;
}

.searchBoxSubmit {
    background-color: #fff;
    border-color: #fff;
    background-image: url(/images/search.png);
    background-repeat: no-repeat;
    height: 20px;
    width: 20px;
    text-indent: -99em;
    border-width: 0;
    border-style: solid;
    margin: 10px;
    outline: 0;
}
Save the stylesheet file as hotels.css, into the wwwroot/css folder, alongside the default site.css file.
That completes our view. At this point, both the models and views are completed. Only the controller is left to tie everything together.
Define methods
In this step, modify to the contents of Home Controller.
Open the HomeController.cs file and replace the using statements with the following.
using Azure;
using Azure.Search.Documents;
using Azure.Search.Documents.Indexes;
using FirstAzureSearchApp.Models;
using Microsoft.AspNetCore.Mvc;
using Microsoft.Extensions.Configuration;
using System;
using System.Diagnostics;
using System.Linq;
using System.Threading.Tasks;
Add Index methods
In an MVC app, the Index() method is a default action method for any controller. It opens the index HTML page. The default method, which takes no parameters, is used in this tutorial for the application start-up use case: rendering an empty search page.
In this section, we extend the method to support a second use case: rendering the page when a user has entered search text. To support this case, the index method is extended to take a model as a parameter.
Add the following method, after the default Index() method.
    [HttpPost]
    public async Task<ActionResult> Index(SearchData model)
    {
        try
        {
            // Ensure the search string is valid.
            if (model.searchText == null)
            {
                model.searchText = "";
            }

            // Make the Azure Cognitive Search call.
            await RunQueryAsync(model);
        }

        catch
        {
            return View("Error", new ErrorViewModel { RequestId = "1" });
        }
        return View(model);
    }
Notice the async declaration of the method, and the await call to RunQueryAsync. These keywords take care of making asynchronous calls, and thus avoid blocking threads on the server.
The catch block uses the default error model that was created.
Note the error handling and other default views and methods
Depending on which version of .NET Core you're using, a slightly different set of default views is created. For .NET Core 3.1 the default views are Index, Privacy, and Error. You can view these default pages when running the app, and examine how they're handled in the controller.
You'll be testing the Error view later on in this tutorial.
In the GitHub sample, unused views and their associated actions are deleted.
Add the RunQueryAsync method
The Azure Cognitive Search call is encapsulated in our RunQueryAsync method.
First add some static variables to set up the Azure service, and a call to initiate them.
    private static SearchClient _searchClient;
    private static SearchIndexClient _indexClient;
    private static IConfigurationBuilder _builder;
    private static IConfigurationRoot _configuration;

    private void InitSearch()
    {
        // Create a configuration using appsettings.json
        _builder = new ConfigurationBuilder().AddJsonFile("appsettings.json");
        _configuration = _builder.Build();

        // Read the values from appsettings.json
        string searchServiceUri = _configuration["SearchServiceUri"];
        string queryApiKey = _configuration["SearchServiceQueryApiKey"];

        // Create a service and index client.
        _indexClient = new SearchIndexClient(new Uri(searchServiceUri), new AzureKeyCredential(queryApiKey));
        _searchClient = _indexClient.GetSearchClient("hotels");
    }
Now, add the RunQueryAsync method itself.
private async Task<ActionResult> RunQueryAsync(SearchData model)
{
    InitSearch();

    var options = new SearchOptions()
    {
        IncludeTotalCount = true
    };

    // Enter Hotel property names into this list so only these values will be returned.
    // If Select is empty, all values will be returned, which can be inefficient.
    options.Select.Add("HotelName");
    options.Select.Add("Description");

    // For efficiency, the search call should be asynchronous, so use SearchAsync rather than Search.
    model.resultList = await _searchClient.SearchAsync<Hotel>(model.searchText, options).ConfigureAwait(false);

    // Display the results.
    return View("Index", model);
}
In this method, first ensure our Azure configuration is initiated, then set some search options. The Select option specifies which fields to return in results, and thus match the property names in the hotel class. If you omit Select, all unhidden fields are returned, which can be inefficient if you're only interested in a subset of all possible fields.
The asynchronous call to search formulates the request (modeled as searchText) and response (modeled as searchResult). If you're debugging this code, the SearchResult class is a good candidate for setting a break point if you need to examine the contents of model.resultList. You should find that it's intuitive, providing just the data you asked for, and not much else.
Test the app
Now, let's check whether the app runs correctly.
Select Debug > Start Without Debugging or press F5. If the app runs as expected, you should get the initial Index view.
Enter a query string such as "beach" (or any text that comes to mind), and click the search icon to send the request.
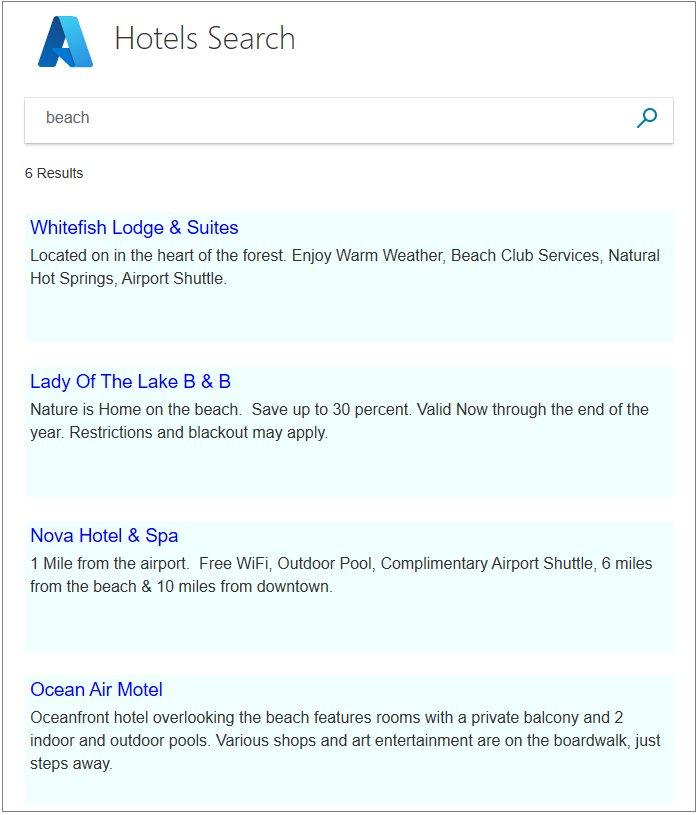
Try entering "five star". Notice that this query returns no results. A more sophisticated search would treat "five star" as a synonym for "luxury" and return those results. Support for synonyms is available in Azure Cognitive Search, but isn't be covered in this tutorial series.
Try entering "hot" as search text. It doesn't return entries with the word "hotel" in them. Our search is only locating whole words, though a few results are returned.
Try other words: "pool", "sunshine", "view", and whatever. You'll see Azure Cognitive Search working at its simplest, but still convincing level.
Test edge conditions and errors
It's important to verify that our error handling features work as they should, even when things are working perfectly.
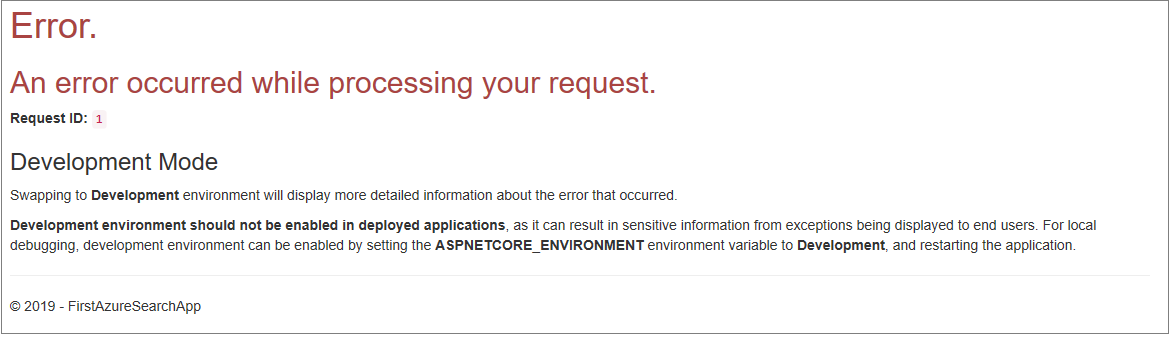
In the Index method, after the try { call, enter the line Throw new Exception(). This exception will force an error when you search on text.
Run the app, enter "bar" as search text, and click the search icon. The exception should result in the error view.
Important
It's considered a security risk to return internal error numbers in error pages. If your app is intended for general use, follow security best practices of what to return when an error occurs.
Remove Throw new Exception() when you're satisfied the error handling works as it should.
Takeaways
Consider the following takeaways from this project:
- An Azure Cognitive Search call is concise, and it's easy to interpret the results.
- Asynchronous calls add a small amount of complexity to the controller, but are a best practice that improves performance.
- This app performed a straightforward text search, defined by what's set up in searchOptions. However, this one class can be populated with many members that add sophistication to a search. With a bit more work, you can make this app considerably more powerful.
Next steps
To improve upon the user experience, add more features, notably paging (either using page numbers, or infinite scrolling), and autocomplete/suggestions. You can also consider other search options (for example, geographical searches on hotels within a specified radius of a given point) and search results ordering.
These next steps are addressed in the remaining tutorials. Let's start with paging.