Note
Access to this page requires authorization. You can try signing in or changing directories.
Access to this page requires authorization. You can try changing directories.
This article explains how to use automation rules to create lists of incident tasks, in order to standardize analyst workflow processes in Microsoft Sentinel.
Incident tasks can be created automatically not only by automation rules, but also by playbooks, and also manually, ad-hoc, from within an incident.
Use cases for different roles
This article addresses the following scenarios that apply to SOC managers, senior analysts, and automation engineers:
Another such scenario is addressed in the following companion article:
Another article, at the following links, addresses scenarios that apply more to SOC analysts:
Important
Microsoft Sentinel is generally available in the Microsoft Defender portal, including for customers without Microsoft Defender XDR or an E5 license.
Starting in July 2026, all customers using Microsoft Sentinel in the Azure portal will be redirected to the Defender portal and will use Microsoft Sentinel in the Defender portal only. Starting in July 2025, many new customers are automatically onboarded and redirected to the Defender portal.
If you're still using Microsoft Sentinel in the Azure portal, we recommend that you start planning your transition to the Defender portal to ensure a smooth transition and take full advantage of the unified security operations experience offered by Microsoft Defender. For more information, see It’s Time to Move: Retiring Microsoft Sentinel’s Azure portal for greater security.
Prerequisites
The Microsoft Sentinel Responder role is required to create automation rules and to view and edit incidents, both of which are necessary to add, view, and edit tasks.
View automation rules with incident task actions
In the Automation page, you can filter the view of automation rules to see only the ones that have Add task actions defined.
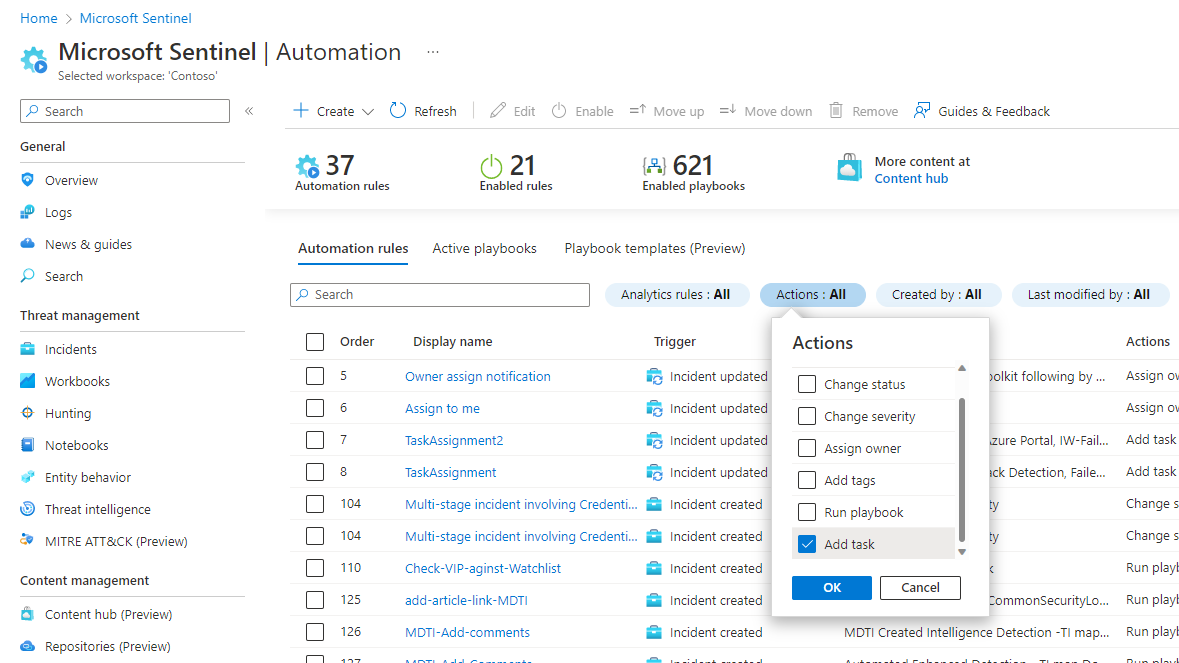
Select the Actions filter.
Unmark the Select all checkbox.
Scroll down and mark the Add task checkbox.
Select OK and see the results.
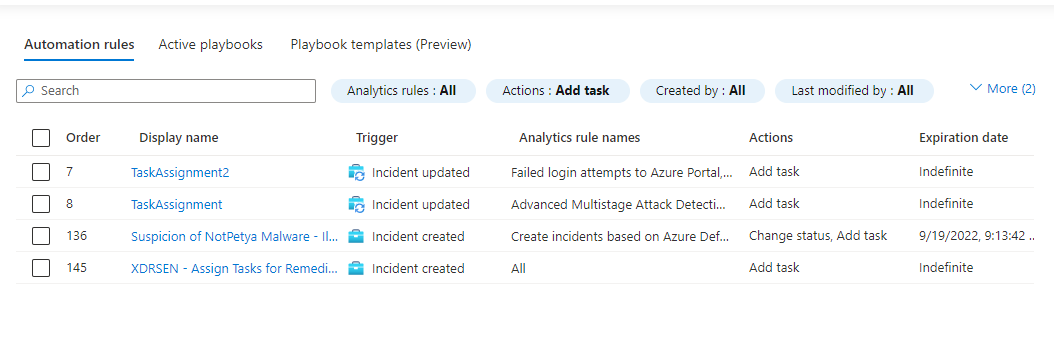
These are the automation rules that add tasks to incidents. The Analytics rule names column tells you which analytics rules these automation rules are conditioned on, so you'll have a general idea of which incidents are affected.
Note
To have exact knowledge of whether an automation rule will apply to a particular incident, you must open the rule to see if any additional conditions are defined, besides the analytics rule condition. If other conditions are defined, the scope of the affected incidents will be accordingly narrowed.
Add tasks to incidents with automation rules
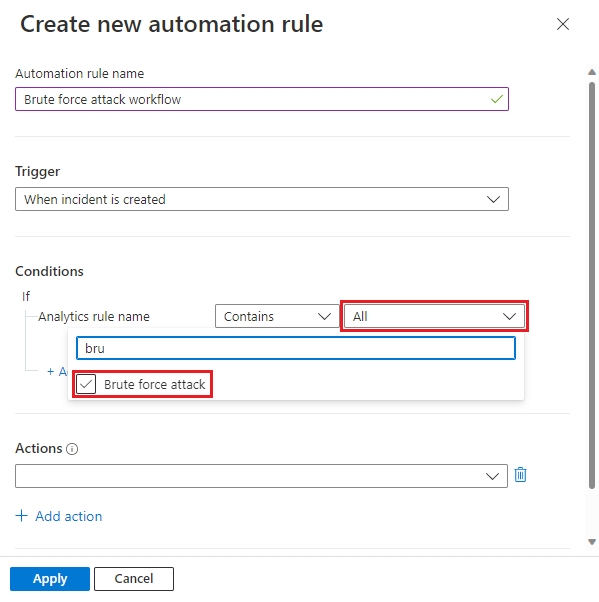
In the Automation page, select + Create and select Automation rule.
The Create new automation rule panel will open on the right side.
Give your automation rule a name that describes what it does.Select When incident is created as the trigger (you can also use When incident is updated).
Add Conditions to determine to which incidents new tasks will be added.
For example, filter by Analytics rule name:
You might want to add tasks to incidents based on the types of threats detected by an analytics rule or a group of analytics rules that need to be handled according to a certain workflow. Search for and select the relevant analytics rules from the drop-down list.
Or, you might want to add tasks that are relevant for incidents across all types of threats (in this case, leave the default selection of All as is).
In either case, you can add more conditions to narrow the scope of incidents to which your automation rule will apply. Learn more about adding advanced conditions to automation rules.
One thing you'll need to consider is that the order in which tasks appear in your incident is determined by the tasks' creation time. You can set the order of automation rules so that rules that add tasks required for all incidents will run first, and only afterwards any rules that add tasks required for incidents generated by specific analytics rules.
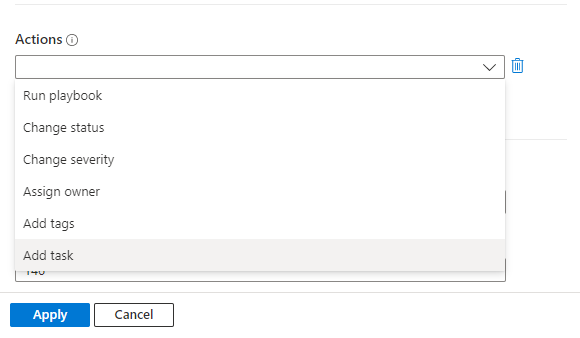
Under Actions, select Add task.
For each task, enter a title in the Task title field, and then (optionally) select + Add description to open a description field.
Only task titles appear by default in the incident's task list panel. A task's description appears only when the task item is expanded.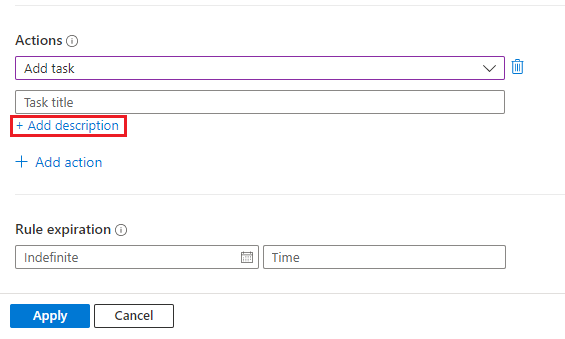
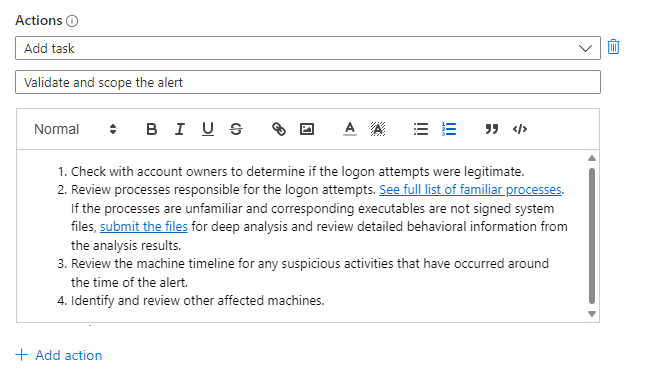
In the description field you can add a free-form description for the task, including images, links and rich-text formatting (see the hyperlinks, numbered lists, and code-block-formatted text in the examples below).
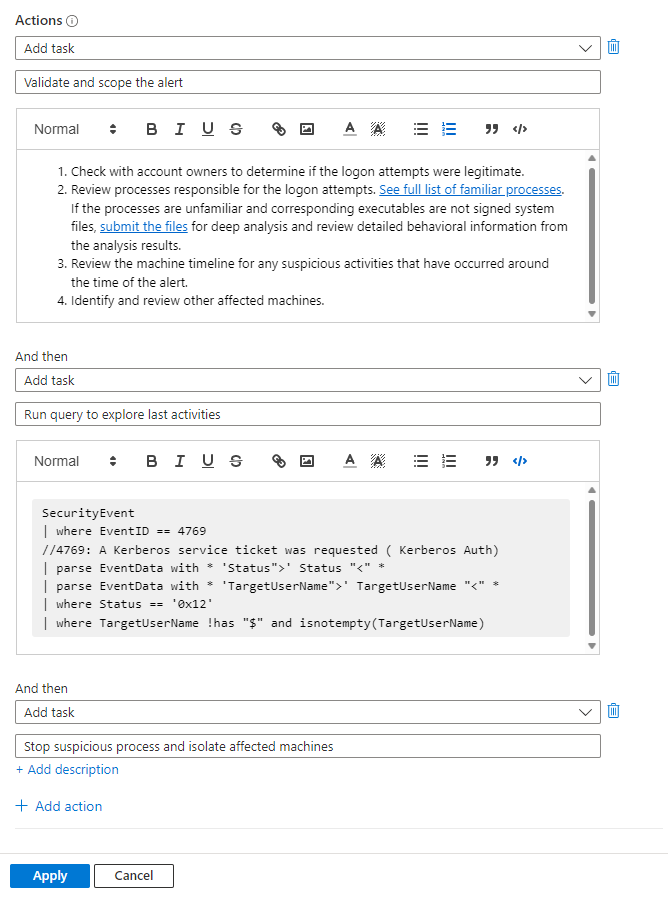
Add more tasks to the same group of incidents by selecting + Add action and repeating the last three steps.
Tasks will be created and added to the incident according to the order of the Add task actions in your automation rule.
Finish creating the automation rule by completing the remaining steps, Rule expiration and Order, and selecting Apply at the end. See Create and use Microsoft Sentinel automation rules to manage response for full details.
Regarding the Order setting: The order in which tasks appear in your incidents depends on two things:
- The order of execution of the automation rules, as determined by the number in the Order setting, and...
- The order of the Add task actions defined within each automation rule.
Next steps
- Learn more about incident tasks.
- Learn how to investigate incidents.
- Learn how to add tasks to groups of incidents automatically using playbooks.
- Learn how to use tasks to handle incident workflow in Microsoft Sentinel.
- Learn more about automation rules and how to create them.