Note
Access to this page requires authorization. You can try signing in or changing directories.
Access to this page requires authorization. You can try changing directories.
Mongoose is the most popular ODM (Object Document Mapping) client for Node.js. Mongoose allows you to design a data structure and enforce validation, and provides all the tooling necessary to interact with databases that support the MongoDB API. Cosmos DB supports the necessary MongoDB APIs and is available as a back-end server option on Azure.
Prerequisites
- An Azure account. If you don’t have an Azure subscription, create a free trial account.
- A GitHub account.
- A Cosmos DB serverless account. With a serverless account, you only pay for the resources as they're used and avoid needing to create a full infrastructure.
1. Create a Cosmos DB serverless database
Complete the following steps to create a Cosmos serverless DB.
- Sign in to the Azure portal.
- Select Create a resource.
- Enter Azure Cosmos DB in the search box.
- Select Azure Cosmos DB.
- Select Create.
- If prompted, under Azure Cosmos DB API for MongoDB select Create.
- Configure your Azure Cosmos DB Account with the following information:
- Subscription: Choose the subscription you wish to use
- Resource: Select Create new, and set the name to aswa-mongoose
- Account name: A unique value is required
- Location: West US 2
- Capacity mode: Serverless (preview)
- Version: 4.0
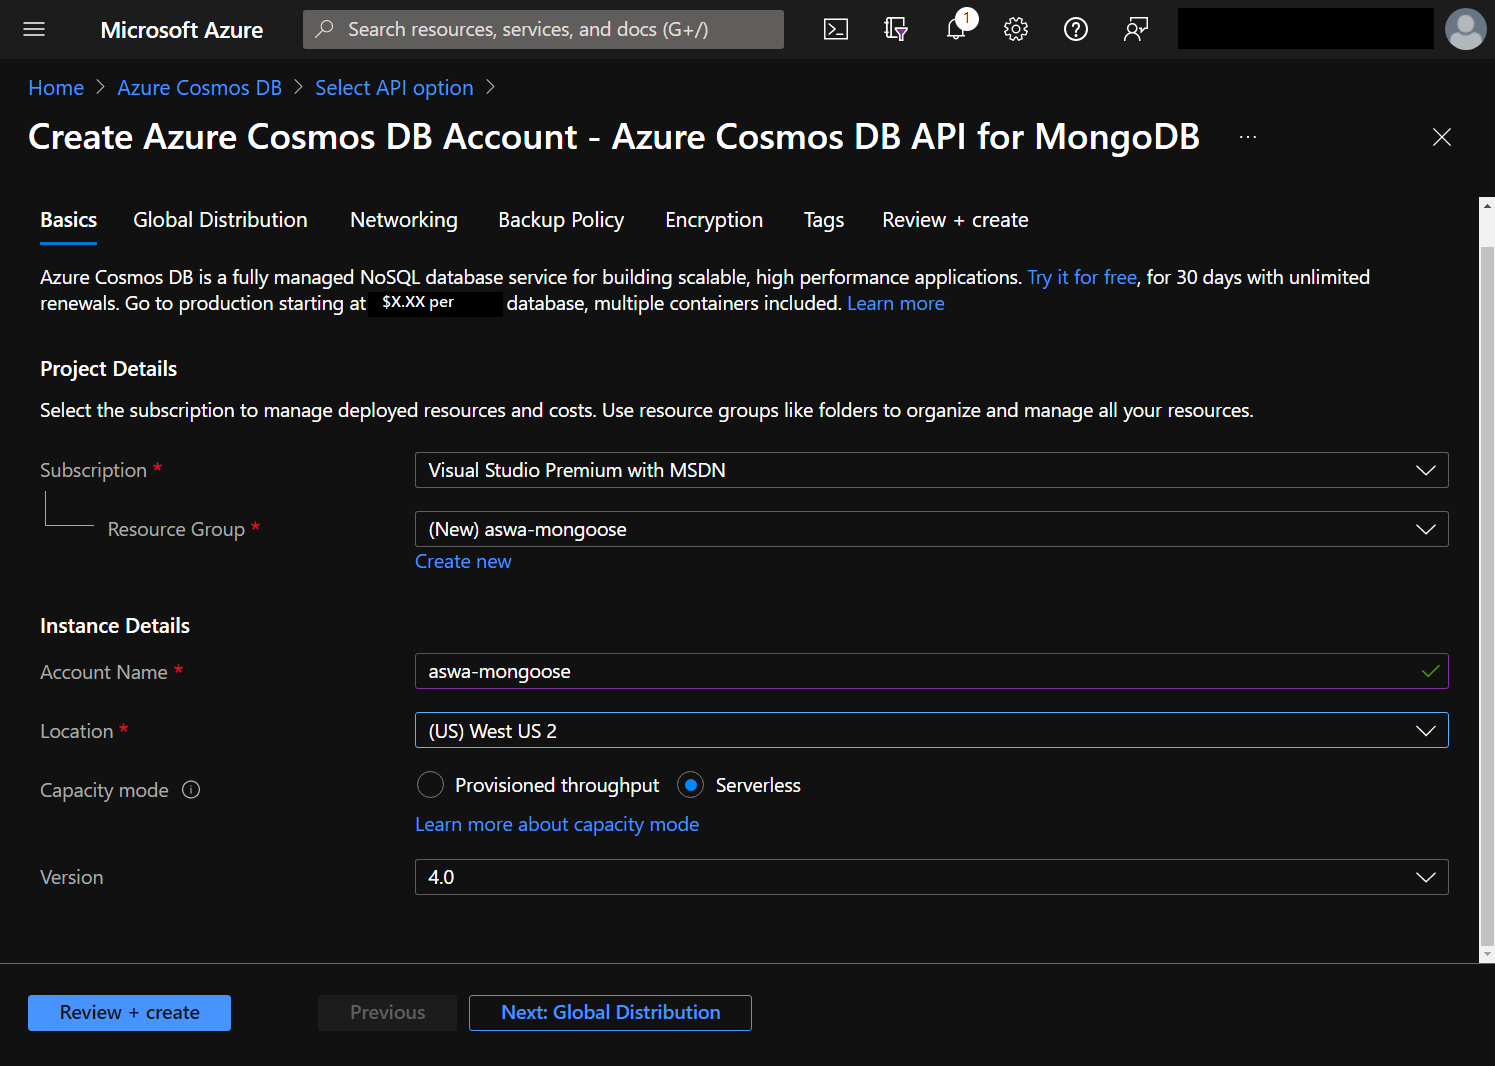
- Select Review + create.
- Select Create.
The creation process takes a few minutes. We'll come back to the database to gather the connection string after we create a static web app.
2. Create a static web app
This tutorial uses a GitHub template repository to help you create your application.
Go to the starter template.
Choose the owner (if using an organization other than your main account).
Name your repository aswa-mongoose-tutorial.
Select Create repository from template.
Return to the Azure portal.
Select Create a resource.
Enter static web app in the search box.
Select Static Web App.
Select Create.
Configure your Azure Static Web App with the following information:
- Subscription: Choose the same subscription as before
- Resource group: Select aswa-mongoose
- Name: aswa-mongoose-tutorial
- Region: West US 2
- Select Sign in with GitHub
- Select Authorize if prompted to allow Azure Static Web Apps to create the GitHub Action to enable deployment
- Organization: Your GitHub account name
- Repository: aswa-mongoose-tutorial
- Branch: main
- Build presets: Choose React
- App location: /
- Api location: api
- Output location: build
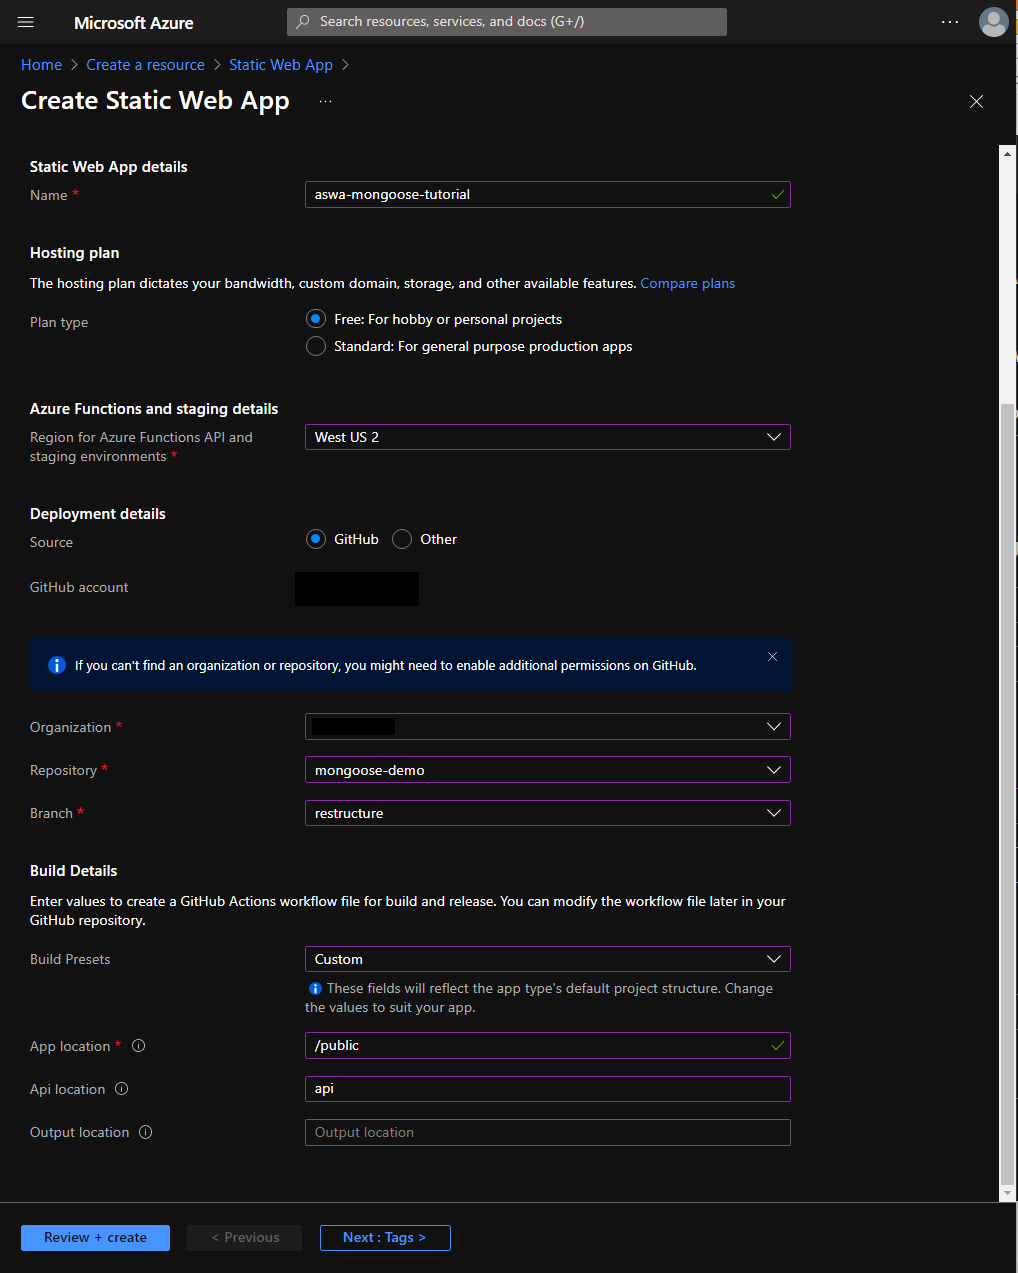
Select Review and create.
Select Create.
The creation process takes a few moments; select Go to resource once the static web app is provisioned.
3. Configure database connection string
To allow the web app to communicate with the database, the database connection string is stored as an application setting. Setting values are accessible in Node.js using the process.env object.
- Select Home in the upper left corner of the Azure portal (or go back to https://portal.azure.com).
- Select Resource groups.
- Select aswa-mongoose.
- Select the name of your database account - it has a type of Azure Cosmos DB API for Mongo DB.
- Under Settings select Connection String.
- Copy the connection string listed under PRIMARY CONNECTION STRING.
- In the breadcrumbs, select aswa-mongoose.
- Select aswa-mongoose-tutorial to return to the website instance.
- Under Settings select Configuration.
- Select Add and create a new Application Setting with the following values:
- Name: AZURE_COSMOS_CONNECTION_STRING
- Value: <Paste the connection string you copied earlier>
- Select OK.
- Select Add and create a new Application Setting with the following values for name of the database:
- Name: AZURE_COSMOS_DATABASE_NAME
- Value: todo
- Select OK.
- Select Save.
4. Go to your site
You can now explore the static web app.
- In the Azure portal, select Overview.
- Select the URL displayed in the upper right.
- It looks similar to
https://calm-pond-05fcdb.azurestaticapps.net.
- It looks similar to
- Select Please login to see your list of tasks.
- Select Grant consent to access the application.
- Create a new list by entering a name into the textbox labeled create new list and selecting Save.
- Create a new task by typing in a title in the textbox labeled create new item and selecting Save.
- Confirm the task is displayed (it may take a moment).
- Mark the task as complete by selecting the check; the task moves to the Done items section of the page.
- Refresh the page to confirm a database is being used.
Clean up resources
If you're not going to continue to use this application, delete the resource group with the following steps:
- Return to the Azure portal.
- Select Resource groups.
- Select aswa-mongoose.
- Select Delete resource group.
- Enter aswa-mongoose into the textbox.
- Select Delete.
Next steps
Advance to the next article to learn how to configure local development...