Note
Access to this page requires authorization. You can try signing in or changing directories.
Access to this page requires authorization. You can try changing directories.
This article shows you how to connect an external data source to your storage account and read its data through a blob access point. You allow blob access point creation on the account, create a blob access point configuration, test the connection, and then create the blob access point.
This article uses a public connection. To connect over a private connection, see Connect blob access points privately (preview).
To learn how blob access points work, see Blob access points overview.
Prerequisites
A standard general-purpose v2 or premium block blob storage account in a supported region. To create one, see Create a storage account. The Azure portal steps work only in regions where the Azure portal experience for blob access points is available. In other supported regions, use the REST API.
Network access to the storage account from the client that you use to read data, or to create the blob access point by using the REST API. The network rules of the storage account apply to blob access points the same way that they apply to other containers. For more information, see Networking considerations.
The following permissions. For details, see Authorize access to blob access points.
Task Permission Allow blob access point creation Permission to update the storage account ( Microsoft.Storage/storageAccounts/write), such as the Storage Account Contributor roleCreate and test a configuration Storage Account Contributor, or Storage Blob Access Point Contributor (preview) Create a blob access point Storage Account Contributor in the Azure portal. With the REST API, Storage Blob Access Point Contributor (preview) or Storage Blob Data Contributor. The details of your data source, such as its source endpoint and credentials. For the complete list, see Data source requirements for blob access points.
Allow blob access point creation
Blob access point creation is off by default for every storage account. Turn it on before you create a configuration.
This account-level setting affects security and billing:
- Impact on security. When the setting is on, users who can manage configurations can connect the storage account to data sources outside Azure Storage. To audit or block the setting across your organization, use Azure Policy. See Govern blob access points with Azure Policy.
- Impact on billing. Turning on the setting doesn't start billing. You're billed for each configuration while it's active. See Pricing and billing.
Important
After you allow blob access point creation, the storage account doesn't return List Blobs results in Apache Arrow format. List Blobs requests that accept only Apache Arrow aren't supported, and requests that accept Apache Arrow with XML fallback return XML. For details, see Apache Arrow listings.
In the Azure portal, go to your storage account.
Under Data management, select Blob access points.
Select Access settings.
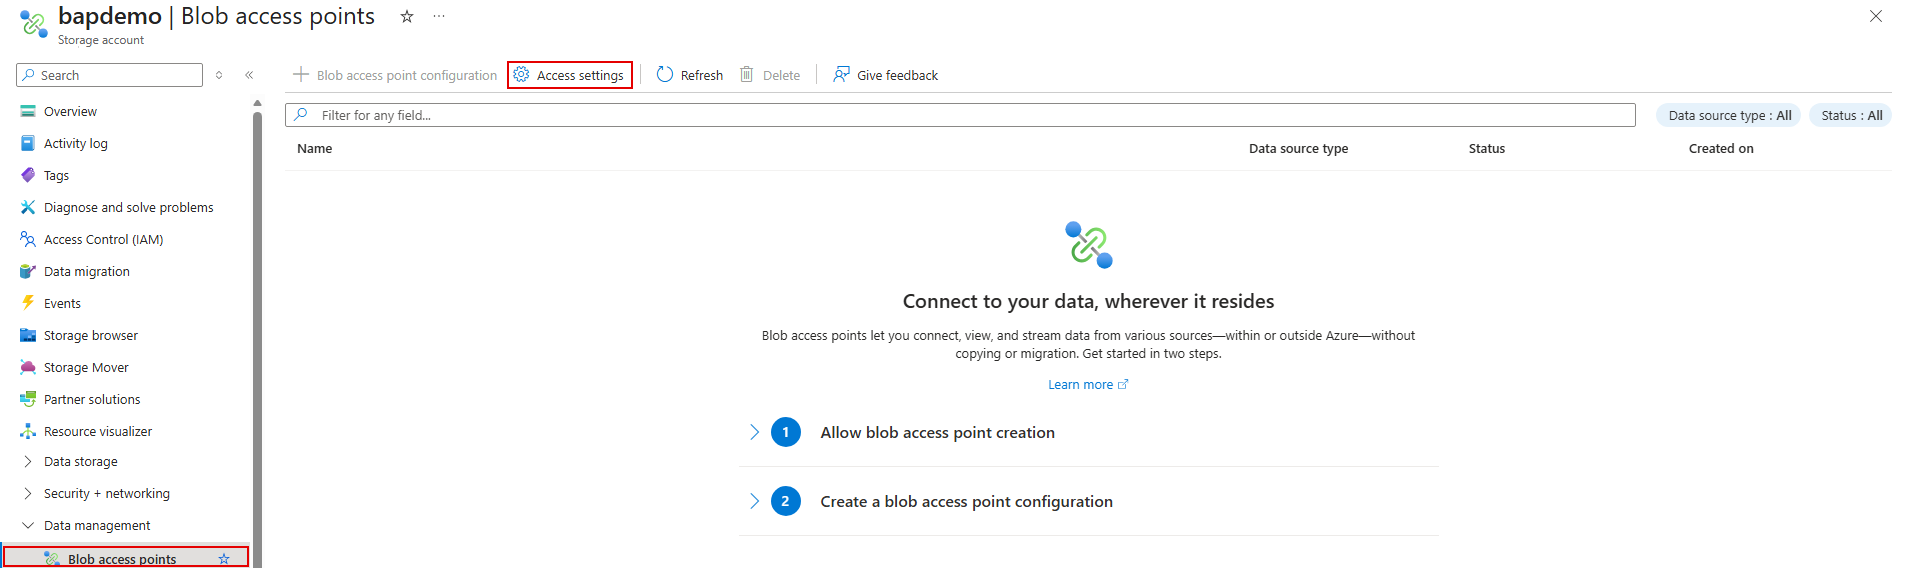
Select Allow blob access point creation, and then select Apply.
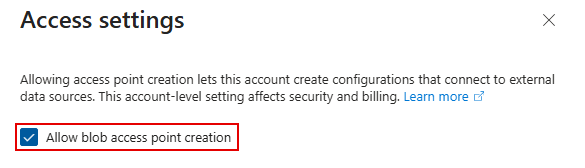
A notification confirms that access point creation is enabled.
Create a configuration
The configuration tells Azure Storage where your data is, how to reach it, and how to sign in to it.
The configuration name must be 3 to 63 characters long and contain only lowercase letters, numbers, and hyphens. It must begin and end with a letter or number, and each hyphen must be preceded and followed by a letter or number.
On the Blob access points page, select Create configuration.
On the Basics tab, under Project details, enter the following values:
- Name: The configuration name.
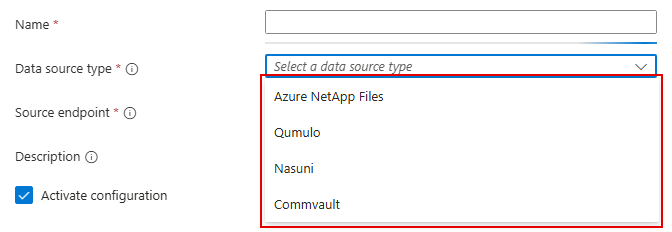
- Data source type: The type that matches your data source. You can't change it later.
- Source endpoint: The URL of your bucket.
- Description: Optional. Add aliases or identifiers that help you match the configuration to its data source.
- Activate configuration: Leave it selected so the configuration serves data as soon as it's created. You're billed for each hour that a configuration is active.
Under Networking, select Public: Access data via the internet. You can't change the connection type later.
Under Authentication, enter the Access key ID and the Secret access key. Change Signing region only if your data source uses a region other than
us-east-1.Select Allow self-signed certificates for TLS verification (Less secure) only if your data source uses a self-signed certificate.
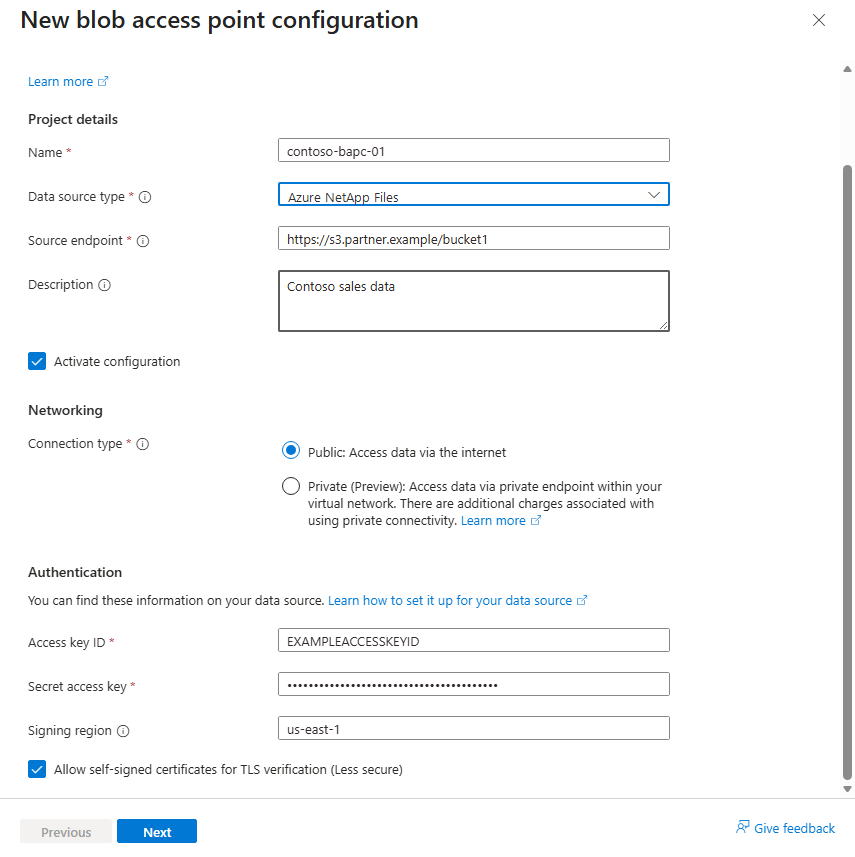
Select Next.
On the Create blob access point tab, select + Blob access point, and then enter a name for the blob access point. Add only one blob access point. The name follows container naming rules and must not match an existing container in the storage account.
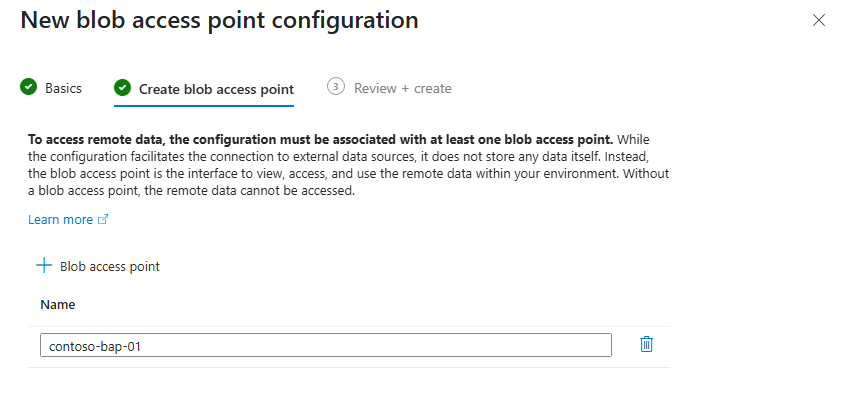
Select Next, review your settings, and then select Create.
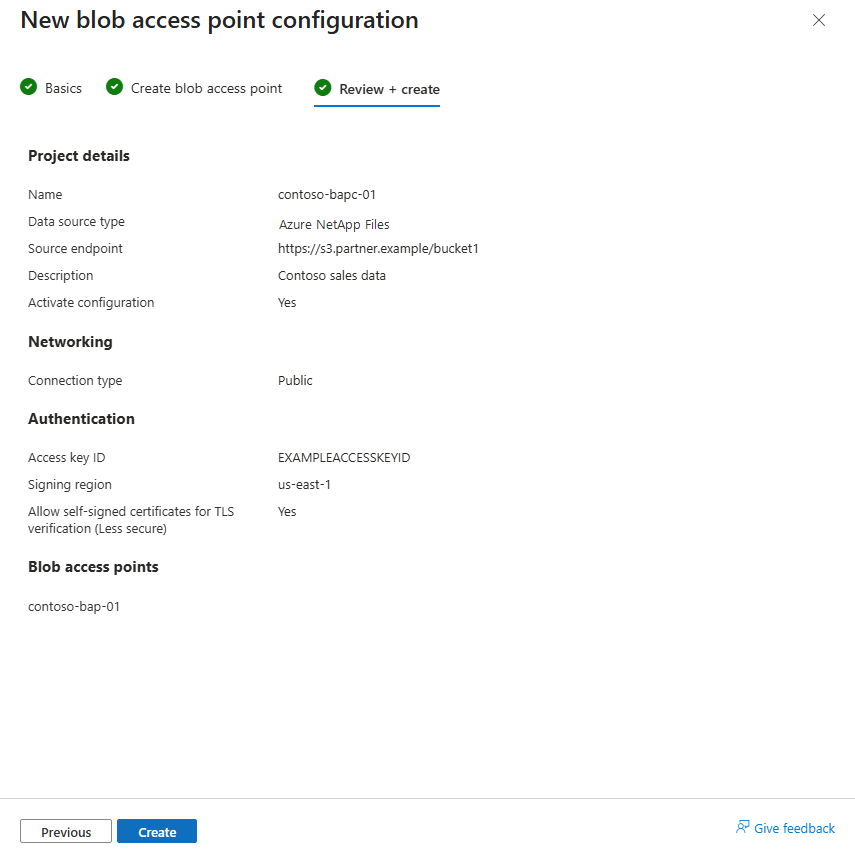
When the deployment finishes, the configuration appears in the list with the status Active, and its blob access point appears on the Containers page, on the Blob access points tab.
Important
Billing starts when you create an active configuration. You're billed for every hour that the configuration stays active, even when no one reads data through it. To stop charges for a data source that you aren't using, deactivate the configuration.
Test the connection
Creating a configuration doesn't prove that Azure Storage can reach your data source or that your credentials work. The connection test checks the following items:
| Check | Passes when |
|---|---|
| Network path | Azure Storage reaches the source endpoint. |
| Authentication | The data source accepts the access key ID and secret access key. |
| Request signing | The signing region matches what the data source expects. |
On the Blob access points page, select the configuration.
On the Overview page, select Test connection.
When the test finishes, Connection tested shows Successful with the time of the test.
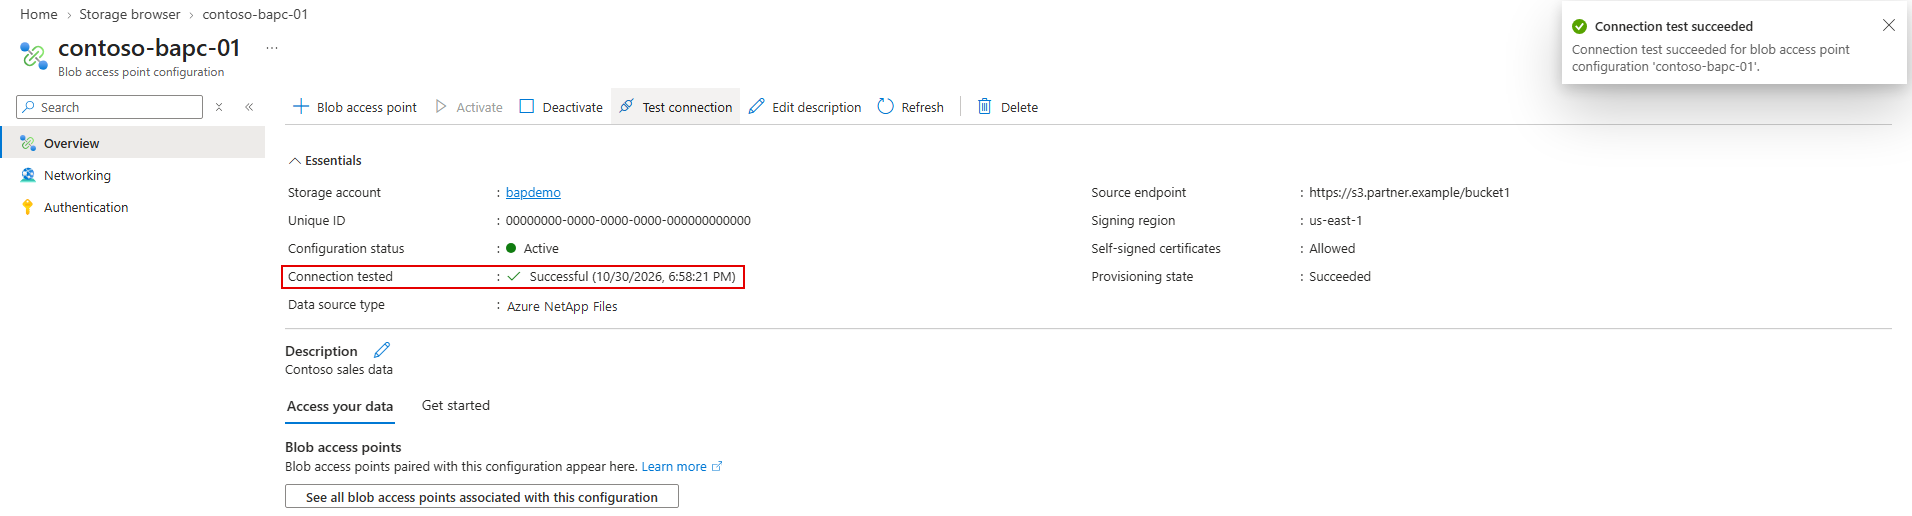
If the test fails, see Connection test fails.
Create a blob access point
A blob access point is a container that's linked to your configuration. You link it when you create it, and you can't change the link later. Each configuration serves one blob access point. The name of the blob access point follows container naming rules and must not match an existing container in the storage account.
If you added a blob access point on the Create blob access point tab, it already exists. Skip to Verify blob access point creation.
Otherwise, create it from the configuration:
On the Overview page of the configuration, select + Blob access point.
Enter a Name for the blob access point.
Select Create.
Verify blob access point creation
In your storage account, under Data storage, select Containers.
Select the Blob access points tab, and then select your blob access point.
The blobs from your data source appear. The Blob access point configuration field shows the configuration that the blob access point uses.
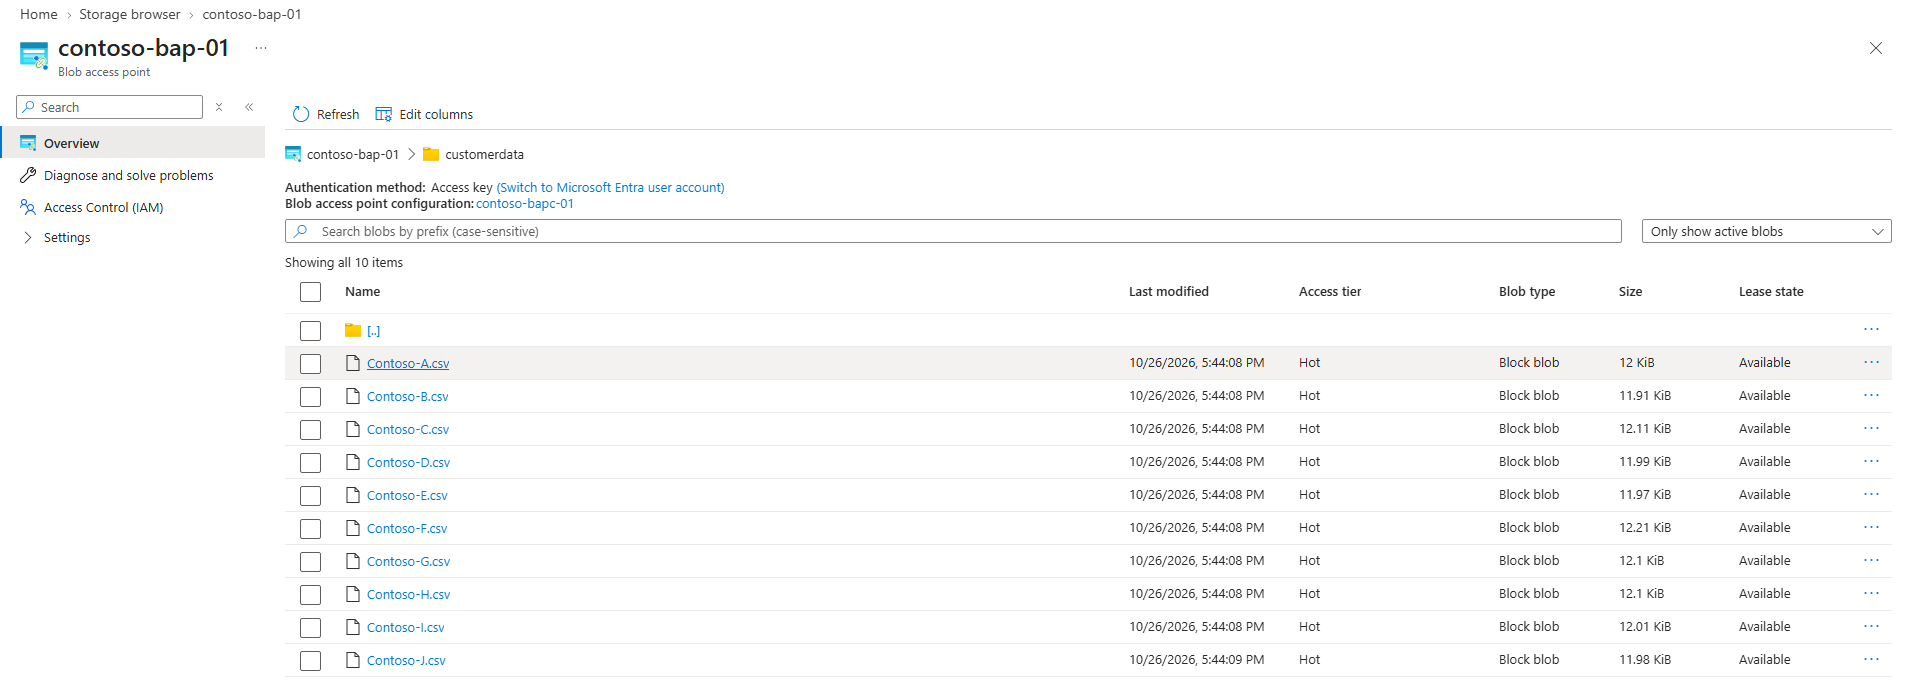
If the portal says that the networking settings of the storage account might be blocking access, allow your client in the network rules of the storage account. For more information, see Networking considerations.
