Note
Access to this page requires authorization. You can try signing in or changing directories.
Access to this page requires authorization. You can try changing directories.
This article shows you how to use Azure portal to manage the access control list (ACL) of a directory or blob in storage accounts that have the hierarchical namespace featured enabled on them.
For information about the structure of the ACL, see Access control lists (ACLs) in Azure Data Lake Storage.
To learn about how to use ACLs and Azure roles together, see Access control model in Azure Data Lake Storage.
Prerequisites
An Azure subscription. See Get Azure free trial.
A storage account that has the hierarchical namespace featured enabled on it. Follow these instructions to create one.
You must have one of the following security permissions:
Your user identity has been assigned the Storage Blob Data Owner role in the scope of either the target container, storage account, parent resource group or subscription.
You're the owning user of the target container, directory, or blob to which you plan to apply ACL settings.
Manage an ACL
Sign in to the Azure portal to get started.
Locate your storage account and display the account overview.
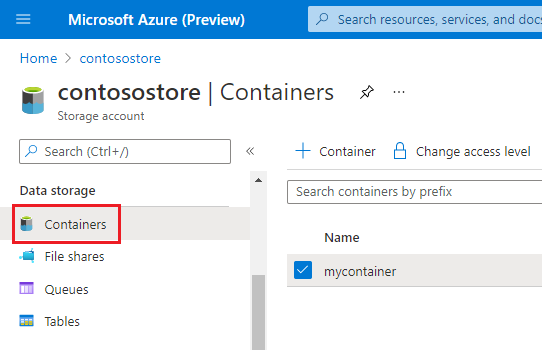
Select Containers under Data storage.
The containers in the storage account appear.
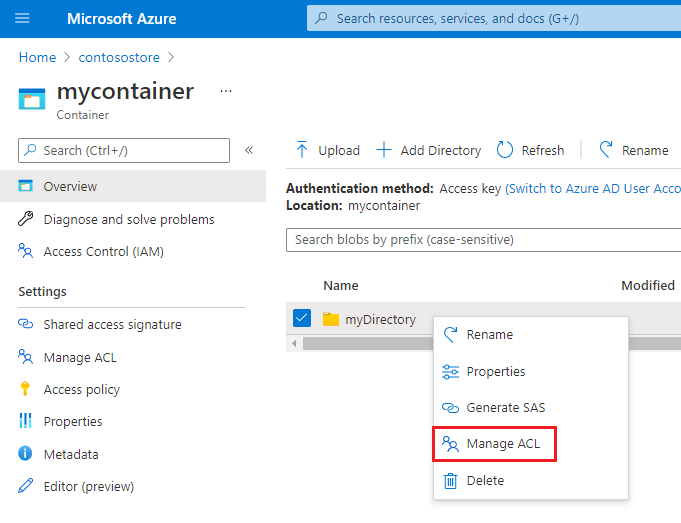
Navigate to any container, directory, or blob. Right-click the object, and then select Manage ACL.
The Access permissions tab of the Manage ACL page appears. Use the controls in this tab to manage access to the object.
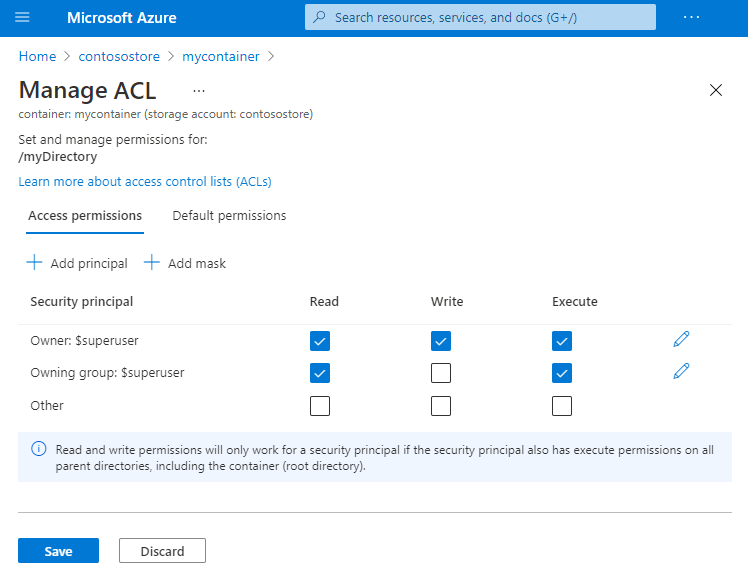
To add a security principal to the ACL, select the Add principal button.
Tip
A security principal is an object that represents a user, group, service principal, or managed identity that is defined in Microsoft Entra ID.
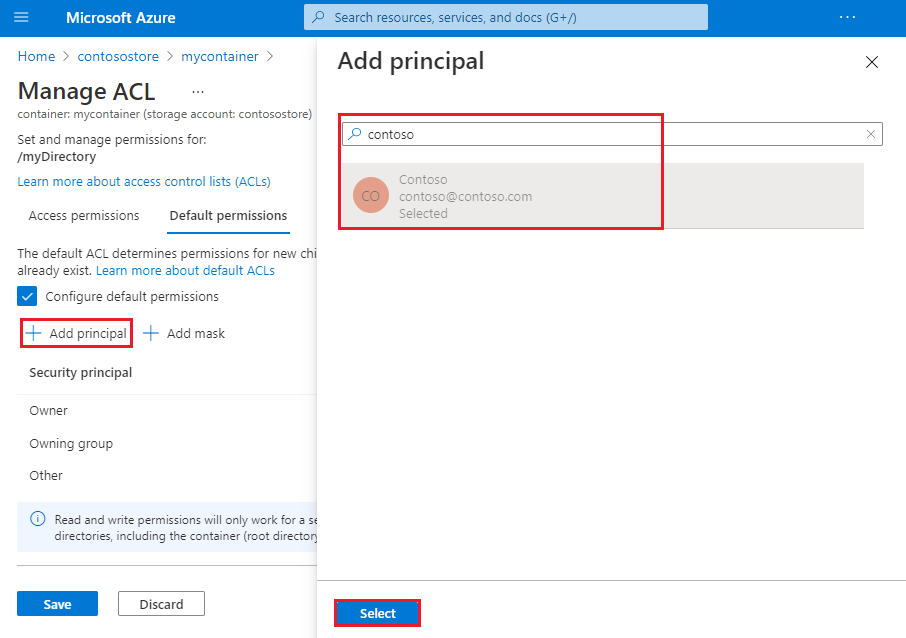
Find the security principal by using the search box, and then select the Select button.
Note
We recommend that you create a security group in Microsoft Entra ID, and then maintain permissions on the group rather than for individual users. For details on this recommendation, as well as other best practices, see Access control model in Azure Data Lake Storage.
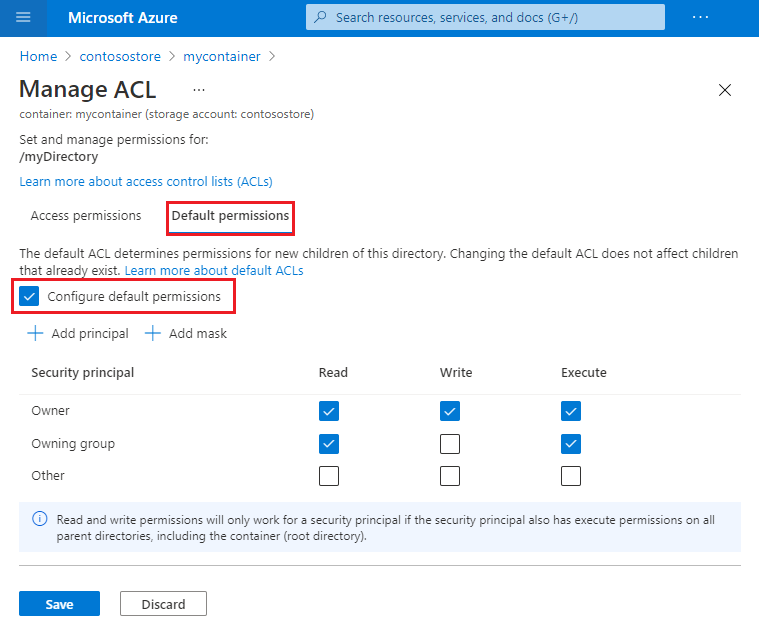
To manage the default ACL, select the default permissions tab, and then select the Configure default permissions checkbox.
Tip
A default ACL is a template of an ACL that determines the access ACLs for any child items that are created under a directory. A blob doesn't have a default ACL, so this tab appears only for directories.
Apply an ACL recursively
You can apply ACL entries recursively on the existing child items of a parent directory without having to make these changes individually for each child item. However, you can't apply ACL entries recursively by using the Azure portal.
To apply ACLs recursively, use Azure Storage Explorer, PowerShell, or the Azure CLI. If you prefer to write code, you can also use the .NET, Java, Python, or Node.js APIs.
You can find the complete list of guides here: How to set ACLs.
Next steps
Learn about the Data Lake Storage permission model.