Note
Access to this page requires authorization. You can try signing in or changing directories.
Access to this page requires authorization. You can try changing directories.
This article shows you how to use Azure Storage Explorer to manage access control lists (ACLs) in storage accounts that has hierarchical namespace (HNS) enabled.
You can use Storage Explorer to view, and then update the ACLs of directories and files. ACL inheritance is already available for new child items that are created under a parent directory. But you can also apply ACL settings recursively on the existing child items of a parent directory without having to make these changes individually for each child item.
This article shows you how to modify the ACL of file or directory and how to apply ACL settings recursively to child directories.
Prerequisites
An Azure subscription. See Get Azure free trial.
A storage account that has hierarchical namespace (HNS) enabled. Follow these instructions to create one.
Azure Storage Explorer installed on your local computer. To install Azure Storage Explorer for Windows, Macintosh, or Linux, see Azure Storage Explorer.
You must have one of the following security permissions:
Your user identity has been assigned the Storage Blob Data Owner role in the scope of either the target container, storage account, parent resource group or subscription.
You're the owning user of the target container, directory, or blob to which you plan to apply ACL settings.
Note
Storage Explorer makes use of both the Blob (blob) & Data Lake Storage (dfs) endpoints when working with Azure Data Lake Storage. If access to Azure Data Lake Storage is configured using private endpoints, ensure that two private endpoints are created for the storage account: one with the target sub-resource blob and the other with the target sub-resource dfs.
Sign in to Storage Explorer
When you first start Storage Explorer, the Microsoft Azure Storage Explorer - Connect to Azure Storage window appears. While Storage Explorer provides several ways to connect to storage accounts, only one way is currently supported for managing ACLs.
In the Select Resource panel, select Subscription.

In the Select Azure Environment panel, select an Azure environment to sign in to. You can sign in to global Azure, a national cloud or an Azure Stack instance. Then select Next.

Storage Explorer opens a webpage for you to sign in.
After you successfully sign in with an Azure account, the account and the Azure subscriptions associated with that account appear under ACCOUNT MANAGEMENT. Select the Azure subscriptions that you want to work with, and then select Open Explorer.

When it completes connecting, Azure Storage Explorer loads with the Explorer tab shown. This view gives you insight to all of your Azure storage accounts as well as local storage configured through the Azurite storage emulator or Azure Stack environments.

Manage an ACL
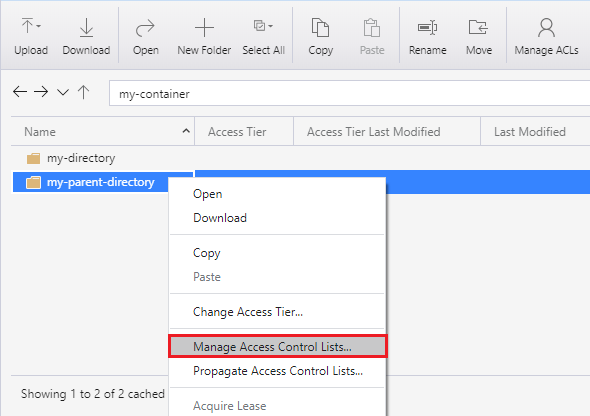
Right-click the container, a directory, or a file, and then select Manage Access Control Lists. The following screenshot shows the menu as it appears when you right-click a directory.
The Manage Access dialog box allows you to manage permissions for owner and the owners group. It also allows you to add new users and groups to the access control list for whom you can then manage permissions.
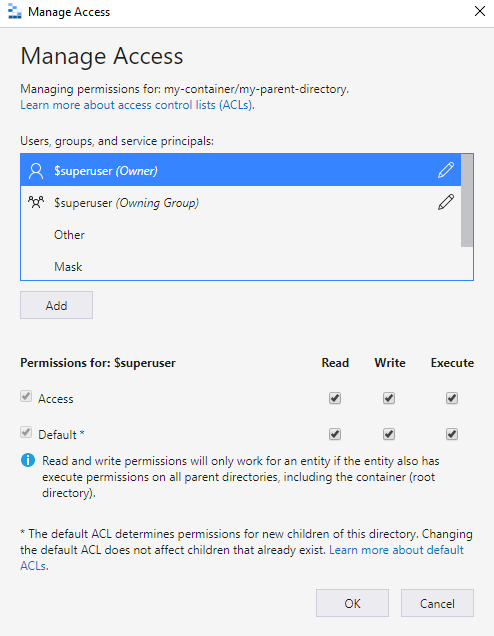
To add a new user or group to the access control list, select the Add button. Then, enter the corresponding Microsoft Entra entry you wish to add to the list and then select Add. The user or group will now appear in the Users and groups: field, allowing you to begin managing their permissions.
Note
It is a best practice, and recommended, to create a security group in Microsoft Entra ID and maintain permissions on the group rather than individual users. For details on this recommendation, as well as other best practices, see Access control model in Azure Data Lake Storage.
Use the check box controls to set access and default ACLs. To learn more about the difference between these types of ACLs, see Types of ACLs.
Apply ACLs recursively
You can apply ACL entries recursively on the existing child items of a parent directory without having to make these changes individually for each child item.
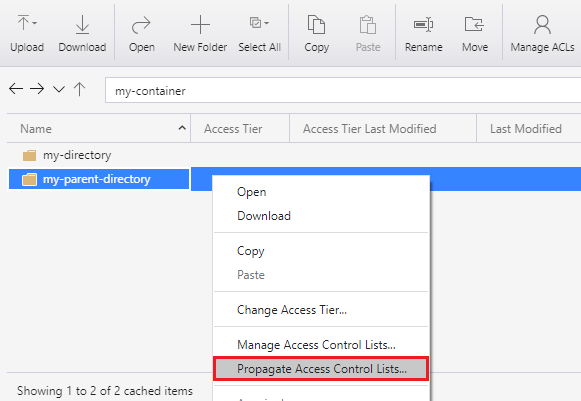
To apply ACL entries recursively, Right-click the container or a directory, and then select Propagate Access Control Lists. The following screenshot shows the menu as it appears when you right-click a directory.
Note
The Propagate Access Control Lists option is available only in Storage Explorer 1.28.1 or later versions.
Next steps
Learn about the Data Lake Storage permission model.