Note
Access to this page requires authorization. You can try signing in or changing directories.
Access to this page requires authorization. You can try changing directories.
This article explains how to change the capacity and performance of Azure Elastic SAN Next Generation, configure autoscaling, expand a volume, and delete resources that you no longer need. Use the Azure portal, Azure PowerShell, or Azure CLI.
Important
Azure Elastic SAN Next Generation is currently in preview. See the Supplemental Terms of Use for Microsoft Azure Previews for legal terms that apply to Azure features that are in beta, preview, or otherwise not yet released into general availability.
Prerequisites
- An existing Elastic SAN Next Generation resource and permission to read, update, or delete the resources you intend to manage.
- Completed preview registration and compatible tools, as described in Deploy Elastic SAN Next Generation.
- For PowerShell, the preview-compatible
Az.ElasticSanmodule. For Azure CLI, the latest compatibleelastic-sanextension. The SAN update commands must expose the total-capacity, IOPS, and throughput parameters shown in this article. - A backup and an appropriate maintenance plan before reducing capacity, detaching a volume, or deleting resources.
Check the Next Generation scale targets before choosing new values. Available limits depend on your region and subscription.
Select the resources to manage
The examples use the same subscription, resource group, SAN, volume-group, and volume variables throughout the article. Replace the placeholders with your resource names. Read the existing configuration before running an update or delete command.
The following screenshots show an example 20-TiB SAN with 40,000 IOPS, 1,280 MB/s, and a 1-GiB General purpose Direct attach volume. These values aren't requirements for every deployment. Run only the procedures you need; the deletion sections aren't part of the resize procedure.
- In the Azure portal, open your Elastic SAN resource.
- On Overview, confirm that Elastic SAN Type is Elastic SAN Next Generation (Preview).
- Verify the subscription and resource before proceeding. Use SAN Management to open Volume groups or Volumes when you need to manage a child resource.
Resize your SAN and change its performance
SAN capacity is provisioned in 1-TiB increments. Each provisioned TiB includes a baseline of 2,000 IOPS and 64 MB/s. General purpose workloads can use the capacity-included baseline at no additional performance charge. You can provision additional IOPS and throughput independently of capacity.
When you increase capacity, provision enough IOPS and throughput to meet the baseline for the new size. For example, 21 TiB requires at least 42,000 IOPS and 1,344 MB/s. The following command examples increase a 20-TiB SAN to 21 TiB and set its performance to 50,000 IOPS and 1,600 MB/s.
Before updating the SAN:
- Ensure that the autoscale maximum is at least the new total capacity. Update the autoscaling policy first if necessary.
- Keep all requested values within the applicable scale targets.
- If Business critical groups reserve performance, ensure that total reserved IOPS and total reserved throughput each remain within 80% of the corresponding SAN-level provisioned value.
- Review the cost impact of the capacity and performance you choose.
On your SAN, select Settings > Configuration.
Under Size and performance, enter the required Size (TiB), IOPS, and Bandwidth (MBps). To change performance without changing capacity, leave Size (TiB) unchanged.

Review the values, and select Apply. Wait for the update to complete.
Refresh Configuration and verify the resulting capacity and performance.
Reduce SAN capacity
You can reduce SAN capacity when the new size satisfies the service limits and your existing resource commitments. This action doesn't reduce the provisioned sizes of individual volumes.
Before reducing capacity, ensure that:
- The combined provisioned size of your volumes fits within five times the proposed SAN capacity.
- The new SAN capacity can accommodate the current used capacity and the configured unused-capacity threshold. Compare these values in consistent units.
- The autoscale maximum is at least the new SAN capacity.
- SAN performance still meets the capacity-included baseline, and existing Business critical reservations fit within the SAN's performance budget.
Keep autoscaling enabled. Unlike the Classic procedure, you can't disable autoscaling on a Next Generation SAN. Capacity can increase again if later usage triggers the configured policy.
- Select Settings > Configuration.
- Under Size and performance, enter the new Size (TiB). Review the performance and autoscaling values against the constraints in the preceding list.
- Select Apply, wait for completion, and verify the resulting configuration.
Configure autoscaling
Next-generation SANs require autoscaling and you can't disable it. Autoscaling increases capacity; it doesn't automatically reduce capacity.
Configure these three settings:
| Setting | Purpose |
|---|---|
| Unused size | The unused-capacity threshold, in TiB, that triggers a capacity increase. |
| Increase capacity unit | The number of TiB to add when autoscaling is triggered. |
| Max scale up | The maximum total SAN capacity, in TiB, that the policy can provision. |
Choose a positive capacity increase and an appropriate threshold for your workload. The threshold must fit within the SAN's current unused capacity. The maximum must be at least the current SAN capacity and must not exceed the applicable regional limit. Plan sufficient headroom for the volume capacity you expect to use.
The following example uses a 1-TiB threshold, a 1-TiB increase, and a 100-TiB maximum. These values are example settings, not a statement of the regional maximum.
Select Settings > Configuration and scroll to Autoscaling.
Review Unused size, Increase capacity unit, and Max scale up.
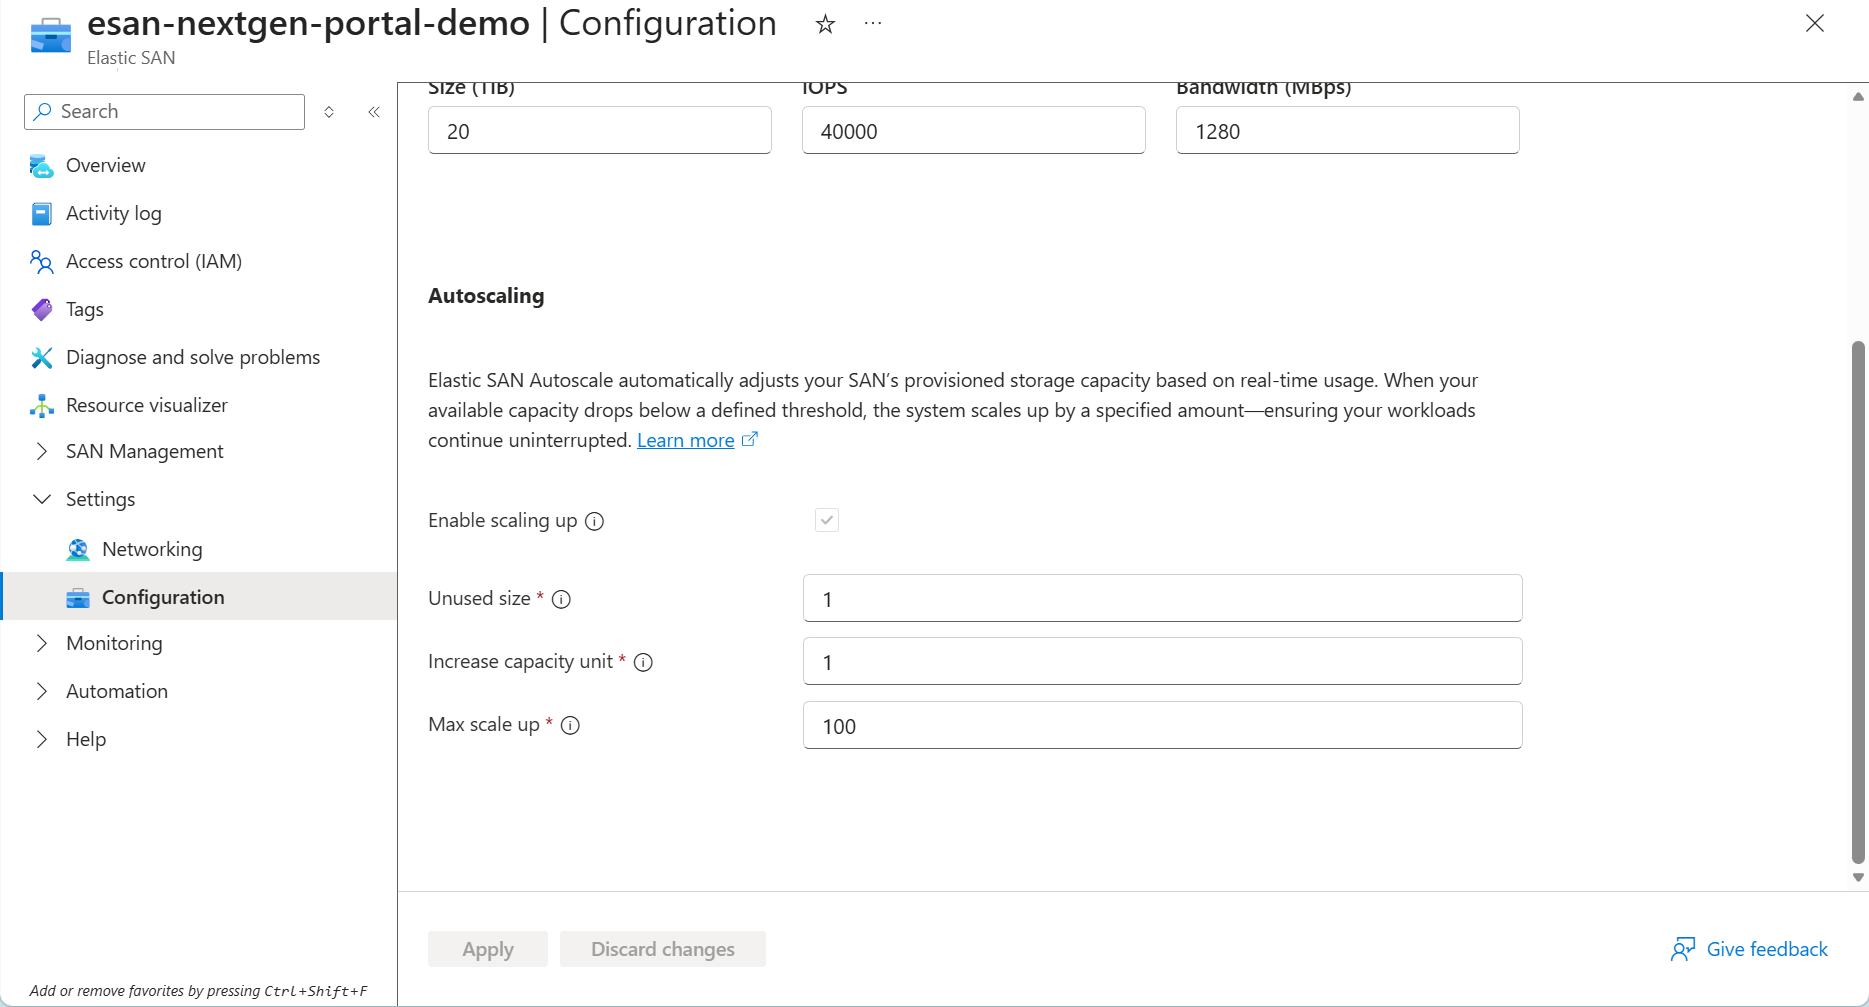
Change the values as needed and select Apply.
After the update completes, refresh the page and verify the policy.
Change Business critical performance reservations
Use the following PowerShell or Azure CLI examples to change reservations on an existing Business critical volume group. This change doesn't affect a group's QoS tier. Don't apply these examples to a General purpose group.
PowerShell and Azure CLI identify the Business critical tier as PerformanceCritical. Each group's reserved performance is available only to its own volumes. Across all Business critical groups, total reserved IOPS and total reserved throughput must each fit within 80% of the corresponding SAN-level provisioned value.
Before lowering SAN performance, lower group reservations first if necessary to maintain that constraint.
Replace the placeholder with an existing Business critical group. The example reserves 10,000 IOPS and 200 MB/s; account for the other groups' reservations before choosing these values.
$businessCriticalGroupName = "<business-critical-volume-group>"

Get-AzElasticSanVolumeGroup -SubscriptionId $subscriptionId `
    -ResourceGroupName $resourceGroupName -ElasticSanName $sanName `
    -Name $businessCriticalGroupName

Update-AzElasticSanVolumeGroup -SubscriptionId $subscriptionId `
    -ResourceGroupName $resourceGroupName -ElasticSanName $sanName `
    -Name $businessCriticalGroupName -ReservedIops 10000 -ReservedMBps 200

Get-AzElasticSanVolumeGroup -SubscriptionId $subscriptionId `
    -ResourceGroupName $resourceGroupName -ElasticSanName $sanName `
    -Name $businessCriticalGroupName
Logical sector size
Azure Elastic SAN Next Generation volumes support only a 512-byte logical sector size (512e). This matches Azure Elastic SAN (Classic). You can't create or convert an Elastic SAN Next Generation volume with a 4-KiB native (4Kn) logical sector size.
When you create an Elastic SAN Next Generation volume from an Azure managed disk snapshot, the source managed disk must have a 512e logical sector size. Managed disk snapshots inherit the logical sector size of the source disk. For more information about managed disk snapshot and sector sizes, see Incremental snapshots of Premium SSD v2 and Ultra Disks.
Expand a volume
You can increase a volume's provisioned size in 1-GiB increments. You can't decrease its size.
Before expanding a volume, check both the applicable per-volume limit and the SAN-wide logical-capacity limits. After the change, the combined provisioned size of all volumes must not exceed the smaller of five times the SAN's provisioned capacity and the autoscale maximum. You don't necessarily need to increase SAN capacity for every volume expansion; increase it when required by these limits and your expected data usage.
Important
Live resizing isn't supported for Business critical volumes or General purpose volumes that use Direct attach. Before resizing these volumes, stop the workload, detach the volume from every VM that uses it, and wait for detachment to complete. After resizing, reattach it and complete any required guest operating system changes.
On your SAN, select SAN Management > Volumes.
Select the volume name to open Edit volume.
Enter a larger Size (GiB). Review the calculated maximum IOPS and bandwidth. The following example stages an increase from 1 GiB to 2 GiB.
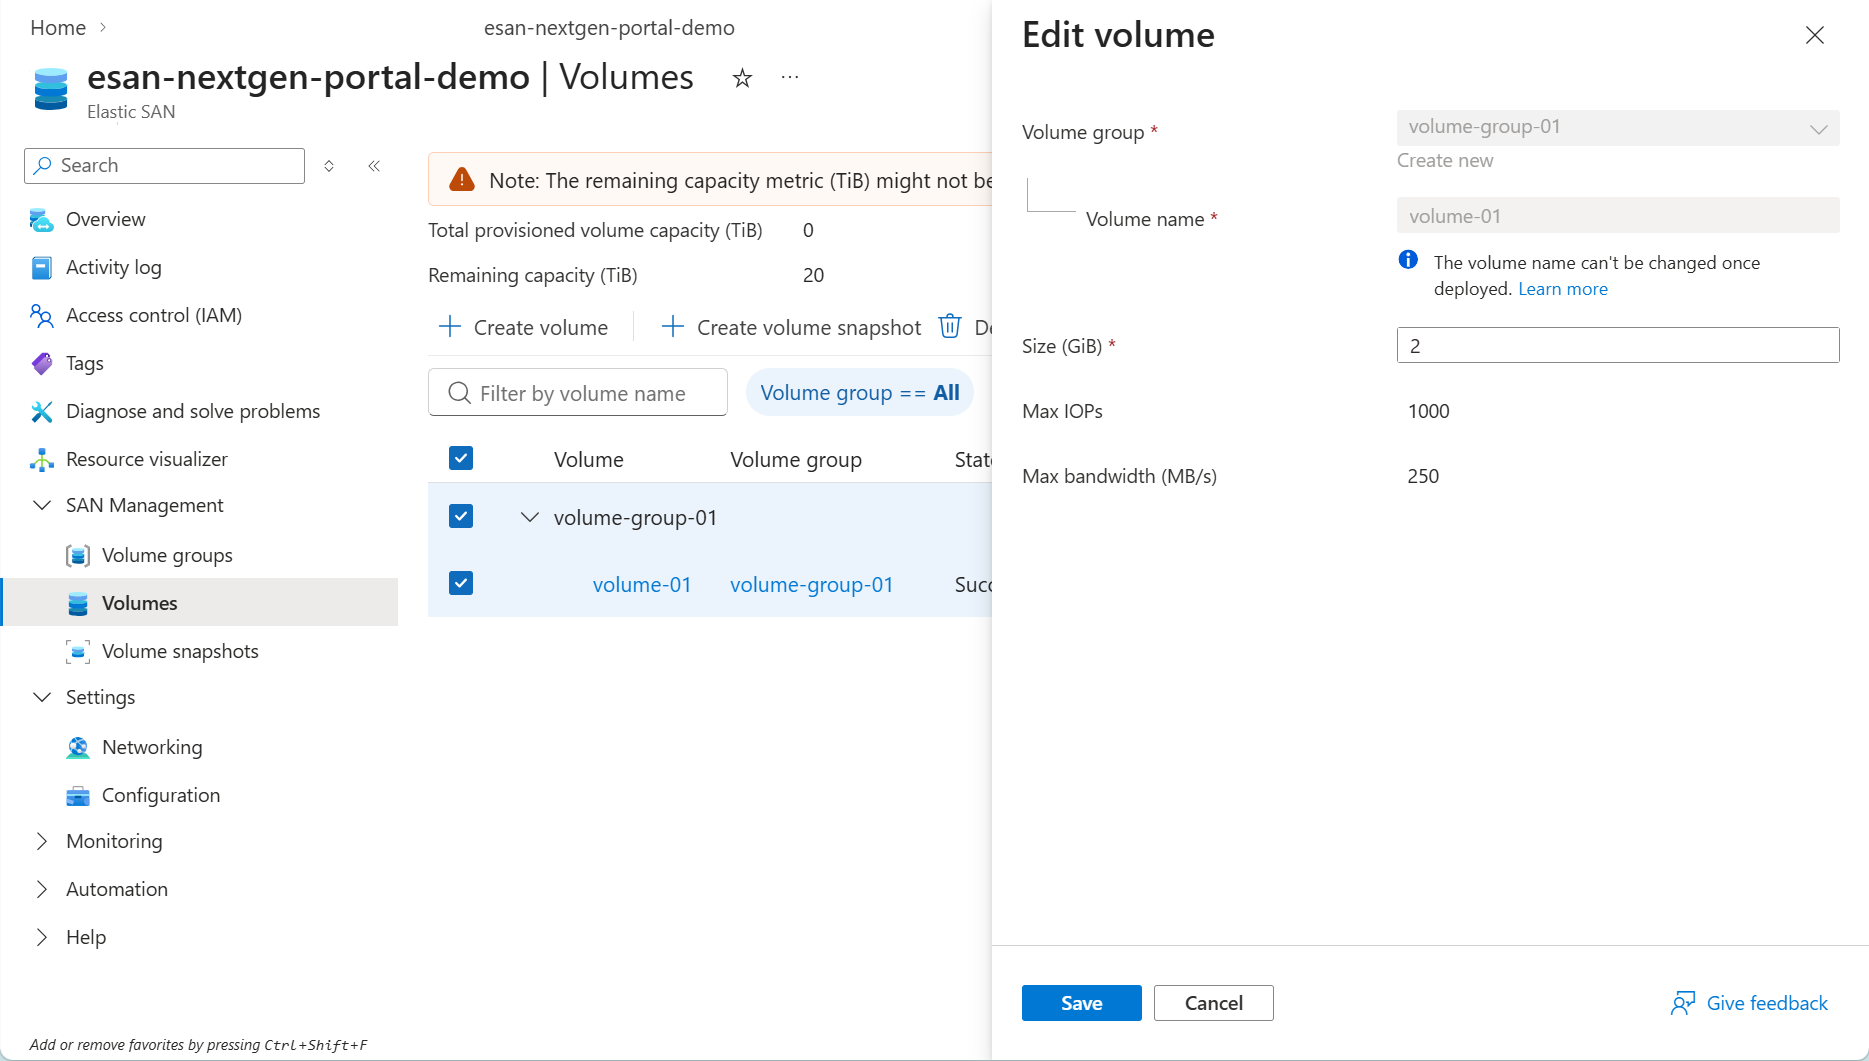
Select Save and wait for the update to complete.
Refresh Volumes and verify the new size.
Increasing the Azure resource size doesn't automatically extend a guest partition or file system. After reconnecting or reattaching, use the appropriate operating system procedure to rescan the disk and extend the existing partition or file system if required. Don't initialize or format an existing volume as part of expansion.
Prepare to delete resources
Warning
Deletion can cause data loss and interrupt workloads. Back up any data you need, stop affected workloads, and verify the target resource and its dependencies before proceeding. Deleting a volume group or SAN also deletes its contained volumes. Run only the deletion procedure that matches your intended scope.
Disconnect or detach every affected volume before deleting it or its parent:
- Direct attach: Stop I/O and detach the volume from every VM that uses it. Wait for detachment to complete. Deletion is blocked while a VM still manages the volume; restarting or merely stopping the VM isn't a substitute for detaching it. Don't try to clear the service-managed ownership property manually.
- iSCSI: Stop applications and disconnect all client sessions. For the existing Windows and Linux disconnect procedures, see Disconnect volumes from clients. These iSCSI procedures aren't Direct Attach detach procedures.
The individual-volume delete example explicitly sets the force-delete and delete-snapshots options to false and doesn't request permanent purge. These options aren't a guarantee about snapshot retention when deleting a parent resource. If deletion is blocked, resolve the reported dependency or connection instead of adding force options.
Delete a volume
Select SAN Management > Volumes.
Select the checkbox for the intended volume, and select Delete.
In Delete a volume, verify the volume name and review the warning and acknowledgement.
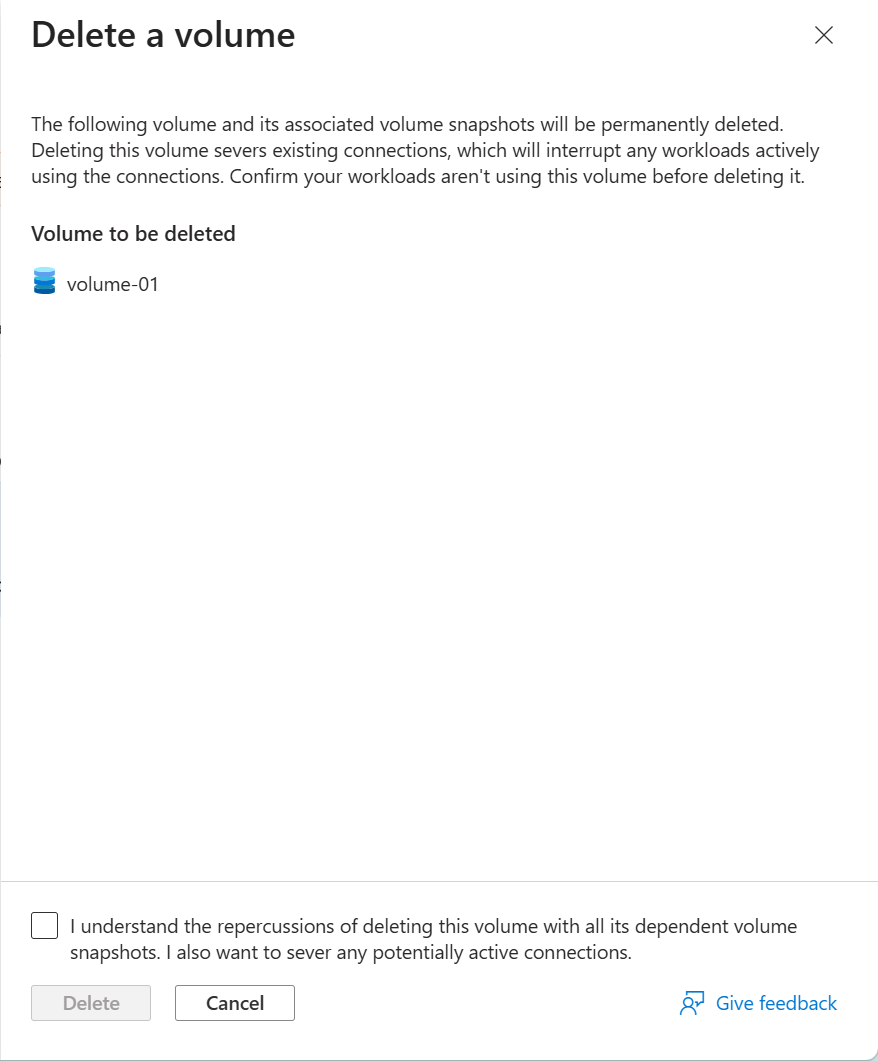
Only when the deletion prerequisites are satisfied, select the acknowledgement checkbox and then select Delete. Otherwise, select Cancel.
Wait for completion and refresh the volume list to confirm that the volume is no longer listed.
Delete a volume group
Delete a volume group only when you no longer need it or its contained volumes. Complete the deletion prerequisites for every affected volume, not just one selected volume.
Select SAN Management > Volume groups.
Select the group's selection control, and select Delete.
In Delete a volume group, verify the group name and review Dependent resources to be deleted.
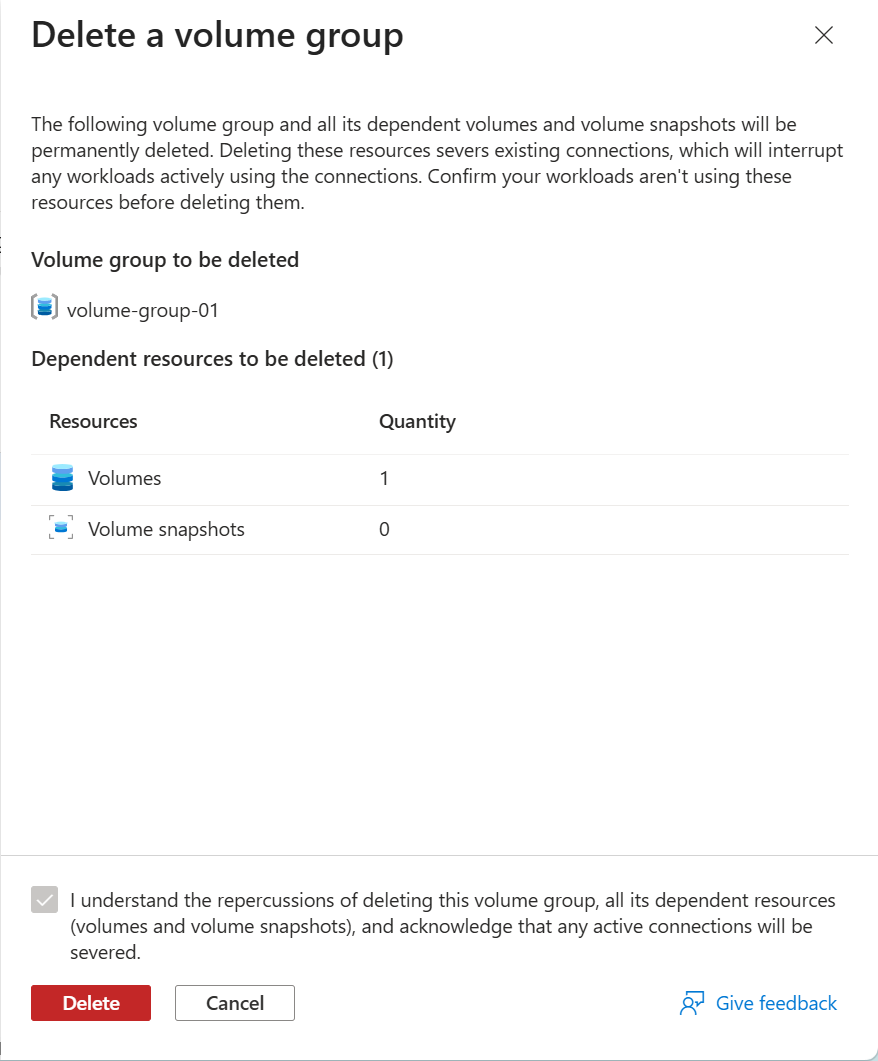
Review the warning and complete any required acknowledgement. Select Delete only when you're ready to delete the group and its affected resources, or select Cancel.
Wait for completion and refresh the group list to confirm that the group is no longer listed.
Delete the entire SAN
Delete the SAN only when you no longer need any of its volume groups or volumes. You don't have to delete each volume individually if your intent is to delete the SAN and its contained resources, but you must complete the disconnect and detach prerequisites for all affected volumes first.
Open the SAN's Overview page and select Delete.
In Delete an Elastic SAN, verify the SAN name and review Dependent volume groups and volumes to be deleted.
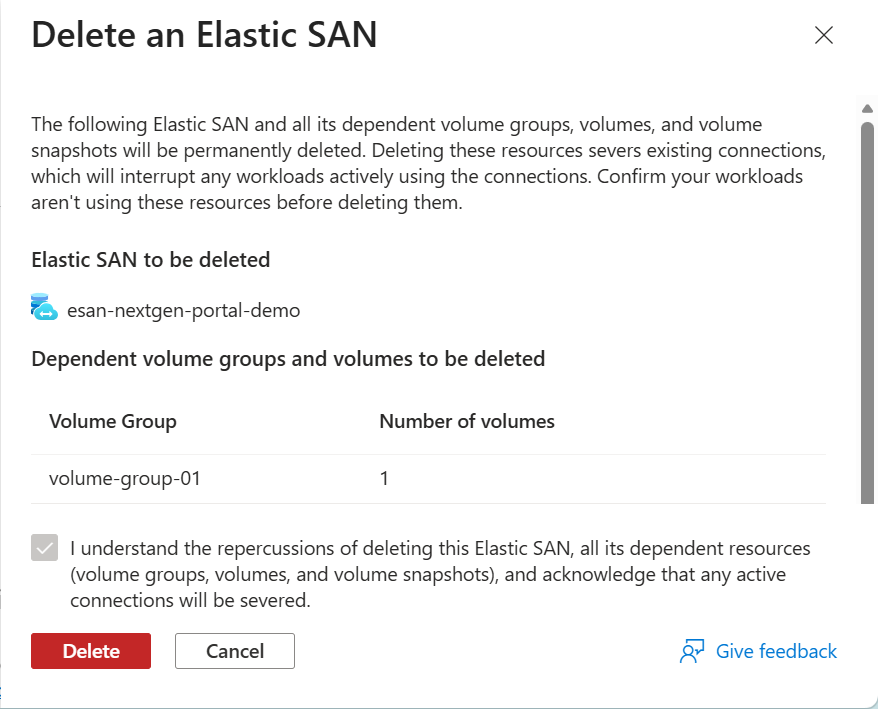
Review the warning and complete any required acknowledgement. Select Delete only when you're ready to delete the SAN and its affected resources, or select Cancel.
Wait for completion and confirm that the SAN no longer appears in the resource group.
