Recovering Synapse Analytics workspace after transferring a subscription to a different Microsoft Entra directory (tenant)
This article describes how to recover the Synapse Analytics workspace after transferring its subscription to a different Microsoft Entra directory. The Synapse Analytics workspace will not be accessible after transferring a subscription to a different Microsoft Entra directory (tenant).
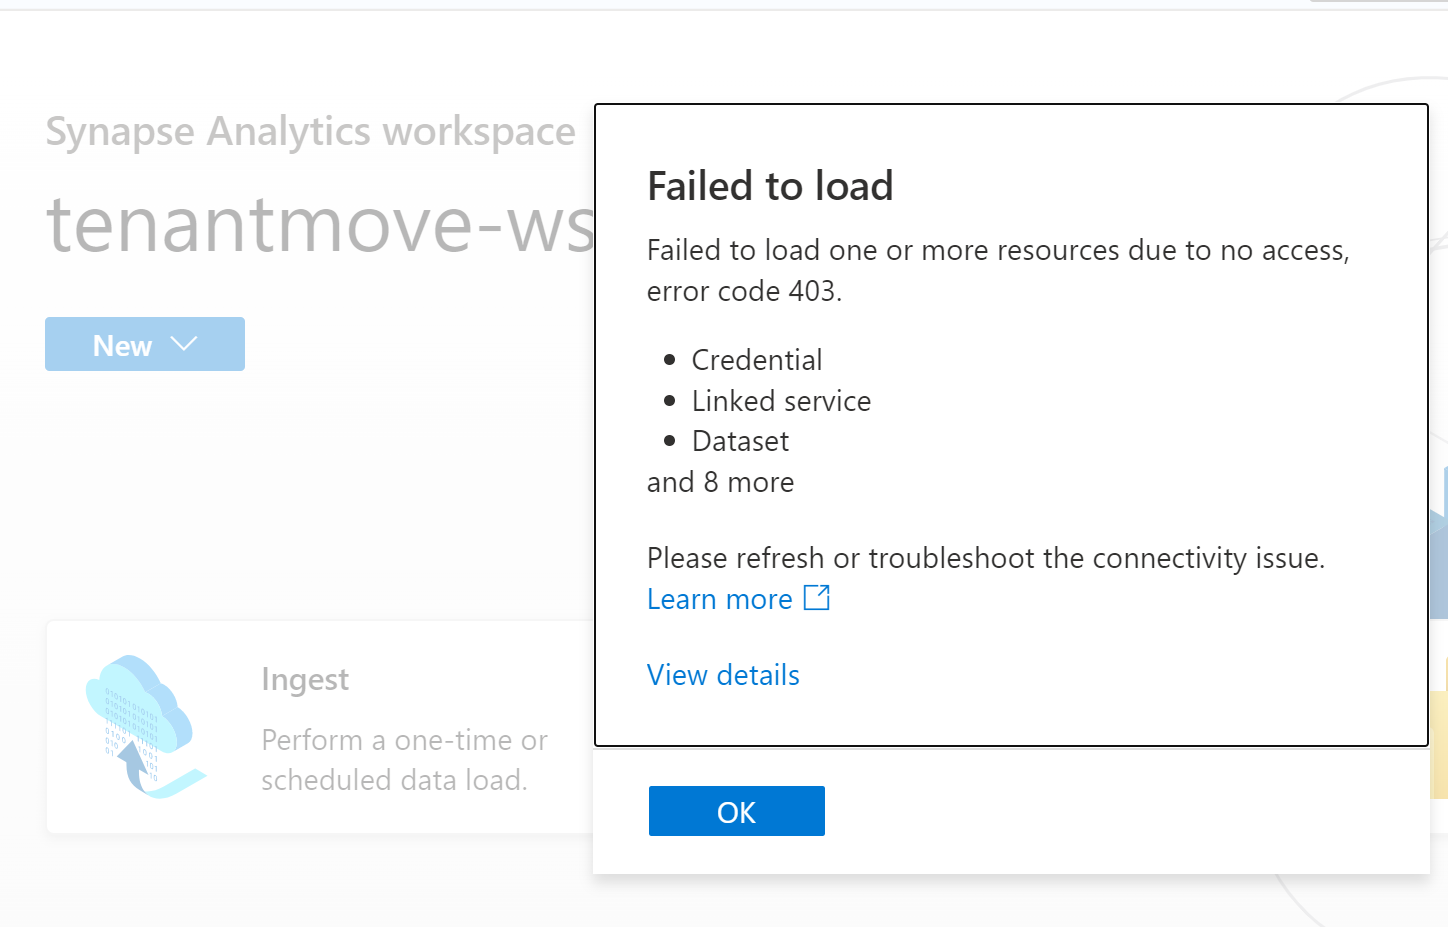
When you try to launch the Synapse studio after the move, you will see the error: "Failed to load one or more resources due to no access, error code 403."
Follow the steps in this article after transferring a subscription across tenant to recover the Synapse Analytics workspace.
Transferring a subscription to a different Microsoft Entra directory (tenant) is a complex process that must be carefully planned and executed. Azure Synapse Analytics require security principals (identities) to operate normally. When a subscription is moved to a different tenant, all principal IDs change, role assignments are deleted from Azure resource, and system assigned managed identities are dropped.
To understand the impact of transferring a subscription to another tenant see Transfer an Azure subscription to a different Microsoft Entra directory
This article covers the steps involved in recovering a Synapse Analytics workspace after moving the subscription across tenants.
Pre-requisites
- To know more about service or resources impacted by tenant move see Transfer an Azure subscription to a different Microsoft Entra directory.
- Save all the role assignment for Microsoft Entra users, groups, and managed identities. This information can be used to assign the required permissions on Azure resources like Azure Synapse Analytics and ADLS Gen2 after tenant move. See Step 1: Prepare for the transfer
- Save all the permissions necessary for Microsoft Entra users in dedicated and serverless SQL pool. Microsoft Entra users will be deleted from the dedicated and serverless SQL pools after tenant move.
Steps for recovering Synapse Analytics workspace
After transferring the subscription to another tenant, follow the below steps to recover the Azure Synapse Analytics workspace.
- Disable and re-enable the system Assigned Managed Identity. More information later in this article.
- Assign Azure RBAC (role based access control) permissions to the required Microsoft Entra users, groups, and managed identities on the Synapse Analytics workspace and required Azure resources.
- Set the SQL Active Directory admin.
- Re-create Microsoft Entra users and groups based on their equivalent users and groups in the new Microsoft Entra tenant for the dedicated and serverless SQL pools.
- Assign Azure RBAC to Microsoft Entra users, groups to Synapse Analytics workspace. This step should be first step after recovering the workspace. Without this step, launching Synapse Studio will throw 403 messages, due to Microsoft Entra users not having permissions on the workspace:
{"error":{"code":"Unauthorized","message":"The principal '<subscriptionid>' does not have the required Synapse RBAC permission to perform this action. Required permission: Action: Microsoft.Synapse/workspaces/read, Scope: workspaces/tenantmove-ws-1/*."}} - Assign Azure RBAC roles to Microsoft Entra users, groups, service principals to all the resources used in the workspace artifacts, such as ADLS Gen2. For more information on Azure RBAC in ADLS Gen2, see Role-based access control (Azure RBAC).
- Add Synapse RBAC role assignments to Microsoft Entra users and groups. For more information, see How to manage Synapse RBAC role assignments in Synapse Studio
- Recreate all the Microsoft Entra logins and users in dedicated and serverless SQL pool. For more information, see SQL Authentication in Azure Synapse Analytics
- Recreate all user assigned managed identity and assign user-assigned managed identity to the Synapse Analytics workspace. For more information, see Credentials in Azure Data Factory and Azure Synapse
Note
Ensure the following steps are executed only after confirming subscription is successfully moved to another tenant.
Disable and re-enable the system assigned managed identity for the Synapse Analytics workspace
This section shows you how to use Azure CLI or Azure PowerShell to disable and re-enable the System-assigned Managed Identity for your Azure Synapse Analytics workspace. Consider the following steps in either Azure CLI or Azure PowerShell.
$resourceGroupName="Provide the Resource group name"
$workspaceName="Provide the workspace name"
$subscriptionId="Provide the subscription Id"

$url = "https://management.azure.com/subscriptions/$subscriptionId/resourceGroups/$resourceGroupName/providers/Microsoft.Synapse/workspaces/$workspaceName\?api-version=2021-06-01"
This next sample disables System Assigned Managed Identity for the workspace.
az rest --method patch --headers  Content-Type=application/json   `
--url  $url `
--body '{ \"identity\":{\"type\":\"None\"}}'
Workspace provisioningState should be Succeeded and the identity type should None after preceding command is executed. If you execute the following command, provisioningState value might be shown as Provisioning and will take few minutes to change the status to Succeeded. Value of the provisioningState should be Succeeded before re-enabling the System Assigned Managed Identity for the workspace.
To get the status of the workspace to get the provisioning status and identity type, use the following code snippet:
az rest --method GET --uri $uri
The resulting JSON should be similar to:
   {
  "id": "/subscriptions/<subscriptionid>/resourceGroups/TenantMove-RG/providers/Microsoft Synapse/workspaces/tenantmove-ws",
  "identity": {
    "type": "None"
  },
  "location": "eastus",
  "name": "tenantmove-ws",
  "properties": {
    "connectivityEndpoints": {
      "dev": "https://tenantmove-ws.dev.azuresynapse.net",
      "sql": "tenantmove-ws.sql.azuresynapse.net",
      "sqlOnDemand": "tenantmove-ws-ondemand.sql.azuresynapse.net",
      "web": "https://web.azuresynapse.net?workspace=%2fsubscriptions%2<subscriptionid>b%2fresourceGroups%2fTenantMove-RG%2fproviders%2fMicrosoft.Synapse%2fworkspaces%2ftenantmove-ws"
    },
    "cspWorkspaceAdminProperties": {
      "initialWorkspaceAdminObjectId": "<object id>"
    },
    "defaultDataLakeStorage": {
      "accountUrl": "https://tenantmovedemowsstorage.dfs.core.windows.net",
      "filesystem": "demo",
      "resourceId": "/subscriptions/<subscriptionid>/resourceGroups/TenantMove-RG/providers/Microsoft.Storage/storageAccounts/tenantmovedemowsstorage"
    },
    "encryption": {
      "doubleEncryptionEnabled": false
    },
    "extraProperties": {
      "WorkspaceType": "Normal"
    },
    "managedResourceGroupName": "tenantmove-ws-managed-rg",
    "privateEndpointConnections": [],
    "provisioningState": "Succeeded",
    "publicNetworkAccess": "Enabled",
    "sqlAdministratorLogin": "sqladminuser",
    "trustedServiceBypassEnabled": false,
    "workspaceUID": "<workspace UID>"
  },
  "resourceGroup": "TenantMove-RG",
  "tags": {},
  "type": "Microsoft.Synapse/workspaces"
}
The next command will re-enable the System Assigned Managed Identity for the workspace:
az rest --method patch --headers  Content-Type=application/json   `
--url  $url `
--body '{ \"identity\":{\"type\":\"SystemAssigned\"}}'
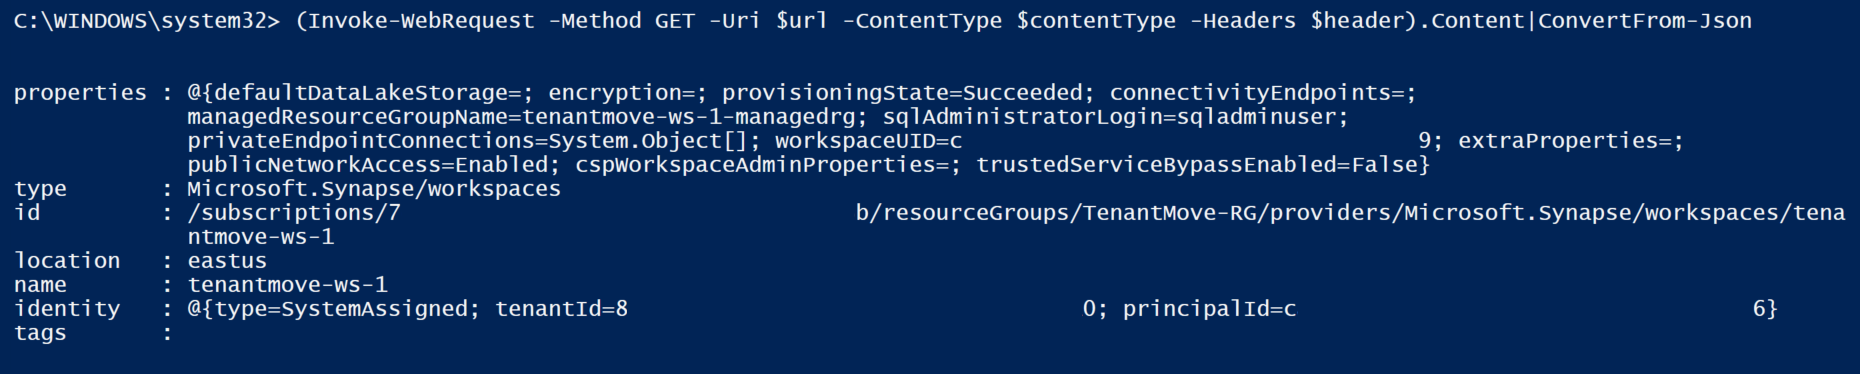
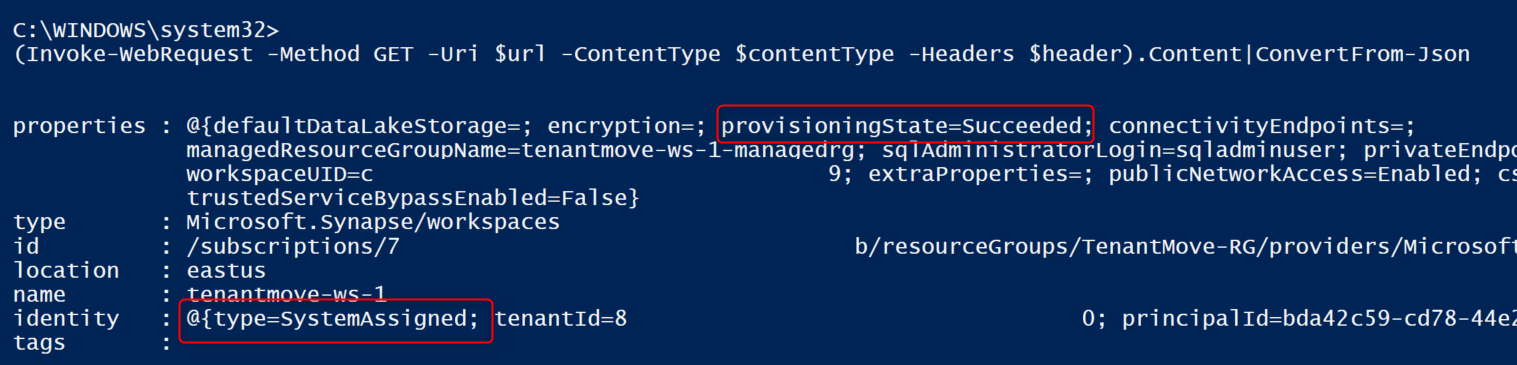
The next command will get you workspace status. The provisioningState value should be Succeeded. The provisioningState value will change from Provisioning to Succeeded. Identity type will be changed to SystemAssigned.
az rest --method GET --uri $uri

Next steps
- Transfer an Azure subscription to a different Microsoft Entra directory
- Move an Azure Synapse Analytics workspace from one region to another
- Assign Azure RBAC (role based access control) permissions to the required Microsoft Entra users, groups, and managed identities
- How to manage Synapse RBAC role assignments in Synapse Studio