Note
Access to this page requires authorization. You can try signing in or changing directories.
Access to this page requires authorization. You can try changing directories.
APPLIES TO: Composer v1.x and v2.x
Your bot might need to access an external service, on behalf of the user or as part of your business logic. To make an HTTP request, with or without authentication, use the Send an HTTP request action.
You can use the Bot Framework Emulator to test such a bot locally.
Prerequisites
- A basic bot you built using Composer
- An external service for your bot to call
- Basic knowledge of how to send an HTTP request without OAuth
- Basic knowledge of how to use OAuth in Composer
Set up OAuth in Composer
This section uses OAuth to issue the HTTP request to authenticate a user. For information about anonymous requests, see Make an HTTP request anonymously.
In Composer, create a bot using the Empty bot template. Let's call it testhttp.
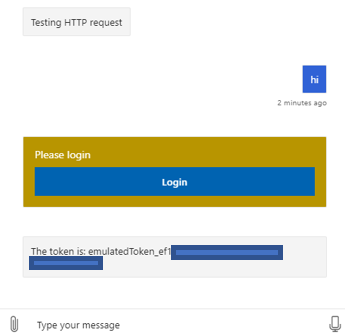
Optionally, in the Greetings trigger, set the message to Testing HTTP request.
Follow the steps described in the article Add user authentication to set up OAuth in your bot to access GitHub. The Unknown intent trigger is modified as shown in the figure below.
The Send a response message contains ${turn.oauth.token} that is the token returned by GitHub after the connection with the bot has been succeeded.
Also make sure your Composer settings have the appropriate app ID and app password of the Azure Bot resource, as described in Configure OAuth connection settings in Composer. When Azure creates the Azure Bot resource, it also generates an app ID and an app password.
Select Start Bot, then Test in Emulator.
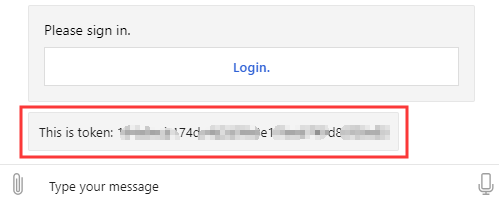
In the emulator, enter a short message. The bot will display a Login card.
Select Login and follow the required steps. GitHub will send back the connection token.
Now, with the OAuth setup ready and token successfully obtained, you're ready to add the HTTP request in your bot.
Make the HTTP request
In Composer, open the Create page.
Select the Unknown intent trigger in the bot explorer.
In the authoring canvas, select the + icon, under Send a response.
Select Access external resources from the drop-down menu, then Send an HTTP request.
![HTTP action]](media/integration/http-menu.png)
In the properties pane, set the method to
GET, then set the URL to your target API. For example, a typical GitHub API URL such ashttps://api.github.com/users/your-username/orgs.Add headers to include more info in the request. For example, we can add two headers to pass in the authentication values in this request.
- In the first line of header, add
Authorizationin the Key field andbearer ${turn.oauth.token}in the Value field. Use Tab or Enter to save your changes. - In the second line of header, add
User-Agentin the Key field andVaryin the Value field. Use Tab or Enter to save your changes.
- In the first line of header, add
Finally, set the Result property to
dialog.api_responseand Response type tojson.Note
The HTTP action sets the following information in the Result property: statusCode, reasonPhrase, content, and headers. Setting the Result property to
dialog.api_responsemeans you can access those values viadialog.api_response.statusCode,dialog.api_response.reasonPhrase,dialog.api_response.contentanddialog.api_response.headers. If the response is json, it will be a deserialized object available viadialog.api_response.content.
![HTTP action]](media/v1x/integration/http-menu.png)
Process and test the HTTP response
Add an If/else branch to test the response of this HTTP request.
In the authoring canvas, select the + icon, under Send an HTTP request.
Select Create a condition from the drop-down menu, then Branch:If/else.
In the properties pane, set Condition to
dialog.api_response.statusCode == 200.Add two Send a response actions to be fired based on the testing results (true/false) of the condition. This means if
dialog.api_response.statusCode == 200is evaluated to betrue, send a responsecalled with success! ${dialog.api_response}, else send a responsecalling api failed.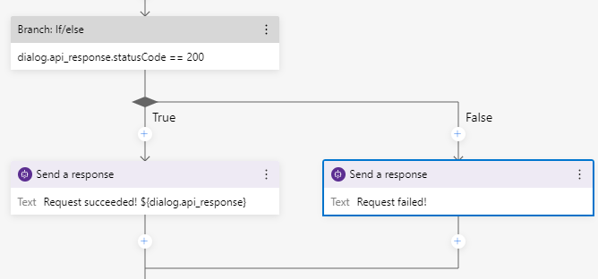
Restart your bot and test it in the Emulator. After logging in successfully, the response content of the HTTP request should be visible.