Note
Access to this page requires authorization. You can try signing in or changing directories.
Access to this page requires authorization. You can try changing directories.
APPLIES TO: Composer v1.x and v2.x
The conversations a bot can have with its users are controlled by various aspects of its dialogs. This article illustrates how dialog actions can control the conversation flow.
Dialogs control both simple and complex conversation flow to your bot. Dialogs contain triggers and actions, and actions can contain response templates (language generation) for messages the bot will send, along with instructions for the bot to carry out tasks. Some dialogs are linear, with just one message after the other. However, more complex interactions require dialogs that can branch and loop based on what the user says and the choices they make.
To see how dialog triggers can control the conversational flow, see Define triggers.
About the sample bot
This section is an introduction to the Controlling Conversation Flow example that's used to explain how to control conversation flow in your bot using Composer.
Do the following to get the Controlling Conversation Flow example running in Composer:
Clone the BotBuilder-Samples GitHub repo onto your machine.
Within the
composer-samplesfolder, you'll find C# and JavaScript projects. Choose a language and navigate into theprojectssubfolder.In this folder you'll find a
ControllingConversationFlowSampleproject that you can open in Composer. Open the bot to load it.After you load it in Composer, you can click Start Bot and then Open in Web Chat to explore the sample interactively.
Select the Greeting trigger in the main dialog to get an idea of how this sample works.
In this sample, the Greeting trigger always runs first when the bot starts. This trigger executes the Send a response action. The Send a response action calls the WelcomeUser template:
${WelcomeUser()}. To see what the help template does, open Bot Responses, select Common, and then Show code to see the#WelcomeUsertemplate.Important
When a conversation with the bot first starts, it executes the Greeting trigger. The Greeting trigger presents the user with different options using
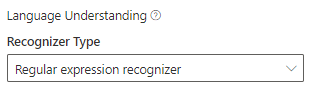
SuggestedActions. When the user selects one of them, the bot sends an event with the corresponding intent. That intent is captured by the Intent recognized trigger created to handle that intent. For example, if the user enters IfCondition the ifCondition trigger handles that event and calls the IfCondition dialog. The remaining steps in this section will walk you through this process.Select the main dialog and look at the properties pane. By default, the Recognizer/Dispatch type is set to the Regular expression recognizer.
In each of the following sections, you'll learn how to create each of these different ways to control the conversation flow, using the corresponding dialog as an example.
To see the intents for each trigger, select the trigger and look in the properties pane. The following image shows a regular expression,
(?i)IfCondition|01, which means when the user enters either IfCondition or 01, theIfConditiontrigger will execute. In a regular expression, the(?i)begins a case-insensitive mode.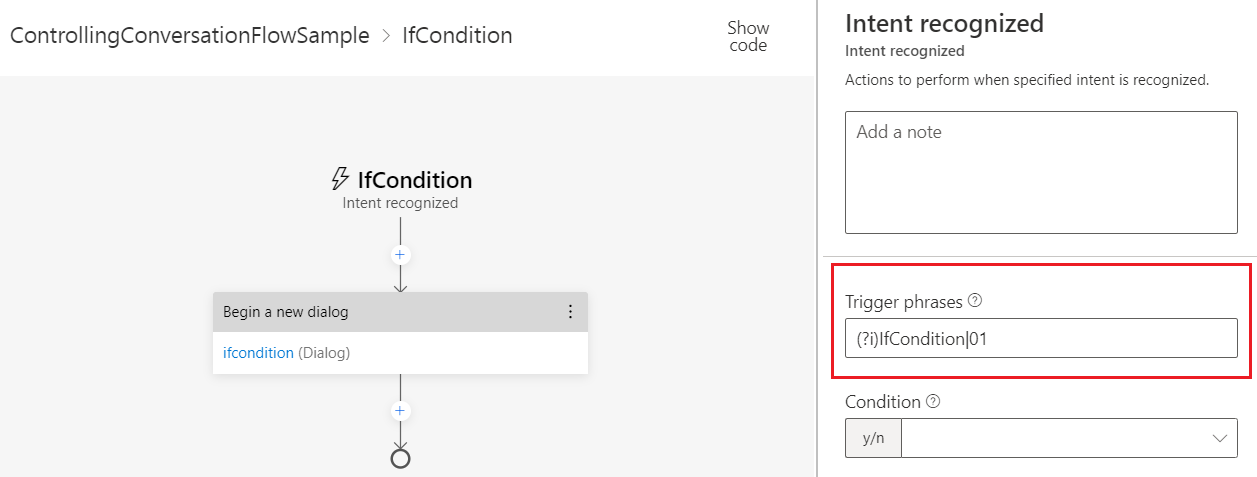


Use branch actions
Composer offers several mechanisms for controlling the flow of the conversation. These building blocks instruct the bot to make a decision based on a property in memory or the result of an expression. Below is a screenshot of the Create a condition menu:
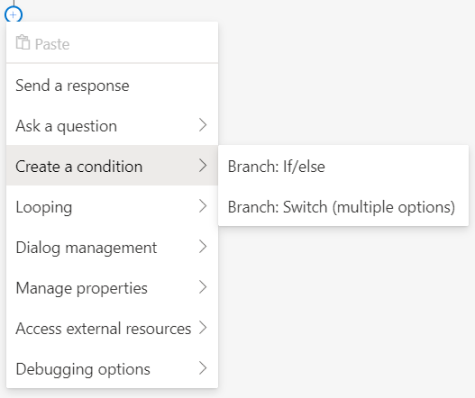
- Branch: If/Else instructs the bot to choose between one of two paths based on a
yes/noortrue/falsetype value. - Branch: Switch (multiple options) branch instructs the bot to choose the path associated with a specific value - for example, a switch can be used to build a multiple-choice menu.
Branch: If/Else
The Branch: If/Else action creates a decision point for the bot, after which it will follow one of two possible branches. To create an Branch: If/Else action, select the + icon in the authoring canvas then select Branch: If/else in the Create a condition menu.
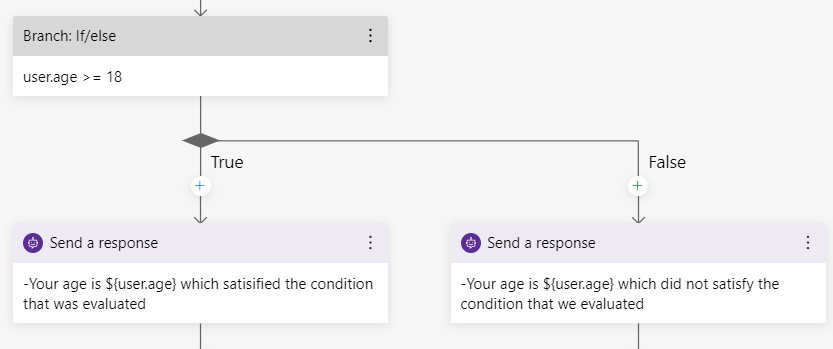
The decision is controlled by the Condition field in the Properties pane, and must contain an expression that evaluates to true or false. For example, the condition user.age >= 18 evaluates whether user.age is greater than or equal to 18.
Once the condition has been set, the corresponding branches can be built. The editor will now display two parallel paths in the flow - one that will be used if the condition evaluates to true, and one if the condition evaluates false. Below the bot will Send a response based on whether user.age>=18 evaluates to true or false.
Branch: Switch (multiple options)
In a Branch: Switch (multiple options) action, the value of the parameter defined in the Condition field of the Properties pane is compared to each of the values defined in the Cases section that immediately follows the Condition field. When a match is found, the flow continues down that path, executing the actions it contains. To create a Branch: Switch (multiple options) action, select the + icon in the authoring canvas then select Branch: Switch (multiple options) from the Create a condition menu.
Like Branch:If/Else you set the Condition to be evaluated in the Properties pane. Underneath you can create Branches in your switch condition by entering the value and press Enter. As each case is added, a new branch appears in the flow. You can add actions to each branch. See below how the Susan and Nick branches are added to the authoring canvas. In addition, there will always be a default branch that executes if no match is found.

Use loop actions
Below is a screenshot of the Looping menu:
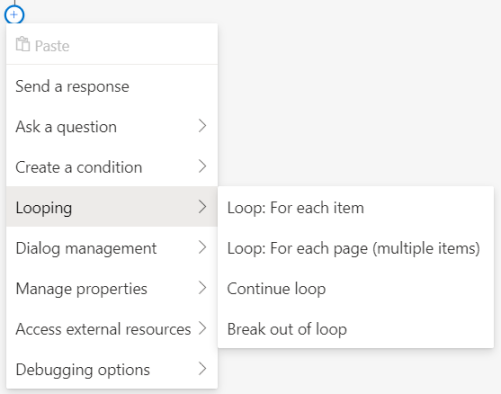
- Loop: For each item instructs the bot to loop through a set of values stored in an array and carry out the same set of actions with each one.
- Loop: For each page (multiple items) that can be used to step through the array one page at a time. This action might be more appropriate for large arrays.
- Continue loop instructs the bot to stop executing this template and continue with the next iteration of the loop.
- Break out of loop instructs the bot to stop executing this loop.
Loop: For each item
The Loop: For each item action instructs the bot to loop through a set of values stored in an array and carry out the same set of actions with each element of the array.
For the sample in this section, you'll first create and populate an array, then create the for each item loop.
Create and populate an array
To create and populate an array:
- Select Edit an array property from the Manage properties menu.
- In the Properties pane, edit the following fields:
- Type of change:
Push - Items property:
dialog.ids - Value:
10000+1000+100+10+1
- Type of change:
- Repeat the previous two steps to add two more elements to the array, setting the Value to:
200*200888888/4
- (optional) Send a response to the user. You do that by selecting the + in the authoring canvas then Send a response. Enter
-Pushed dialog.id into a listinto the Properties pane.
Now you can loop through the array.
Loop through the array
To create the for-each loop:
- Select the + icon in the authoring canvas then Loop: For each item from the Looping menu.
- Enter the name of the array you created,
dialog.idsinto the Items property field. - To show the results when the bot is running, enter a new action to occur with each iteration of the loop to display the results. You do that by selecting the + in the authoring canvas then Send a response. Enter
-${dialog.foreach.index}: ${dialog.foreach.value}into the Properties pane.
Once the loop begins, it will repeat once for each item in the array.
Tip
You can't end the loop before all items have been processed. If the bot needs to process only a subset of the items, use a Branch: If/Else or a Branch: Switch (multiple options) action within the loop to create nested conditional paths.
Loop: For each page
Loop: For each page (multiple items) loops are useful for situations in which you want to loop through a large array one page at a time. Like Loop: For each item, the bot iterates an array, the difference is that For Each Loops executes actions per item page instead of per item in the array.
For the sample in this section, you'll first create and populate an array, then create the for-each-page loop.
Create and populate an array
To create and populate an array:
Select Edit an array property from the Manage properties menu.
Add properties to the array you created by selecting + in the authoring canvas, then Edit an array property from the Manage properties menu.
In the Properties pane, edit the following fields:
- Type of change:
Push - Items property:
dialog.ids - Value:
1
- Type of change:
Repeat step 3, incrementing the Value by 1 each time until you have 6 properties in your array.
Important
You'll notice that this differs from the Controlling Conversation Flow example, the reason is to show another example of the Page size field in the loop that you'll create next.
Loop through the array
To create the Loop: For each page action:
- Select the + icon in the authoring canvas, then Loop: For each page (multiple items) from the Looping menu.
- Enter the name of the array you created,
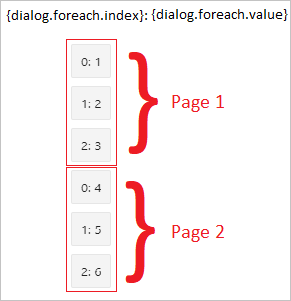
dialog.idsinto the Items property field. - To show the results when the bot is running, enter a new action to occur with each iteration of the loop to display the results. You do that by selecting the + in the authoring canvas then Send a response. Enter
- ${dialog.foreach.index}: ${dialog.foreach.value}into the Properties pane.
After setting the aforementioned properties your Loop: for each page (multiple items) loop is ready. As seen in the sample below, you can nest for Loop: for each item within your Loop: for each page (multiple items) loop, causing your bot to loop through all the items in one page and take an action before handling the next page.
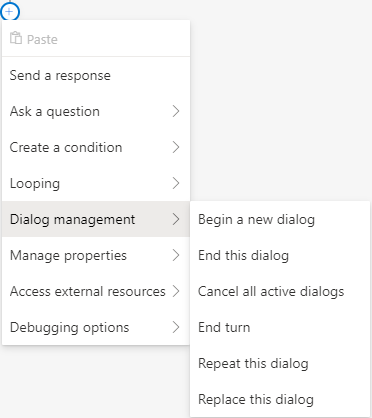
Use dialog actions
In addition to conditional branching and looping, it's also possible to compose multiple dialogs into a larger more complex interaction. Below are the available Dialog management options:
Begin a new Dialog
Child dialogs are called from the parent dialog using the Begin a new dialog action from within any trigger. You do this by selecting the + icon in the authoring canvas then select Begin a new dialog from the Dialog management menu.
Once the child dialog is called, the parent dialog pauses execution until the child completes and returns control back to its parent, which then resumes where it left off.
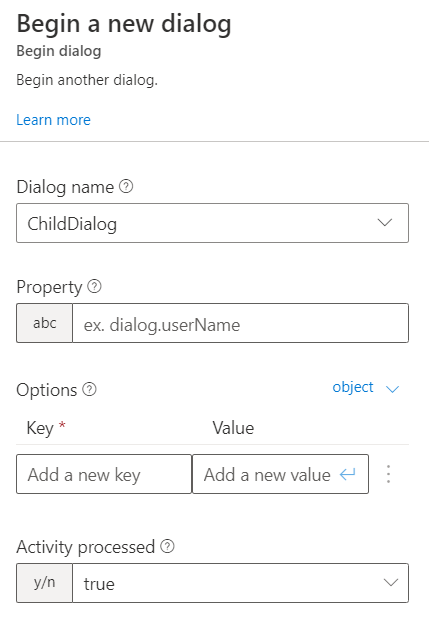
It's possible to pass parameters into the child dialog. Parameters can be added to Options field in the Begin a new dialog action Properties pane. The value of each parameter is saved as a property in memory.
If you choose to use an expression:
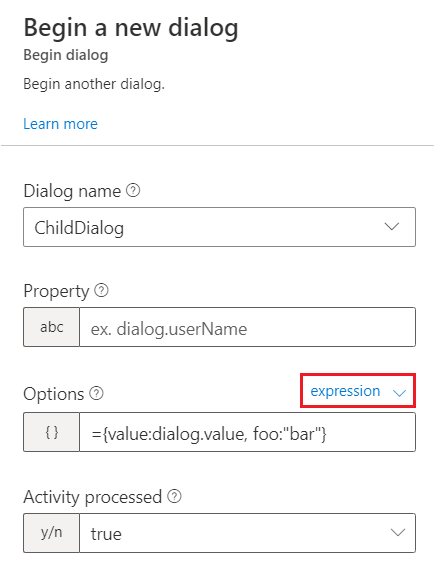
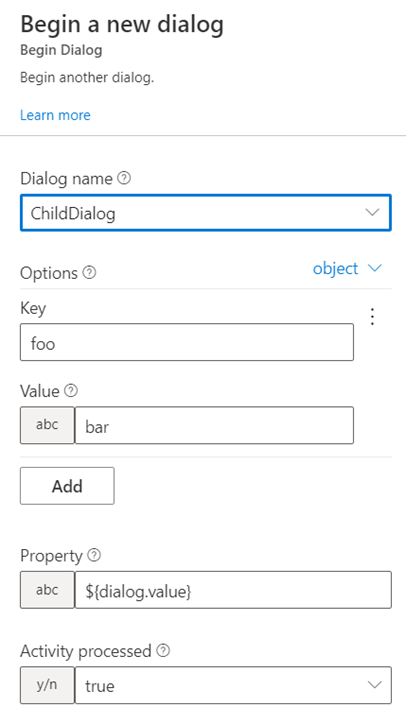
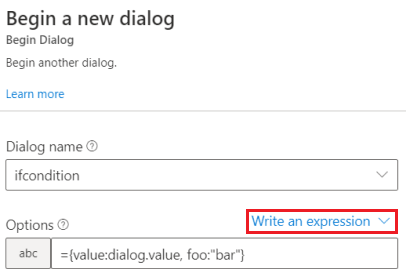
In the screenshot above, ChildDialog will be started, and passed two options:
- The first contains the value of the key
fooand will be available inside the menu dialog asdialog.<field>; in this case,dialog.foo. - The second contains the value of the key
valueand is available inside the menu dialog asdialog.<field>; in this case,dialog.value.
It's not necessary to map memory properties that would otherwise be available automatically - that's, the user and conversation scopes will automatically be available for all dialogs. However, values stored in the turn and dialog scope do need to be explicitly passed.
In addition to passing these key/value pairs into a child dialog, it's also possible to receive a return value from the child dialog. This return value is specified as part of the End this dialog action, as described below.
In addition to Begin a new dialog, there are a few other ways to launch a child dialog.
Replace this dialog
Replace this dialog works just like Begin a new dialog, with one major difference: the parent dialog doesn't resume when the child finishes. To replace a dialog, select the + icon in the authoring canvas then select Replace this dialog from the Dialog management menu.
Repeat this dialog
Repeat this Dialog causes the current dialog to repeat from the beginning, which doesn't reset any of the properties that may have been set during the dialog's run.
To repeat a dialog select the + icon in the authoring canvas then select Repeat this dialog from the Dialog management menu.
Ending dialogs
Any dialog called will naturally end and return control to its parent dialog when it reaches the last action in its flow. While it's not necessary to explicitly call End this dialog, it's sometimes desirable to end a dialog before it reaches the end of the flow - for example, you may want to end a dialog if a certain condition is met.
Another reason to call the End this dialog action is to pass a return value back to the parent dialog. The return value of a dialog can be a property in memory or an expression, allowing developers to return complex values when necessary. To do this, select the + icon in the authoring canvas then select End this dialog from the Dialog management menu.
Imagine a child dialog used to collect a display name for a user profile. It asks the user a series of questions about their preferences, finally helping them enter a valid user name. Rather than returning all of the information collected by the dialog, it can be configured to return only the user name value, as seen in the example below. The dialog's End this dialog action is configured to return the value of dialog.new_user_name to the parent dialog.
Conditional versions of a message in Bot Responses
In addition to creating explicit branches and loops in the flow, it's also possible to create conditional versions of messages using the Language Generation syntax. The LG syntax supports the same Adaptive expressions as is used in the action blocks.
For example, you can create a welcome message that's different depending on whether the user.name property is set or not. The message template could look something like this:
- IF: ${user.name != null}
    - Hello, {user.name}
- ELSE:
    - Hello, human!
Learn more about using memory and expressions in LG.