Use a custom connector from a flow
Note
This topic is part of a tutorial series on creating and using custom connectors in Azure Logic Apps, Power Automate, and Power Apps. Make sure you read the custom connector overview to understand the process.
In this topic, you build a basic flow that uses the custom connector you created in a previous topic. The flow is triggered when an item is added to a SharePoint list, then the flow uses the custom connector to call the Cognitive Services Text Analytics API. The connector returns the sentiment score (0 to 1) for the text in the list item, and the flow writes the score back to the list. The following image shows the finished flow:

Prerequisites
- An Office 365 Business Premium subscription, or sign up for a free trial
- Basic experience building flows. For more information, see Create a flow from scratch.
- The custom connector that you created in one of these topics:
Create the SharePoint list
You first create a simple three-column list in SharePoint Online; this list stores movie review data that the flow analyzes for sentiment. For more information about SharePoint lists, see Introduction to lists in the SharePoint documentation.
In your SharePoint Online site, choose New, then List.
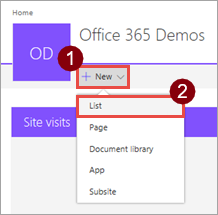
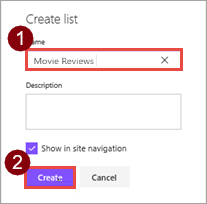
Enter the name Movie Reviews, then choose Create.
The list is created, with the default Title field.

Choose
 , then Single line of text.
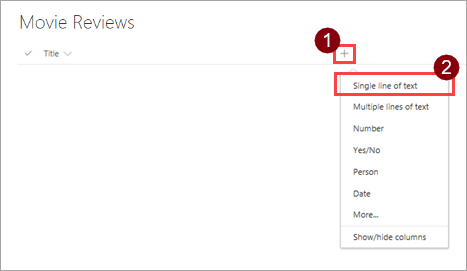
Enter the name Review, then choose Save.
Repeat steps 3. and 4. to add another column to the list: use a data type of Number, and the name Score.
Create a flow from the list
SharePoint Online provides the ability to create flows right from a list, so we'll use that approach. You could create the same flow from flow.microsoft.com.
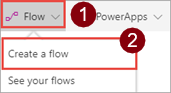
In the SharePoint list, choose Flow then Create a flow.
In the right pane, choose Show more.
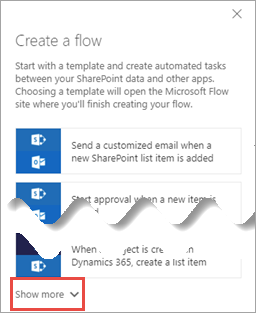
Choose the template When a new item is added in SharePoint, complete a custom action.

The custom action in this case is calling the API through the custom connector.
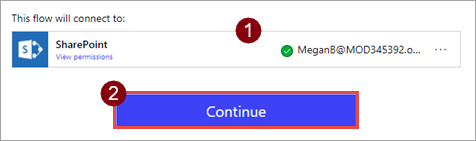
Ensure you're signed in to SharePoint with the correct account, then choose Continue.
In flow.microsoft.com, choose Edit. You should see the SharePoint site and list from which you launched the Create a flow process.

Add the custom connector
Power Automate created a basic flow with a trigger that fires when an item is added to the SharePoint list. Now you add actions to take based on the item that is added.
Choose New step, then Add an action.
Search for the connector you created, then choose the action associated with that connector.
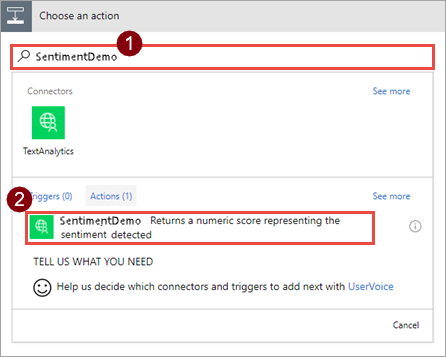
The name and description for the action come from information you provided when you created the connector.
Enter values for all the fields.
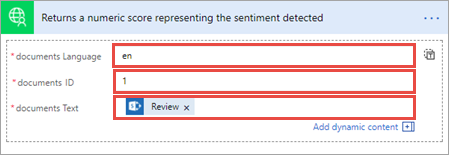
Parameter Value Language "en" ID "1" Text The SharePoint Review field (from the Dynamic content dialog box) ID is required because the connector can handle multiple documents; in these examples, you send one document at a time. In a production flow, Language and ID values might come from a list or another data source.
Choose New step then Add an action.
Add the action SharePoint - Update item and enter values for all the fields.

Parameter Value Site Address The address of the SharePoint Online site from which you launched the Create a flow process List name The list from which you launched the Create a flow process Id The SharePoint ID field Title The SharePoint Title field Review The SharePoint Review field Score The custom connector score field When you add the dynamic content for the Score field, notice that Power Automate adds an Apply to each container because it recognizes that the custom connector accepts multiple documents. Your flow only sends one at a time, but it's cool that the flow matches the capabilities of the connector.
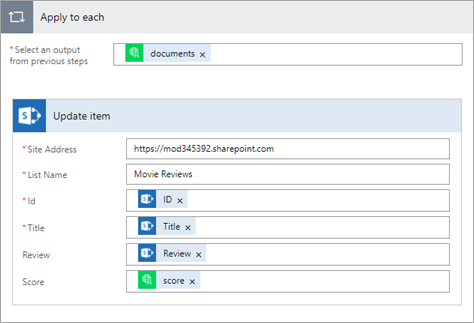
The finished flow should now look like the following image:
Enter a name for your flow, like Sentiment Analysis, then choose Create flow and Done.
Test the flow
Now that the flow is complete, it's time to test it by adding reviews to the SharePoint list, and seeing how the flow responds.
In your SharePoint Online list, choose Quick Edit.

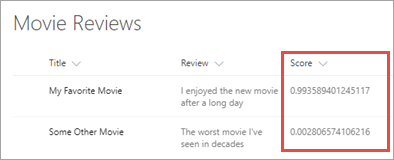
Add two reviews to the list (one negative and one positive), then choose Done.
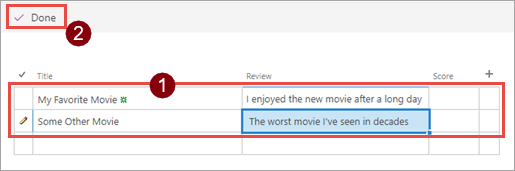
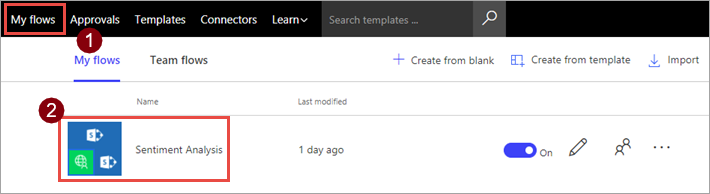
Parameter Suggested value Title (positive) My Favorite Movie Review (positive) "I enjoyed the new movie after a long day" Title (negative) Some Other Movie Review (negative) "The worst movie I've seen in decades" In flow.microsoft.com, choose My flows, then choose the flow you created.
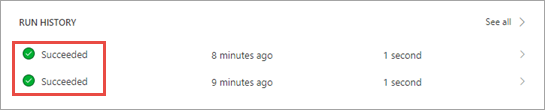
Look at RUN HISTORY, and you should see two runs—one for each review you added to the list.
Back on the SharePoint list page, refresh the browser to see the scores that the flow added.
You're all done! This is a simple flow, but it gains powerful functionality by being able to call Cognitive Services through a custom connector.
Next steps
Share the connector within your organization and/or get the connector certified so that people outside your organization can use it:
Provide feedback
We greatly appreciate feedback on issues with our connector platform, or new feature ideas. To provide feedback, go to Submit issues or get help with connectors and select your feedback type.