Note
Access to this page requires authorization. You can try signing in or changing directories.
Access to this page requires authorization. You can try changing directories.
This article describes the steps to set up a Git repository on your local machine, with the intent to contribute to Microsoft documentation. Contributors may use a locally cloned repository to add new articles, do major edits on existing articles, or change artwork.
You'll run these one-time setup activities to start contributing:
- Determine the appropriate repository.
- Fork the repository to your GitHub account.
- Choose a local folder for the cloned files.
- Clone the repository to your local machine.
- Configure the upstream remote value.
Important
If you're making only minor changes, you don't need to complete the steps in this article. See Edit in the browser to learn how to make quick edits without installing any tools.
Overview
To contribute to documentation on Microsoft Learn, you can make and edit Markdown files locally by cloning the corresponding documentation repository. Microsoft requires you to fork the appropriate repository into your own GitHub account so that you have read/write permissions to store your proposed changes. Then, you use pull requests (PRs) to merge changes into the read-only central shared repository.
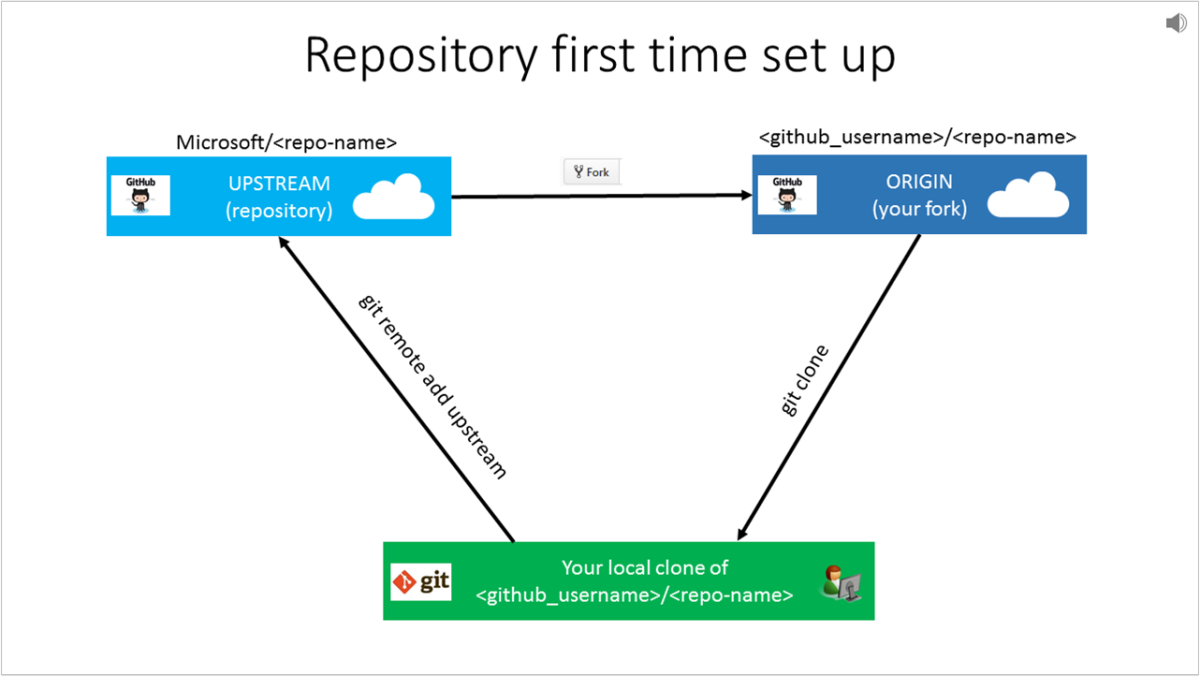
The Microsoft repository is referred to as the upstream repo. Using the fork action within the GitHub user interface, the user forks the Microsoft repo into their own GitHub account. This fork is referred to as the Origin. Using git clone, the user clones the Origin to their local machine. Finally, the user uses git remote add upstream to connect their local clone back to the Microsoft upstream repo.
Determine the repository
Documentation hosted at Microsoft Learn resides in several repositories on GitHub.
If you're unsure of which repository an article resides in, visit the article using your web browser. Select the Edit link (pencil icon) in the upper-right corner of the article.
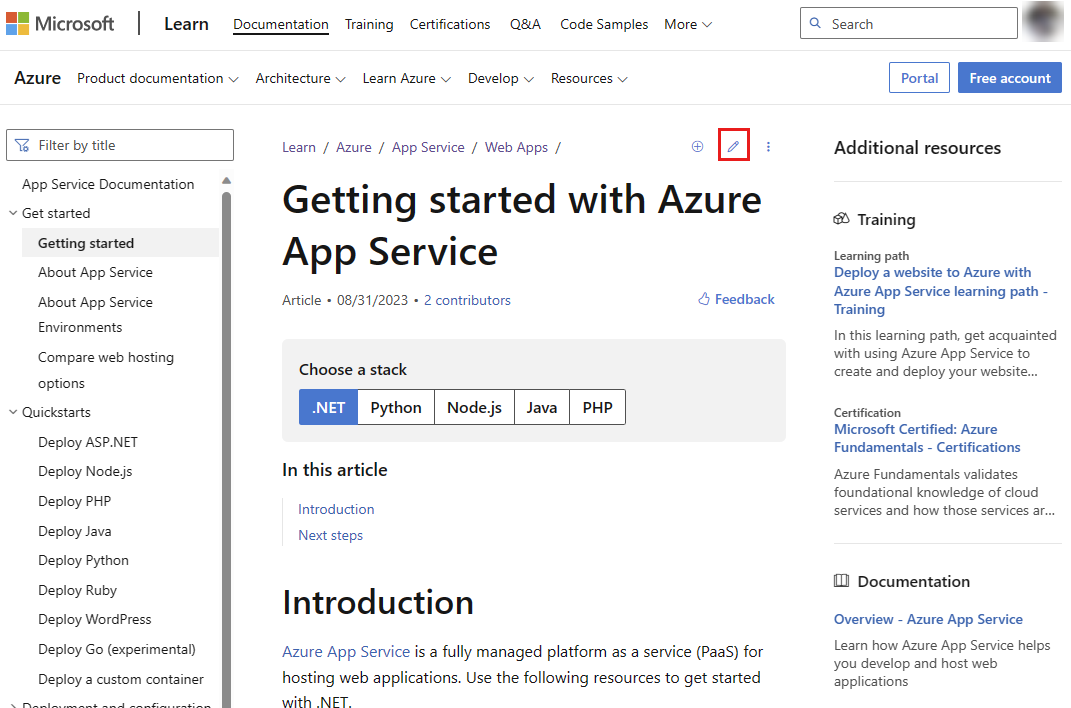
This action takes you to the source file on GitHub. The repository name is displayed in the upper-left corner of the page.

Here are some popular repositories that are available for public contributions:
- Microsoft Learn Community Content https://github.com/MicrosoftDocs/community-content/
- Azure documentation https://github.com/MicrosoftDocs/azure-docs
- SQL Server documentation https://github.com/MicrosoftDocs/sql-docs
- Visual Studio documentation https://github.com/MicrosoftDocs/visualstudio-docs
- .NET Documentation https://github.com/dotnet/docs
- Azure .NET SDK documentation https://github.com/azure/azure-docs-sdk-dotnet
- ConfigMgr documentation https://github.com/MicrosoftDocs/SCCMdocs
Fork the repository
Once you've identified the correct repo, the next step is to fork the repo into your own GitHub account.
To fork a repository means to create a copy of it in your GitHub account. A personal fork is required because all Microsoft documentation repositories provide read-only access, but your fork gives you write access to make your changes. The fork allows you to open PRs from your fork to the Microsoft repo.
From the main repository's GitHub page, select the Fork button in the upper-right corner.

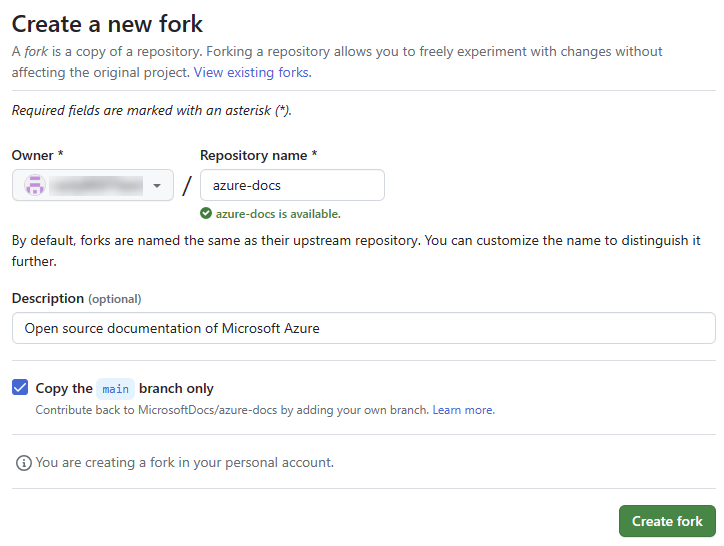
In the Create a new fork screen, make sure Owner is set to your username and that Copy the main branch only is checked. Optionally, change the Repository name and Description fields.
Clone the repository
Clone means create a copy of a repository on your local machine.
Warning
DO NOT clone local repos into OneDrive-synced folders. When choosing the folder into which you'll clone the repo, avoid folders that sync with OneDrive (for example, your Documents folder). OneDrive can cause unintended merge conflicts when you merge your changes back to the main branch. Instead, it's best to create a short filepath on your
C:\drive (for example, C:\GitHub).Git on Windows: Enable long path names. By default, Git for Windows disables support for long filepaths, which prevents any file with a destination path longer than 255 characters from being cloned. Enable long filepaths to avoid this issue by running the following command as an administrator:
git config --global core.longpaths true
Create a
GitHubfolder in your local machine. For example, C:\GitHub. (Don't clone to a OneDrive synced folder.)In a browser, go to GitHub.com and sign in.
In GitHub on the top right, from your profile drop-down, select Your repositories. The repositories page appears with a list of your forked repositories.
Select the repository you want to clone. The repository page of Your fork appears.
Make sure you're on the repository page for your fork, not the page for the production repo. You can confirm that the repository you're on is your fork by checking the URL: it should show your GitHub username, not the Microsoft organization (for example,
https://github.com/nancydavolio/azure-docsand NOThttps://github.com/MicrosoftDocs/azure-docs). Also, you'll see your name in the upper-left corner, and you'll see a note that says forked from followed by the name of the main repository.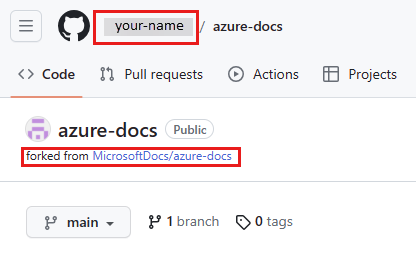
Select the <> Code tab at the top left of the page.
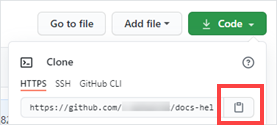
On the right-side, from the Code drop-down, copy the URL under the HTTPS option.
Important
You copied the clone URL via the GitHub UI. The rest of the steps should be performed in VS Code Terminal.
To clone from Visual Studio Code
Open Visual Studio Code.
From top nav menu, select View and then select Terminal. The terminal view appears in the bottom of the Visual Studio Code screen.
In the Terminal view, run the command to change directory (cd) to the
GitHubfolder you created for repositories on your drive in Step 1 in the Clone a repository section.Example:
cd C:\GitHubIf you get an error, you may have to change directory one folder at a time.
Run the following command to clone the repository:
git clone <paste the clone URL you copied via the GitHub UI>For example:
git clone https://github.com/nancydavolio/azure-docs.gitWhen prompted to authenticate via the browser, choose the "Sign in with your browser" button and complete the process. Be sure to download the latest version of Git, which supports authentication via browser functionality. If you choose to use a GitHub personal access token, you can generate one following these instructions: Create a personal access token.
The clone command downloads the repository files from your fork into a new folder in the location you chose in Step 3. A new folder is made within the current folder. It may take a few minutes, depending on the repository size. You can explore the folder to see the structure once it's finished.
Set up remotes
After cloning the repository, set up a read-only remote connection to the main repository named upstream. Remotes are aliases that refer to remote repositories. Origin refers to your fork, and upstream refers to the production repository. Git automatically created the origin remote when you ran the clone command. You use the upstream URL to keep your local repository in sync with the latest changes made by others.
Run the following commands in either Git Bash or VS Code Terminal.
Change directory (
cd) into the repository folder that theclonecommand created. For example:cd repo-nameRun the following command to add a remote named
upstreamthat points to the production repository. For example, theupstreamrepository URL ishttps://github.com/MicrosoftDocs/azure-docs.gitrather thanhttps://github.com/nancydavolio/azure-docs.git.git remote add upstream <the clone URL of the main repo>For example:
git remote add upstream https://github.com/MicrosoftDocs/azure-docs.gitRun the following command to make sure your remotes are correct:
git remote -vExample of output:
origin  https://github.com/nancydavolio/azure-docs.git (fetch)
origin  https://github.com/nancydavolio/azure-docs.git (push)
upstream        https://github.com/MicrosoftDocs/azure-docs.git (fetch)
upstream        https://github.com/MicrosoftDocs/azure-docs.git (push)
If you made a mistake, remove the remote and repeat the step to add it. To remove
upstream, run the command:git remote remove upstream
Next steps
- Now that you've set up your local clone, it's time to make major changes.