Note
Access to this page requires authorization. You can try signing in or changing directories.
Access to this page requires authorization. You can try changing directories.
Note
This article applies to the Employee Self-Service declarative agent. For the Employee Self-Service custom engine agent, see Integrate ServiceNow HRSD and ITSM with your Employee Self-Service deployment.
Important
Deploy the Employee Self-Service HR agent, IT agent, or both before you connect them to ServiceNow. The ServiceNow HRSD topics are already included in the HR agent and the ServiceNow ITSM topics in the IT agent, so you don't need to install an extension pack.
The Employee Self-Service agent is built on Copilot and uses AI to provide relevant information to employees and take actions on their HR data. If your organization uses a human resource management system, the Employee Self-Service agent requires access to that system to function most effectively.
Functional synopsis
The Employee Self-Service agent acts as a front end for ServiceNow HR Service Delivery (HRSD) and ServiceNow IT Service Management (ITSM). Employees can create, track, and update HR cases and IT tickets in natural language, without leaving Microsoft 365 Copilot.
The following table lists what employees can do and the topic that handles each capability for HR and IT.
| What employees can do | HR: ServiceNow HRSD topic | IT: ServiceNow ITSM topic |
|---|---|---|
| Create a case or ticket | ServiceNow HRSD Create Case | ServiceNow ITSM Create Ticket |
| Update a case or ticket | ServiceNow HRSD Update Case | ServiceNow ITSM Update Ticket |
| View full details of a case or ticket | ServiceNow HRSD Get Case Details | ServiceNow ITSM Get Ticket Details |
| Get the latest status update on a case or ticket | ServiceNow HRSD Get Case Updates | ServiceNow ITSM Get Ticket Updates |
| List their cases or tickets | ServiceNow HRSD Get User Cases | ServiceNow ITSM Get User Tickets |
| Add attachments | ServiceNow HRSD Add Attachments To Case | Supported in ServiceNow ITSM Create Ticket and ServiceNow ITSM Update Ticket |
Each agent also includes these topics:
- Setup Configurations (ServiceNow HRSD Setup Configurations, ServiceNow ITSM Setup Configurations): store configuration values that the other topics use, such as the ServiceNow portal base URL. For details, see Set the ServiceNow portal base URL.
- System topics (topics with System in the name): other topics call these internally. Employees don't trigger them directly. For details, see HRSD system topics and ITSM system topics.
Technical synopsis
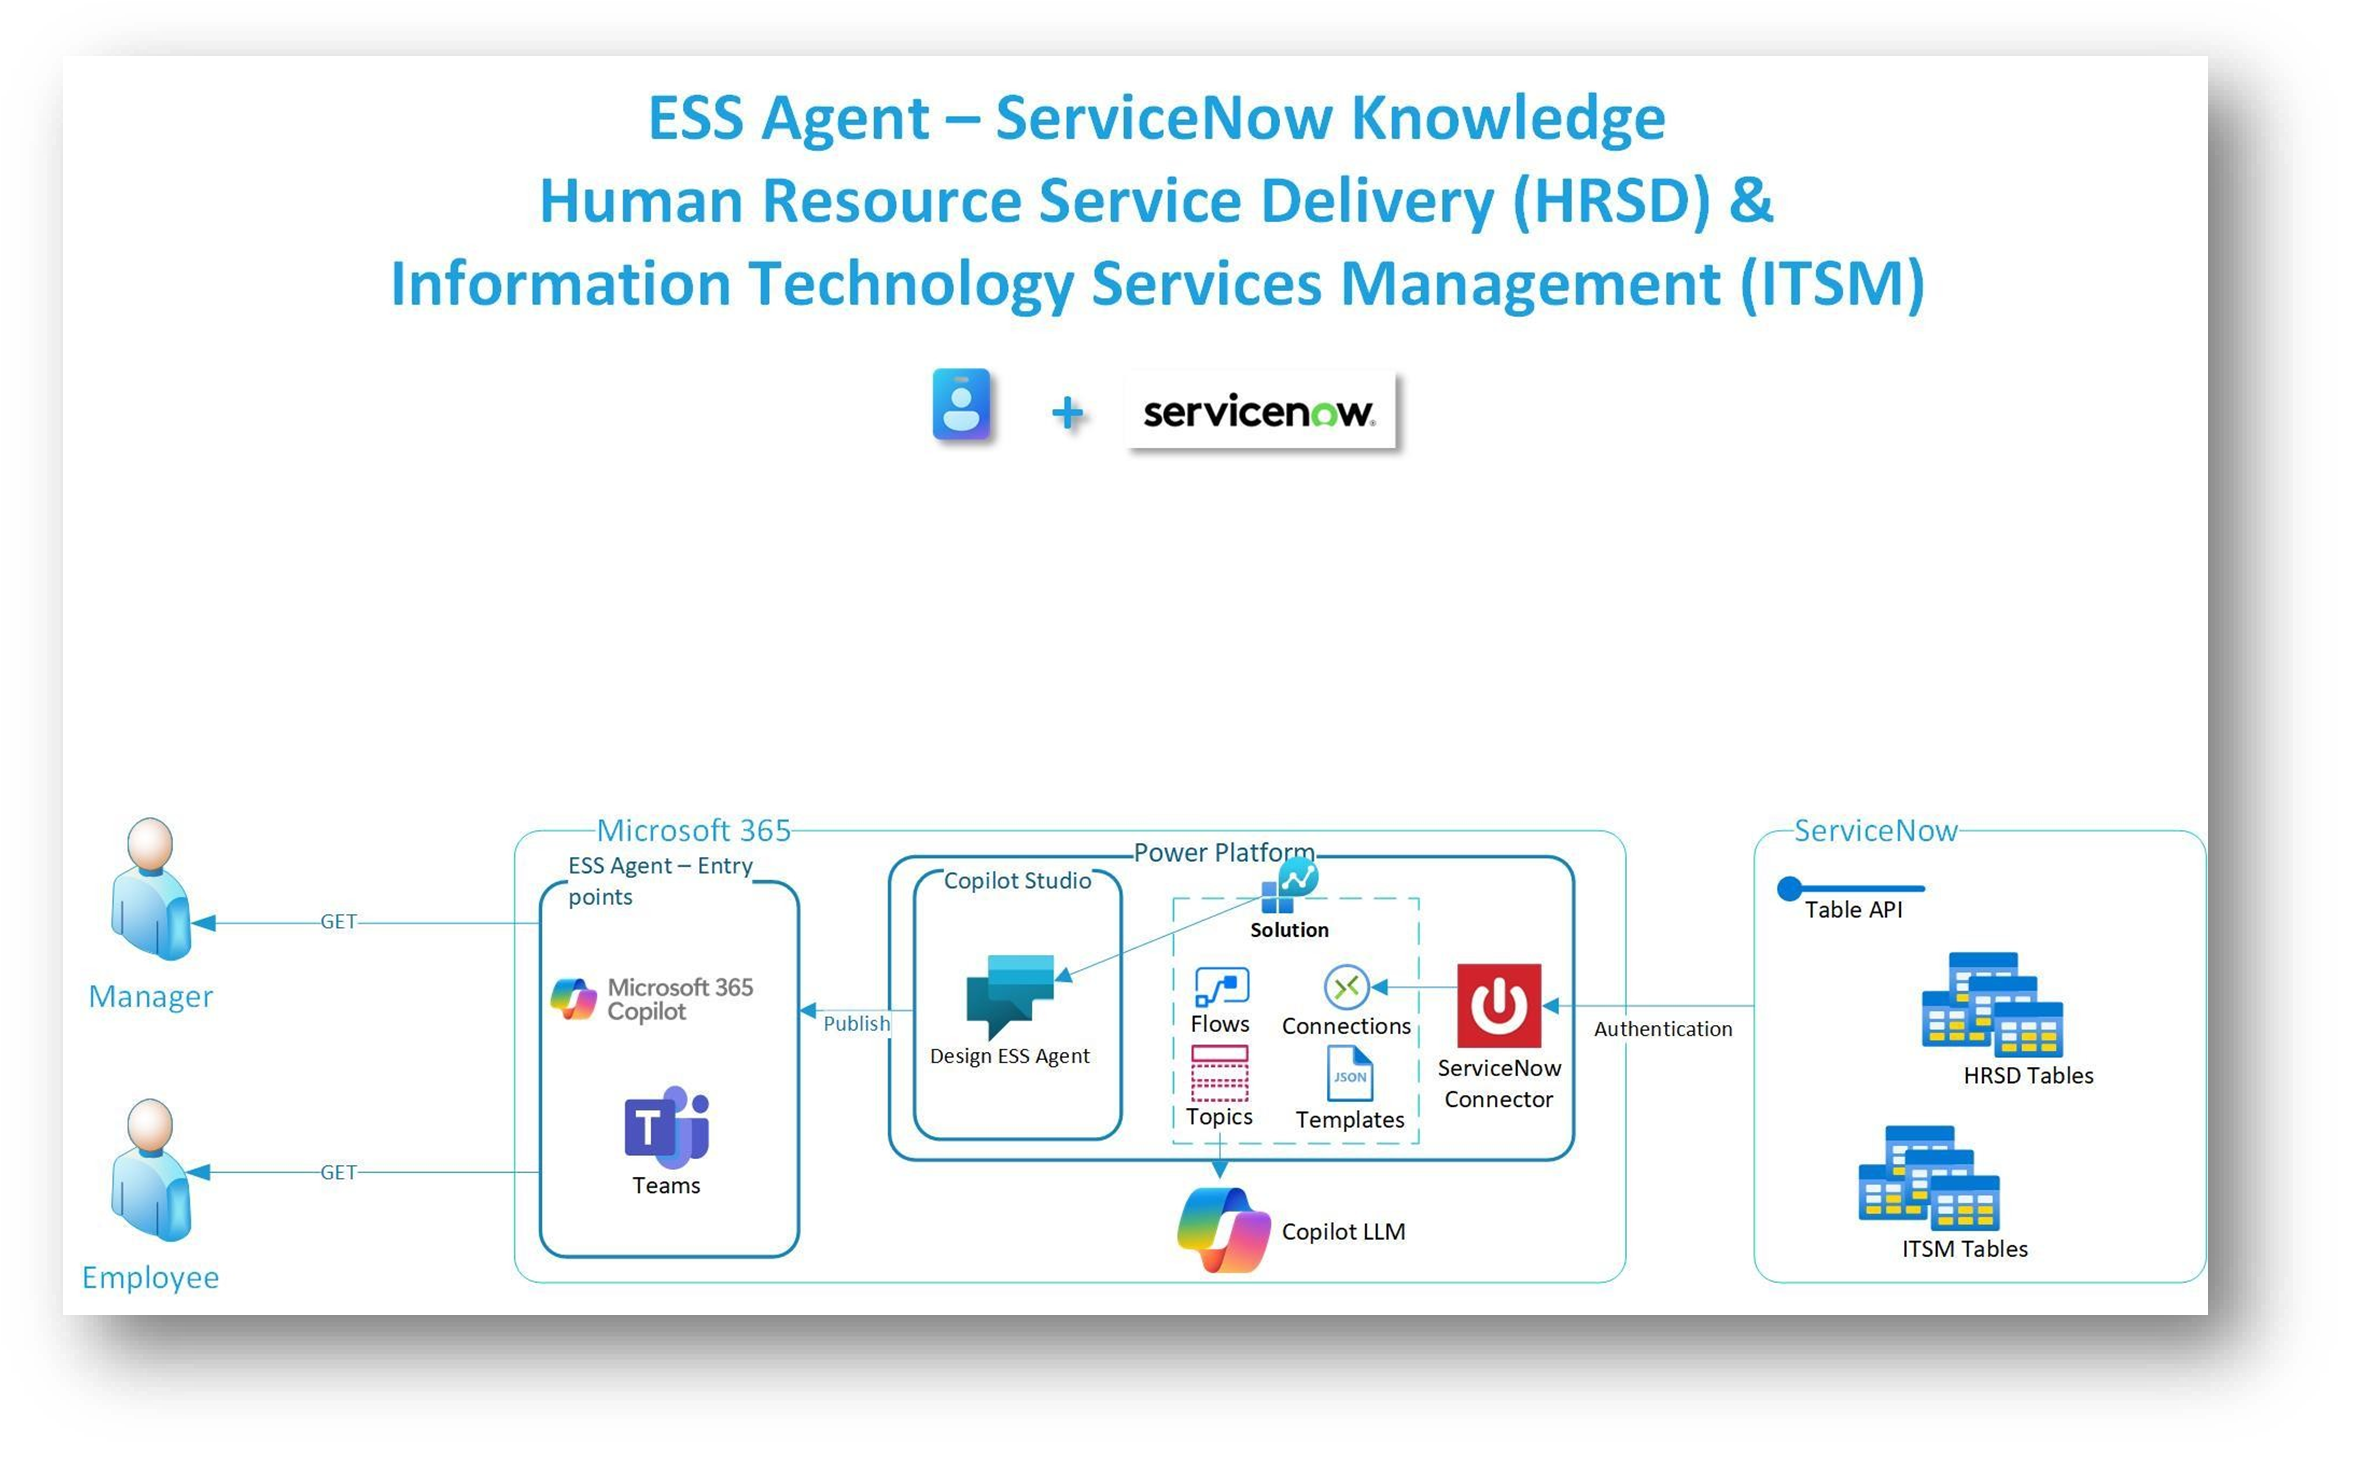
This diagram outlines the high-level components comprising overall solution for the Employee Self-Service agent and ServiceNow HRSD integration. There are different activities to be performed as a part of initial deployment and for an ongoing operation. As the solution involves multiple technologies, it's better to spend some time initially in understanding the various components. When you're ready, you can bring in the right stakeholders to set up an environment to deploy and test the Employee Self-Service agent.
Known issues and limitations
These steps are the known issues and limitations of the Power Platform connector for ServiceNow:
- When using the Create Record action, you can't specify the full record description. The field value is ignored due to ServiceNow REST API limitations.
- The Get Records action might return an "Invalid Table" or other error in Power Apps. For Power Apps implementations the suggested workaround is to use the Get Records action in Power Automate and pass the data back to Power Apps.
For detailed documentation about the connector, see ServiceNow - Connectors.
Prerequisites
- Have a ServiceNow HRSD/ITSM instance
- Have a Microsoft 365 tenant
- Deploy the Employee Self-Service HR agent, IT agent, or both
Refer to the Employee Self-Service agent deployment guide for installation of the agent and subscription requirements required for the Employee Self-Service agent.
Deployment role requirements
| Roles/Persona | Description | Activities performed | Configuration Areas |
|---|---|---|---|
| ServiceNow Administrator | A user who can perform administrative tasks | Create a service account and assign a role to provide read access to specific table records | ServiceNow |
| ServiceNow Security Administrator | A user who can configure OAuth | Create OAuth Application Registry - if using OAuth for ServiceNow connector | ServiceNow |
| Application Developer (minimum privileged role) | A user who can register an application | Create an App registration - if using Microsoft Entra OAuth for ServiceNow connector | Microsoft 365 admin center |
| Environment Maker | A user who can customize Employee Self-Service agent | Configure and customize the Employee Self-Service agent | Microsoft Copilot Studio |
ServiceNow configuration
This section outlines the tasks an administrator needs to configure in ServiceNow for Employee Self-Service.
Important
For employee-facing HR and IT scenarios in the Employee Self-Service agent, use Microsoft Entra ID User sign in so calls run in each signed-in user's context.
Don't use Basic authentication, certificate-based app-token authentication, or other service-token paths for customer-facing Employee Self-Service deployments. These methods can break delegated user-context behavior in BizChat and can trigger impractical user prompts.
For more information, see Securely integrate with external systems.
Note
For all security related tasks in ServiceNow, the logged in user with admin or security_admin role must elevate their access using "Elevate role" option from the profile menu in the top right of navigation bar.
Tip
Without elevating access, the new security objects can't be created. If New button in the top right of configuration pane is missing, then the role isn't elevated to "security_admin".
Microsoft Entra ID user sign-in configuration
This authentication uses delegated user tokens. The user signs in through Microsoft Entra ID and ServiceNow receives calls in that signed-in user's context.
Important
ServiceNow allows only one OIDC provider configuration per tenant because it enforces uniqueness on the OIDC Metadata URL. If you also configure the Microsoft Graph Connector for ServiceNow on the same ServiceNow instance using OIDC, both connectors can't share or duplicate the same OIDC configuration. Review Coexistence with the Microsoft Graph Connector for ServiceNow before you start.
Task 1: Register an application in Microsoft Entra ID for OIDC integration with ServiceNow
Learn how to register an app in Microsoft Entra ID.
- Sign into the Microsoft Entra admin center as a Global Administrator or Cloud App Administrator.
- Go to Applications then App registrations.
- Select New registration.
- In the new registration form, fill in the following fields:
- Name: Any name that represents the purpose of app registration
- Redirect URL: Not needed
- Choose Register to complete the creation of the new app registration.
- Select Token configuration then Add optional claim for adding claims setting.
- Select Token type as Access and choose the following claims:
- Aud - for audience validation
- Email - addressable email for user
- UPN - an identifier for the user
- Select Add to complete adding the claims.
- If it's the first time OpenId Connect being setup using claims like email, UPN, there's a confirmation screen to turn on the Microsoft Graph permissions. If you see the confirmation, check the box, and then select Add.
This flow completes the Microsoft Entra piece of configuration.
Task 2: Register OIDC provider in ServiceNow
Sign in to the ServiceNow instance that needs to be integrated with the Employee Self-Service agent.
Elevate access permissions using Elevate role. Refer to the section Error! Reference source not found. - only the first part and not the tasks.
Select All in the top navigation bar.
Search for "OAuth" in the search box within dropdown navigation menu.
Select System OAuth à Application Registry from the search results (if you don't see this option, you don't have sufficient privileges).
Select New in the configuration section pane.
Select Configure an OIDC provider to verify ID tokens.
Fill in the following information for the new application registry:
Configuration Description Name a meaningful name to identify that this OIDC provider was created for the Employee Self-Service agent Client ID The client ID of Microsoft Entra Application created in Task 1 above Client secret This value isn't used; can be any value Scope Restriction Broadly scoped OAuth OIDC provider configuration Add a new OIDC provider configuration by selecting the search icon and choosing New in the search popup. Fill in the fields as follows:
OIDC Provider: A name that represents the Microsoft Entra tenant from task 1 above.
OIDC Metadata URL:login.microsoftonline.com/<tenant ID>/.well-known/openid-configuration
Replace < tenant ID > with the Microsoft Entra tenant ID from task 1 above.
OIDC Configuration Cache Life Span: 120
Application: Global
User Claim: oid
User Field: User ID
Enable JTI claim verification: disabled
Select Submit and update the OIDC Entity form.
After you complete Task 1 and Task 2, add the ServiceNow connector application to the permission scope with Client ID = c26b24aa-7874-4e06-ad55-7d06b1f79b63.
Update the User Claim in Task 2 to UPN, or to any other claim from the token that identifies the user in ServiceNow. The User Field must match the ServiceNow user table field that contains that value. If your ServiceNow user ID isn't an email or UPN (for example, a salary ID or account name), see Match users when the ServiceNow user ID isn't an email or UPN.
Match users when the ServiceNow user ID isn't an email or UPN
Some organizations identify users in ServiceNow by a value that isn't an email address or Microsoft Entra user principal name (UPN)—for example, a payroll or salary ID such as M043794. The default guidance assumes the Microsoft Entra UPN or email matches the ServiceNow user ID, so user resolution fails when the identity key is different. Use the following approach to authenticate these users with the Microsoft Entra ID OAuth User sign in method.
How user matching works
When a user signs in, Microsoft Entra issues a token that contains claims about the user. The ServiceNow OIDC provider configuration maps one token claim (the User Claim) to a field on the ServiceNow user record (the User Field). ServiceNow resolves the signed-in user by matching the value of the User Claim against the value stored in the User Field. To support a non-email identity key, you need a token claim that carries the same value that ServiceNow stores for the user.
Configure Microsoft Entra to emit the identity key
The identity key must exist as an attribute on the user's Microsoft Entra object and then be emitted as a token claim on the application that represents ServiceNow. Both are standard Microsoft Entra tasks. Follow the Microsoft Entra documentation rather than reproducing the steps here:
- Populate the attribute on each user through HR-driven provisioning, directory synchronization, or directly on the user object. See Plan cloud HR application to Microsoft Entra user provisioning and Microsoft Entra Connect Sync: Attributes synchronized.
- Emit the attribute as a claim on the ServiceNow application, then note the claim name to use in ServiceNow. See Customize claims issued in the JSON web token (JWT) for enterprise applications.
The directory attribute and claim names that are available depend on your tenant configuration. Confirm the attribute is populated for every user who needs ServiceNow access. Users with an empty attribute can't be matched and fail to authenticate.
Important
In the claims mapping configuration, Microsoft Entra sets the claim format to email by default. Because the identity key isn't an email address, change this format setting so that it isn't email format, and choose a format that fits the attribute value you use as the identifier. This setting is easy to miss in the Microsoft Entra admin center. If the format stays set to email, Microsoft Entra doesn't match the non-email identifier, and sign-in fails.
Note
Emitting a customized claim might require a custom signing key or the acceptMappedClaims property on the application; otherwise, Microsoft Entra returns an error. For single-tenant apps, you can set acceptMappedClaims to true in the application manifest. For details, see Customize claims issued in the JSON web token (JWT) for enterprise applications.
Set the Employee Self-Service OIDC mapping in ServiceNow
Set the following fields in the OIDC provider configuration you created in Task 2: Register OIDC provider in ServiceNow so ServiceNow matches users on the identity key instead of email or UPN:
| OIDC configuration field | Value for a non-email identity key |
|---|---|
| User Claim | The custom claim emitted from Microsoft Entra that carries the identity key (for example, salaryid), rather than upn or email. |
| User Field | The ServiceNow sys_user field that stores the same identity key, for example, the field that holds the employee or account ID. |
Select Submit and update the OIDC Entity form.
Validate the configuration
After you complete the setup, sign in as a test user and confirm ServiceNow resolves the correct user. A mismatch—an empty claim, a claim value that doesn't match the User Field, or a misnamed claim—causes authentication to fail silently rather than return an explicit error. To troubleshoot, inspect the token claims issued by Microsoft Entra and confirm the claim value exactly matches the value stored in the ServiceNow User Field.
Coexistence with the Microsoft Graph Connector for ServiceNow
Some customers can't configure both the Employee Self-Service ServiceNow Power Platform (PP) connector and the ServiceNow Microsoft Graph Connector (GC) in the same ServiceNow instance. ServiceNow supports only one OIDC configuration per tenant, while the two connectors require different authentication flows and token-claim mappings.
Token expectation differences (why a single OIDC setup can't satisfy both connectors):
- PP connector: delegated (user) tokens; user-centric claims (such as
oid); usesupnmapped to the ServiceNow Email field. - GC connector: app-only tokens; relies on the
sub(oroid) claim mapped to the ServiceNow User ID field.
For coexistence guidance and latest options, use the ServiceNow Knowledge Microsoft Copilot connector documentation. Keep the Employee Self-Service ServiceNow Power Platform connector on Microsoft Entra ID user sign-in.
Connect the agents to ServiceNow
After you complete the ServiceNow configuration, connect each agent to your ServiceNow instance. You don't need to share connection parameters with employees; each employee's calls run in their own signed-in context.
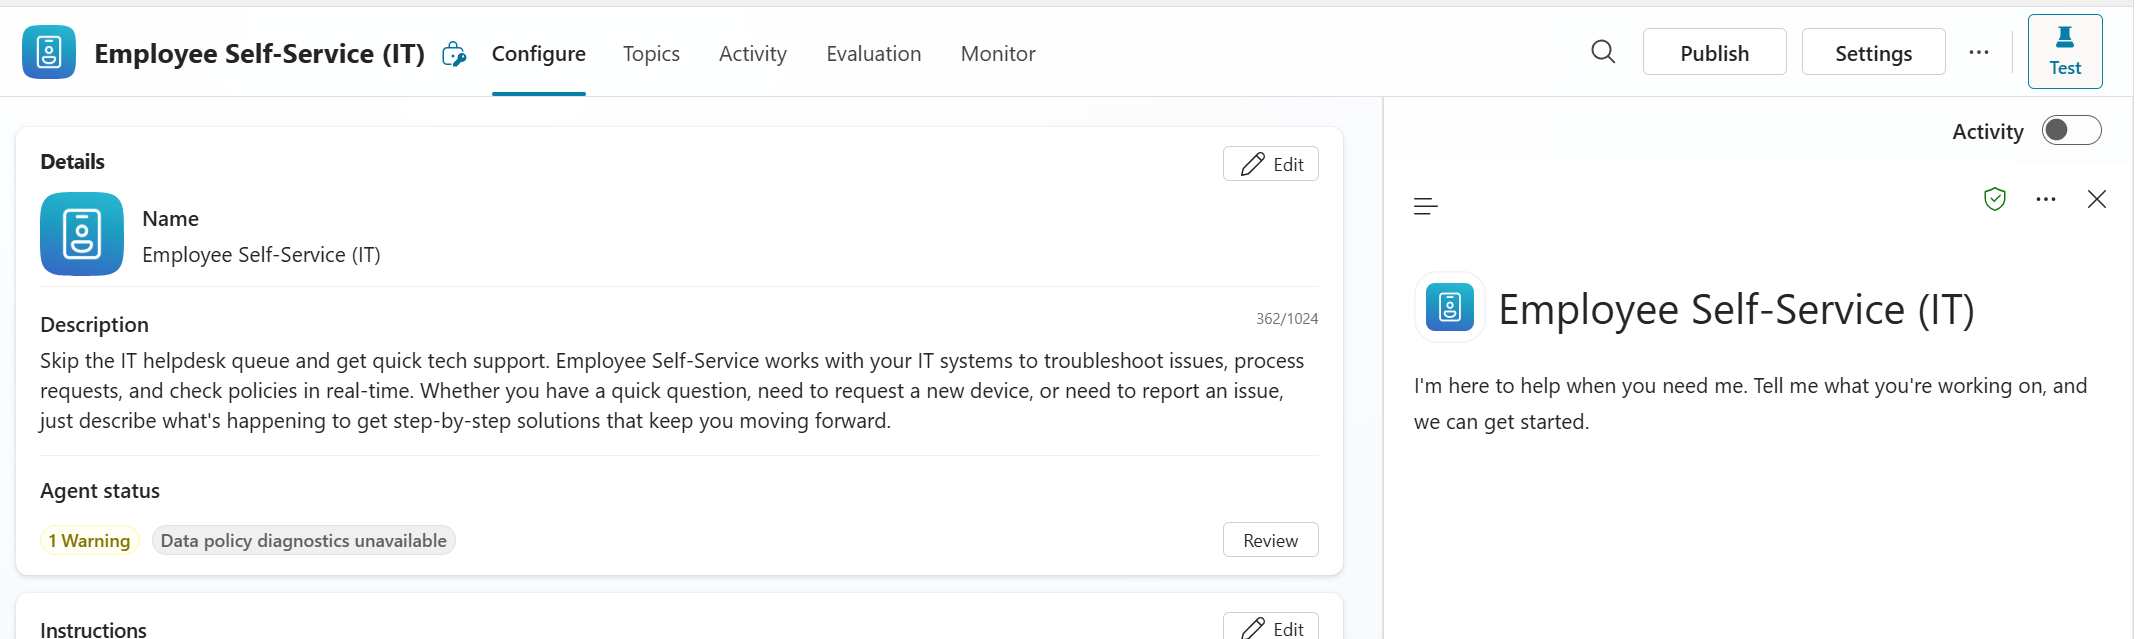
In Copilot Studio, open the Employee Self-Service (HR) agent and select Settings.
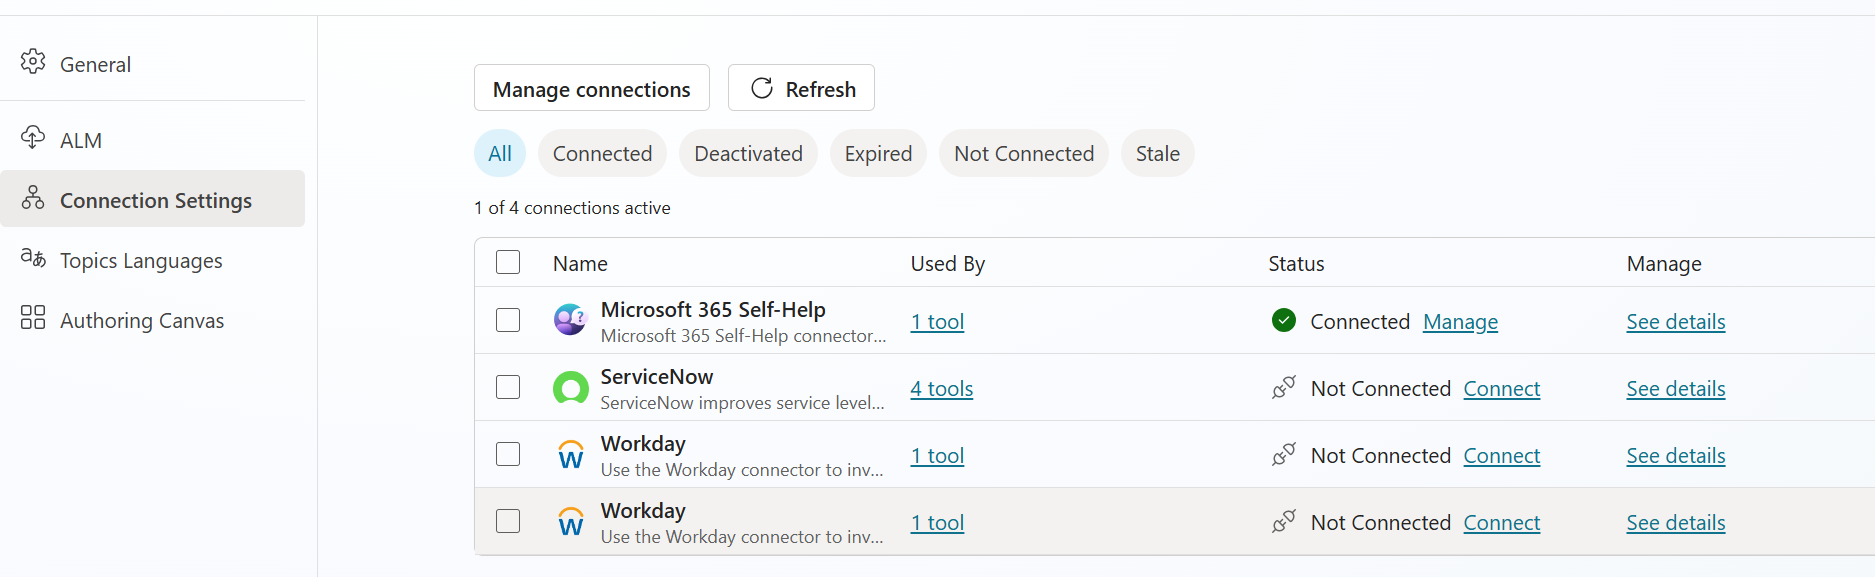
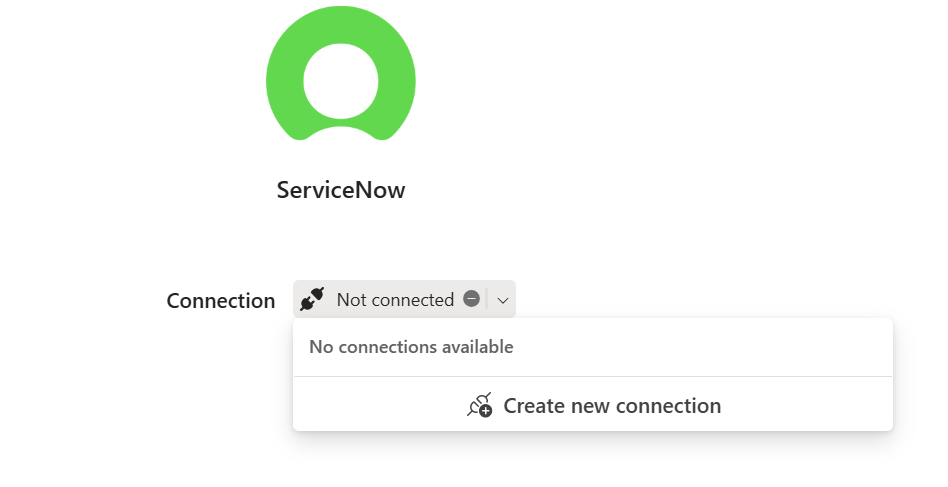
Select Connection Settings. The ServiceNow connection shows the status Not Connected. Select Connect.
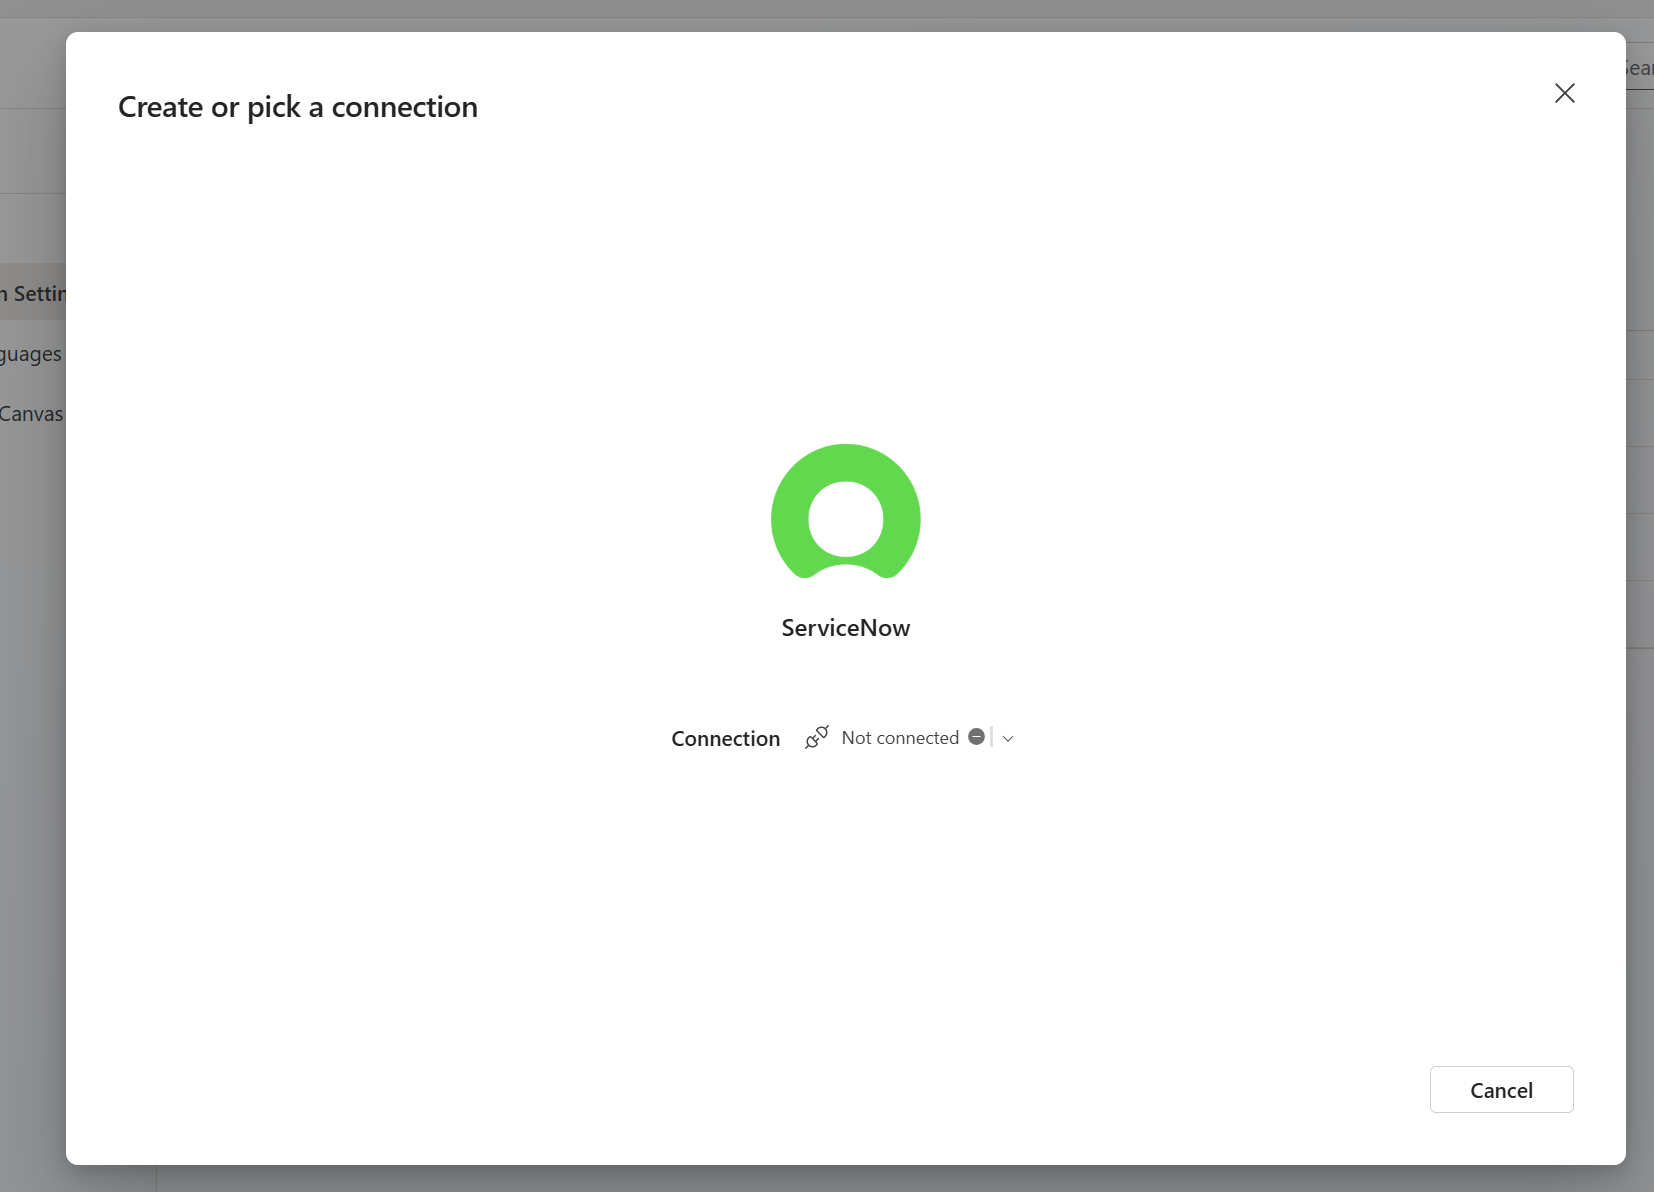
In the Create or pick a connection dialog, open the Connection list.
Select Create new connection.
Optionally, enter a Display name for the connection. For Authentication Type, select Microsoft Entra ID User Login.
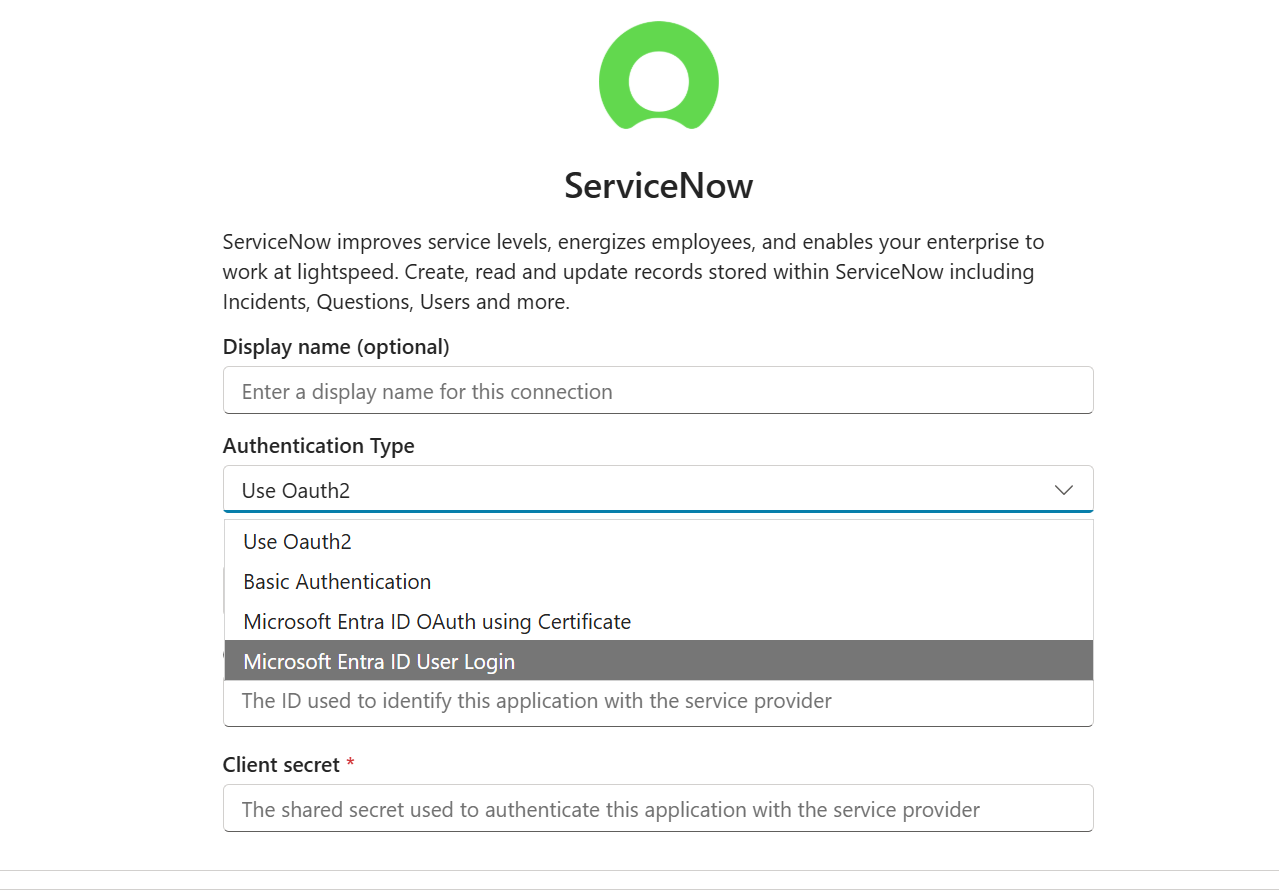
Enter the following values:
Field Value Resource URI The client ID of the Microsoft Entra application that you created in Task 1 of Microsoft Entra ID user sign-in configuration. Instance name The name of your ServiceNow instance. For example, enter contoso, not the full URL or domain name such as contoso.service-now.com.Select Create. The ServiceNow connection shows as Connected.
Repeat these steps for the Employee Self-Service (IT) agent.
For the IT agent, you can reuse the ServiceNow connection that you created for the HR agent or create a dedicated connection. To reuse the connection, select it from the Connection list instead of selecting Create new connection.
Turn on the ServiceNow topics
Turn on the ServiceNow topics in each agent:
- HR agent: Turn on all topics whose names start with ServiceNow HRSD.
- IT agent: Turn on all topics whose names start with ServiceNow ITSM.
These sets include the system topics. For the full list, see ServiceNow - HRSD and ServiceNow - ITSM.
To turn on a topic:
- In Copilot Studio, open the agent and select the Topics tab.
- Select the All filter. System topics are also listed under the System filter.
- For each topic, set the Enabled toggle to On.
Set the ServiceNow portal base URL
The agents use the ServiceNow portal base URL to build links back to records in ServiceNow. If you don't set it, scenarios that return a list of tickets or cases, such as when an employee asks to see all their tickets, can return results without working ServiceNow links. Setting the base URL makes sure that ticket and case links open in the correct ServiceNow portal.
You set the base URL in the Setup Configurations topic of each agent:
| Agent | Topic | Example value |
|---|---|---|
| HR | ServiceNow HRSD Setup Configurations | https://contoso.service-now.com/sp |
| IT | ServiceNow ITSM Setup Configurations | https://contoso.service-now.com/esc |
The value is the portal root: the scheme, host, and portal path. The agent appends the record-specific part of the link. The portal path depends on your ServiceNow portal configuration. Common paths are /sp for the Service Portal and /esc for the Employee Service Center. Your ServiceNow administrator knows the correct portal URL. In the examples, contoso is the ServiceNow instance name.
To set the base URL:
In Copilot Studio, open the Employee Self-Service (HR) agent and select the Topics tab.
Open the ServiceNow HRSD Setup Configurations topic.
Find the Set ServiceNow Portal BaseURI node.
In To value, replace the existing value with your ServiceNow portal base URL.
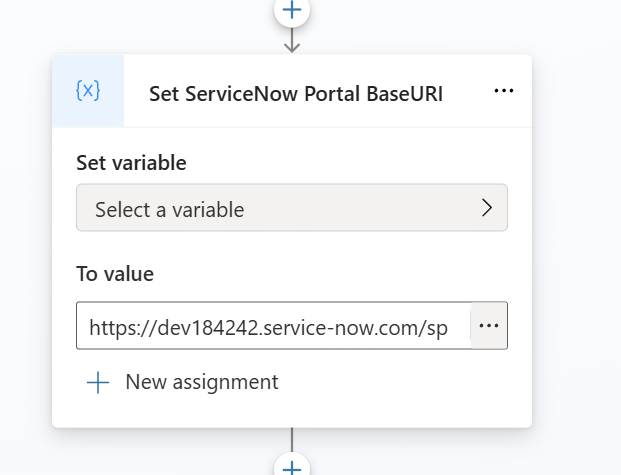
Save the topic.
Repeat these steps in the Employee Self-Service (IT) agent, using the ServiceNow ITSM Setup Configurations topic.
ServiceNow - HRSD
HRSD topics
The Employee Self-Service HR agent includes the following ServiceNow HRSD topics. Employees trigger them through the agent.
| Topic | Description |
|---|---|
| ServiceNow HRSD Add Attachments To Case | Adds attachments to an existing HR case. |
| ServiceNow HRSD Create Case | Creates an HR case in ServiceNow from the employee's request. |
| ServiceNow HRSD Get Case Details | Gets full details of an HR case, such as number, description, and state. |
| ServiceNow HRSD Get Case Updates | Gets a short summary of the latest updates on an HR case. It's less detailed than case details. |
| ServiceNow HRSD Get User Cases | Lists the employee's HR cases. |
| ServiceNow HRSD Setup Configurations | Stores the configuration values the HRSD topics use, such as the ServiceNow portal base URL. Employees don't trigger it. |
| ServiceNow HRSD Update Case | Updates an existing HR case: comments, state, and close code or notes. |
Note
Copilot Studio also shows system topics for HRSD. Other topics call them; employees don't trigger them directly, and you can't customize them. For details, see HRSD system topics.
HRSD system topics
The HR agent also includes these system topics. They appear in the Topics list in Copilot Studio, but other topics call them; the agent doesn't trigger them directly. You can't customize these topics.
| Topic | Purpose |
|---|---|
| ServiceNow HRSD System Case Details Cache Lookup | Looks up case details from the cache. |
| ServiceNow HRSD System Common Execution | Shared orchestration logic for all HRSD scenarios. |
| ServiceNow HRSD System Create Case | Internal processing for case creation. |
| ServiceNow HRSD System Create Case Execution | Runs the ServiceNow call that creates the case. |
| ServiceNow HRSD System Get Case Details | Internal processing for retrieving case details. |
| ServiceNow HRSD System Get Cases List | Internal processing for retrieving the employee's case list. |
| ServiceNow HRSD System Get Metadata Cached | Caches HR service metadata from ServiceNow. |
| ServiceNow HRSD System Read Execution | Runs read calls to ServiceNow, such as getting case details or lists. |
| ServiceNow HRSD System Response Mapper | Maps ServiceNow responses into the format the agent shows to employees. |
| ServiceNow HRSD System Update Case | Internal processing for case updates. |
| ServiceNow HRSD System Update Execution | Runs the ServiceNow call that updates the case. |
| ServiceNow HRSD System User Permission Check | Validates that the employee has permission to update the case. |
ServiceNow - ITSM
ITSM topics
The ServiceNow ITSM integration focuses on incident management. It lets employees create, read, and update ServiceNow incidents. The Employee Self-Service IT agent includes the following ServiceNow ITSM topics, which employees trigger through the agent.
| Topic | Description |
|---|---|
| ServiceNow ITSM Create Ticket | Collects details such as description and severity, and creates an IT ticket in ServiceNow. Employees can add attachments. After creation, an adaptive card shows the ticket details. |
| ServiceNow ITSM Get Ticket Details | Gets full details of an IT ticket, such as number, short and full description, and state. |
| ServiceNow ITSM Get Ticket Updates | Gets the latest update on the employee's most recent IT ticket. |
| ServiceNow ITSM Get User Tickets | Lists the employee's active or closed IT tickets. Uses a cached list when available. |
| ServiceNow ITSM Setup Configurations | Stores the configuration values the ITSM topics use, such as the ServiceNow portal base URL. Employees don't trigger it. |
| ServiceNow ITSM Update Ticket | Updates an existing IT ticket with comments, attributes, or attachments. Checks that the employee has permission to update it. |
Note
Copilot Studio also shows system topics for ITSM. Other topics call them; employees don't trigger them directly, and you can't customize them. For details, see ITSM system topics.
ITSM system topics
The IT agent also includes these system topics. They appear in the Topics list in Copilot Studio, but other topics call them; the agent doesn't trigger them directly. You can't customize these topics.
| Topic | Purpose |
|---|---|
| ServiceNow ITSM System Common Execution | Shared orchestration logic for all ITSM scenarios. |
| ServiceNow ITSM System Create Ticket | Internal processing for ticket creation. |
| ServiceNow ITSM System Get Ticket Details | Internal processing for retrieving ticket details. |
| ServiceNow ITSM System Get Tickets List | Internal processing for retrieving the employee's ticket list. |
| ServiceNow ITSM System Read Execution | Runs read calls to ServiceNow, such as getting ticket details or lists. |
| ServiceNow ITSM System Response Mapper | Maps ServiceNow responses into the format the agent shows to employees. |
| ServiceNow ITSM System Update Ticket | Internal processing for ticket updates. |
| ServiceNow ITSM System User Permission Check | Validates that the employee has permission to update a ticket. |
| ServiceNow ITSM System Write Execution | Runs write calls to ServiceNow, such as creating or updating tickets. |
References
- ServiceNow - Connectors
- External ID Token Authentication (OIDC) for Rest APIs - Support and Troubleshooting
- ServiceNow Catalog Microsoft Copilot connector | Microsoft Learn
For ServiceNow Knowledge documentation, refer to the following link, which requires ServiceNow logins: