Note
Access to this page requires authorization. You can try signing in or changing directories.
Access to this page requires authorization. You can try changing directories.
Building on how organizations already use Logic Apps to automate security workflows, a new connector action for Security Copilot in Logic Apps flows allows teams to easily invoke agents they create as part of repeatable workflows. This automated workflow brings deeper AI-driven investigation, context, and decision support into tasks such as incident triage, threat intelligence analysis, and policy validation.
This article explains how to trigger Microsoft Security Copilot agents within the automated Azure Logic Apps workflows by configuring prerequisites, adding the agent action in Logic Apps, and verifying the agent run in Security Copilot.
Using the Security Copilot Logic Apps agent connector, you can:
Trigger previously configured Microsoft Security Copilot agents from Logic App
Chain agent execution with other Logic Apps actions
Pass inputs dynamically from earlier workflow steps including advanced parameter support
Before you begin
Make sure you have the following resources and permissions:
Access to Microsoft Security Copilot with permission to create and run agents.
An agent that is already created and configured (agent that is set up and ready to run) in Security Copilot.
Note
When you create your own agent, you must upload the plugin containing the agent to Anyone in this Workspace to be available for triggering from Logic Apps.
Access to Azure Logic Apps (Consumption or Standard).
Permission to create connections in Azure Logic Apps.
Step 1: Set up an agent in Security Copilot
Logic Apps can only trigger agents that are fully configured and available in your Security Copilot workspace.
- Create a new agent or select an existing agent in Security Copilot. The following table provides reference to documentation for creating agents:
| Type | Description |
|---|---|
| Plugins | Build and upload a custom plugin |
| Agents | Build custom agents using natural language or the agent builder form |
Complete the agent Set up process. For more information, see Setup agents.
Configure the agent run identity during setup.
This identity is used when the agent executes.
It is separate from the identity used to sign in to the Logic Apps connector.
If you create your own custom agent, you must upload as a plugin that contains the agent and set sharing to Anyone in this workspace, so that the agent is available to trigger from Azure Logic Apps.

The illustration shows the agents that are set up and ready to use in the Agents in use section.
Note
Currently, agents must be created and set up in the default workspace. Agents created in non-default workspace aren't available to trigger from Logic Apps. So, if an agent isn't shared with the workspace or is missing required setup, it does not appear in Logic Apps.
Step 2: Add an action in Azure Logic Apps
In the Azure portal, create a new Logic App or open an existing one.
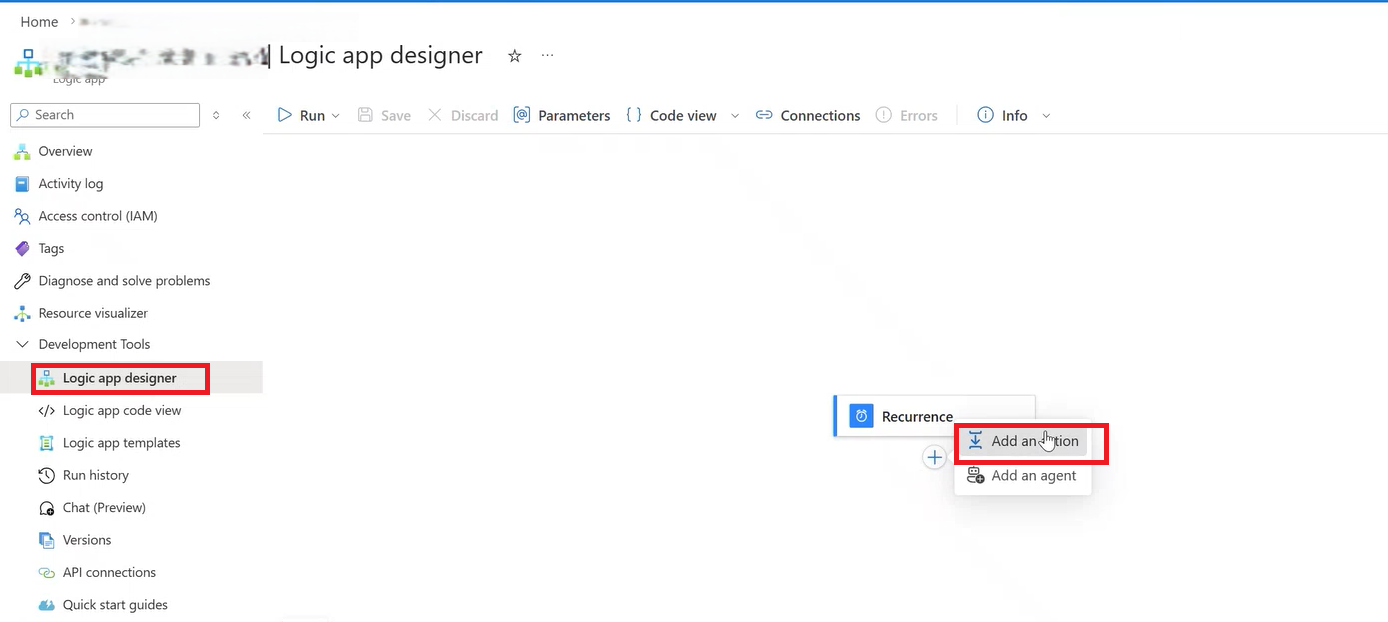
Open the Logic app designer.
Add a trigger as the first step to start any workflow in Azure Logic Apps. For information on adding a trigger, see Add a trigger.
Select Add an action in the Logic app designer.

Step 3: Add the Security Copilot agent action
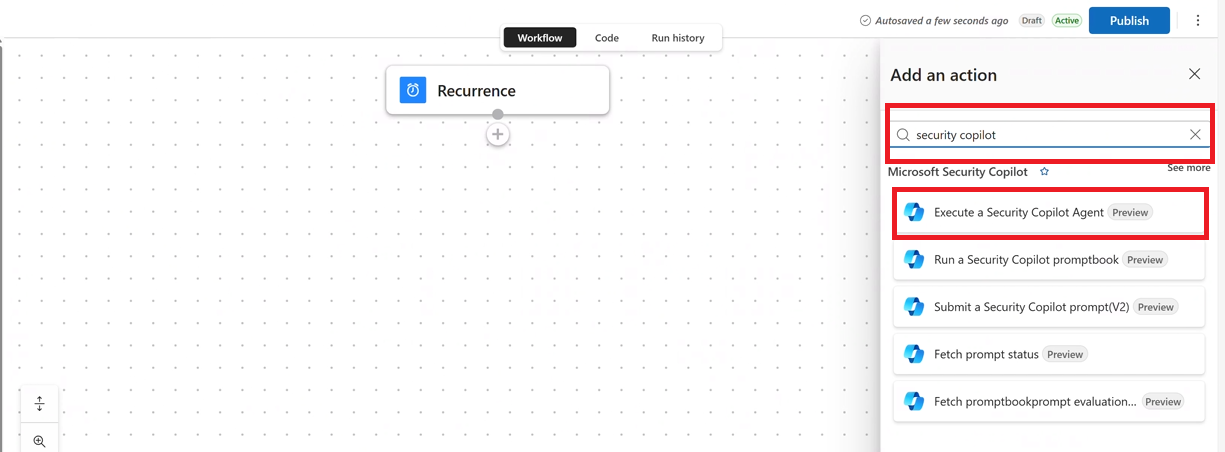
Search for Security Copilot connector. The Security Copilot actions are displayed.
Select the action Execute a Security Copilot Agent.

Step 4: Create the connector connection
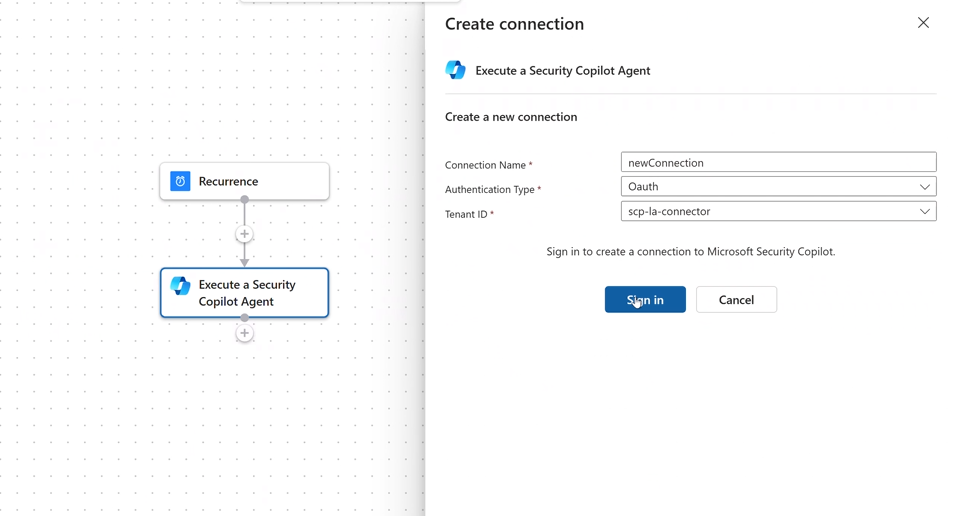
Create a connection when you add the agent action for the first time.
The Create connection window is displayed.
Sign in with an identity that has access to Security Copilot to create a new connection.

Important
The connection sign-in identity is used only to access Security Copilot. The agent itself runs using the agent run identity configured during agent setup.
Step 5: Configure the agent parameters
In the Agent Name field, select the agent you want to run.
Select the trigger configuration (the default trigger is typically sufficient).
Provide required parameters.
Fill in all the required inputs.
Find optional inputs under Advanced parameters.
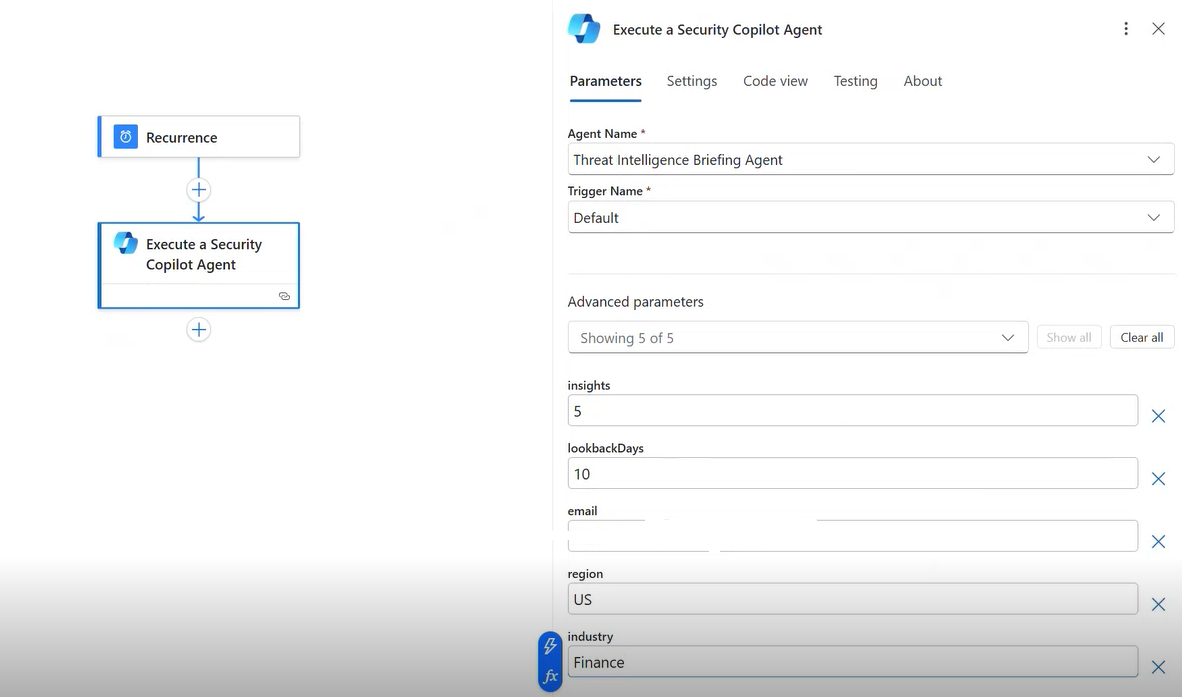
(Optional) You can pass in outputs of previous steps as agent inputs.
Select Save to save the workflow.
Run the Logic App manually or wait for the trigger to fire.
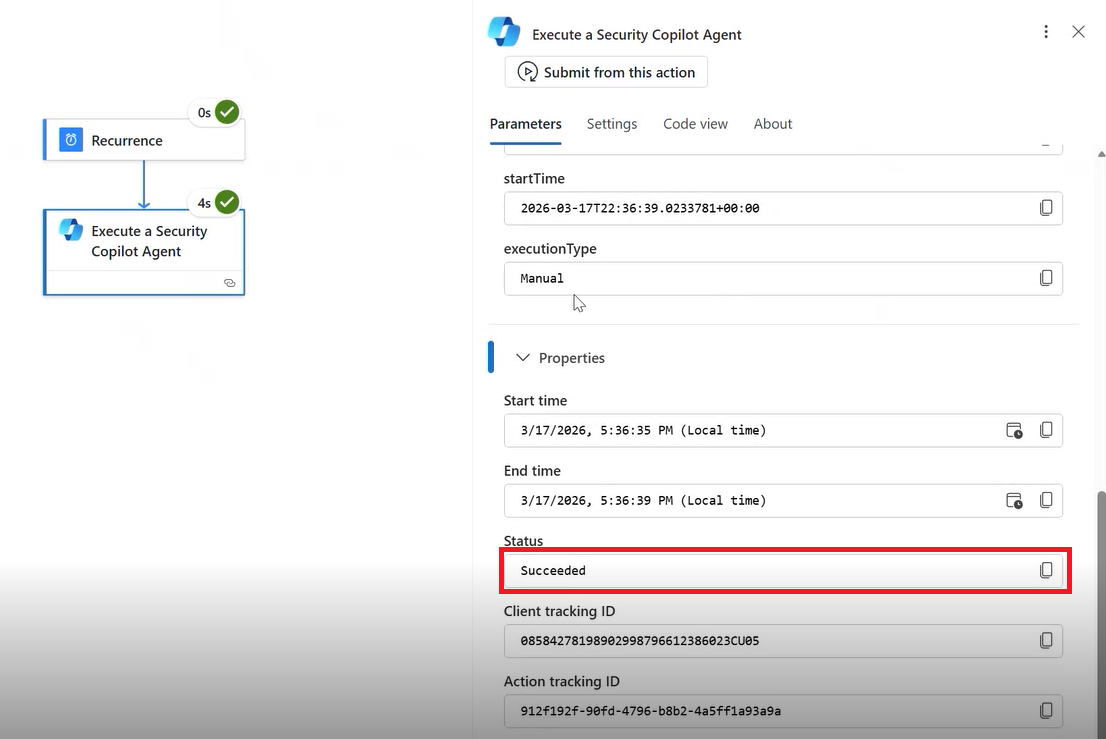
Select Show runs to see the Runs history. Confirm that the agent action completed successfully.
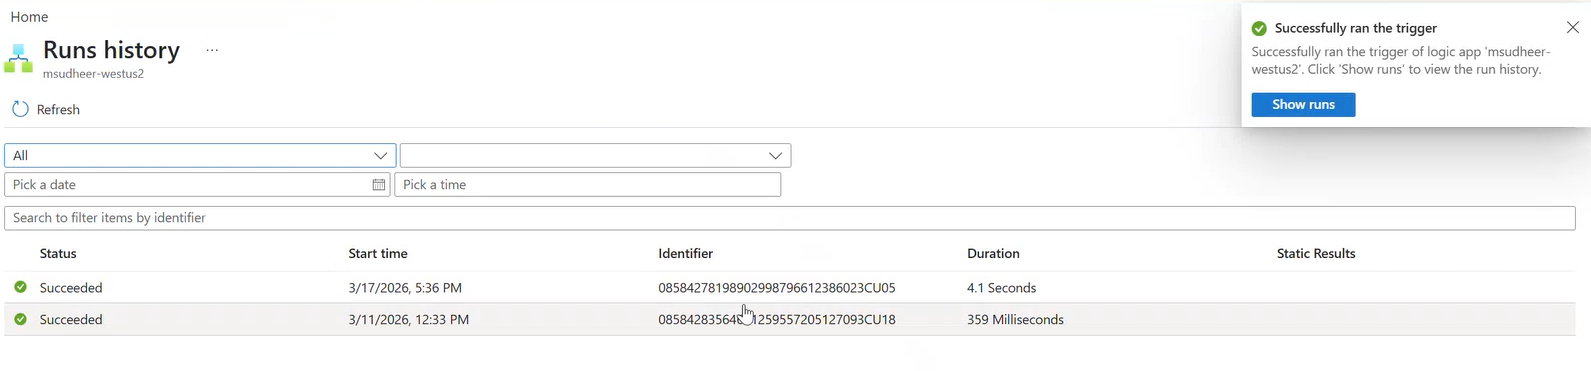
You can also see the response in the Status as Succeeded.


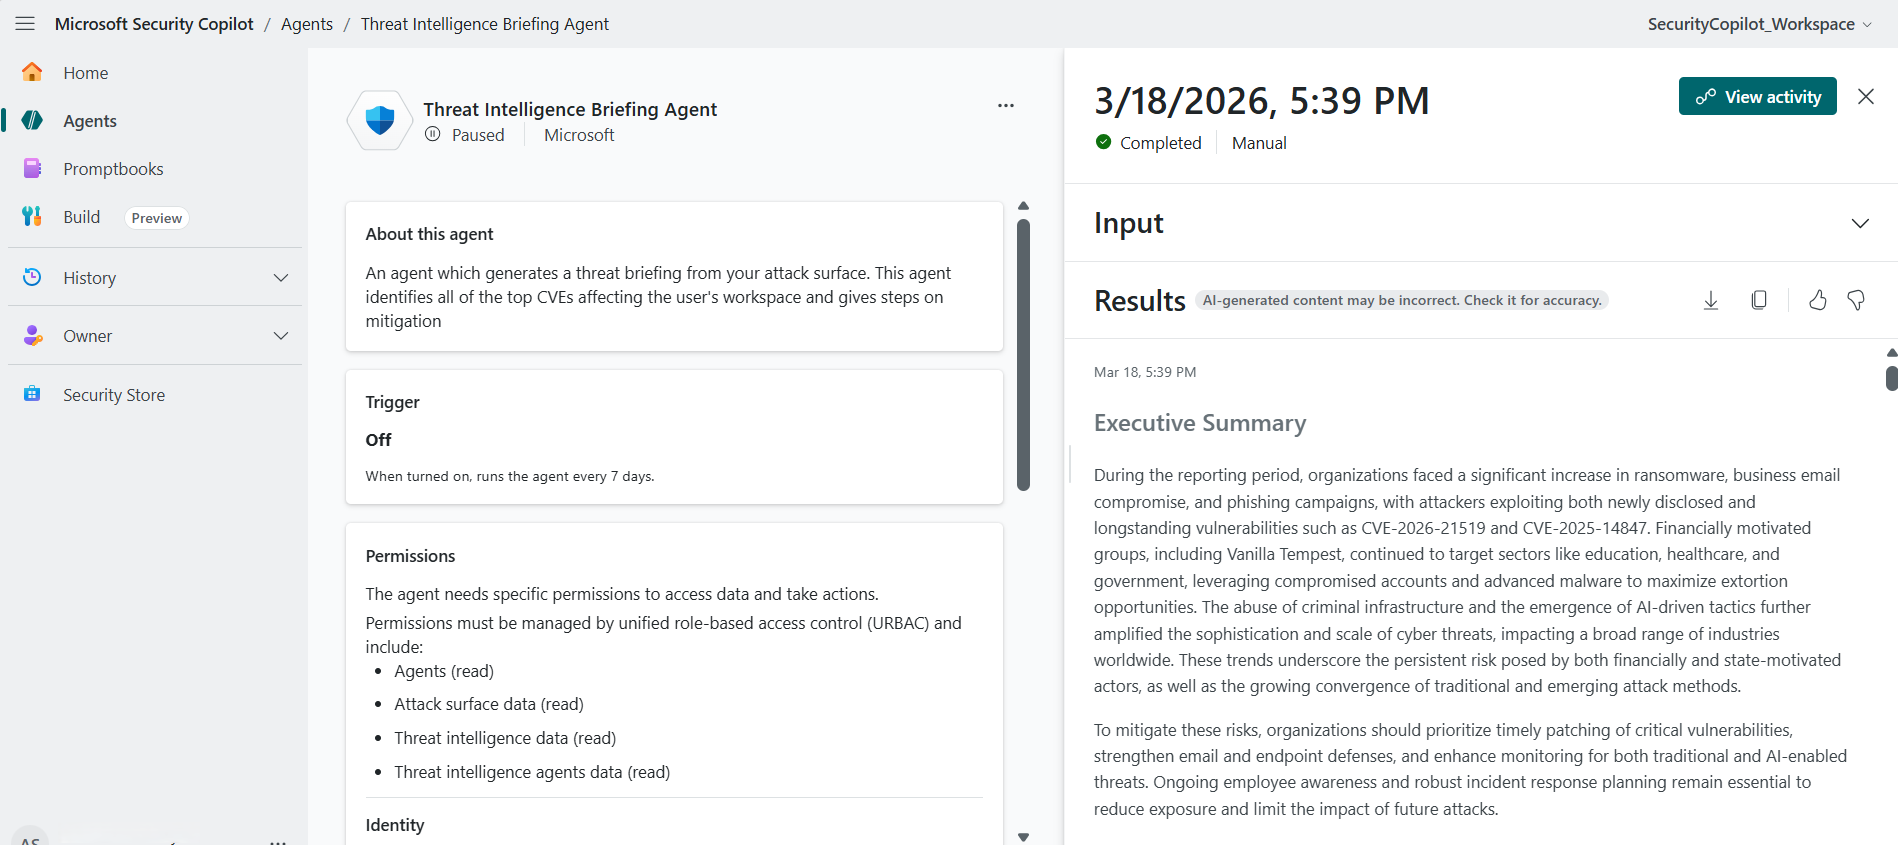
Step 6: Verify the agent run in Security Copilot
Navigate to Security Copilot.
Open the agent you triggered.
Confirm that the agent run appears in the agent run history.

You can also edit the Logic Apps action to select a different agent.
Troubleshooting
Agent doesn't appear in Logic Apps
Make sure you fully set up the agent in Security Copilot.
For custom agents, confirm you share the plugin that contains the agent with Anyone in this workspace so the agent is available to trigger from Logic Apps.
Permission or sign-in errors
Verify the Logic Apps connection identity has access to Security Copilot.
Verify the agent run identity has the required permissions.
Missing required inputs
- Check that you provide all required agent inputs in the action configuration.