Note
Access to this page requires authorization. You can try signing in or changing directories.
Access to this page requires authorization. You can try changing directories.
The Microsoft Defender for Cloud Apps integration with Microsoft Defender for Endpoint provides a seamless Shadow IT visibility and control solution. Our integration enables Defender for Cloud Apps administrators to block access of end users to cloud apps, by natively integrating Defender for Cloud Apps app governance controls with Microsoft Defender for Endpoint's network protection. Alternatively, administrators can take a gentler approach of warning users when they access risky cloud apps.
Defender for Cloud Apps uses the built-in Unsanctioned app tag to mark cloud apps as prohibited for use, available in both the Cloud Discovery and Cloud App Catalog pages. By enabling the integration with Defender for Endpoint, you can seamlessly block access to unsanctioned apps with a single click in Defender for Cloud Apps.
Apps marked as Unsanctioned in Defender for Cloud Apps are automatically synced to Defender for Endpoint. More specifically, the domains used by these unsanctioned apps are propagated to endpoint devices to be blocked by Microsoft Defender Antivirus within the Network Protection SLA.
Note
The time latency to block an app via Defender for Endpoint is up to three hours from the moment you mark the app as unsanctioned in Defender for Cloud Apps to the moment the app is blocked in the device. This is due to up to one hour of synchronization of Defender for Cloud Apps sanctioned/unsanctioned apps to Defender for Endpoint, and up to two hours to push the policy to the devices in order to block the app once the indicator was created in Defender for Endpoint.
Prerequisites
One of the following licenses:
- Defender for Cloud Apps + Endpoint
- Microsoft 365 E5
Microsoft Defender Antivirus. For more information, see:
One of the following supported operating systems:
- Windows: Windows versions 10 18.09 (RS5) OS Build 1776.3, 11, and higher
- Android: minimum version 8.0: For more information see: Microsoft Defender for Endpoint on Android
- iOS: minimum version 14.0: For more information see: Microsoft Defender for Endpoint on iOS
- macOS: minimum version 11: For more information see: Network protection for macOS
- Linux system requirements: For more information see: Network protection for Linux
Microsoft Defender for Endpoint onboarded. For more information, see Onboard Defender for Cloud Apps with Defender for Endpoint.
Administrator access to make changes in Defender for Cloud Apps. For more information, see Manage admin access.
Enable cloud app blocking with Defender for Endpoint
Use the following steps to enable access control for cloud apps:
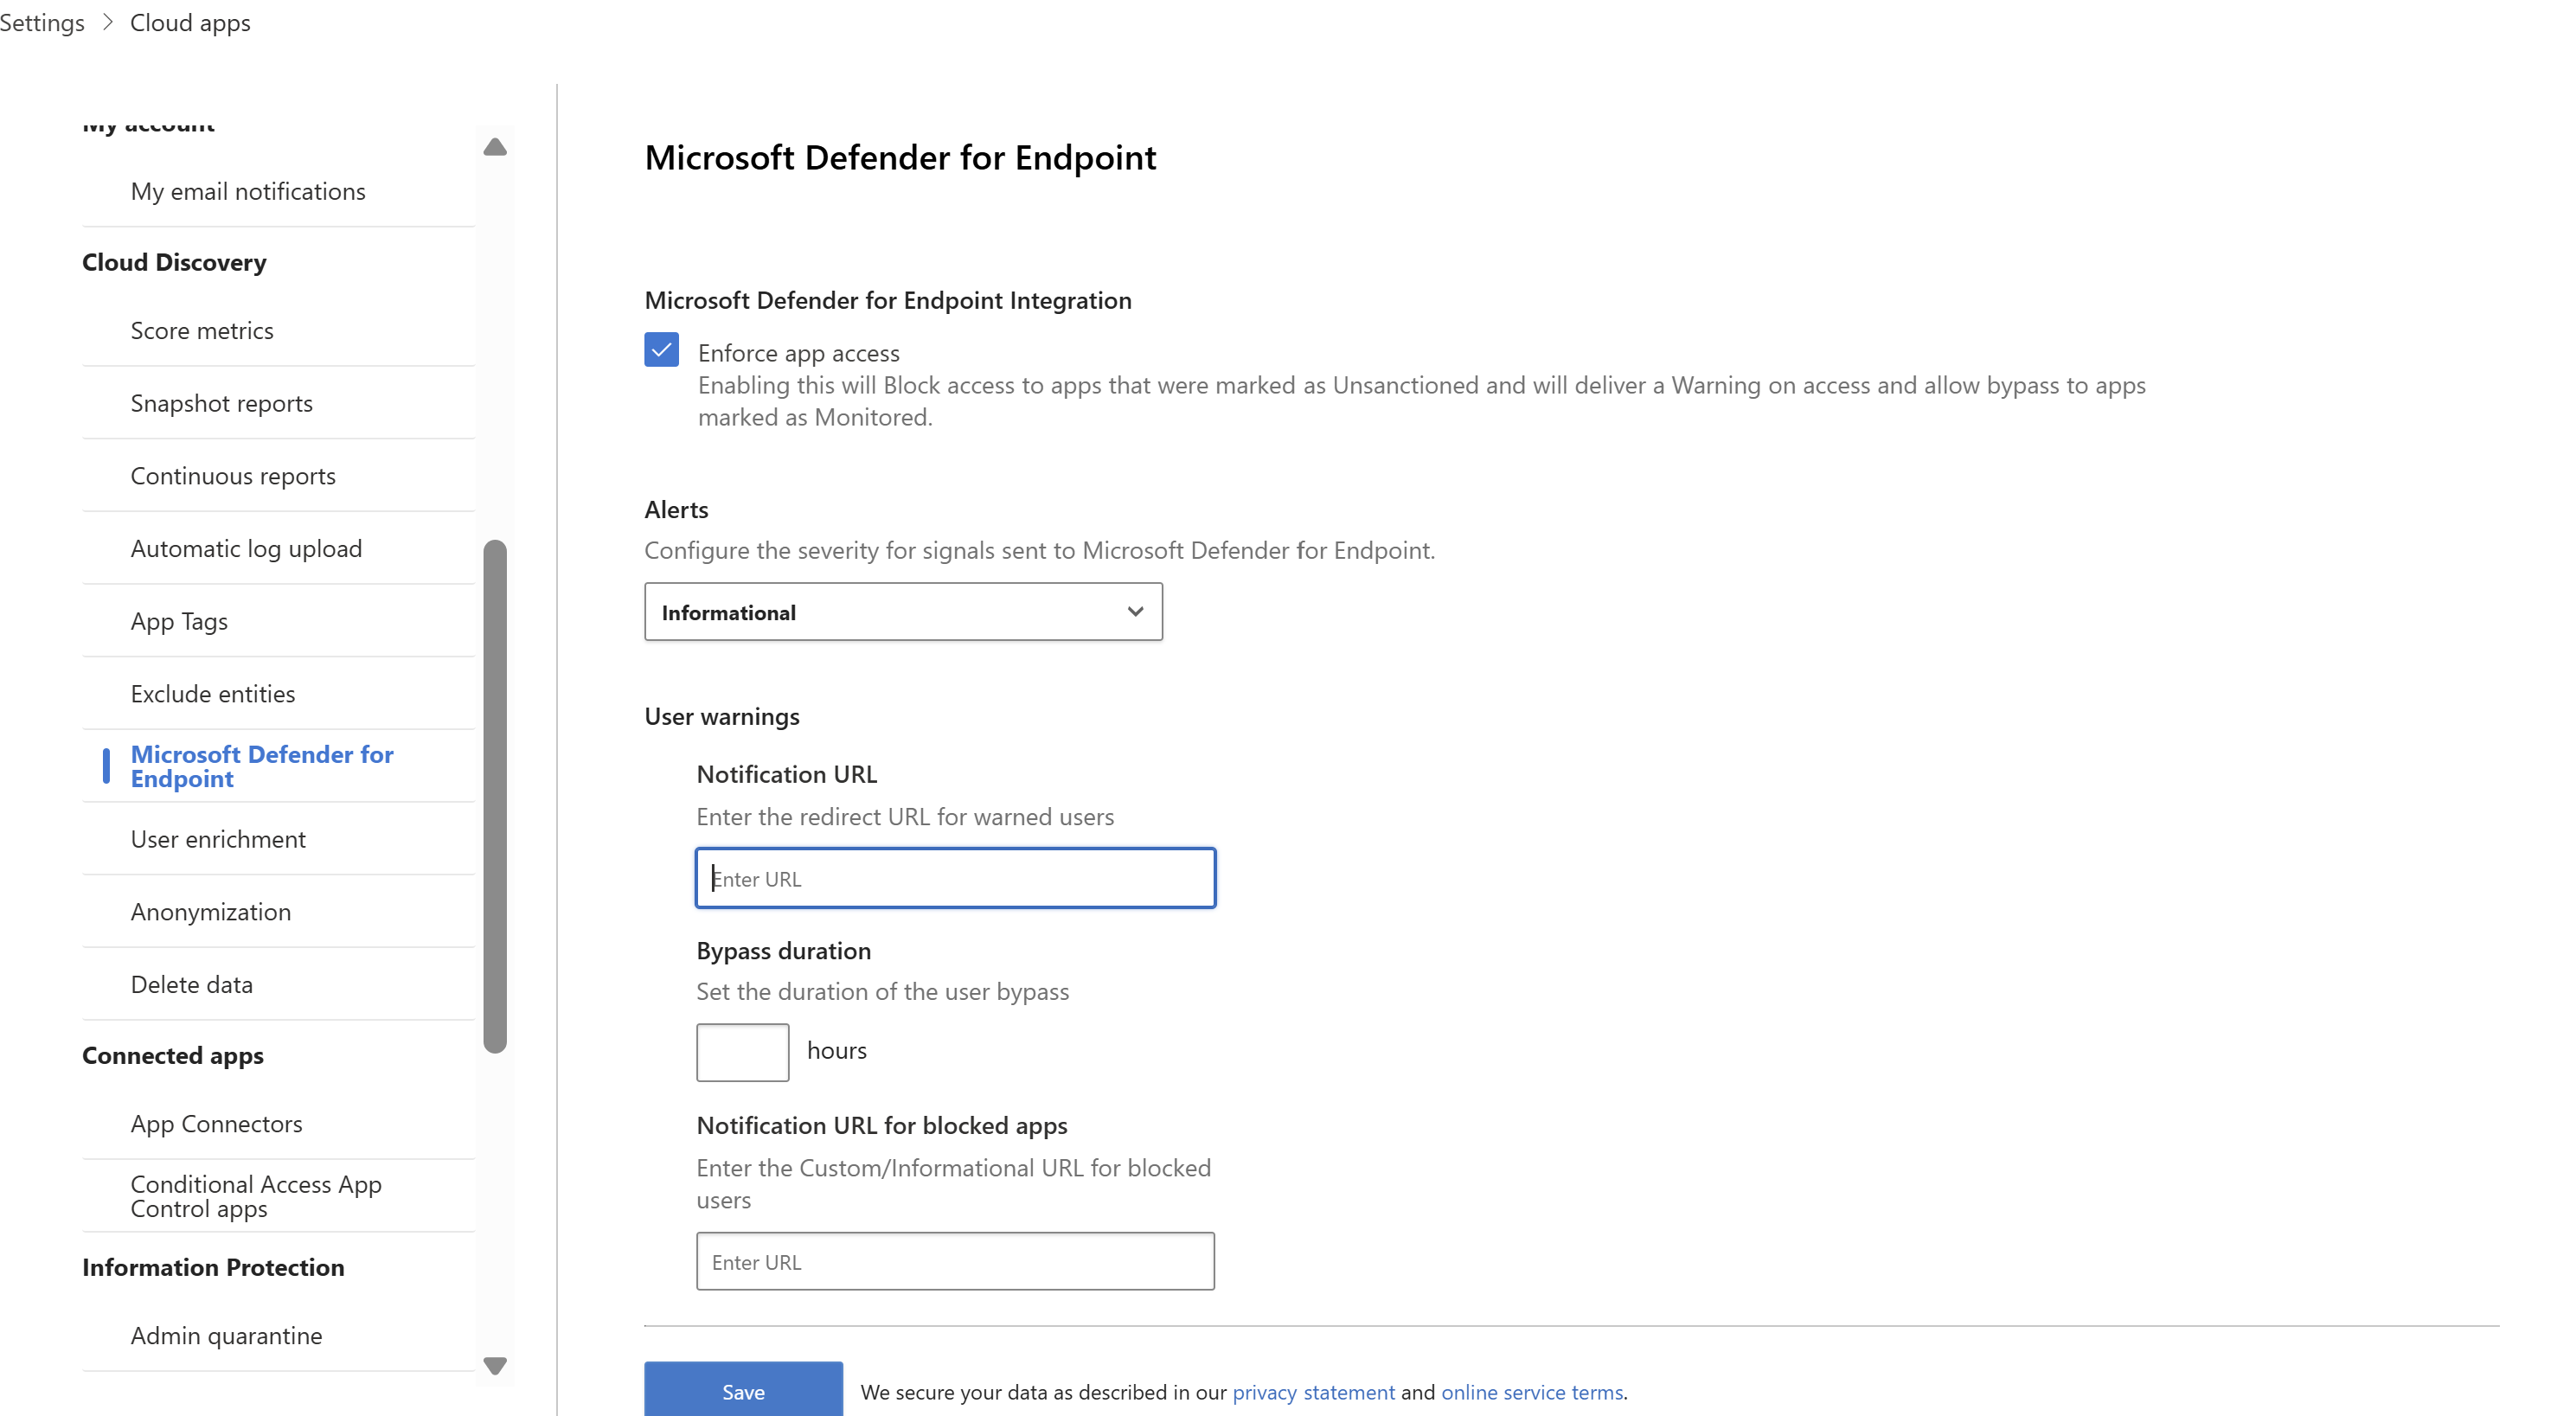
In the Microsoft Defender Portal, select Settings. Then choose Cloud Apps. Under Cloud Discovery, select Microsoft Defender for Endpoint, and then select Enforce app access.

Note
It can take up to 30 minutes for this setting to take effect.
In Microsoft Defender XDR, go to Settings > Endpoints > Advanced features, and then select Custom network indicators. For information about network indicators, see Create indicators for IPs and URLs/domains.
This allows you to leverage Microsoft Defender Antivirus network protection capabilities to block access to a predefined set of URLs using Defender for Cloud Apps, either by manually assigning app tags to specific apps or automatically using an app discovery policy.

Educate users when accessing blocked apps & customize the block page
Admins can now configure and embed a support/help URL for block pages. With this configuration, admins can educate users when they access blocked apps. Users are prompted with a custom redirect link to a company page listing apps blocked for use and necessary steps to be followed to secure an exception on block pages. End users will be redirected to this URL that is configured by admin when they click on "Visit the Support page” on the block page.
Defender for Cloud Apps uses the built-in Unsanctioned app tag to mark cloud apps as blocked for use. The tag is available on both the Cloud Discovery and Cloud App Catalog pages. By enabling the integration with Defender for Endpoint, you can seamlessly educate users on apps blocked for use and steps to secure an exception with a single click in Defender for Cloud Apps.
Apps marked as Unsanctioned are automatically synced to Defender for Endpoint's custom URL indicators, usually within a few minutes. More specifically, the domains used by blocked apps are propagated to endpoint devices to provide a message by Microsoft Defender Antivirus within the Network Protection SLA.
Setting up the custom redirect URL for the block page
Use the following steps to configure a custom help/support URL pointing to a company web page or a sharepoint link where you can educate employees on why they've been blocked from accessing the application and provide a list of steps to secure an exception or share the corporate access policy to adhere to your organization's risk acceptance.
In the Microsoft Defender portal, select Settings > Cloud Apps > Cloud Discovery > Microsoft Defender for Endpoint.
In the Alerts dropdown, select Informational.
Under User warnings > Notification URL for blocked apps, enter your URL. For example:

Block apps for specific device groups
To block usage for specific device groups, do the following steps:
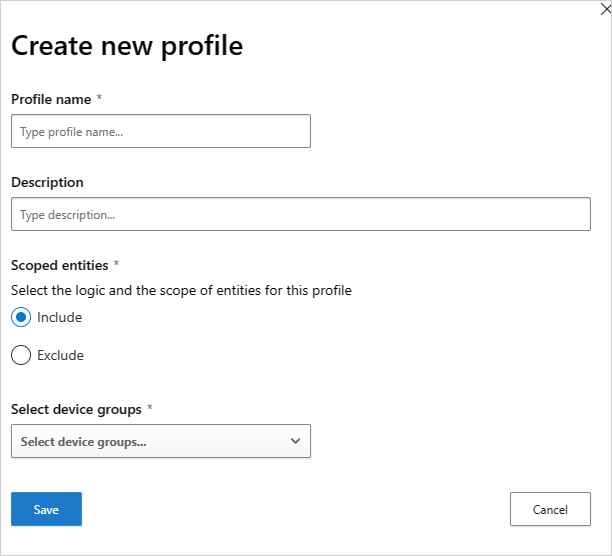
In the Microsoft Defender Portal, select Settings. Then choose Cloud Apps. Then under Cloud discovery, select Apps tags and go to the Scoped profiles tab.
Select Add profile. The profile sets the entities scoped for blocking/unblocking apps.
Provide a descriptive profile name and description.
Choose whether the profile should be an Include or Exclude profile.
Include: only the included set of entities will be affected by the access enforcement. For example, the profile myContoso has Include for device groups A and B. Blocking app Y with the profile myContoso will block app access only for groups A and B.
Exclude: The excluded set of entities won't be affected by the access enforcement. For example, the profile myContoso has Exclude for device groups A and B. Blocking app Y with the profile myContoso will block app access for the entire organization except for groups A and B.
Select the relevant device groups for the profile. Device groups listed are pulled from Microsoft Defender for Endpoint. For more information, see Create a device group.
Select Save.
To block an app, do the following steps:
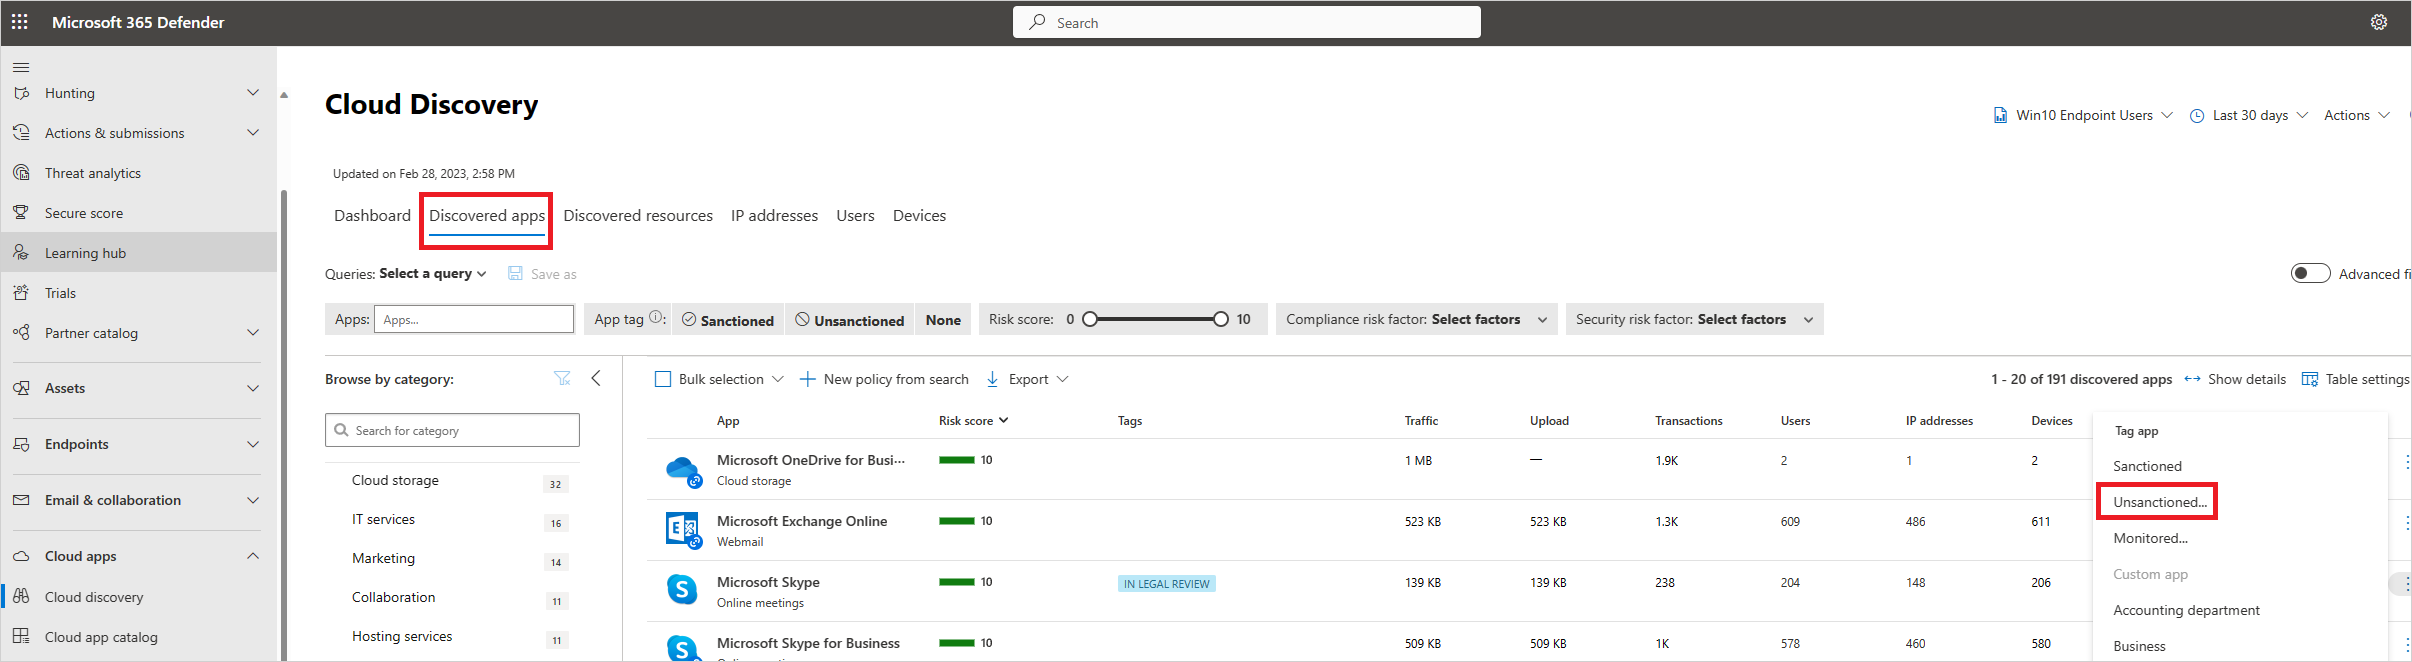
In the Microsoft Defender Portal, under Cloud Apps, go to Cloud Discovery and go to the Discovered apps tab.
Select the app that should be blocked.
Tag the app as Unsanctioned.
To block all the devices in your organization, in the Tag as unsanctioned? dialog, select Save. To block specific device groups in your organizations, select Select a profile to include or exclude groups from being blocked. Then choose the profile for which the app will be blocked, and select Save.
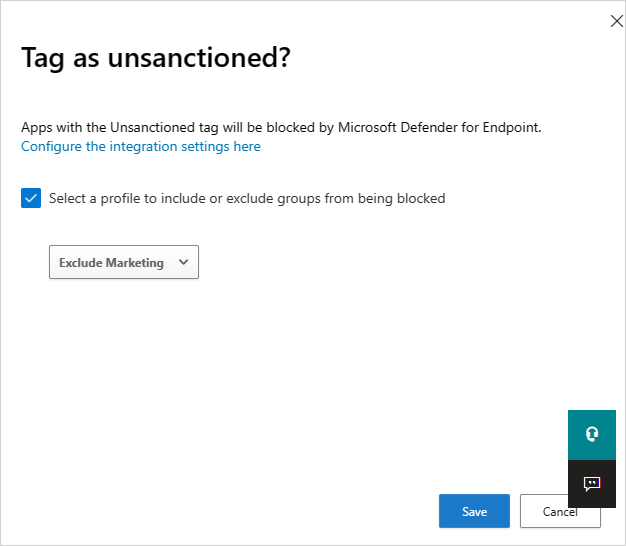
The Tag as unsanctioned? dialog appears only when your tenant has cloud app blocking with Defender for Endpoint enabled and if you have admin access to make changes.
Note
- The enforcement ability is based on Defender for Endpoint’s custom URL indicators.
- Any organizational scoping that was set manually on indicators that were created by Defender for Cloud Apps before the release of this feature will be overridden by Defender for Cloud Apps. The required scoping should be set from the Defender for Cloud Apps experience using the scoped profiles experience.
- To remove a selected scoping profile from an unsanctioned app, remove the unsanctioned tag and then tag the app again with the required scoped profile.
- It can take up to two hours for app domains to propagate and be updated in the endpoint devices once they're marked with the relevant tag or/and scoping.
- When an app is tagged as Monitored, the option to apply a scoped profile shows only if the built-in Win10 Endpoint Users data source has consistently received data during the past 30 days.
- Device groups in Microsoft Defender for Business(MDB) are managed differently. Due to this- No device groups will appear in MDA device groups for customers with MDB license.
Educate users when accessing risky apps
Admins have the option to warn users when they access risky apps. Rather than blocking users, they're prompted with a message providing a custom redirect link to a company page listing apps approved for use. The prompt provides options for users to bypass the warning and continue to the app. Admins are also able to monitor the number of users that bypass the warning message.
Defender for Cloud Apps uses the built-in Monitored app tag to mark cloud apps as risky for use. The tag is available on both the Cloud Discovery and Cloud App Catalog pages. By enabling the integration with Defender for Endpoint, you can seamlessly warn users on access to monitored apps with a single click in Defender for Cloud Apps.
Apps marked as Monitored are automatically synced to Defender for Endpoint's custom URL indicators, usually within a few minutes. More specifically, the domains used by monitored apps are propagated to endpoint devices to provide a warning message by Microsoft Defender Antivirus within the Network Protection SLA.
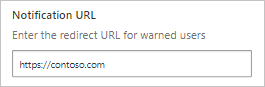
Setting up the custom redirect URL for the warn message
Use the following steps to configure a custom URL pointing to a company web page where you can educate employees on why they've been warned and provide a list of alternative approved apps that adhere to your organization's risk acceptance or are already managed by the organization.
In the Microsoft Defender Portal, select Settings. Then choose Cloud Apps. Under Cloud Discovery, select Microsoft Defender for Endpoint.
In the Notification URL box, enter your URL.
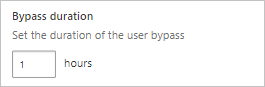
Setting up user bypass duration
Since users can bypass the warning message, you can use the following steps to configure the duration of the bypass apply. Once the duration has elapsed, users are prompted with the warning message the next time they access the monitored app.
In the Microsoft Defender Portal, select Settings. Then choose Cloud Apps. Under Cloud Discovery, select Microsoft Defender for Endpoint.
In the Bypass duration box, enter the duration (hours) of the user bypass.
Monitor applied app controls
Once controls are applied, you can monitor app usage patterns by the applied controls (access, block, bypass) using the following steps.
- In the Microsoft Defender Portal, under Cloud Apps, go to Cloud Discovery and then go to the Discovered apps tab. Use the filters to find the relevant monitored app.
- Select the app's name to view applied app controls on the app's overview page.
Next steps
Related videos
If you run into any problems, we're here to help. To get assistance or support for your product issue, please open a support ticket.