Note
Access to this page requires authorization. You can try signing in or changing directories.
Access to this page requires authorization. You can try changing directories.
In this quickstart, you learn how to create a .NET AI app to chat with custom data using the .NET AI app template. The template is designed to streamline the getting started experience for building AI apps with .NET by handling common setup tasks and configurations for you.
Prerequisites
- .NET 9.0 SDK
- One of the following IDEs (optional):
Install the .NET AI app template
The AI Chat Web App template is available as a template package through NuGet. Use the dotnet new install command to install the package:
dotnet new install Microsoft.Extensions.AI.Templates
Create the .NET AI app
After you install the AI app templates, you can use them to create starter apps through Visual Studio UI, Visual Studio Code, or the .NET CLI.
- Inside Visual Studio, navigate to File > New > Project.
- On the Create a new project screen, search for AI Chat Web App. Select the matching result and then choose Next.
- On the Configure your new project screen, enter the desired name and location for your project and then choose Next.
- On the Additional information screen:
- For the Framework option, select .NET 9.0.
- For the AI service provider option, select GitHub Models.
- For the Vector store option, select Local on-disc (for prototyping).
- Select Create to complete the process.
Explore the sample app
The sample app you created is a Blazor Interactive Server web app preconfigured with common AI and data services. The app handles the following concerns for you:
- Includes essential
Microsoft.Extensions.AIpackages and other dependencies in thecsprojfile to help you get started working with AI. - Creates various AI services and registers them for dependency injection in the
Program.csfile:- An
IChatClientservice to chat back and forth with the generative AI model - An
IEmbeddingGeneratorservice that's used to generate embeddings, which are essential for vector search functionality - A
JsonVectorStoreto act as an in-memory vector store
- An
- Registers a SQLite database context service to handle ingesting documents. The app is preconfigured to ingest whatever documents you add to the
Datafolder of the project, including the provided example files. - Provides a complete chat UI using Blazor components. The UI handles rich formatting for the AI responses and provides features such as citations for response data.
Configure access to GitHub Models
To authenticate to GitHub models from your code, you'll need to create a GitHub personal access token:
- Navigate to the Personal access tokens page of your GitHub account settings under Developer Settings.
- Select Generate new token.
- Enter a name for the token, and under Permissions, set Models to Access: Read-only.
- Select Generate token at the bottom of the page.
- Copy the token for use in the steps ahead.
Configure the app
The AI Chat Web App is almost ready to go as soon as it's created. However, you need to configure the app to use the personal access token you set up for GitHub Models. By default, the app template searches for this value in the project's local .NET user secrets. You can manage user secrets using either the Visual Studio UI or the .NET CLI.
Note
If you enabled Aspire for your app, skip to the Aspire configuration section.
Right-click on your project in the Solution Explorer and select Manage User Secrets. This opens a
secrets.jsonfile where you can store your API keys without them being tracked in source control.Add the following key and value:
{
    "GitHubModels:Token": "<your-gh-models-access-token>"
}
Aspire configuration
To use the AI Chat Web App template with Aspire orchestration, add the following configurations:
Right-click on your
*.AppHostproject in the Solution Explorer and select Manage User Secrets. This opens asecrets.jsonfile where you can store your API keys without them being tracked in source control.Add the following key and value:
{
    "ConnectionStrings:openai": "Endpoint=https://models.inference.ai.azure.com;Key=<your-gh-models-access-token>"
}
By default, the app template uses the gpt-4o-mini and text-embedding-3-small models. To try other models, update the name parameters in Program.cs:
var chatClient = ghModelsClient.AsChatClient("gpt-4o-mini");
var embeddingGenerator = ghModelsClient.AsEmbeddingGenerator("text-embedding-3-small");
Prerequisites
- .NET 9.0 SDK
- One of the following IDEs (optional):
Install the .NET AI app template
The AI Chat Web App template is available as a template package through NuGet. Use the dotnet new install command to install the package:
dotnet new install Microsoft.Extensions.AI.Templates
Create the .NET AI app
After you install the AI app templates, you can use them to create starter apps through Visual Studio UI, Visual Studio Code, or the .NET CLI.
- Inside Visual Studio, navigate to File > New > Project.
- On the Create a new project screen, search for AI Chat Web App. Select the matching result and then choose Next.
- On the Configure your new project screen, enter the desired name and location for your project and then choose Next.
- On the Additional information screen:
- For the Framework option, select .NET 9.0.
- For the AI service provider option, select Azure OpenAI.
- Make sure the Use keyless authentication for Azure services checkbox is checked.
- For the Vector store option, select Local on-disc (for prototyping).
- Select Create to complete the process.
Explore the sample app
The sample app you created is a Blazor Interactive Server web app preconfigured with common AI and data services. The app template handles the following concerns for you:
- Includes essential
Microsoft.Extensions.AIpackages and other dependencies in the.csprojfile to help you get started working with AI. - Creates various AI services and registers them for dependency injection in the
Program.csfile:- An
IChatClientservice to chat back and forth with the generative AI model. - An
IEmbeddingGeneratorservice that's used to generate embeddings, which are essential for vector search functionality. - A
JsonVectorStoreto act as an in-memory vector store.
- An
- Registers a SQLite database context service to handle ingesting documents. The app is preconfigured to ingest whatever documents you add to the
wwwroot/Datafolder of the project, including the provided example files. - Provides a complete chat UI using Blazor components. The UI handles rich formatting for the AI responses and provides features such as citations for response data.
Create and authenticate to the Azure OpenAI service
To use the .NET AI templates with Azure OpenAI, you'll need to create and authenticate to an Azure OpenAI service.
Create the Azure OpenAI service
Create an Azure OpenAI Service resource if you don't already have one available.
Deploy the
gpt-4o-miniandtext-embedding-3-smallmodels to your Azure OpenAI Service resource. When creating those deployments, give them the same names as the models (gpt-4o-miniandtext-embedding-3-small) so that they match the default template values. To learn how to deploy a model, see Create a resource in the Azure OpenAI docs.
Authenticate to the Azure OpenAI service
The AI template uses Microsoft Entra ID for seamless, keyless authentication. It leverages DefaultAzureCredential to automatically detect and utilize credentials from your development tools when running locally. To connect to the service, ensure your developer account has the appropriate roles assigned and is signed in to your local development tools.
Assign a role to your developer account to access the Azure OpenAI resource:
- In the Azure portal, navigate to the overview page of your Azure OpenAI resource.
- Select Access control (IAM) from the left navigation.
- Add a role assignment for the
Azure AI Developerrole to your Azure account.
Sign-in to a local development tool such as Visual Studio or the Azure CLI using the Azure account you assigned the
Azure AI Developerrole to.
Configure the app
The AI Chat Web App app is almost ready to go as soon as it's created. However, you'll need to provide the endpoint for your Azure OpenAI service for the app to connect to. By default, the app template searches for this value in the project's local .NET user secrets. You can manage user secrets using either the Visual Studio UI or the .NET CLI.
Note
To avoid authentication errors, make sure you're signed in to Visual Studio or the Azure CLI with a user that's assigned the Azure AI Developer role on your Azure OpenAI resource.
In Visual Studio, right-click on your project in the Solution Explorer and select "Manage User Secrets". This opens a
secrets.jsonfile where you can store your API keys without them being tracked in source control.Add the following key and value:
{
    "AzureOpenAi:Endpoint": "<your-endpoint>"
}
By default, the app template assumes your AI model deployment names are the same as the underlying models. If necessary, update the deployment name parameters to match your gpt-4o-mini and text-embedding-3-small deployment names:
// Update these parameter values to match your Azure OpenAI model deployment names
var chatClient = azureOpenAi.AsChatClient("gpt-4o-mini");
var embeddingGenerator = azureOpenAi.AsEmbeddingGenerator("text-embedding-3-small");
Prerequisites
- .NET 9.0 SDK
- Access to an OpenAI service and the corresponding API key
- One of the following IDEs (optional):
Install the .NET AI app template
The AI Chat Web App template is available as a template package through NuGet. Use the dotnet new install command to install the package:
dotnet new install Microsoft.Extensions.AI.Templates
Create the .NET AI app
After you install the AI app templates, you can use them to create starter apps through Visual Studio UI, Visual Studio Code, or the .NET CLI.
- Inside Visual Studio, navigate to File > New > Project.
- On the Create a new project screen, search for AI Chat Web App. Select the matching result and then choose Next.
- On the Configure your new project screen, enter the desired name and location for your project and then choose Next.
- On the Additional information screen:
- For the Framework option, select .NET 9.0.
- For the AI service provider option, select OpenAI.
- For the Vector store option, select Local on-disk (for prototyping).
- Select Create to complete the process.
Explore the sample app
The sample app you created is a Blazor Interactive Server web app preconfigured with common AI and data services. The app template handles the following concerns for you:
- Includes essential
Microsoft.Extensions.AIpackages and other dependencies in the.csprojfile to help you get started working with AI. - Creates various AI services and registers them for dependency injection in the
Program.csfile:- An
IChatClientservice to chat back and forth with the generative AI model. - An
IEmbeddingGeneratorservice that's used to generate embeddings, which are essential for vector search functionality. - A
JsonVectorStoreto act as an in-memory vector store.
- An
- Registers a SQLite database context service to handle ingesting documents. The app is preconfigured to ingest whatever documents you add to the
wwwroot/Datafolder of the project, including the provided example files. - Provides a complete chat UI using Blazor components. The UI handles rich formatting for the AI responses and provides features such as citations for response data.
Configure the app
The AI Chat Web App app is almost ready to go as soon as it's created. However, you'll need to provide the key for your OpenAI service that the app will use to connect and authenticate. By default, the app template searches for this value in the project's local .NET user secrets. You can manage user secrets using either the Visual Studio UI or the .NET CLI.
In Visual Studio, right-click on your project in the Solution Explorer and select "Manage User Secrets". This opens a
secrets.jsonfile where you can store your API keys without them being tracked in source control.Add the following key and value:
{
    "OpenAi:Key": "<your-OpenAI-key>"
}
By default, the app template assumes the use of certain AI models. If necessary, update the model name parameters to match your the models you want to target:
// Update these parameter values to match your preferred OpenAI models
var chatClient = openAIClient.AsChatClient("gpt-4o-mini");
var embeddingGenerator = openAIClient.AsEmbeddingGenerator("text-embedding-3-small");
Prerequisites
- .NET 9.0 SDK
- Ollama installed locally - Install Ollama locally on your device
- One of the following IDEs (optional):
Install the .NET AI app template
The AI Chat Web App template is available as a template package through NuGet. Use the dotnet new install command to install the package:
dotnet new install Microsoft.Extensions.AI.Templates
Create the .NET AI app
After you install the AI app templates, you can use them to create starter apps through Visual Studio UI, Visual Studio Code, or the .NET CLI.
- Inside Visual Studio, navigate to File > New > Project.
- On the Create a new project screen, search for AI Chat Web App. Select the matching result and then choose Next.
- On the Configure your new project screen, enter the desired name and location for your project and then choose Next.
- On the Additional information screen:
- For the Framework option, select .NET 9.0.
- For the AI service provider option, select Ollama.
- For the Vector store option, select Local on-disk (for prototyping).
- Select Create to complete the process.
Explore the sample app
The sample app you created is a Blazor Interactive Server web app preconfigured with common AI and data services. The app template handles the following concerns for you:
- Includes essential
Microsoft.Extensions.AIpackages and other dependencies in the.csprojfile to help you get started working with AI. - Creates various AI services and registers them for dependency injection in the
Program.csfile:- An
IChatClientservice to chat back and forth with the generative AI model. - An
IEmbeddingGeneratorservice that's used to generate embeddings, which are essential for vector search functionality. - A
JsonVectorStoreto act as an in-memory vector store.
- An
- Registers a SQLite database context service to handle ingesting documents. The app is preconfigured to ingest whatever documents you add to the
wwwroot/Datafolder of the project, including the provided example files. - Provides a complete chat UI using Blazor components. The UI handles rich formatting for the AI responses and provides features such as citations for response data.
Configure the app
The AI Chat Web App app is almost ready to go as soon as it's created. However, you should verify that certain configurations match your needs before you run the app.
In a local terminal window, make sure Ollama is running on your computer using the
ollama servecommand:ollama serveBy default, the app template targets the default Ollama host address at
http://localhost:11434and assumes the use of thellama3.2andall-minilmAI models. Pull those models down onto your device using the following commands:ollama pull llama3.2 ollama pull all-minilmIf you prefer to use alternative models, pull those models down using the same
ollama pullcommand.Verify the client configuration code parameters match your preferred models:
// Update these parameter values to match your preferred OpenAI models
IChatClient chatClient = new OllamaApiClient(
    new Uri("http://localhost:11434"),
    "llama3.2");
IEmbeddingGenerator<string, Embedding<float>> embeddingGenerator = new OllamaApiClient(
    new Uri("http://localhost:11434"),
    "all-minilm");
Run and test the app
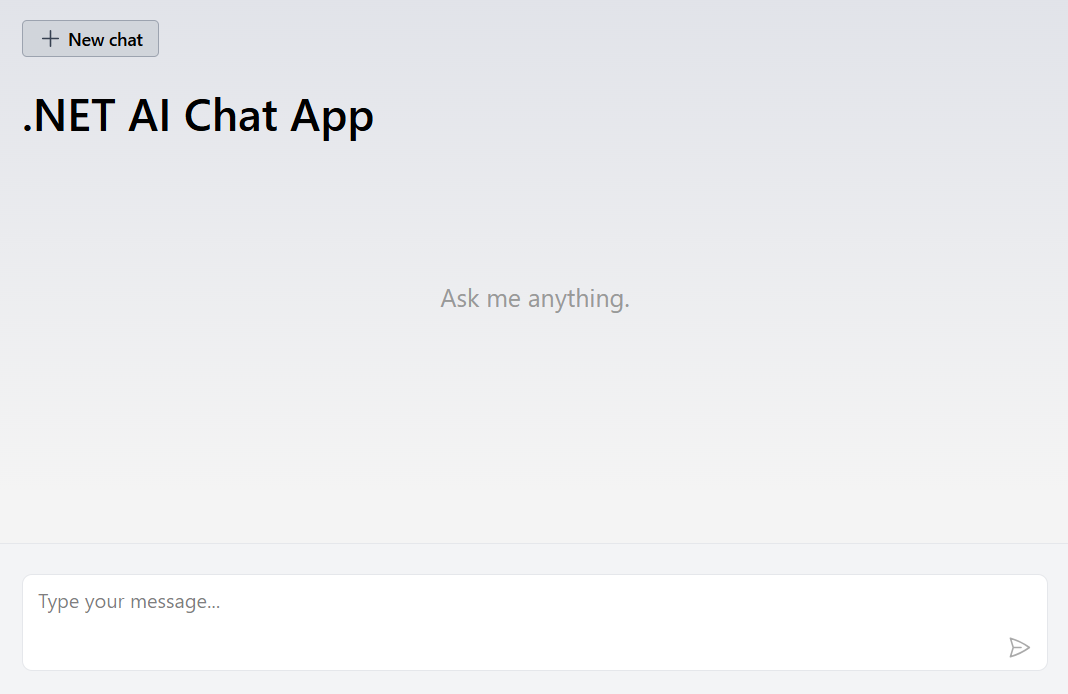
Select the run button at the top of Visual Studio to launch the app. After a moment, you should see the following UI load in the browser:
Enter a prompt into the input box such as "What are some essential tools in the survival kit?" to ask your AI model a question about the ingested data from the example files.
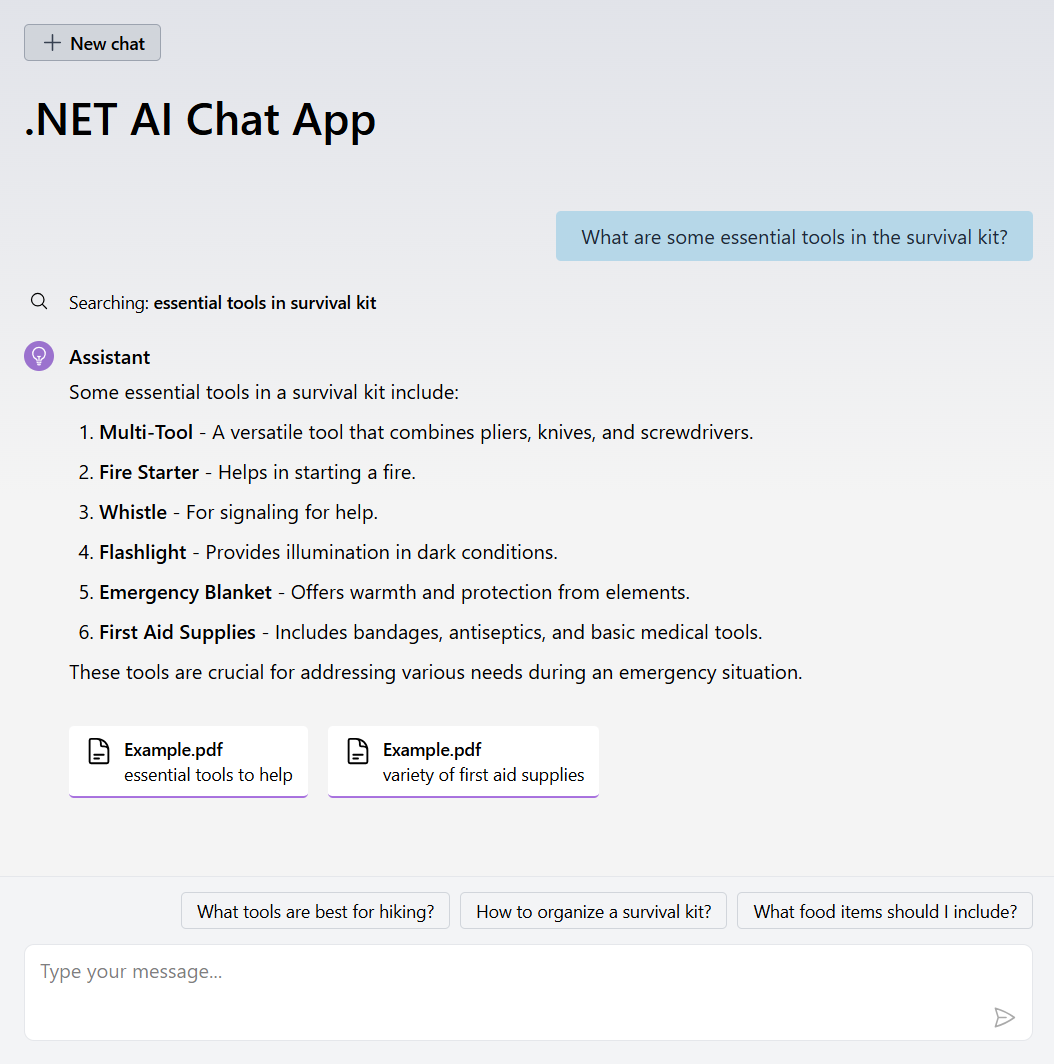
The app responds with an answer to the question and provides citations of where it found the data. You can click on one of the citations to be directed to the relevant section of the example files.
Next steps
Collaborate with us on GitHub
The source for this content can be found on GitHub, where you can also create and review issues and pull requests. For more information, see our contributor guide.