Note
Access to this page requires authorization. You can try signing in or changing directories.
Access to this page requires authorization. You can try changing directories.
When you create a .NET Windows Service (not to be mistaken with a .NET Framework Windows Service), you may want to create an installer for your service. Without an installer, users would have to know how to install and configure your service. An installer bundles your app's executables and exposes a customizable installation user experience. This tutorial is a continuation of the Create a Windows Service tutorial. It shows how to create an installer for your .NET Windows Service.
In this tutorial, you'll learn how to:
- Install the Visual Studio Installer Projects extension.
- Create a setup project.
- Update an existing .NET Worker project to support installation.
- Automate the installation and uninstallation with the Windows Service Control Manager.
Prerequisites
- You're expected to have completed the Create a Windows Service tutorial, or be prepared to clone the sample repo.
- The .NET 8.0 SDK or later
- A Windows OS
- A .NET integrated development environment (IDE)
- Feel free to use Visual Studio
- An existing .NET Windows Service
Install tooling dependencies
Start by installing the Wix Toolset. The Wix Toolset is a set of tools that build Windows installation packages from XML source code.
dotnet tool install --global wix
Next, install the HeatWave for VS2022 extension. After installing, restart Visual Studio and you'll see new project templates available.
Get existing project
This tutorial is based on the app created as part of the Create a Windows Service using BackgroundService tutorial. You can either clone the sample repo or use the app you built in the previous tutorial.
Tip
All of the "Workers in .NET" example source code is available in the Samples Browser for download. For more information, see Browse code samples: Workers in .NET.
Open the solution in Visual Studio, and select F5 to ensure that the app builds and runs as expected. Press Ctrl+C to stop the app.
Add new setup project
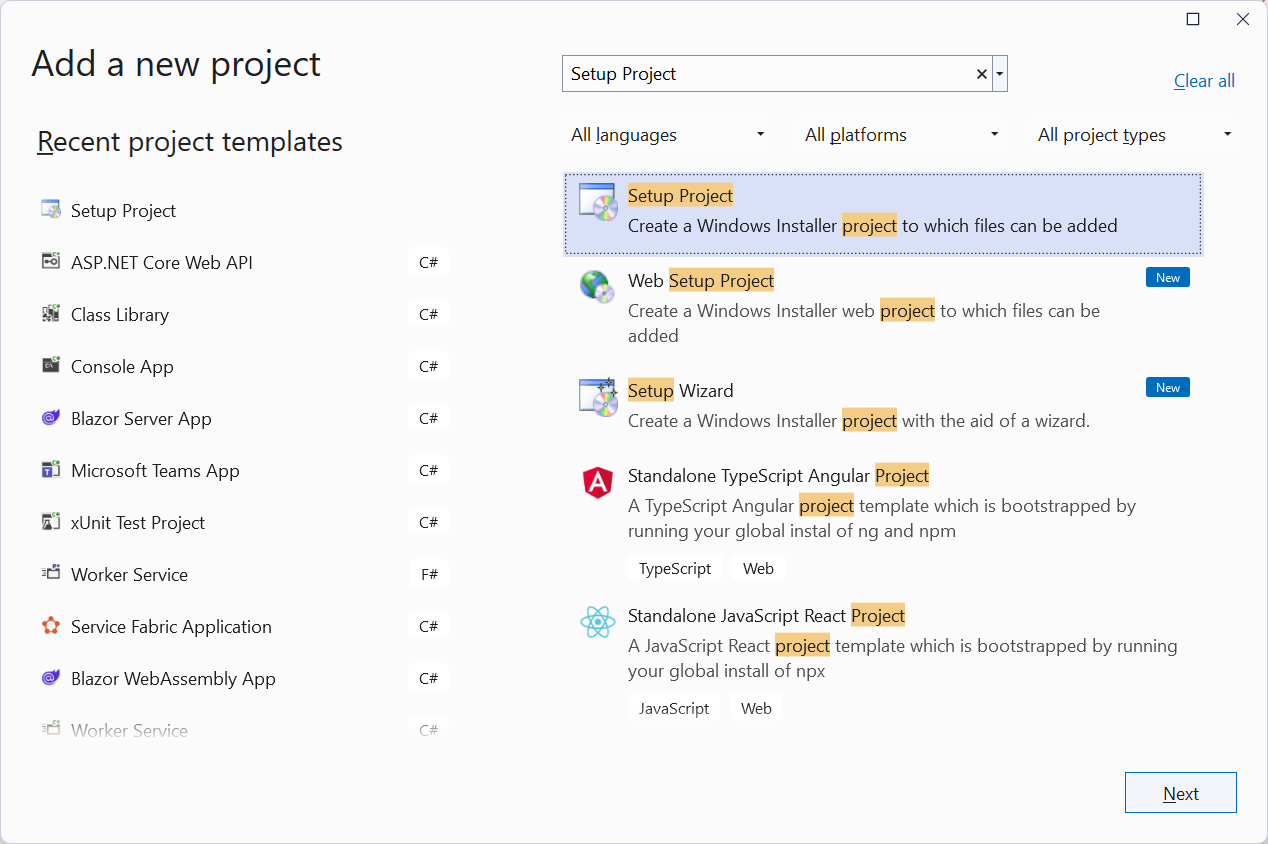
To add a new Wix setup project, right-click on the solution in the Solution Explorer and select Add > New Project:
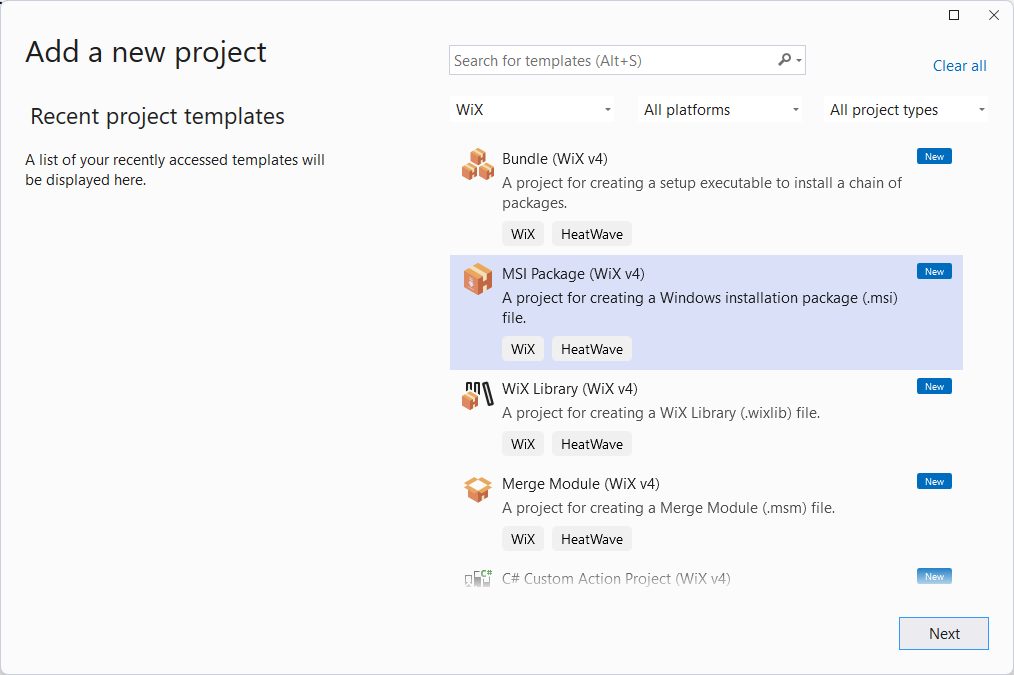
Select MSI Package (Wix v4) from the available templates, then select Next. Provide the desired Name and Location, then select Create.
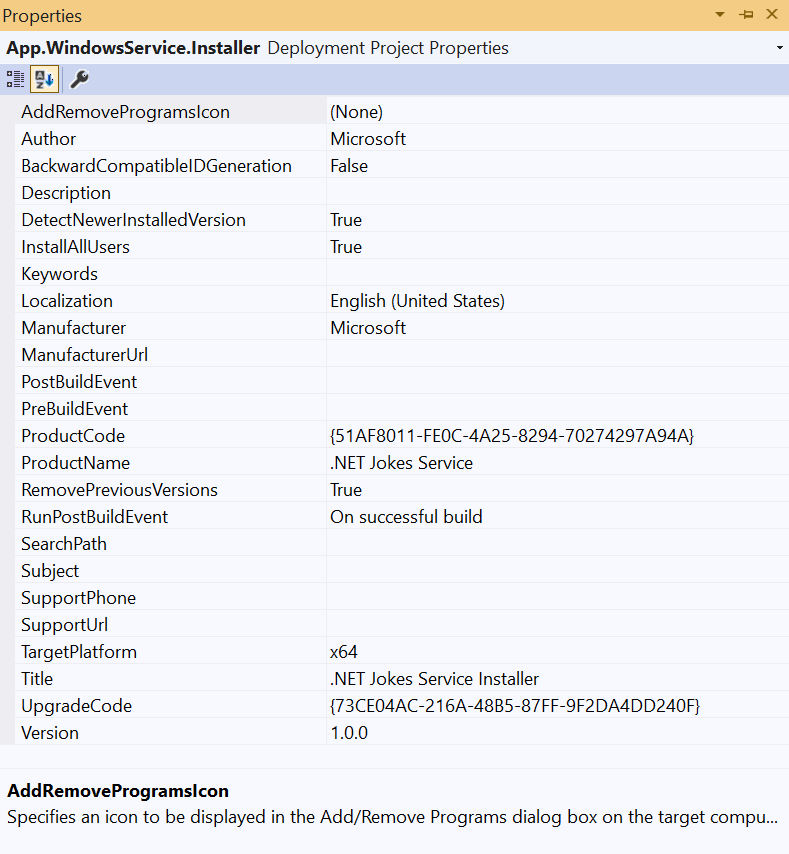
Configure installer project
To configure the setup project, you first must add a reference to the App.WindowsService project. Right-click the setup project in the Solution Explorer, and then select Add > Project Reference.
The template includes example component and localization files. Delete these, files leaving only the Package.wxs file. Your project should now include a ProjectReference element, similar to the following:
<Project Sdk="WixToolset.Sdk/4.0.0">
  <ItemGroup>
    <ProjectReference Include="..\App.WindowsService.csproj" />
  </ItemGroup>
</Project>
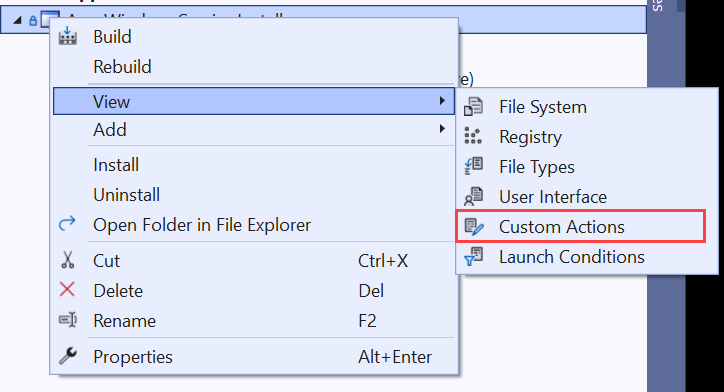
After the project reference has been added, configure the Package.wxs file. Open the file in the editor, and then replace the contents with the following:
<?xml version="1.0" encoding="UTF-8"?>

<!-- Define the variables in "$(var.*) expressions" -->
<?define Name = ".NET Joke Service" ?>
<?define Manufacturer = "Microsoft" ?>
<?define Version = "1.0.0.0" ?>
<?define UpgradeCode = "9ED3FF33-8718-444E-B44B-69A2344B7E98" ?>

<Wix xmlns="http://wixtoolset.org/schemas/v4/wxs">
    <Package Name="$(Name)"
             Manufacturer="$(Manufacturer)"
             Version="$(Version)"
             UpgradeCode="$(var.UpgradeCode)"
             Compressed="true">

        <!-- Allow upgrades and prevent downgrades -->
        <MajorUpgrade DowngradeErrorMessage="A later version of [ProductName] is already installed. Setup will now exit." />

        <!-- Define the directory structure -->
        <StandardDirectory Id="ProgramFiles6432Folder">

            <!-- Create a folder inside program files -->
            <Directory Id="ROOTDIRECTORY" Name="$(var.Manufacturer)">

                <!-- Create a folder within the parent folder given the name -->
                <Directory Id="INSTALLFOLDER" Name="$(Name)" />
            </Directory>
        </StandardDirectory>

        <!-- The files inside this DirectoryRef are linked to
             the App.WindowsService directory via INSTALLFOLDER -->
        <DirectoryRef Id="INSTALLFOLDER">

            <!-- Create a single component which is the App.WindowsService.exe file -->
            <Component Id="ServiceExecutable" Bitness="always64">

                <!-- Copies the App.WindowsService.exe file using the
                     project reference preprocessor variables -->
                <File Id="App.WindowsService.exe"
                      Source="$(var.App.WindowsService.TargetDir)publish\App.WindowsService.exe"
                      KeyPath="true" />

                <!-- Remove all files from the INSTALLFOLDER on uninstall -->
                <RemoveFile Id="ALLFILES" Name="*.*" On="both" />

                <!-- Tell WiX to install the Service -->
                <ServiceInstall Id="ServiceInstaller"
                                Type="ownProcess"
                                Name="App.WindowsService"
                                DisplayName="$(Name)"
                                Description="A joke service that periodically logs nerdy humor."
                                Start="auto"
                                Account="LocalService"
                                ErrorControl="normal" />

                <!-- Tell WiX to start the Service -->
                <ServiceControl Id="StartService"
                                Start="install"
                                Stop="both"
                                Remove="uninstall"
                                Name="App.WindowsService"
                                Wait="true" />
            </Component>
        </DirectoryRef>

        <!-- Tell WiX to install the files -->
        <Feature Id="Service" Title="App.WindowsService Setup" Level="1">
            <ComponentRef Id="ServiceExecutable" />
        </Feature>

    </Package>
</Wix>
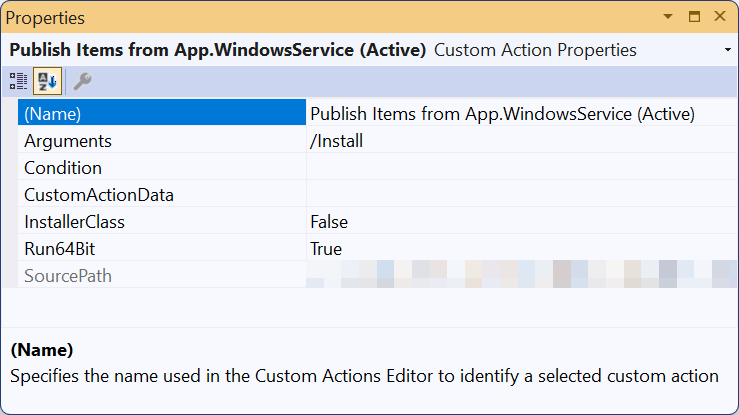
The ServiceInstall element's Account attribute specifies the account under which the service runs. The LocalService account is a built-in account with reduced privileges that's appropriate for most services. Common values include:
LocalService: A built-in account with reduced privileges and no network credentials.NetworkService: Similar to LocalService but has network credentials.LocalSystem: The highest privilege level (use with caution).
When you build the project, the output is an MSI file that can be used to install and uninstall the service.
Test installation
To test the installer, publish the App.WindowsService project. Right-click the project in the Solution Explorer, and then select Publish. Once published with the profile you created in the previous tutorial, the executable will be in the publish directory. Next, you Build the setup project and run the installer.
You need to run the installation as an administrator. To do this, right-click the MSI file, and then select Run as administrator.
Once the service is installed, you can open Services to see the service running. To uninstall the service, use the Windows Add or Remove Programs feature to call the installer.


See also
Collaborate with us on GitHub
The source for this content can be found on GitHub, where you can also create and review issues and pull requests. For more information, see our contributor guide.