Note
Access to this page requires authorization. You can try signing in or changing directories.
Access to this page requires authorization. You can try changing directories.
Administrators can create an automated flow in Power Automate that notifies your Business Central about changes to records in your Dataverse organization.
Note
This article assumes you've connected your online version of Business Central with Dataverse and scheduled synchronization between the two applications.
Import the Flow Template
Tip
To make it easier to set up the flow, we've created a template that will define the flow trigger and flow condition for you. To use the template, follow the steps in this section. To create the flow yourself, skip this section and start with the steps in Define the Flow Trigger.
- Sign in to Power Automate.
- Choose Templates, and then search for Notify Business Central.
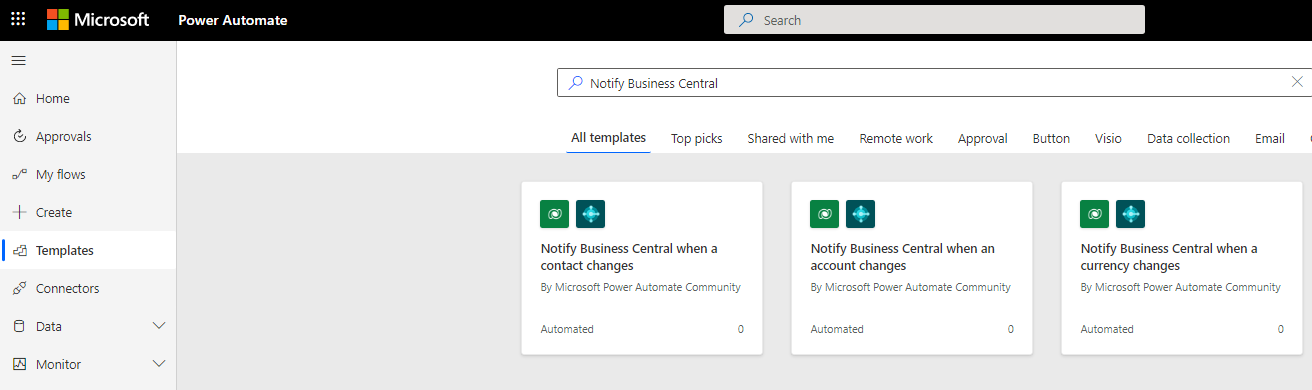 3. Choose the Notify Business Central when an account changes template.
4. Continue with the steps in the Notify Business Central about a change section.
3. Choose the Notify Business Central when an account changes template.
4. Continue with the steps in the Notify Business Central about a change section.
Define the Flow Trigger
- Sign in to Power Automate.
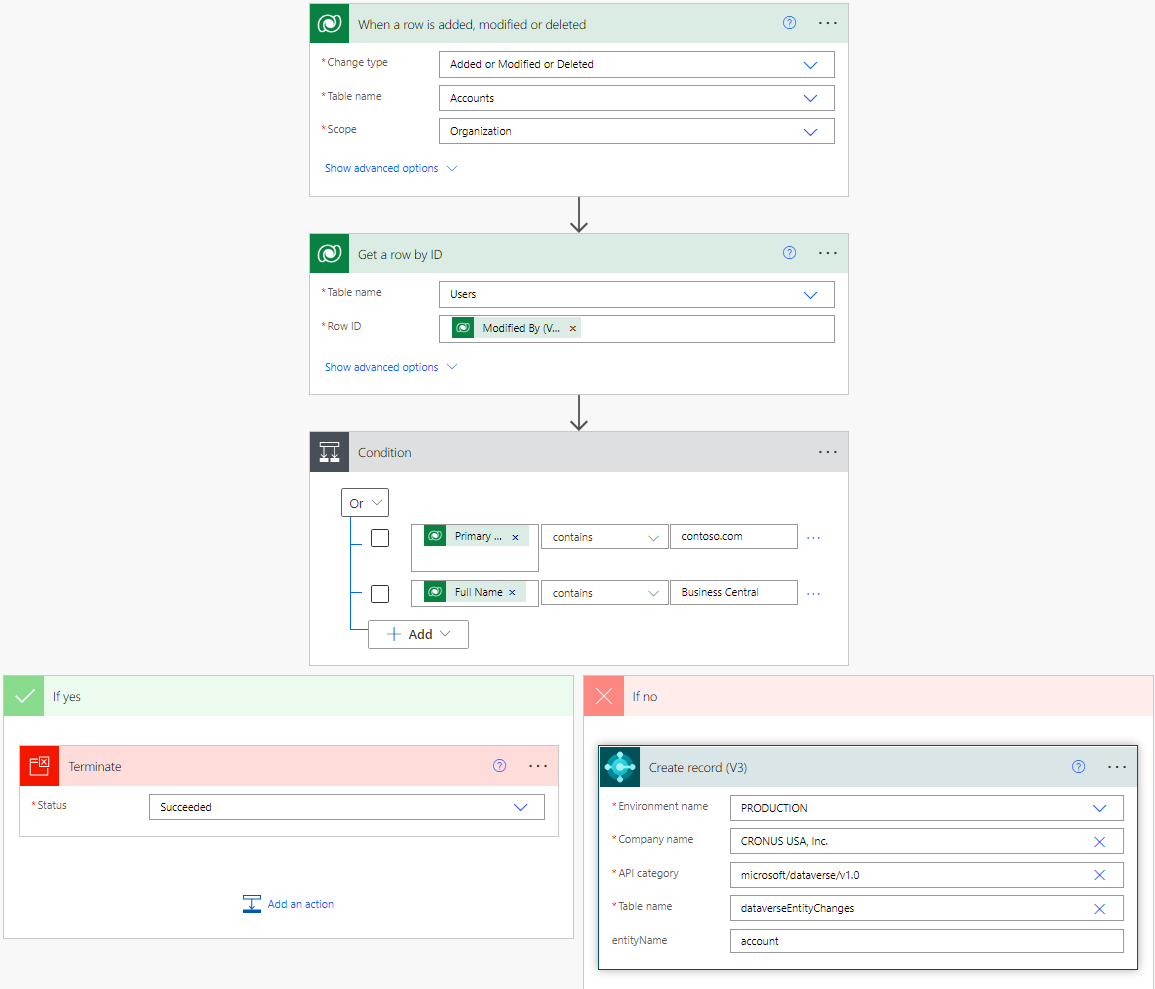
- Create an automated cloud flow that starts when a row for a Dataverse entity is added, modified, or deleted. For more information, see Trigger flows when a row is added, modified, or deleted. This example uses the Accounts entity. The following image shows the settings for the first step in defining a flow trigger.
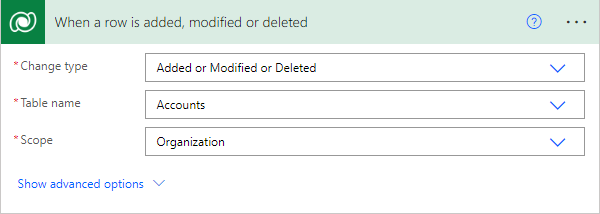 3. Use the AssistEdit (...) button in the upper right corner to add the connection to your Dataverse environment.
4. Choose Show advanced options, and in the Filter Rows field, enter customertypecode eq 3 or customertypecode eq 11 and statecode eq 0. These values mean that the trigger will react only when changes are made to active accounts of the type customer or vendor.
3. Use the AssistEdit (...) button in the upper right corner to add the connection to your Dataverse environment.
4. Choose Show advanced options, and in the Filter Rows field, enter customertypecode eq 3 or customertypecode eq 11 and statecode eq 0. These values mean that the trigger will react only when changes are made to active accounts of the type customer or vendor.
Define the Flow Condition
Data is synchronized between Business Central and Dataverse through an integration user account. To ignore the changes made by the synchronization, create a condition step in your flow that excludes changes made by the integration user account.
Add a Get a row by ID from Dataverse step after the flow trigger with the following settings. For more information, see Get a row by ID from Dataverse.
- In the Table name field, choose Users
- In the Row ID field, choose the Modified By (Value) from the flow trigger.
Add a condition step with the following or settings to identify the integration user account.
- The user's Primary Email Address contains contoso.com
- The user's Full Name contains Business Central.
Add a Terminate control to stop the flow if the entity was changed by the integration user account.
The following image shows how to define the flow trigger and the flow condition.

Notify Business Central About a Change
If the flow isn't stopped by the condition, you must notify Business Central that a change occurred. Use the Business Central Connector to do that.
- In the No fork of the condition step, add an action and search for Dynamics 365 Business Central. Choose the connector icon in the list.
- Choose the Create record (V3) action.
] Connector](media/power-automate-flow-dataverse-connector.png)
- Use the assist edit (...) button in the upper right corner to add the connection to your Business Central.
- When connected, fill in the Environment name and Company name fields.
- In the API category field, enter microsoft/dataverse/v1.0.
- In the Table name field, enter dataverseEntityChanges.
- In the entityName field, enter account.
- Save the flow.
The following image shows how your flow should look.
When you add, delete, or modify an account in your Dataverse environment, this flow will do the following actions:
- Call the Business Central environment that you specified in the Business Central Connector.
- Use the Business Central API to insert a record with the entityName set to account in the Dataverse Entry Change table. This parameter is the exact name of the Dataverse entity that you're creating the flow for.
- Business Central will start the job queue entry that synchronizes customers with accounts.
Related information
Use Business Central in Power Automate Flows
Set Up Automated Workflows
Integrating with Microsoft Dataverse
Synchronizing Data in Business Central with Microsoft Dataverse