Note
Access to this page requires authorization. You can try signing in or changing directories.
Access to this page requires authorization. You can try changing directories.
Note
The Retail Interest Group by Dynamics 365 Commerce has moved from Yammer to Viva Engage. If you don't have access to the new Viva Engage community, fill out this form (https://aka.ms/JoinD365commerceVivaEngageCommunity) to be added and stay engaged in the latest discussions.
This article describes how to add a recommendations control to the transaction screen on a point of sale (POS) device by using the screen layout designer in Microsoft Dynamics 365 Commerce. Learn more in Add product recommendations on POS.
You can display product recommendations on your POS device when you use Commerce. To display product recommendations, add a control to the transaction screen by using the screen layout designer.
Open Layout designer
Go to Retail and Commerce > Channel setup > POS setup > POS > Screen layouts.
Use the Quick Filter to find the screen that you want to add the control to. For example, filter on the Screen layout ID field by entering "F2CP16:9M".
In the list, find and select the desired record. For example, select Name: F2CP16:9M Screen Layout ID: F2CP16:9M.
Select Layout designer.
Follow the prompts to launch the layout designer. When prompted for credentials, enter the same credentials that you used when you launched the Layout designer from Screen layouts.
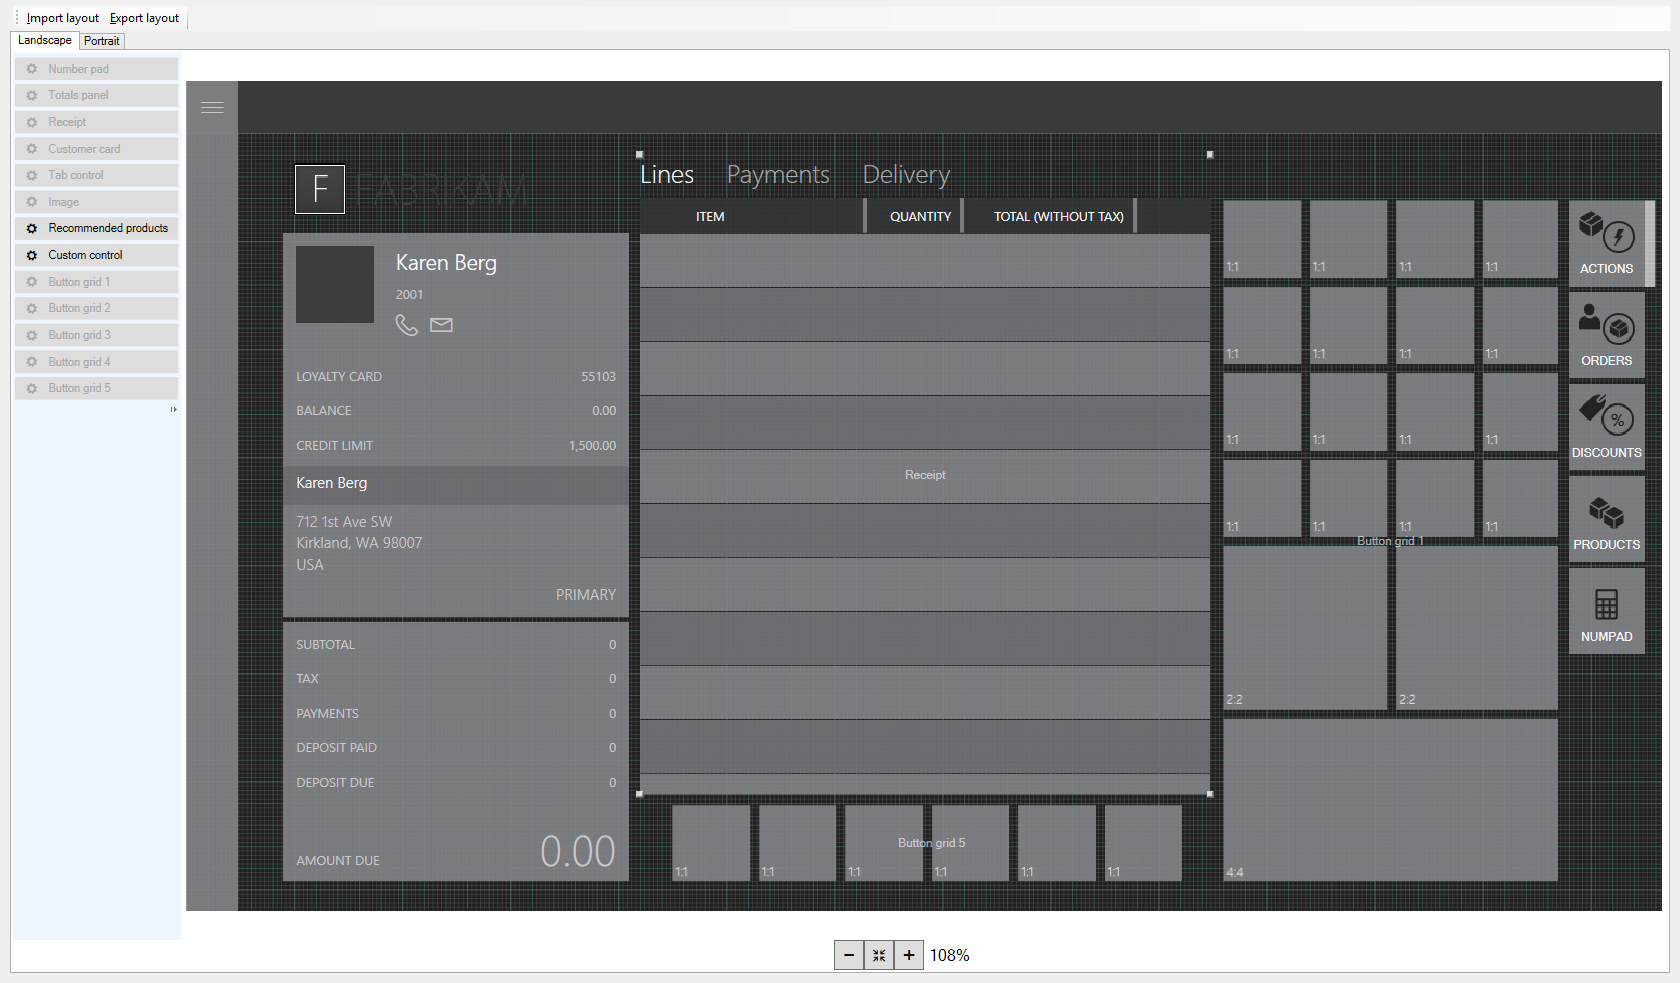
When you sign in, a page similar to the one shown in the following image appears. The layout is different depending on the customizations that were made for your store.

Choose a display option
Two configuration options are available. Choose the option that works best for your store, and follow the remaining instructions to finish setting up the control. The two options are:
- Recommendations are always visible.
- A Recommendations tab appears in the grid on the right side of the screen.
Make recommendations always visible
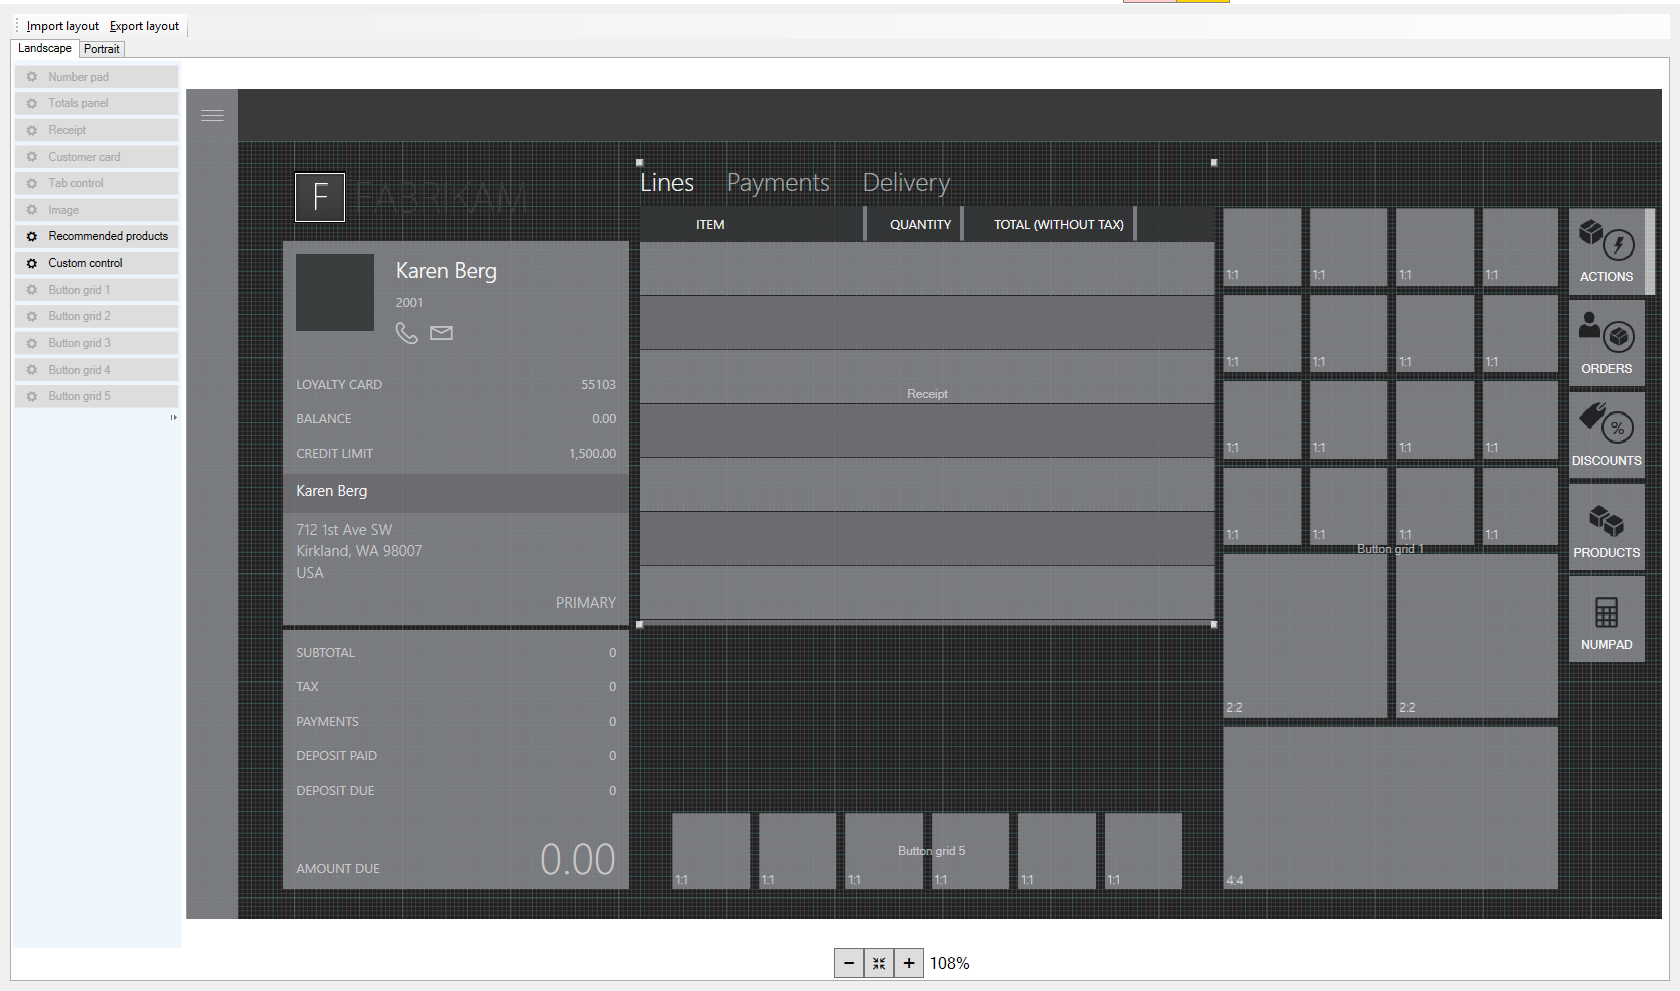
Reduce the height of the transaction lines details area so that it matches the height of the customer panel to its left.
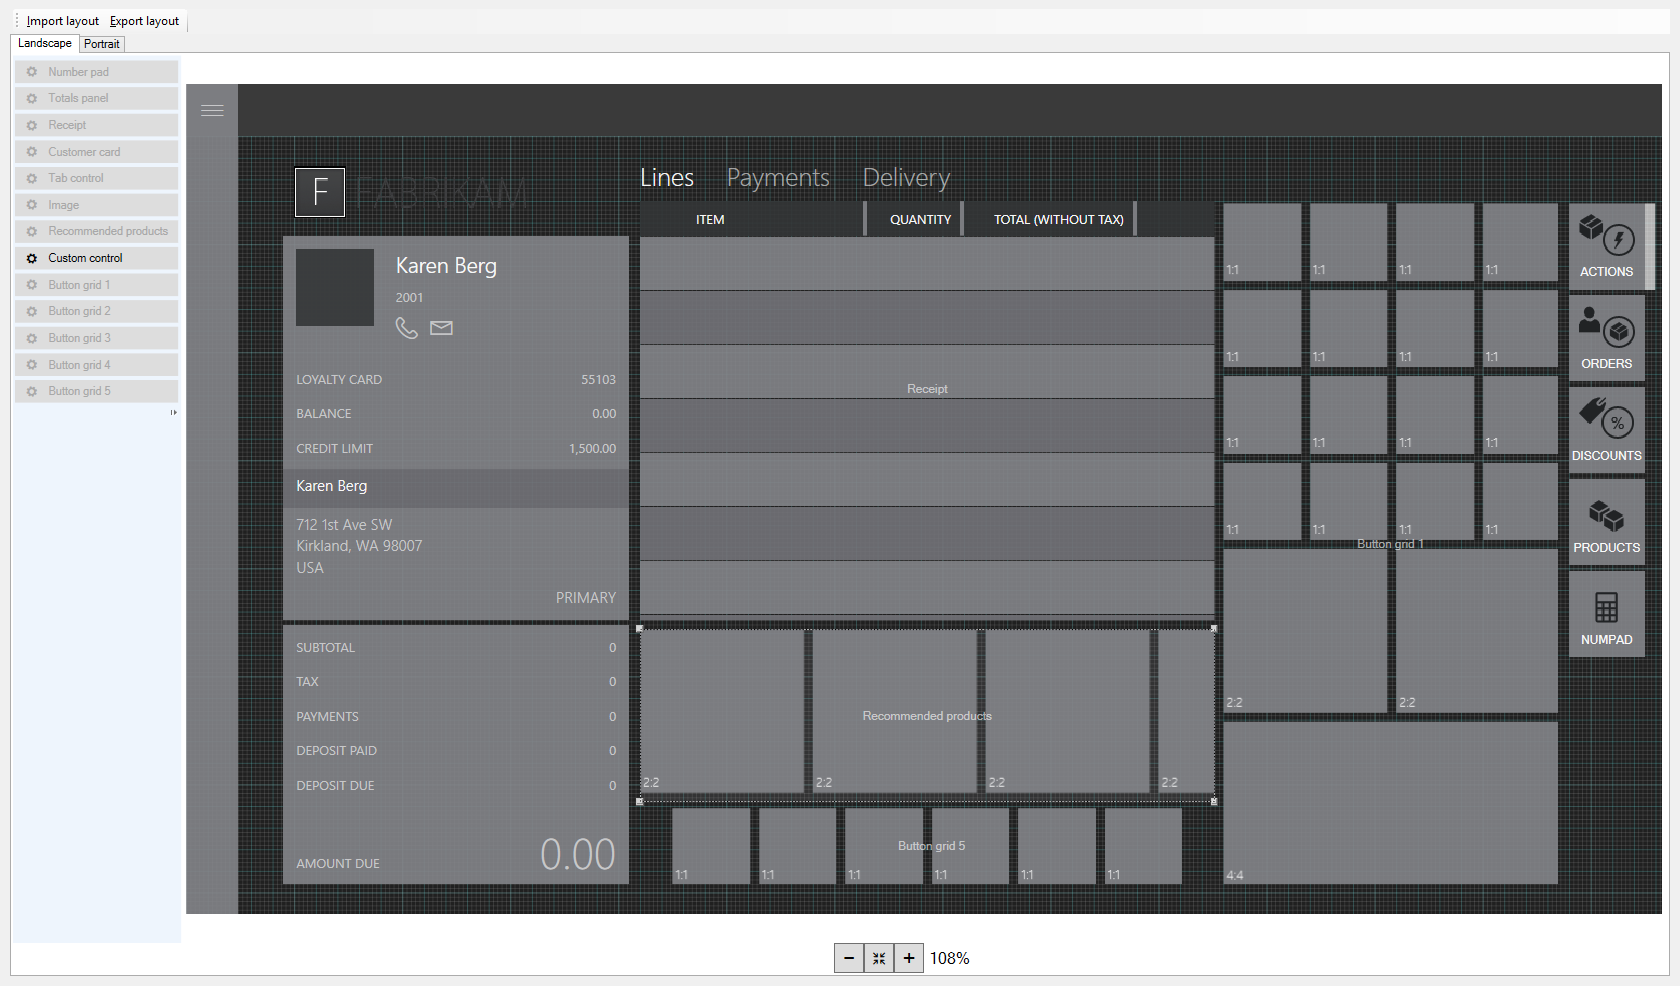
From the menu on the left, drag and drop the recommendations control to the space between the transaction line details area and the button grid in the center bottom of the transaction screen. Resize the control so it fits in that space.
Select the X to save and exit Layout designer.
In Commerce, go to Retail and Commerce > Retail and Commerce IT > Distribution schedules.
In the list, select 1090 Registers.
Select Run now.


Add a Recommendations tab to the button grid on the right side of the screen
Right-click the empty space below the last tab on the button grid located on the right side of the page.
Select Customize.
Select New tab.
Find the new tab that you just added. You might need to scroll down.
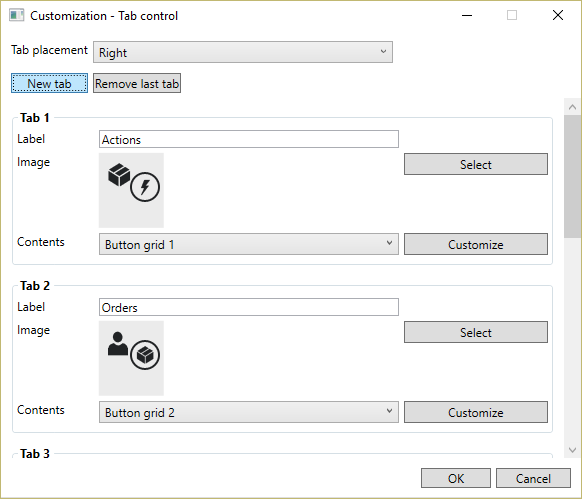
In the Contents drop-down, select Recommended products.
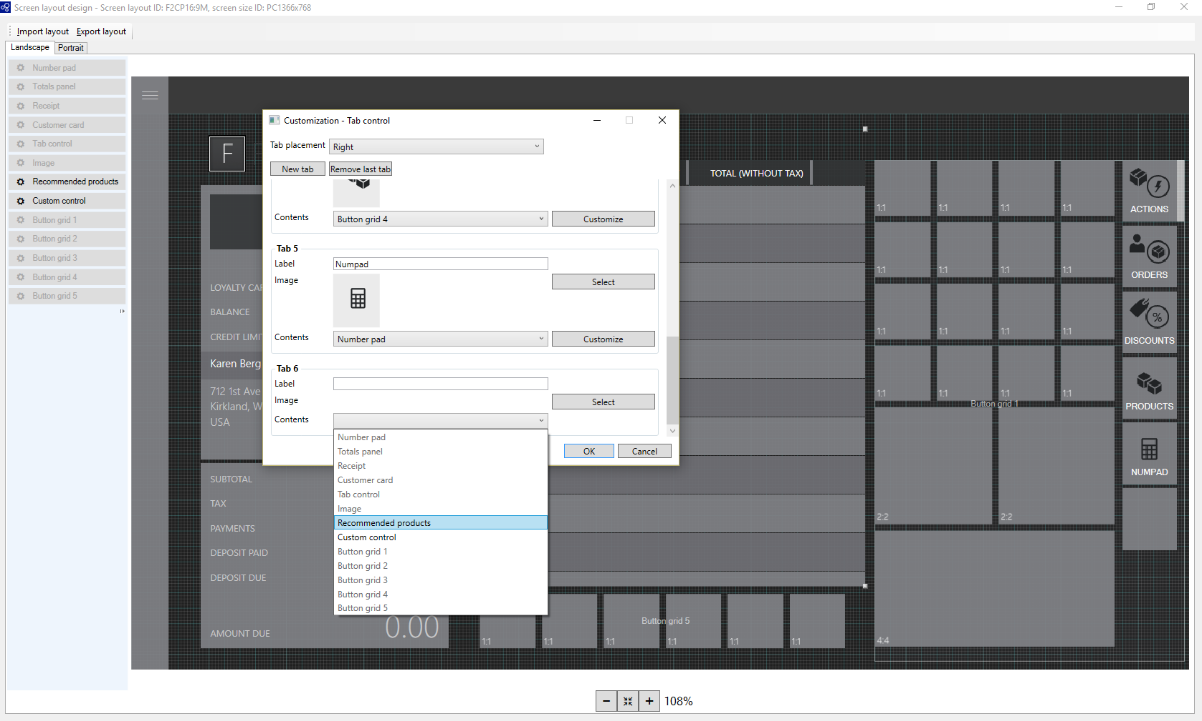
In the Label field, type a name for the recommendations tab. For example, enter "Recommended products."
In the Image field, select the image to appear on the tab.
Select OK. The new tab appears in the button grid.
Select the X to save and exit Layout designer.
In Commerce, go to Retail and Commerce > Retail and Commerce IT > Distribution schedules.
In the list, select 1090 Registers.
Select Run now.


Additional resources
Product recommendations overview
Enable Azure Data Lake Storage in a Dynamics 365 Commerce environment
Enable product recommendations
Enable personalized recommendations
Opt out of personalized recommendations
Enable "shop similar looks" recommendations
Add product recommendations on POS
Adjust AI-ML recommendations results
Manually create curated recommendations