Note
Access to this page requires authorization. You can try signing in or changing directories.
Access to this page requires authorization. You can try changing directories.
Note
The Retail Interest Group by Dynamics 365 Commerce has moved from Yammer to Viva Engage. If you don't have access to the new Viva Engage community, fill out this form (https://aka.ms/JoinD365commerceVivaEngageCommunity) to be added and stay engaged in the latest discussions.
This article provides instructions on how to connect an Azure Data Lake Storage Gen2 solution to a Dynamics 365 Commerce environment's Entity store. This is a required step before enabling product recommendations.
In the Dynamics 365 Commerce solution, the data necessary to compute recommendations, products, and transactions are aggregated in the environment's Entity store. To make this data accessible to other Dynamics 365 services, such as data analytics, business intelligence, and personalized recommendations, it is necessary to connect the environment to a customer-owned Azure Data Lake Storage Gen2 solution.
After the steps above have been completed, all customer data in the environment's Entity store is automatically mirrored to the customer's Azure Data Lake Storage Gen 2 solution. When recommendations features are enabled via the Feature management workspace in Commerce headquarters, the recommendations stack will be granted access to the same Azure Data Lake Storage Gen2 solution.
During the entire process customers' data remains protected and under their control.
Prerequisites
A Dynamics 365 Commerce environment's Entity store must be connected to an Azure Data Lake Gen Storage Gen2 account and accompanying services.
For more information about Azure Data Lake Storage Gen2 and how to set it up, see Azure Data Lake Storage Gen2 official documentation.
Configuration steps
This section covers the configuration steps necessary for enabling Azure Data Lake Storage Gen2 in an environment as it relates to product recommendations. For a more in-depth overview of the steps required to enable Azure Data Lake Storage Gen2, see Make entity store available as a Data Lake.
Enable Azure Data Lake Storage in the environment
- Log in to the environment's back office portal.
- Search for System Parameters and navigate to the Data connections tab.
- Set Enable Data Lake integration to Yes.
- Next, enter the following required information:
- Application ID // Application Secret // DNS Name - Needed to connect to KeyVault where the Azure Data Lake Storage secret is stored.
- Secret name - The secret name stored in KeyVault and used to authenticate with Azure Data Lake Storage.
- Save your changes in the top left corner of the page.
Test the Azure Data Lake Storage connection
- Test the connection to KeyVault using the Test Azure Key Vault link.
- Test the connection to Azure Data Lake Storage using the Test Azure Storage link.
Note
If either of the tests above fail, confirm that all of the KeyVault information added above is correct and then try again.
Once the connection tests are successful, you must enable automatic refresh for Entity store.
To enable automatic refresh for Entity store, follow these steps:
- Search for Entity Store.
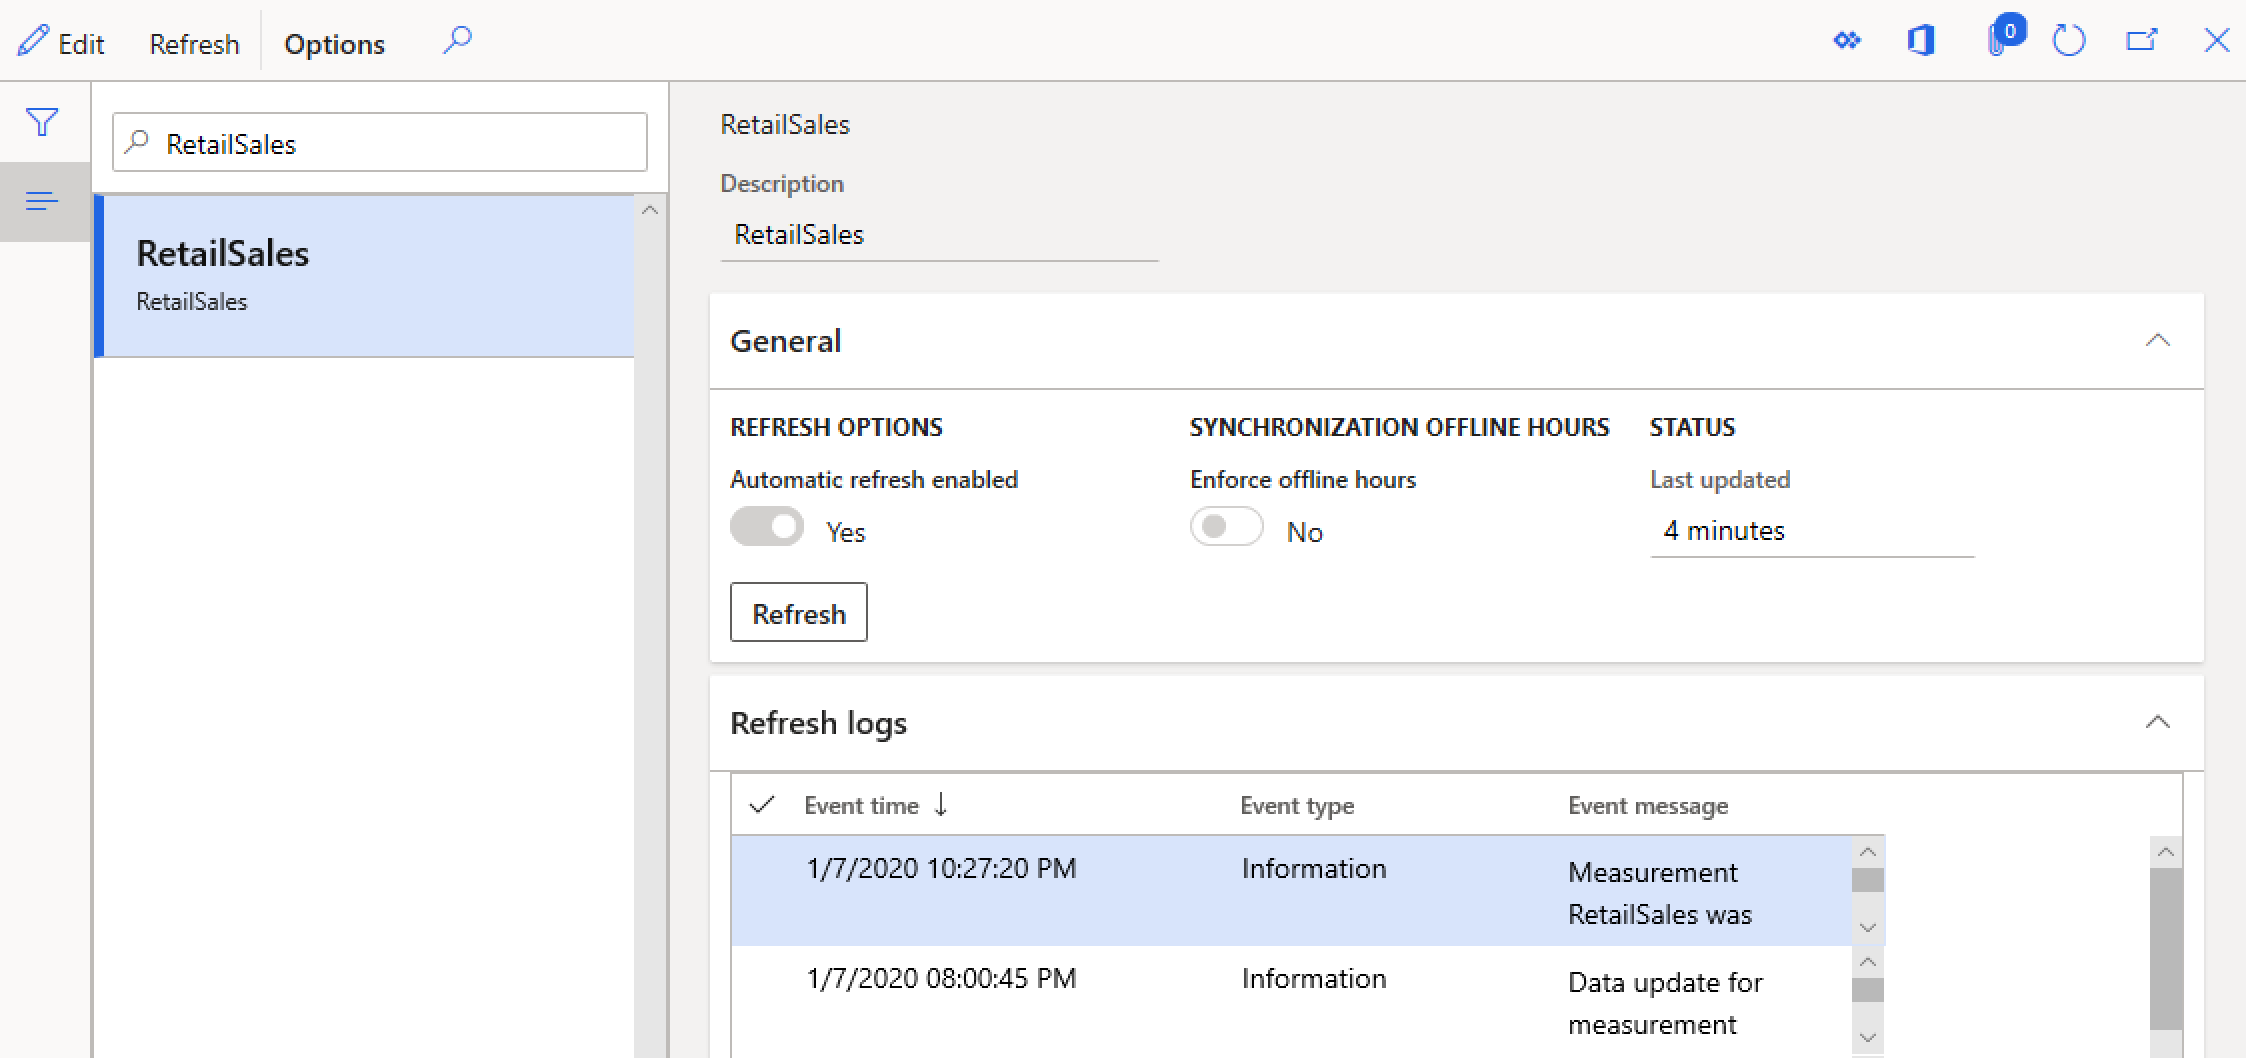
- In the list on the left, navigate to the RetailSales entry, and select Edit.
- Ensure that Automatic Refresh Enabled is set to Yes, select Refresh, and then select Save.
The following image shows an example of Entity store with automatic refresh enabled.

Azure Data Lake Storage is now configured for the environment.
If not completed already, follow the steps for enabling product recommendations and personalization for the environment.
Additional resources
Make entity store available as a data lake
Product recommendations overview
Enable product recommendations
Enable personalized recommendations
Opt out of personalized recommendations
Enable "shop similar looks" recommendations
Add product recommendations on POS
Add recommendations to the transaction screen
Adjust AI-ML recommendations results
Manually create curated recommendations