Note
Access to this page requires authorization. You can try signing in or changing directories.
Access to this page requires authorization. You can try changing directories.
Note
The Retail Interest Group by Dynamics 365 Commerce has moved from Yammer to Viva Engage. If you don't have access to the new Viva Engage community, fill out this form (https://aka.ms/JoinD365commerceVivaEngageCommunity) to be added and stay engaged in the latest discussions.
This article describes how to create a default customer to use when creating a channel in Microsoft Dynamics 365 Commerce.
When you create a channel, you need to provide a default customer. You can easily create a default customer after you create the customer group and customer address book.
Create a customer group
If no customer groups exist yet, create one. Examples of customer groups include wholesale, retail, Internet, employees, and more.
To create a customer group, follow these steps:
- In the navigation pane, go to Modules > Retail and commerce > Customers > Customer groups.
- On the action pane, select New.
- In the Customer group box, enter a customer group ID.
- In the Description box, enter an appropriate description.
- In the Terms of payment box, enter an appropriate value.
- In the Time between invoice due date and payment date box, enter an appropriate value.
- In the Default tax group box, enter a tax group if applicable.
- Select the Prices include sales tax check box if applicable.
- In the Default write-off reason box, enter an appropriate value, if applicable.
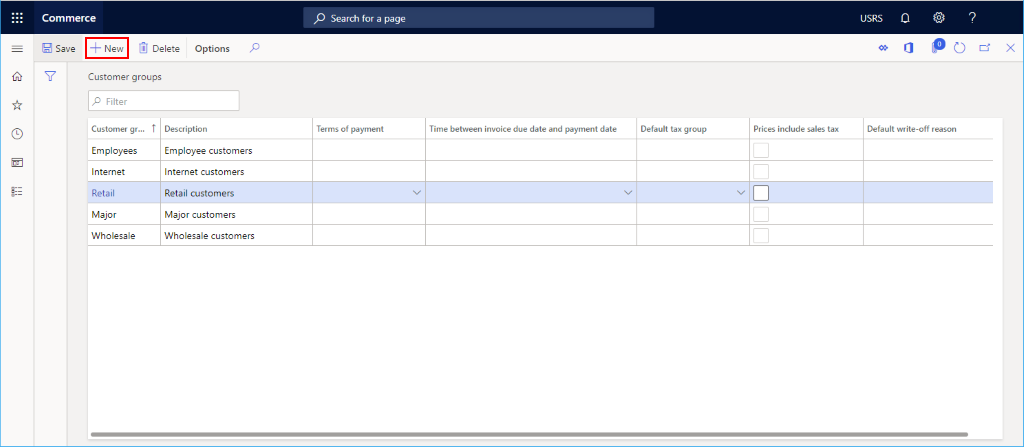
The following image shows several configured customer groups.
Create a customer address book
You need to associate each customer with an address book. If an address book doesn't exist, create one.
To create a customer address book, follow these steps:
- In the navigation pane, go to Modules > Retail and commerce > Channel setup > Address Books.
- On the action pane, select New.
- In the Name box, enter a name.
- In the Description box, enter a description.
- On the action pane, select Save.
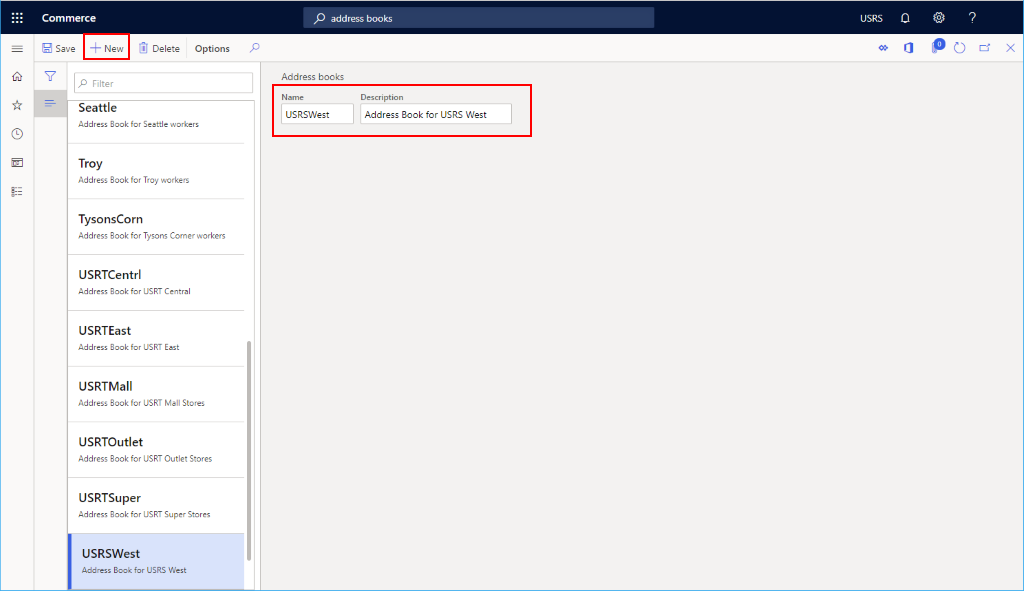
The following image shows an example address book.
Create a default customer
To create a default customer, follow these steps:
- In the navigation pane, go to Modules > Retail and commerce > Customers > All customers.
- On the action pane, select New.
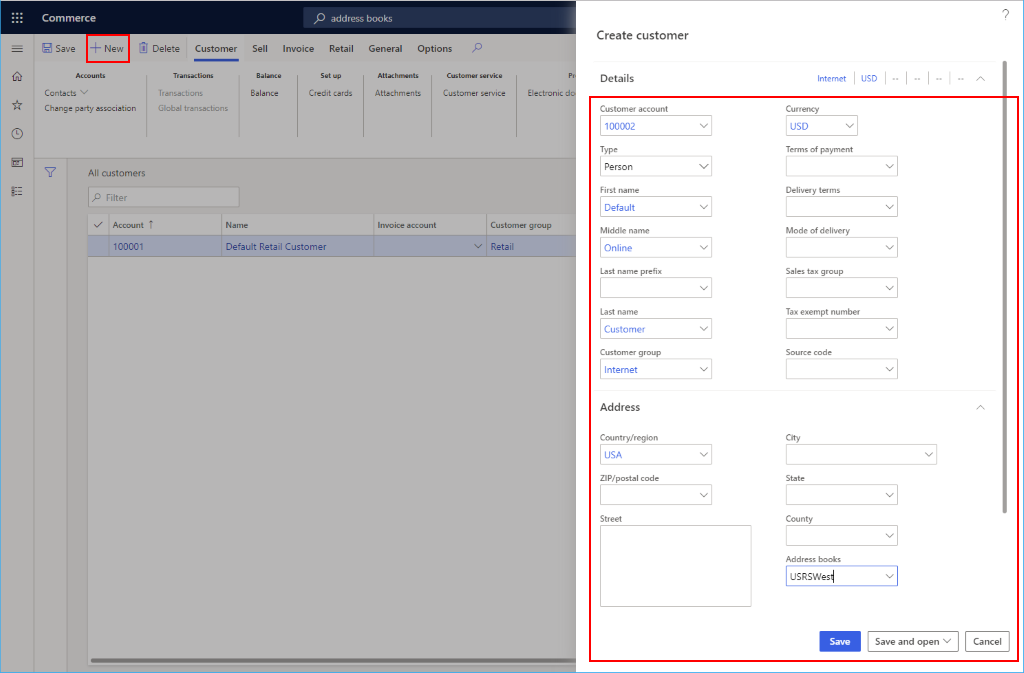
- In the Type drop-down list, select Person.
- In the Customer account drop-down list, select or enter an account number (for example, 100001).
- In the First name drop-down list, select or enter a name (for example, Default).
- In the Middle name drop-down list, select or enter a name (for example, Retail).
- In the Last name drop-down list, select or enter a name (for example, Customer).
- In the Currency drop-down list, select or enter a currency (for example, USD).
- In the Customer group drop-down list, select the customer group you created previously.
- In the Address books drop-down list, select an existing customer address book.
- Select Save to save and return to customer details screen for the new customer.
Note
You don't need to add an address for a default customer.
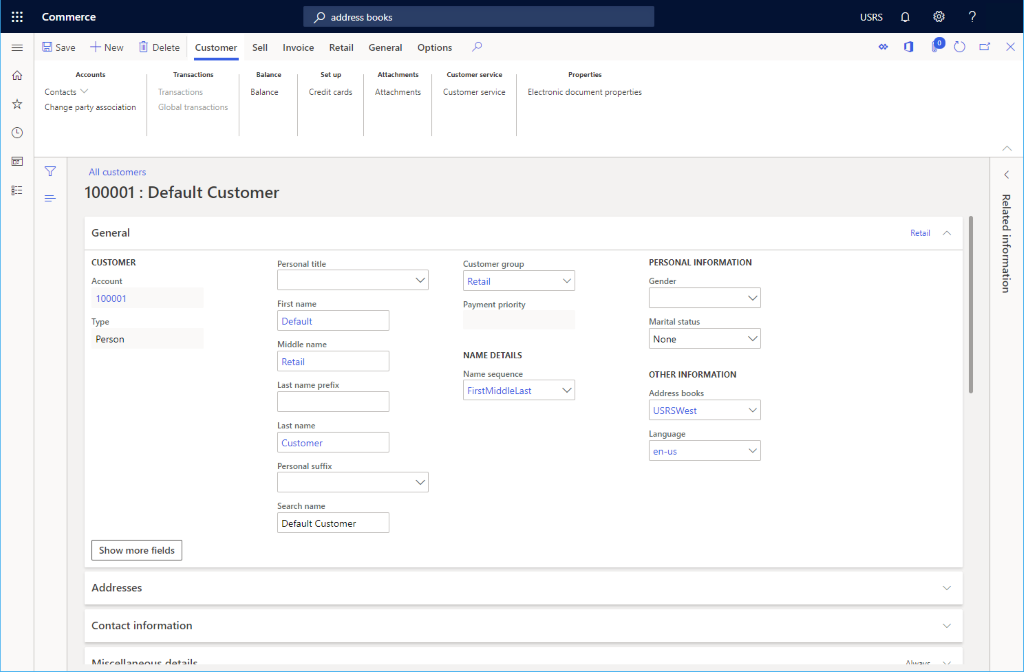
The following image shows an example of customer creation.
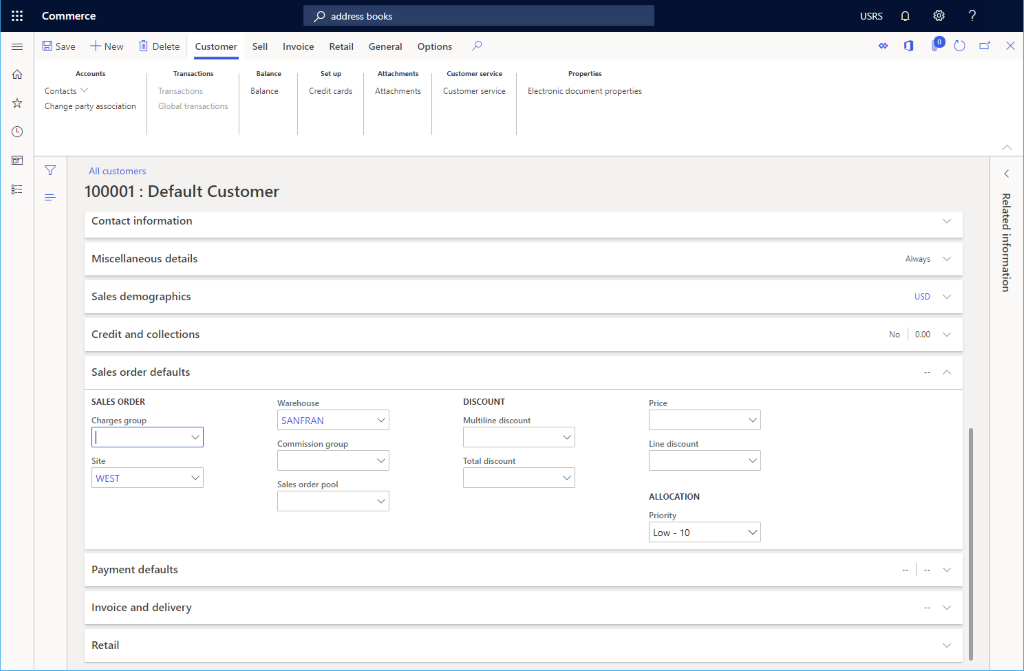
The following image shows a default customer configuration.
Most of the default values on the customer details screen can remain, but change two values.
- On the customer details screen, expand Sales order defaults.
- In the Site drop-down list, select or enter a preconfigured site.
- In the Warehouse drop-down list, select or enter a preconfigured warehouse.
The following image shows an example customer configuration.