Create and configure a Microsoft Entra application for account manager sign-in
This article describes how to create and configure an Microsoft Entra application for account manager sign-in for on behalf of functionality (OBO) in Microsoft Dynamics 365 Commerce.
Create a Microsoft Entra application for account manager sign-in in the Azure B2B tenant
To create a Microsoft Entra application for account manager sign-in in the Azure business-to-business (B2B) tenant, follow these steps.
Sign in to the Azure portal.
Go to the directory that contains the Microsoft Entra business-to-business (B2B) tenant that's being used for sign-in in headquarters.
In the row of Azure services, select Microsoft Entra ID.
On the Manage menu, select App Registration, and then select New Registration.
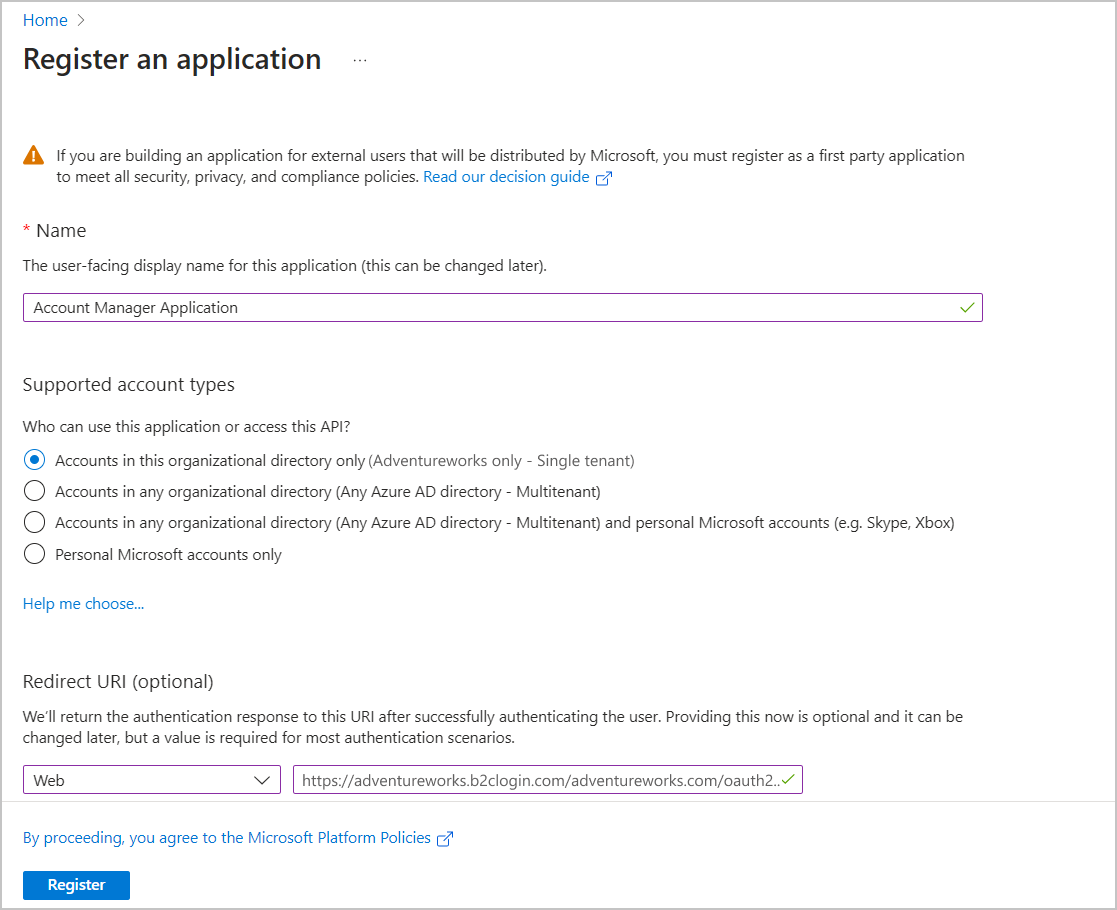
Enter a name for the application (for example, Account Manager Employer Auth).
Under Supported account types, select Accounts in this organizational directory only (
<YOUR-TENANT-NAME>only - Single tenant), where<YOUR-TENANT-NAME>is the name of your tenant.Under Redirect URI, select Web, and then, in the URL field, enter
https://<your-tenant-name>.b2clogin.com/<your-tenant-name>.onmicrosoft.com/oauth2/authresp, where<your-tenant-name>is the name of your tenant. If you use a custom domain, enterhttps://<your-domain-name>/<your-tenant-name>.onmicrosoft.com/oauth2/authresp, where<your-domain-name>is your custom domain.Note
Use lowercase letters when you enter your tenant's name, even if the tenant is defined with uppercase letters in Microsoft Entra ID B2C. For example, enter
https://adventure-works.b2clogin.com/adventure-works.onmicrosoft.com/oauth2/authresp.Select Register.
Configure a Microsoft Entra application for account manager sign-in in the Azure B2B tenant
After you complete the registration, locate the application that you created (for example, Account Manager Application).
In the Essentials section, copy and save the Application (Client) ID value. This value is a globally unique identifier (GUID) (for example, "88760a037-ea1e-4e04-8e50-0a8dfcb4eb50").
Select Add an Application ID URI.
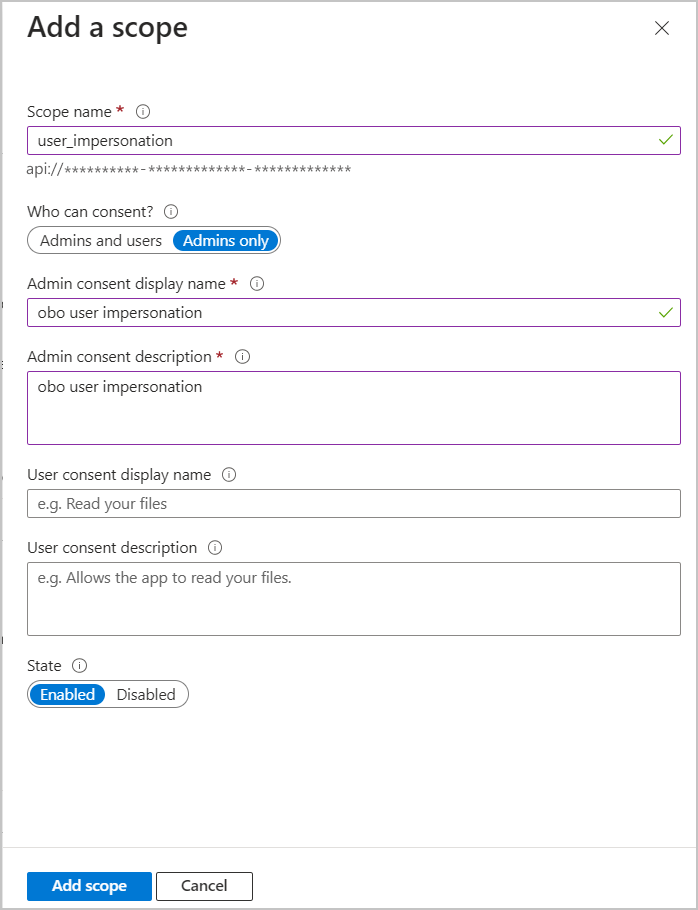
Select Add a scope. An application ID URI is generated for you.
Select Save and continue.
For Scope name, enter "user_impersonation".
For Admin consent display name, enter "obo user impersonation", or any other name.
For Admin consent description, enter "obo user impersonation", or any other description.
Select Save.
On the left menu, under Manage, select Certificates & secrets.
Select New client secret.
In the Description field, enter a description of the client secret (for example, "clientsecret1").
Under Expires, select the date when the secret expires.
Select Add.
Copy and save the secret value to use later.
Important
The secret value is never shown again after you leave the Certificates & secrets page. Therefore, be sure to copy it.
Configure an identity provider in your Azure B2C tenant for account manager sign-in to a B2B site
To configure an identity provider in your Azure B2C tenant for account manager sign-in to a B2B site, follow these steps.
Go to the directory that contains your Microsoft Entra B2C tenant. On the top menu, select the Directory + subscription filter, and then select the directory that contains your Microsoft Entra B2C tenant.
In the upper-left corner of the Azure portal, select All services , and then search for and select Microsoft Entra ID B2C.
Select Identity providers, and then select New OpenID Connect provider.
In the Name field, enter StoreManagerB2BSignin. This exact name is required and can't be modified.
Important
For on behalf of sign-in to work, the identity provider name must match the ID used in your sign-in module. The default value is StoreManagerB2BSignin.
In the Metadata url field, enter the URL of the Azure B2B OpenID Connect (OIDC) configuration document (for example,
https://login.microsoftonline.com/<TENANT-ID>/v2.0/.well-known/openid-configuration, where<TENANT-ID>is the ID of your Microsoft Entra B2B tenant).Important
The OIDC configuration document URL must use HTTPS.
In the Client ID field, enter the application ID that you copied earlier.
In the Client secret field, enter the client secret that you copied earlier.
In the Scope field, enter "openid profile
<Azure-B2B-Application-ID-URI>/user_impersonation", where<Azure-B2B-Application-ID-URI>is the ID of the Azure B2B Microsoft Entra application (for example, "openid profile api://88760a037-ea1e-4e04-8e50-0a8dfcb4eb50/user_impersonation"). The Scope field format must be "openid profile<scope-name>", where<scope-name>is the scope name you created in the Create a Microsoft Entra application for account manager sign-in in the Azure B2B tenant procedure.In the Response type field, select code.
In the Response mode field, select form_post.
Under Identity provider claims mapping, select the following claims:
- For User ID, select sub.
- For Display name, select name.
- For Given name, select given_name.
- For Surname, select family_name.
- For Email, select email.
Select Save.
Add the Azure identity provider to a user flow
To add the Azure identity provider to a user flow, follow these steps.
- In your Microsoft Entra B2C tenant, select User flows.
- Select the user flow that you want to add the identity provider to.
- Under the Custom identity providers, select the identity provider that you added in the Create a Microsoft Entra application for account manager sign-in in the Azure B2B tenant procedure.
- In Application Claims, select Identity Provider Access Token, Identity Provider, Email address, Given Name, and Surname.
- Select Save.
Additional resources
Create and modify pages for on behalf of (OBO) functionality