Note
Access to this page requires authorization. You can try signing in or changing directories.
Access to this page requires authorization. You can try changing directories.
This article describes how to set up code sharing with Microsoft Azure DevOps and create a build pipeline for your Microsoft Dynamics 365 Commerce online extensibility code.
By taking advantage of the capabilities of Azure DevOps, you can help your team plan work, collaborate on code development, and automate the building of deployment packages for Dynamics 365 Commerce e-Commerce.
This article guides you through the steps that are required to complete the following tasks:
- Create a GitHub repository (repo) for the Commerce online software development kit (SDK).
- Create and configure a build pipeline to generate a Commerce online deployable package.
Create an Azure DevOps GitHub repo
You can create an Azure DevOps GitHub repo project from a new or existing Azure DevOps service subscription. For more information, see Azure DevOps Service. To get started with a free trial account, see the Get started with Azure DevOps quickstart guide. To create an Azure DevOps GitHub repo, follow these steps.
After the Azure DevOps service is set up for your organization, create a new Azure DevOps project.
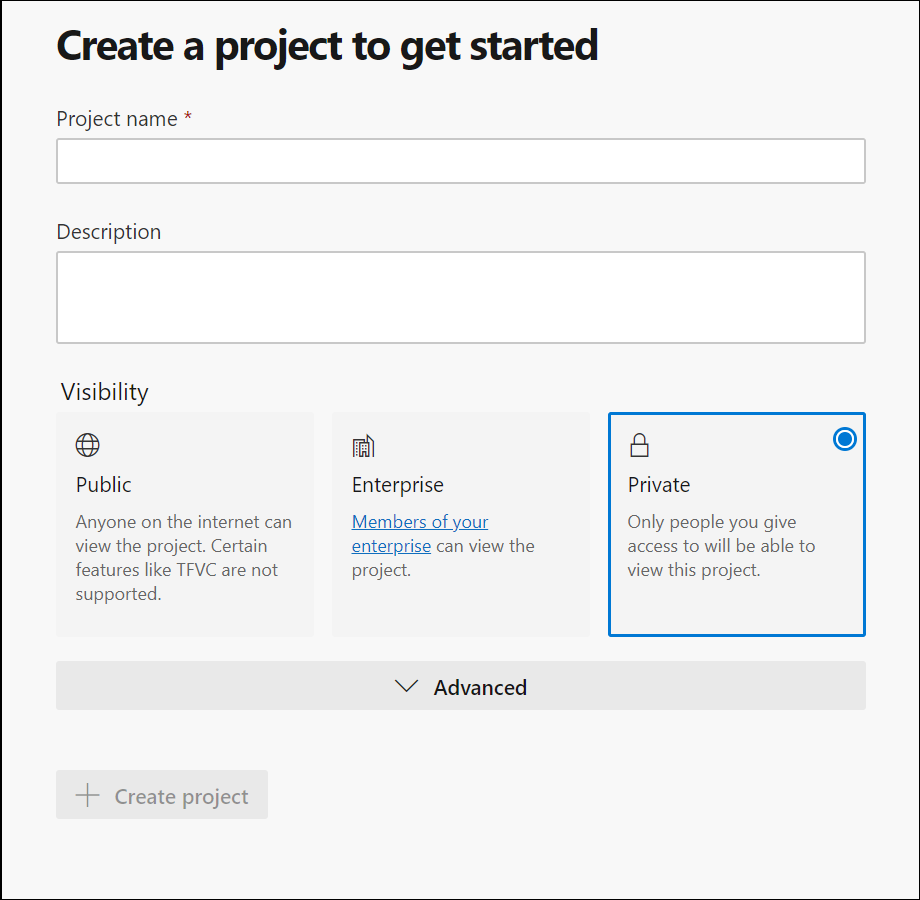
Enter a project name and a description. Select Private or Enterprise visibility, so that the project is accessible to your organization and developers.
For this example, you will use Git to clone the SDK code. Git is a free, open-source distributed version control system. Go to https://git-scm.com/downloads to download and install the latest build. You should be able to accept all the default installation values.
Install Visual Studio Code. Visual Studio Code is a lightweight source code editor that runs on your desktop, and is available for Windows, macOS, and Linux. It includes built-in support for JavaScript, TypeScript, and Node.js. Go to https://code.visualstudio.com to download the latest stable build. Then open the installer, and accept the user license agreement. You should be able accept all the default installation values.
Clone the Commerce online SDK. The SDK provides everything that you need to extend your e-Commerce site. For example, you can use it to create new modules, data actions, and themes. The SDK configuration package is available through the following GitHub repo: https://github.com/microsoft/Msdyn365.Commerce.Online.
There are two ways to get the SDK configuration packages to your development computer. You can either download the packages directly from the GitHub repo, or you can clone the repo.
To clone the repo, follow these steps:
- Open a Command Prompt window as an admin, and create a directory to hold your e-Commerce site code (for example, c:\repos).
- From the new directory, enter git clone <YOUR_GIT_REPO>, where <YOUR_GIT_REPO> is your GitHub repo. Because you're pulling from the GitHub repo only one time, you can remove the .git folder, which is a hidden directory under the root.
Here is an example.
md c:\repos
cd c:\repos
git clone https://github.com/microsoft/Msdyn365.Commerce.Online.git
cd Msdyn365.Commerce.Online
Clone the Azure DevOps GitHub project repo:
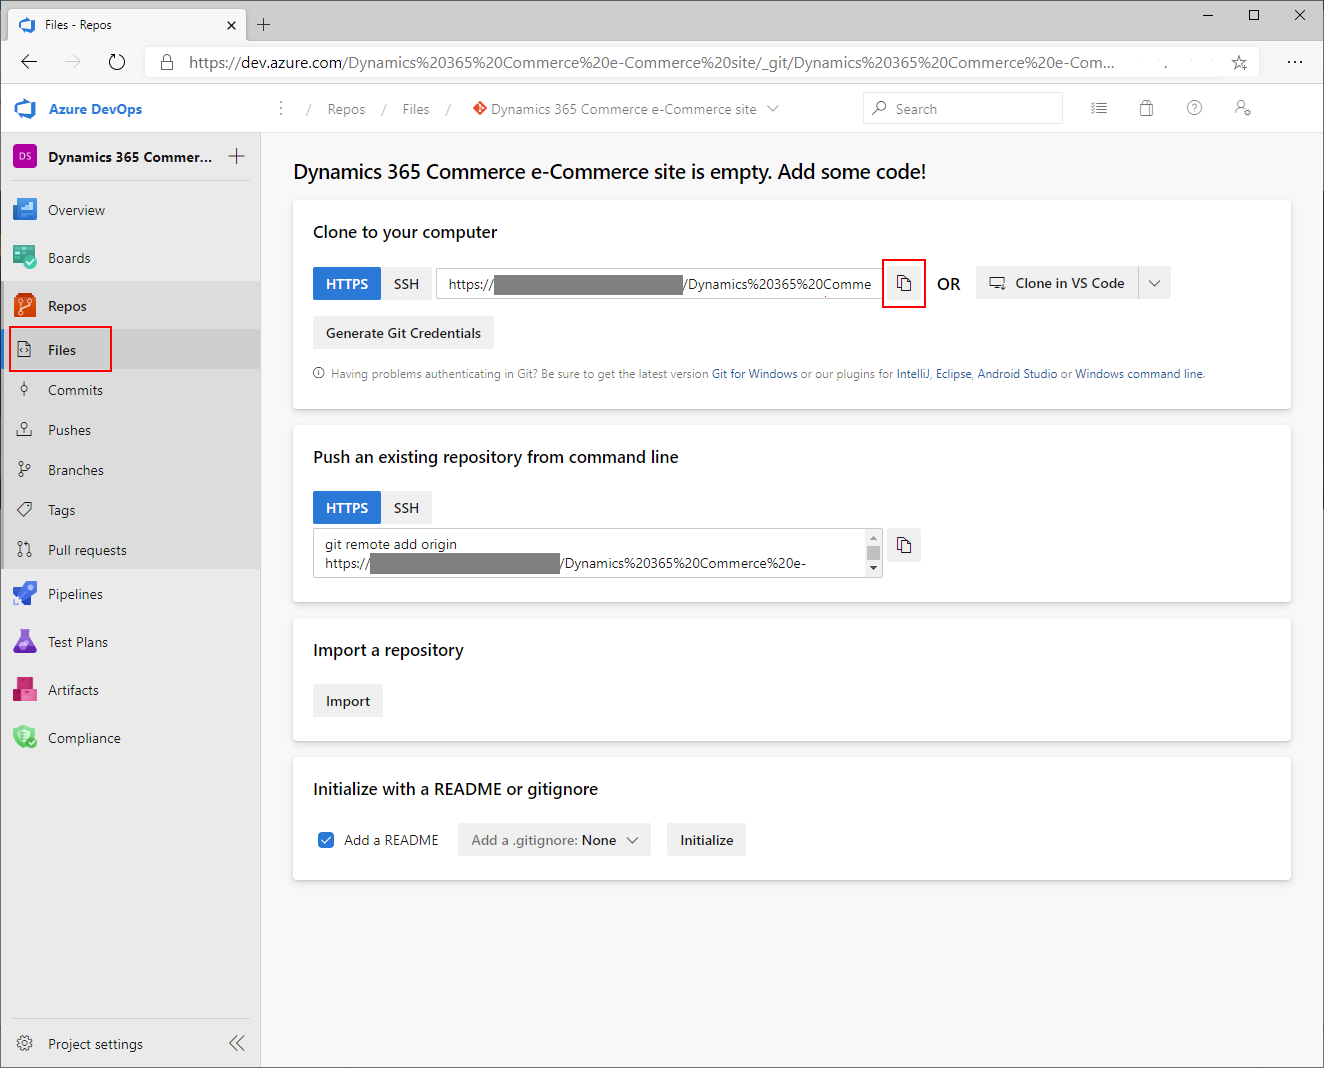
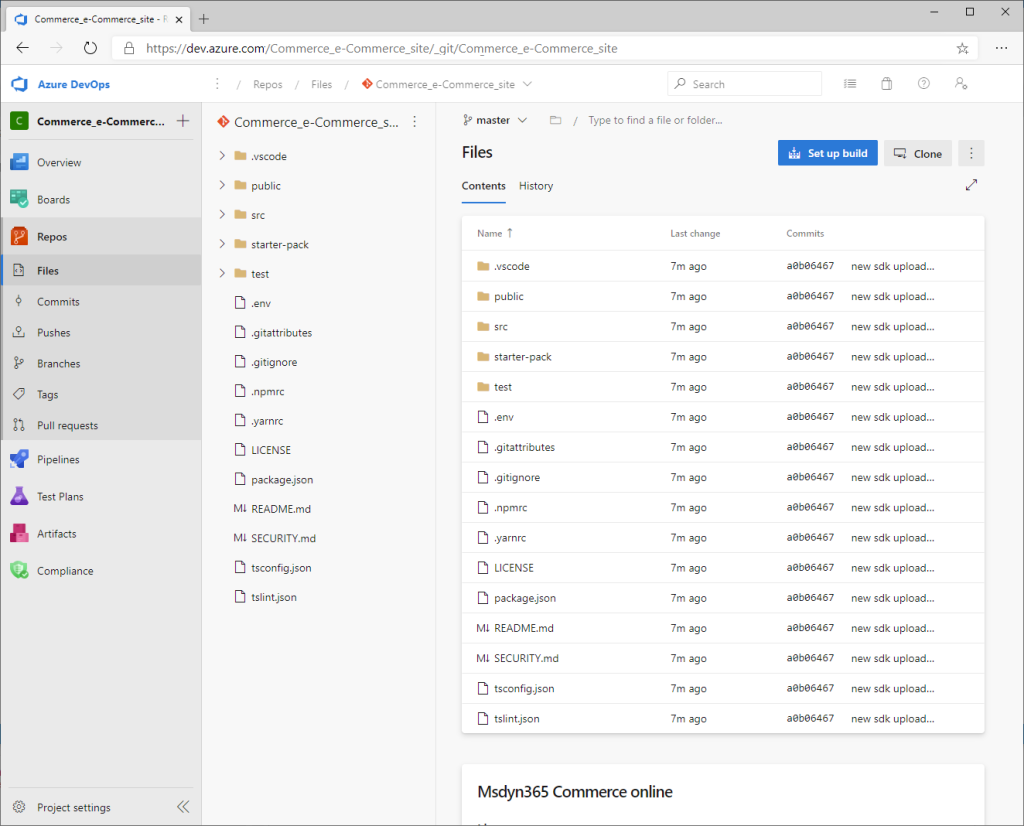
In the left navigation pane, under Repos, select Files.
Select the Copy button to copy the URL.
Open a Command Prompt window as an admin, and create a directory to hold your e-Commerce site code (for example, c:\repos).
From the new directory, enter git clone <AZURE_DEVOPS_GIT_REPO>, where <AZURE_DEVOPS_GIT_REPO> is the Azure DevOps GitHub project repo. A new, empty folder that has the name of the Azure DevOps project will be created.
cd c:\repos
git clone https://xxxxxx.dev.azure.com/<DevOpsProjectName>/_git/<DevOpsProjectName>
Copy all the contents of C:\repos\Msdyn365.Commerce.Online to C:\repos\<DevOpsProjectName>. Don't copy the hidden .git folder.
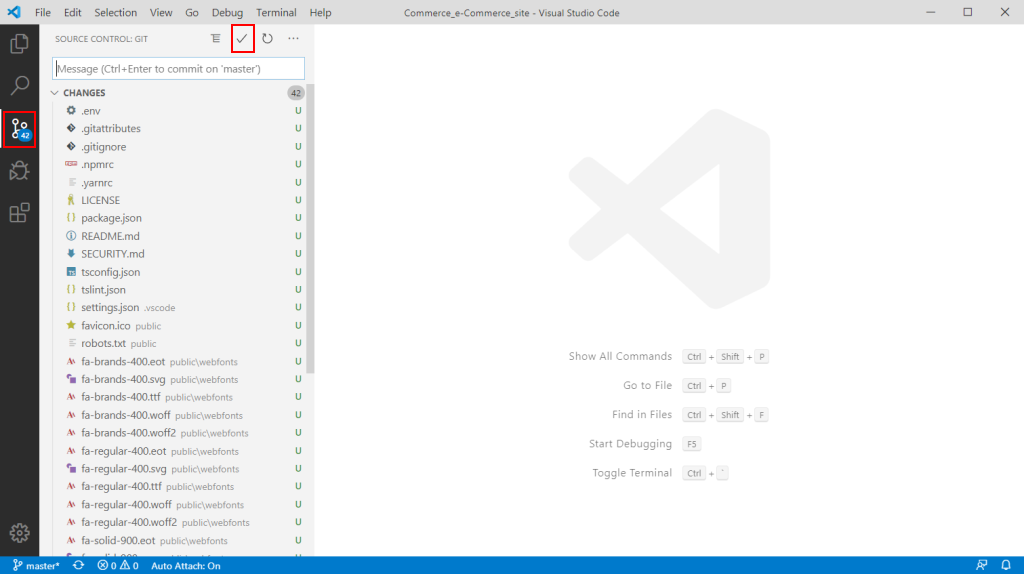
In Visual Studio Code, open the c:\repos\<DevOpsProjectName> folder. When you select the Source Control button on the left, Visual Studio Code shows the new changes that must be committed.
To commit all the changes to Git, enter a description in the field at the top of the Source Control: Git pane, and then select the check mark symbol above it. When you're prompted to stage all your changes and commit them directly, select Yes.
Select the ellipsis (...) to the right of the check mark symbol, and then, on the menu that appears, select Push to push the changes to the repo.
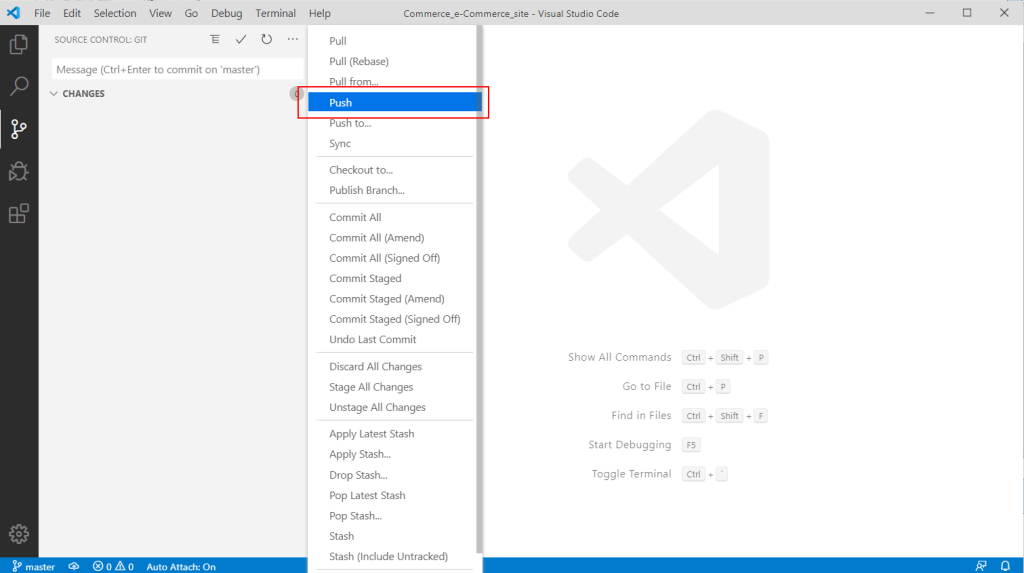
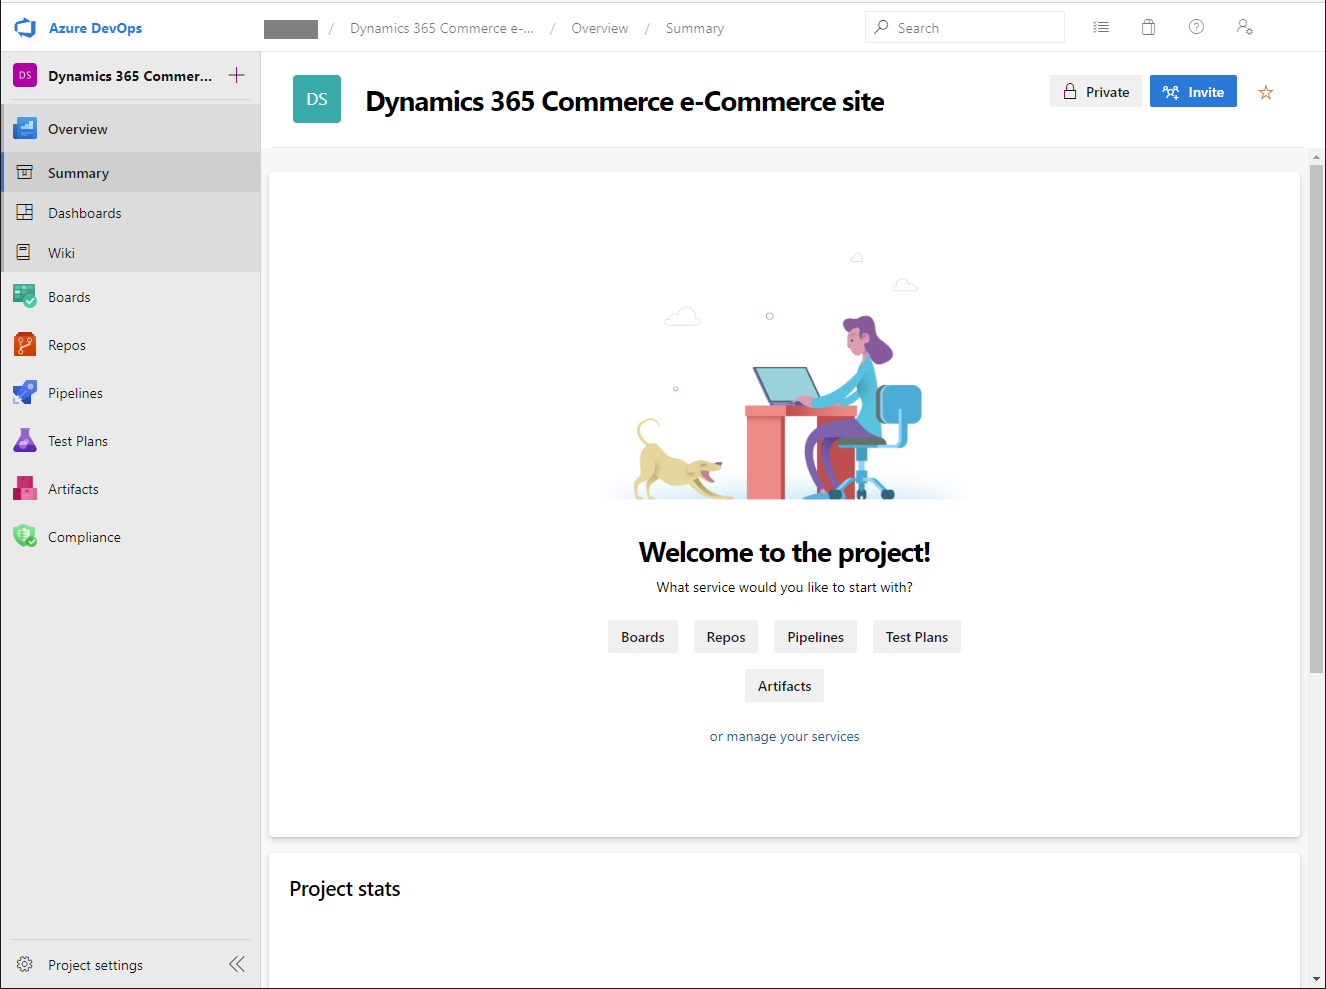
In Azure DevOps, you should now see the new files.
Create and configure a new build pipeline in Azure DevOps
To create and configure a new build pipeline in Azure DevOps, follow these steps.
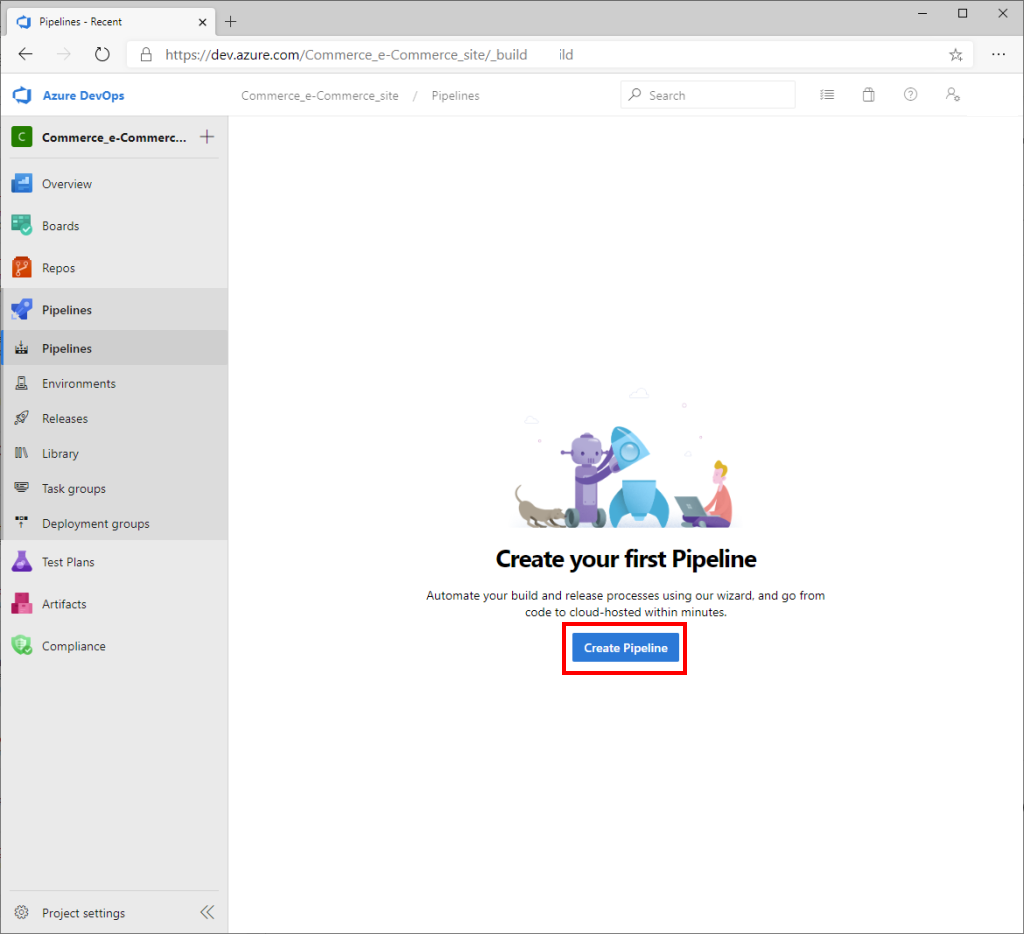
In the left navigation pane, under Pipelines, select Pipelines, and then select Create Pipeline in the main part of the page.
Select Use the classic editor.
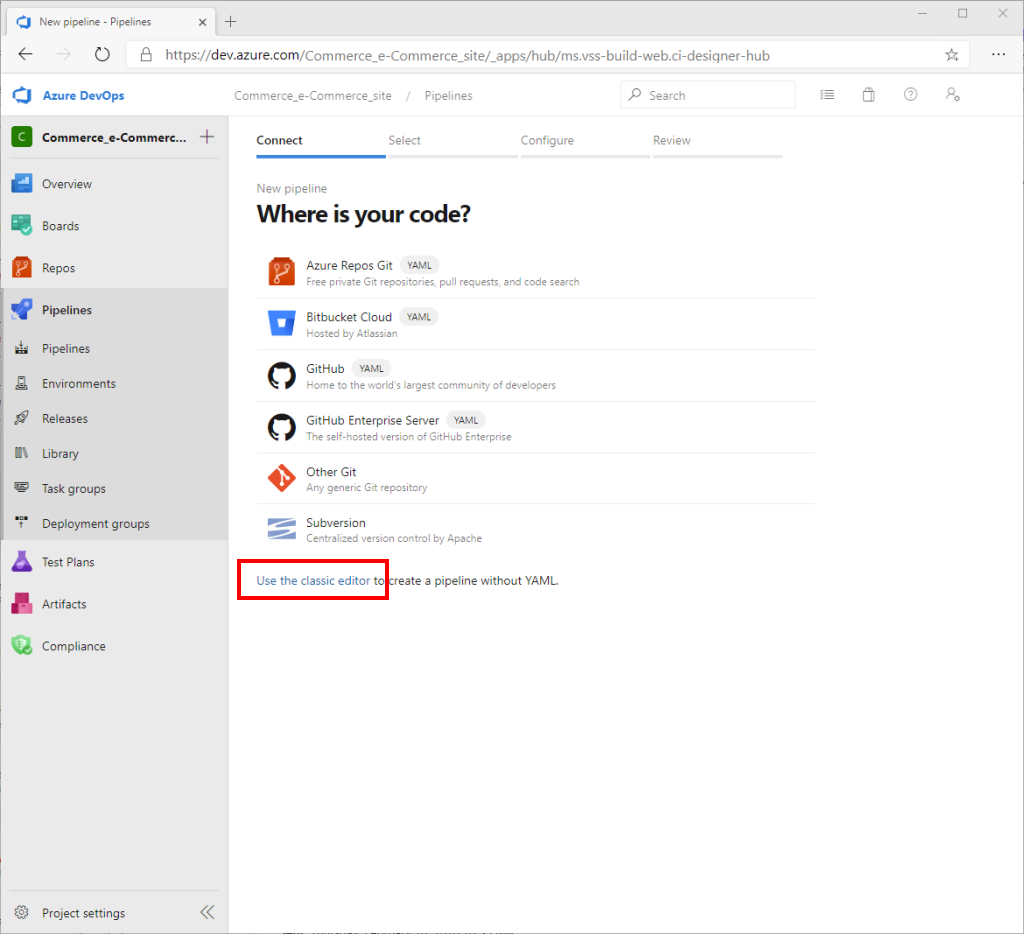
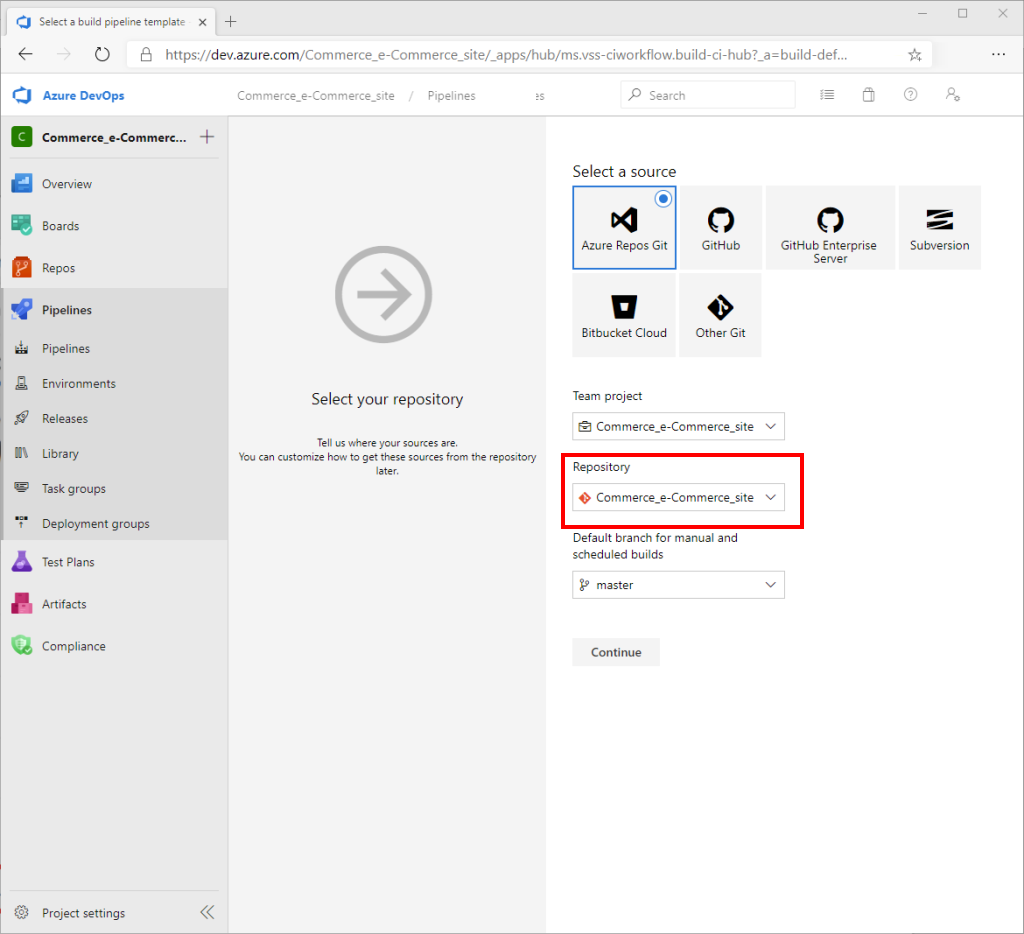
In the Repository field, select your Azure DevOps GitHub repo project, and then select Continue.
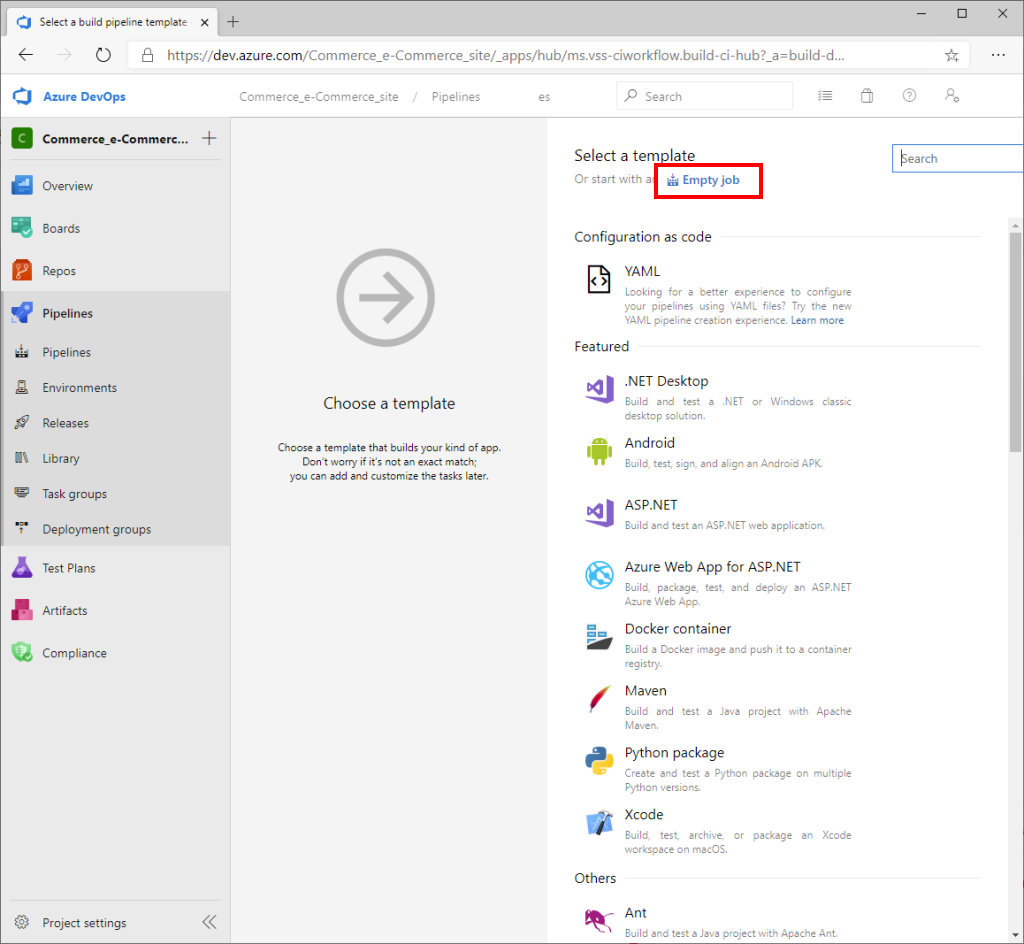
Under Select a template, select Empty job.
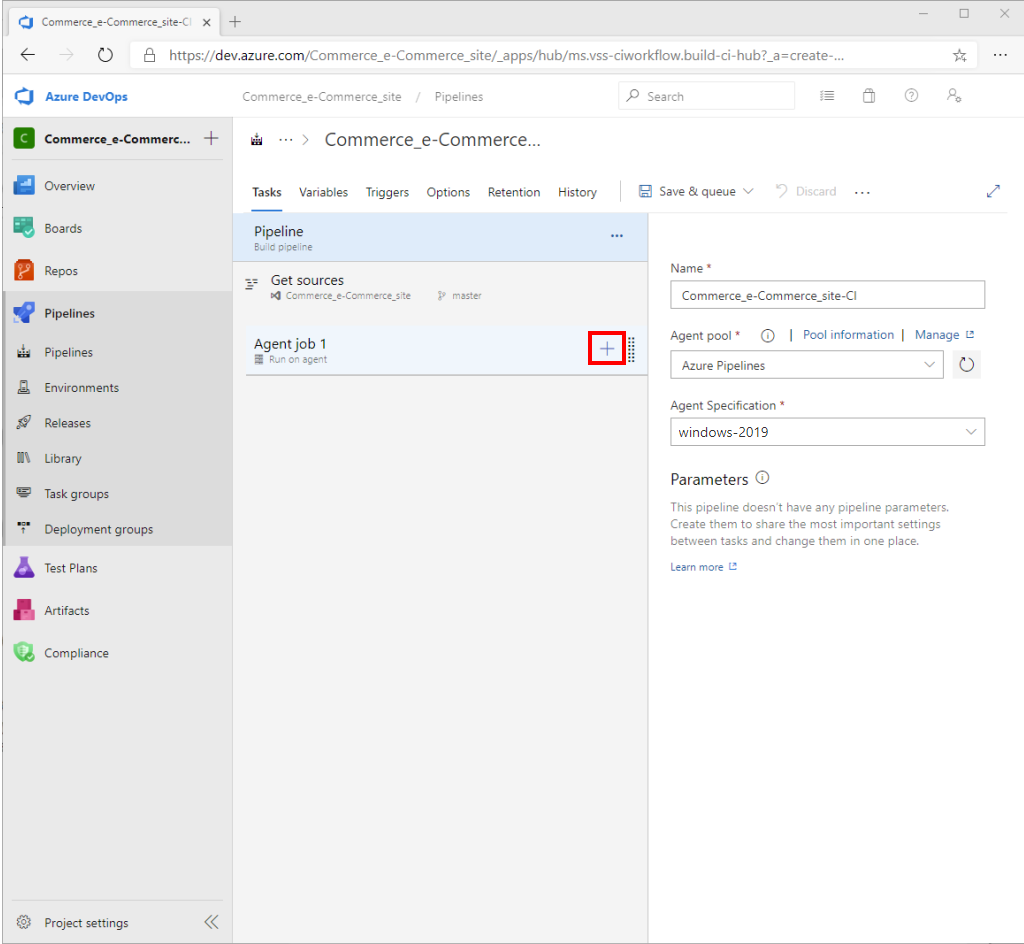
Next to Agent job, select the plus sign (+) to add a new agent job.
In the Add tasks pane on the right, search for "PowerShell," and then, in the PowerShell task, select Add.

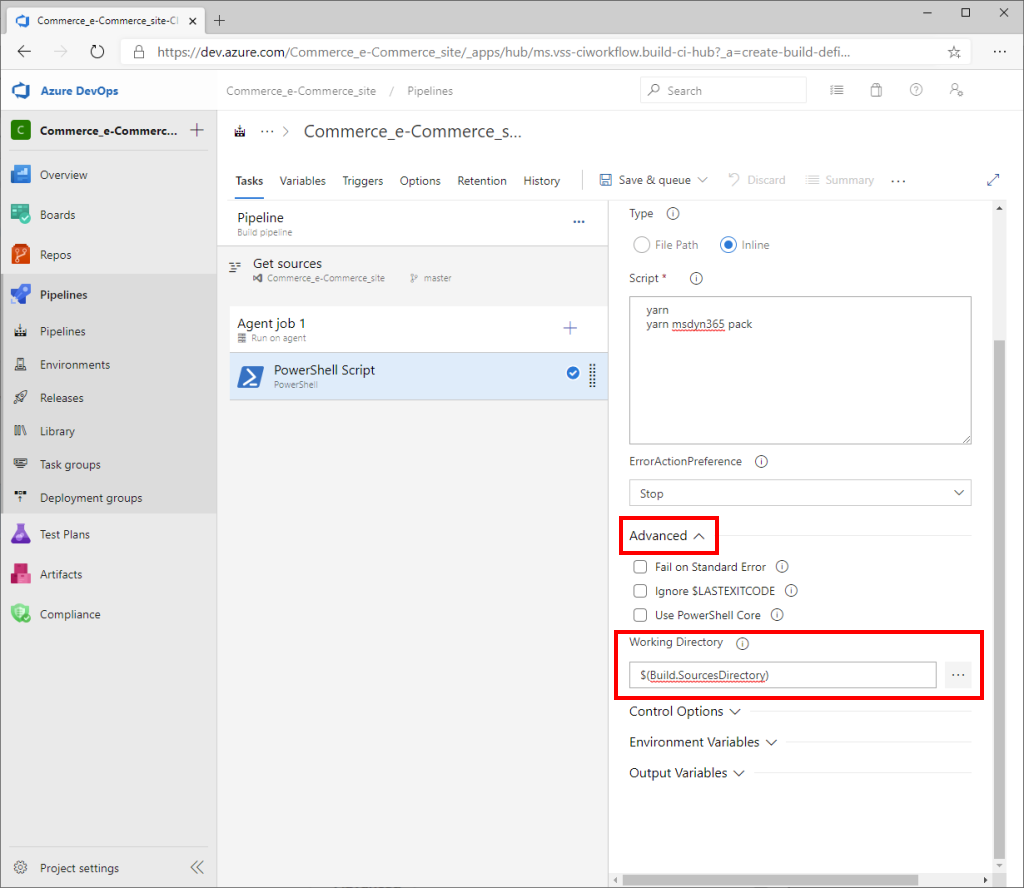
In the main part of the page, select PowerShell Script. Then, in the PowerShell pane on the right, under Type, select Inline. Copy the following script into the Script field.
yarn
yarn msdyn365 pack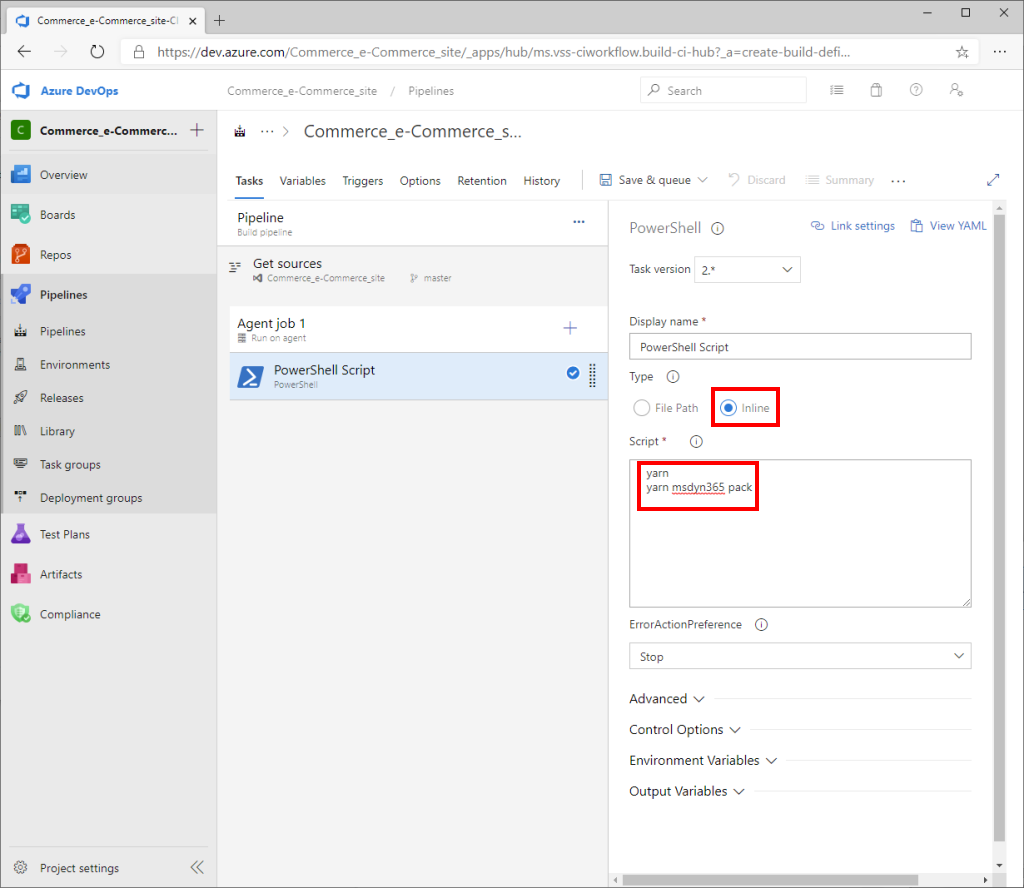
In the right pane, on the Advanced FastTab, in the Working Directory field, enter $(Build.SourcesDirectory).
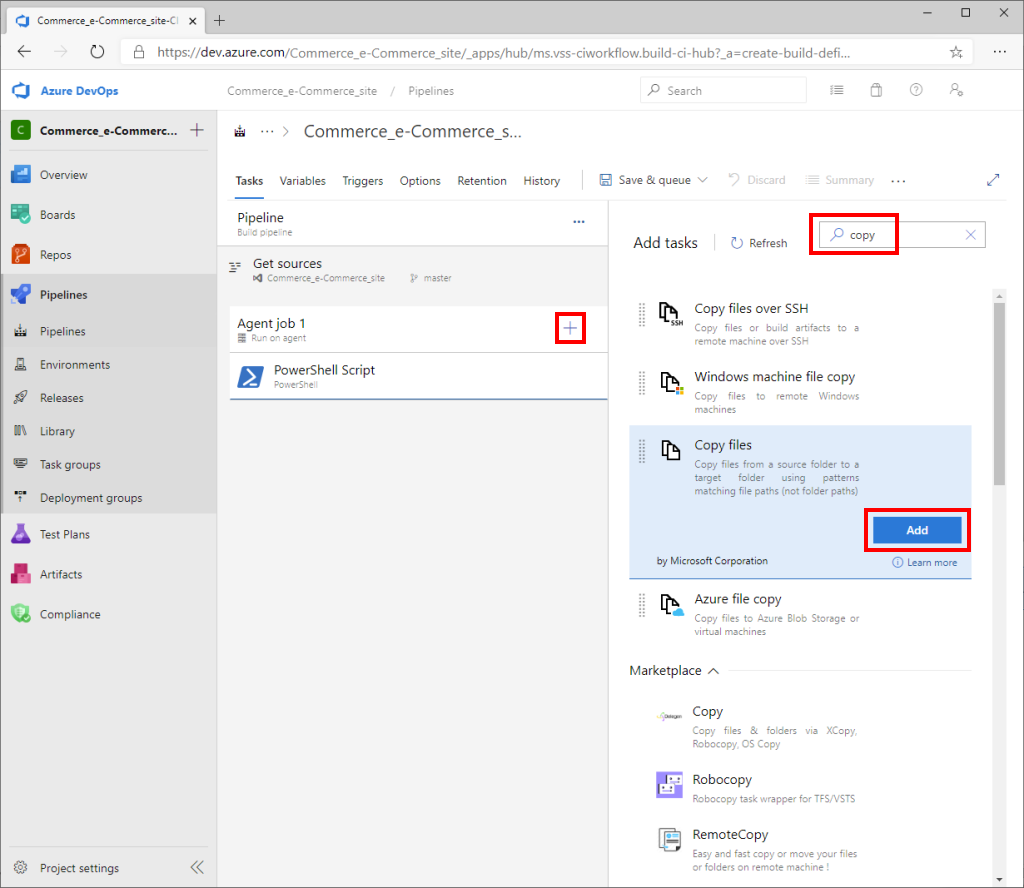
In the main part of the page, next to Agent job, select the plus sign (+) to add a new agent job.
In the Add tasks pane on the right, search for "copy," and then, in the Copy files task, select Add.
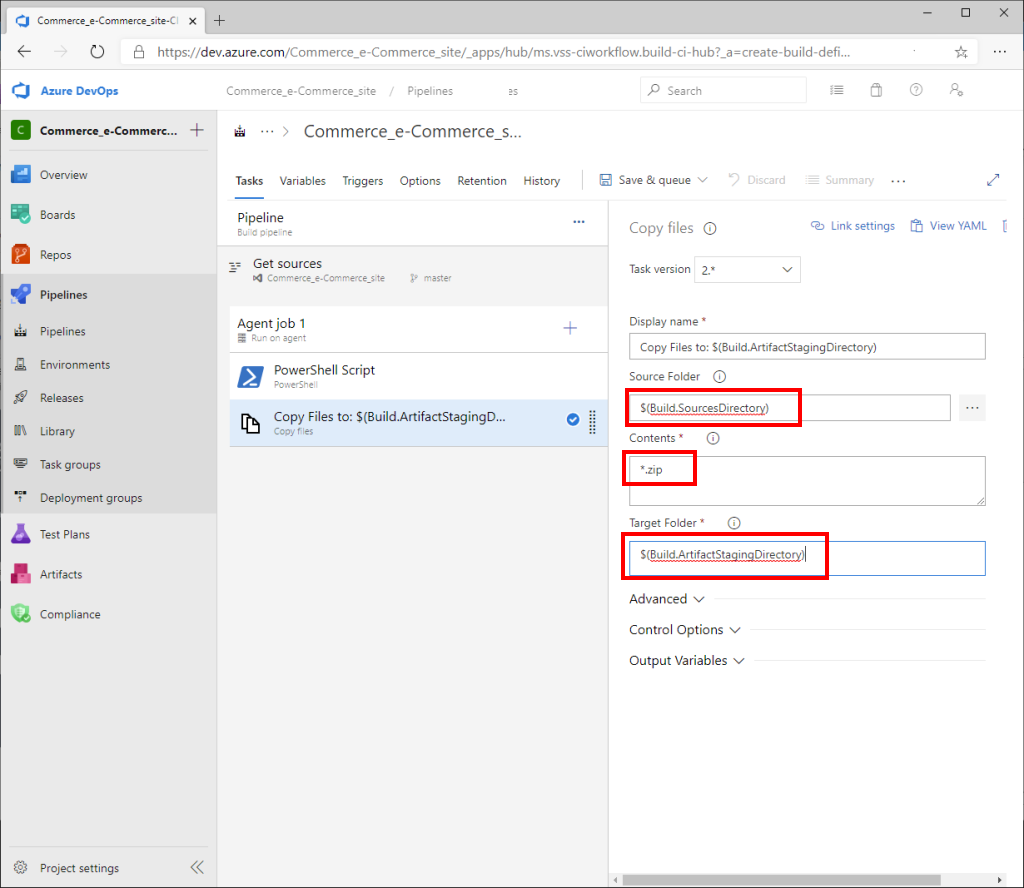
In the main part of the page, select the Copy files task, and then, in the Copy files pane on the right, follow these steps:
- In the Source Folder field, enter $(Build.SourcesDirectory).
- In the Contents field, enter *.zip.
- In the Target Folder field, enter $(Build.ArtifactStagingDirectory).
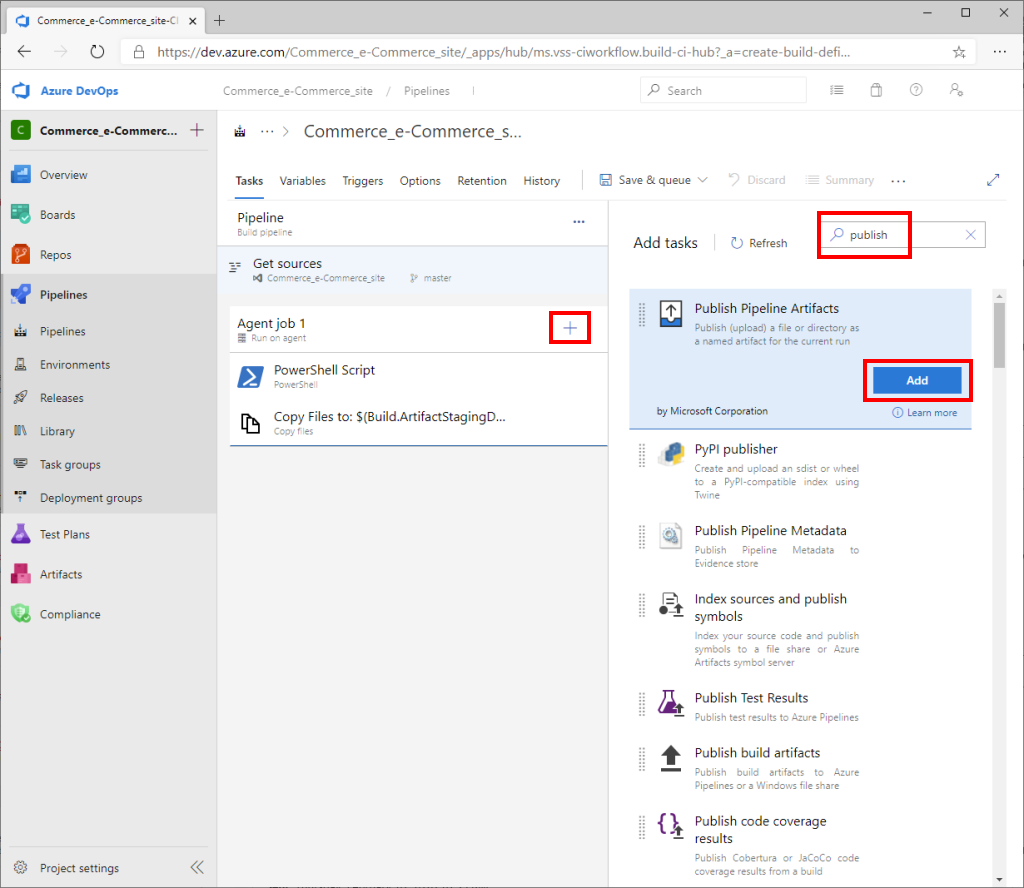
In the main part of the page, next to Agent job, select the plus sign (+) to add a new agent job.
In the Add tasks pane on the right, search for "publish," and then, in the Publish Pipeline Artifacts task, select Add.
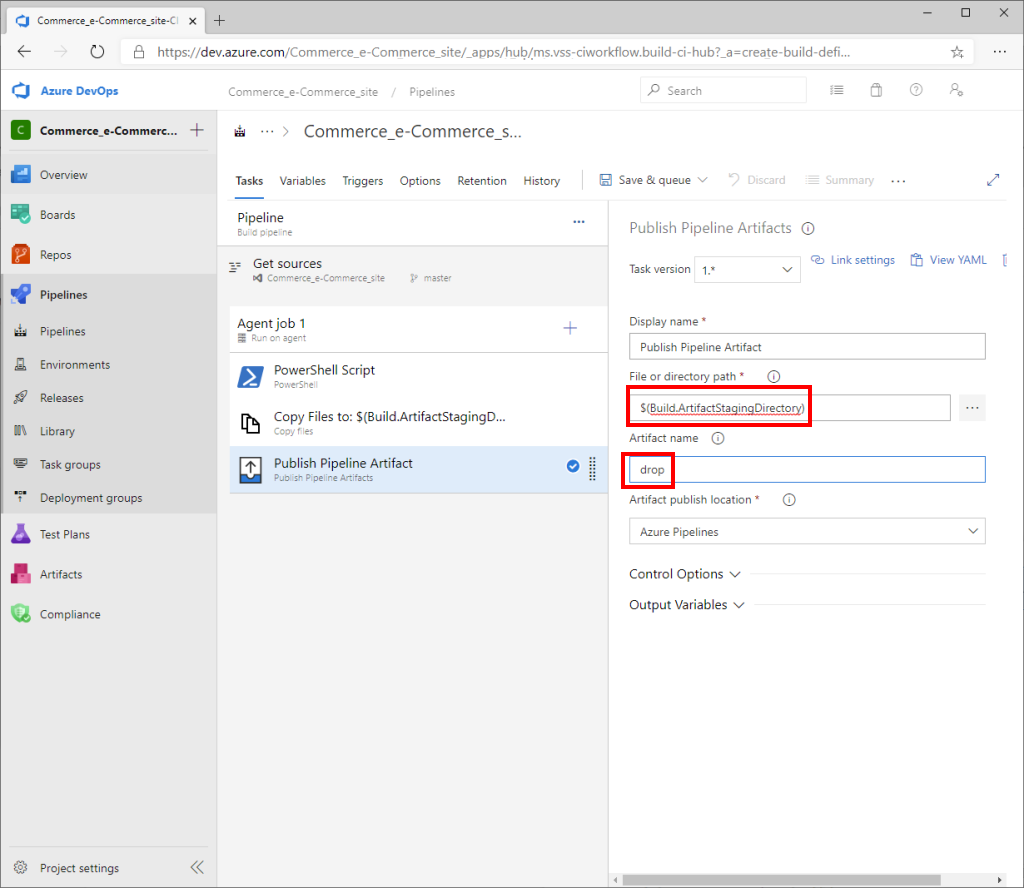
In the main part of the page, select the Publish Pipeline Artifacts task. Then, in the Publish Pipeline Artifacts pane on the right, follow these steps:
- In the File or directory path field, enter $(Build.ArtifactStagingDirectory).
- In the Artifact name field, enter drop.
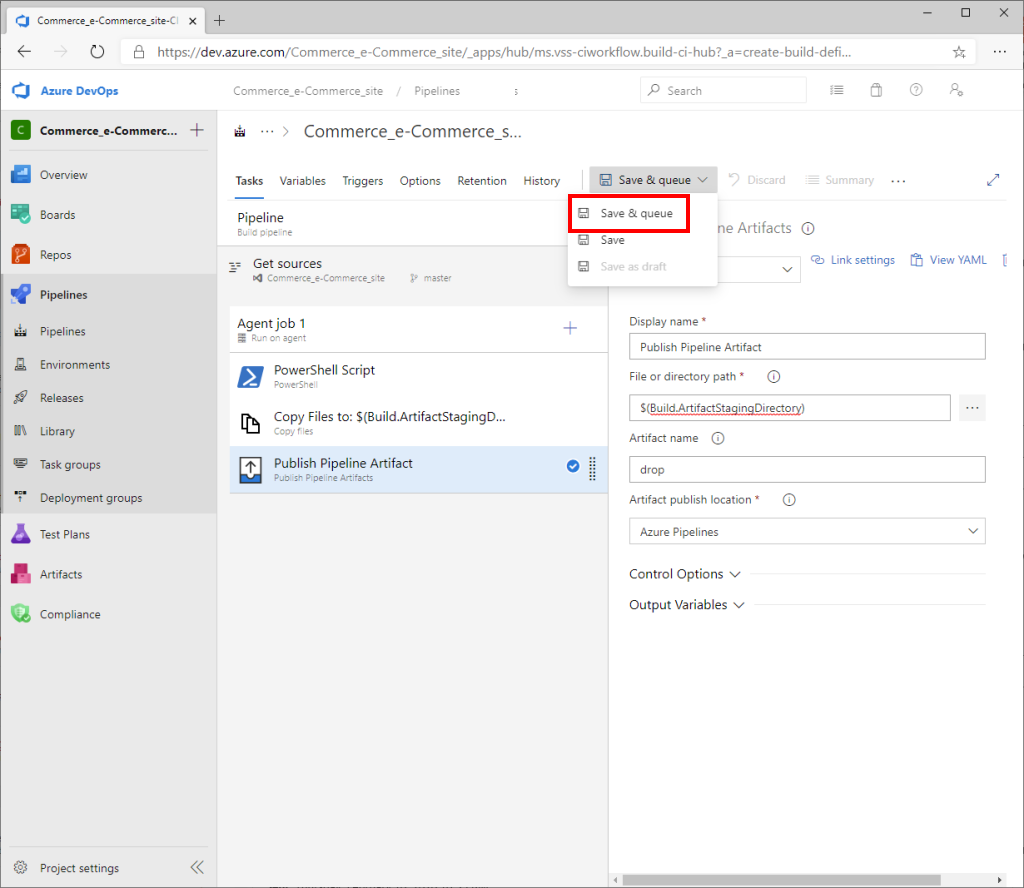
On the toolbar, select Save & queue.
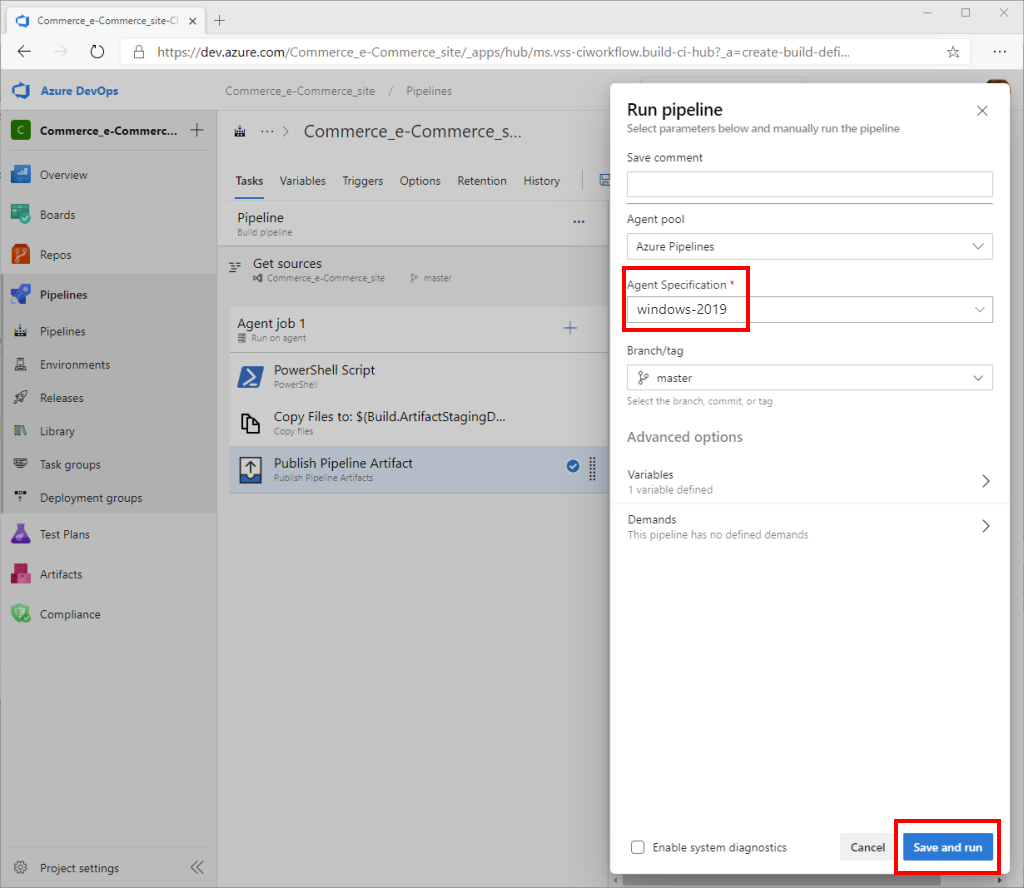
In the Run pipeline dialog box, make sure that the Agent Specification field is set to windows-2019, and then select Save and run.
Tools that you typically use to build, test, and run JavaScript apps (such as npm, Node, Yarn, and Gulp) are preinstalled on Microsoft-hosted agents in Azure Pipelines. For the exact versions of Node.js and npm that are preinstalled, see the Microsoft-hosted agents. To install a specific version of these tools on Microsoft-hosted agents, add the Node Tool Installer task to the beginning of your process. Yarn and Node.js version 16.x are both preinstalled on the windows-2019 agent.
Note
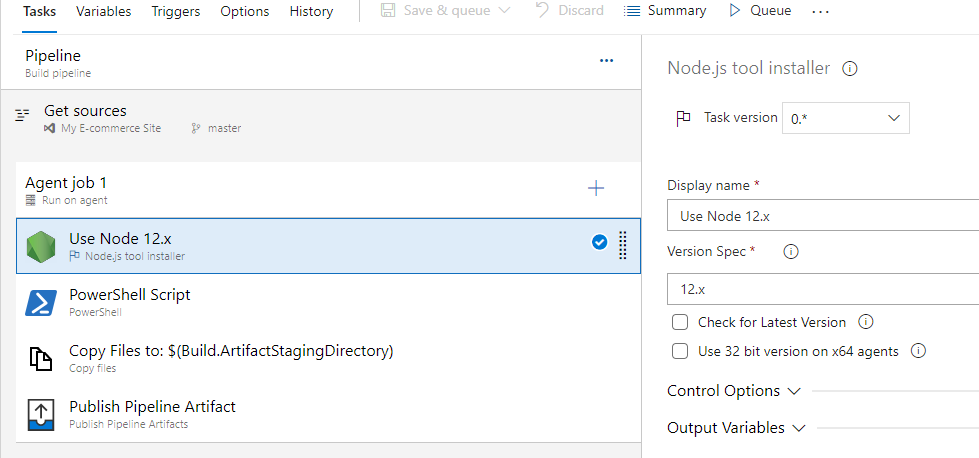
Version 10.0.26 and earlier of the online SDK requires Node version 12.x. To support this on the agent, add the Node tool installer task specifying version 12.x ahead of the PowerShell task, as shown in the following illustration.
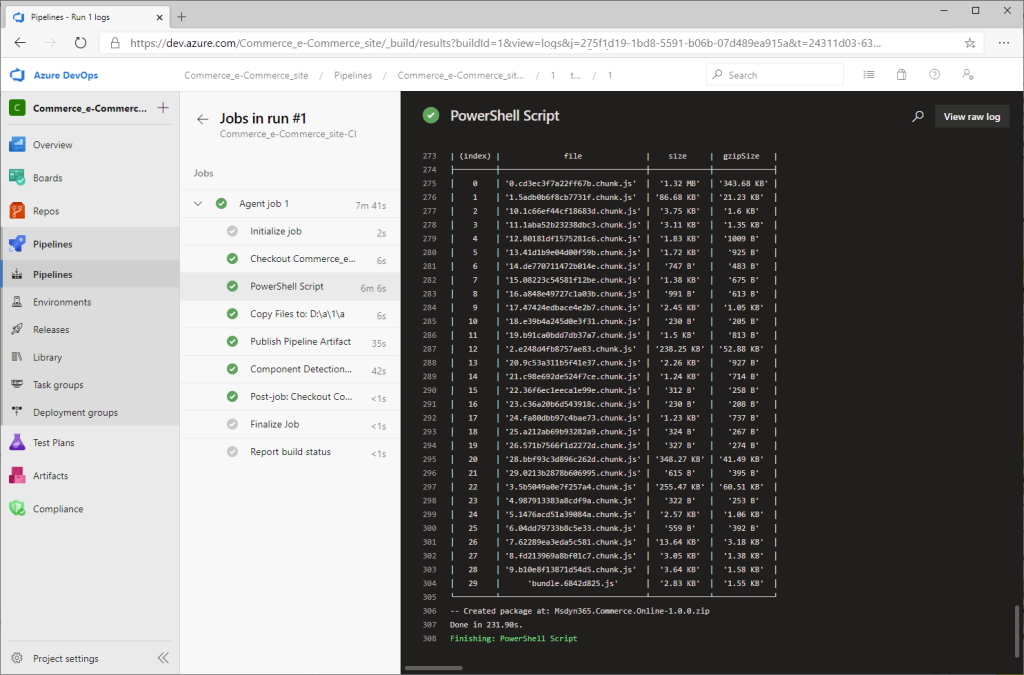
Monitor the agent job logs to learn when the job is completed.
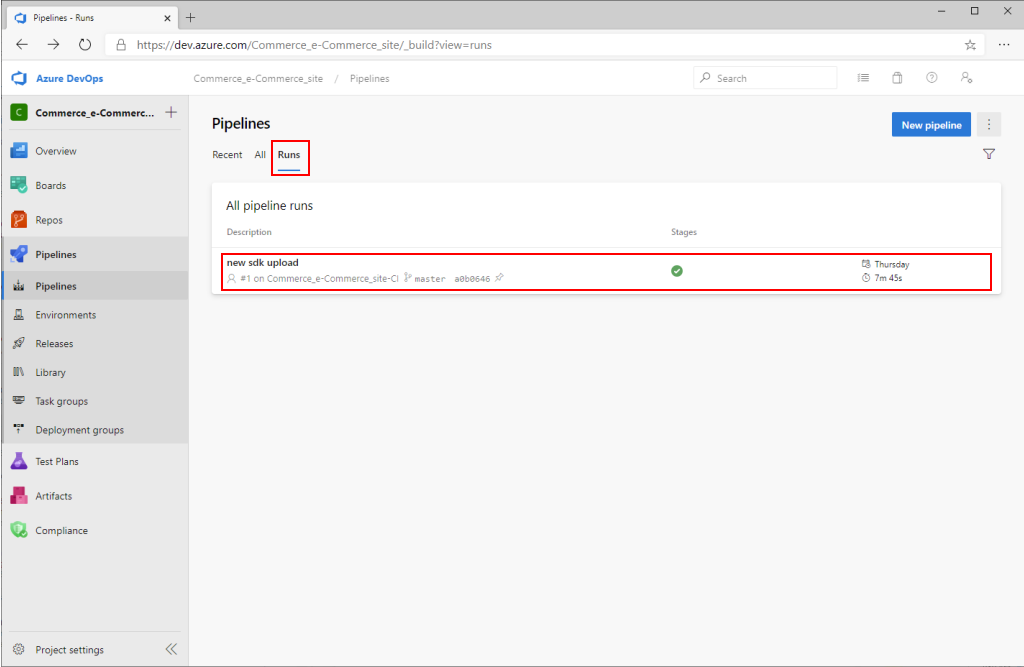
After the job is completed, in the left navigation pane, under Pipelines, select Pipelines. Then, on the Runs tab, under All pipeline runs, select the pipeline run to download the deployable package.
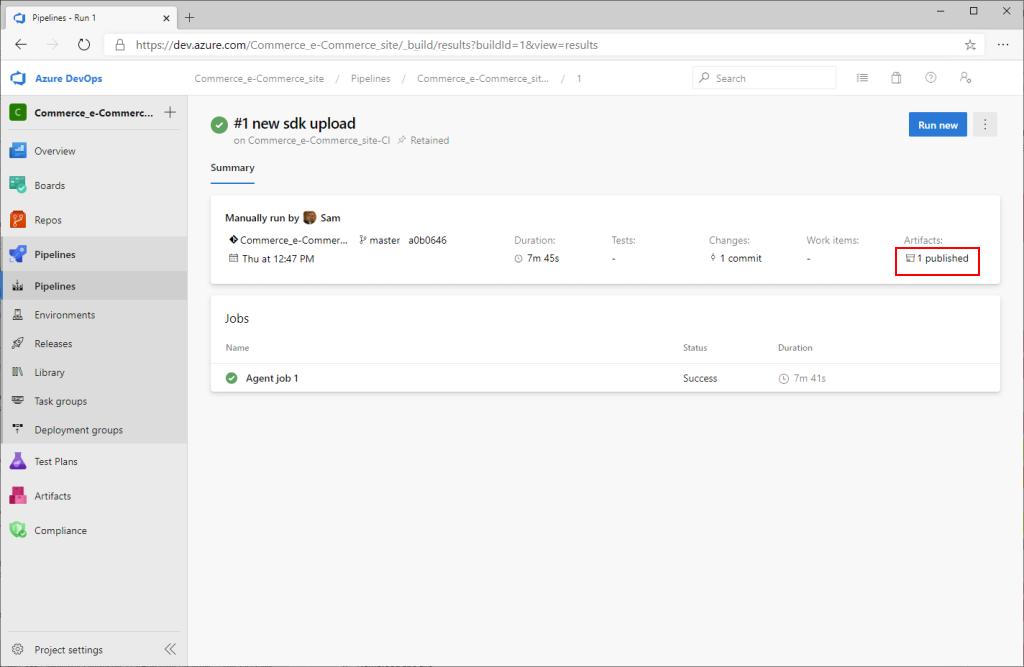
Under Summary, under Artifacts, select 1 published.
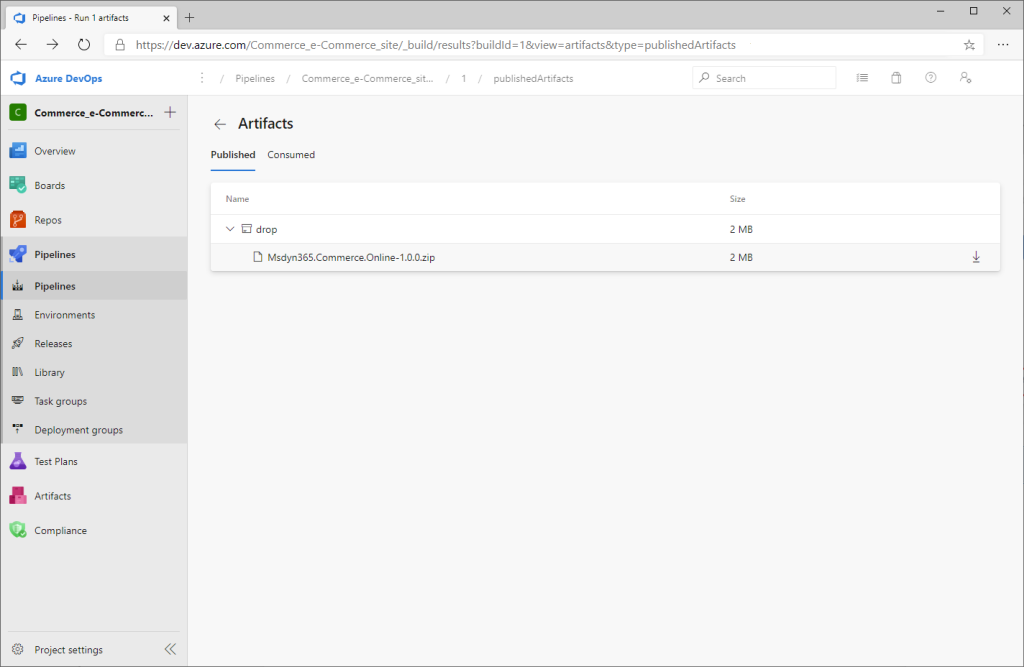
Select the drop folder to expand it and see the zip file that was created as part of the pipeline run. Select the Download button to download the file.
Increase Node memory size
The default memory setting should be sufficient for most customization scenarios. However, if your application needs more heap space (for example, if you see a "JavaScript heap out of memory" build error) you can specify the environment variable in the scripts section of the package.json file by adding --max_old_space_size=4096, as shown in the following example.
"build": "SET NODE_OPTIONS=--max_old_space_size=4096 && yarn msdyn365b build --use-eslint",
Additional resources
Get started with e-commerce online extensibility development
System requirements for a Dynamics 365 Commerce online extensibility development environment
Set up a development environment
Configure a development environment (.env) file
Configure an e-commerce development environment against a Commerce cloud environment