Note
Access to this page requires authorization. You can try signing in or changing directories.
Access to this page requires authorization. You can try changing directories.
[This article is prerelease documentation and is subject to change.]
Bring unified customer profiles into your personalized apps with Microsoft Power Apps.
Tip
We recommend using this option to create apps with Dataverse data. It ensures you benefit from our integration into Dataverse.
Connect Power Apps and Dynamics 365 Customer Insights - Data
Customer Insights - Data is one of the many available sources for data in Power Apps.
Refer to the Power Apps documentation to learn how to add a data connection to an app. We recommend you also review how Power Apps uses delegation to handle large datasets in Canvas apps.
Available tables
After adding Customer Insights - Data as a data connection, choose the following tables in Power Apps:
- Customer: to use data from the unified customer profile.
- UnifiedActivity: to display the activity timeline in the app.
Limitations
Retrievable tables
You can only retrieve the Customer, UnifiedActivity, and Segments tables through the Power Apps connector. Other tables are shown because the underlying connector supports them through triggers in Power Automate.
You can do a maximum of 100 calls per 60 seconds. You can call the API endpoint multiple times by using the $skip parameter. Learn more about the $skip parameter.
Delegation
Delegation works for the Customer table and UnifiedActivity table.
- Delegation for Customer table: To use delegation for this table, the fields need to be indexed in search & filter index.
- Delegation for UnifiedActivity: Delegation for this table only works for the fields ActivityId and CustomerId.
For more information about delegation, go to Power Apps delegable functions and operations.
Example gallery control
Optionally, add customer profiles to a gallery control.
Add a gallery control to an app you're building.
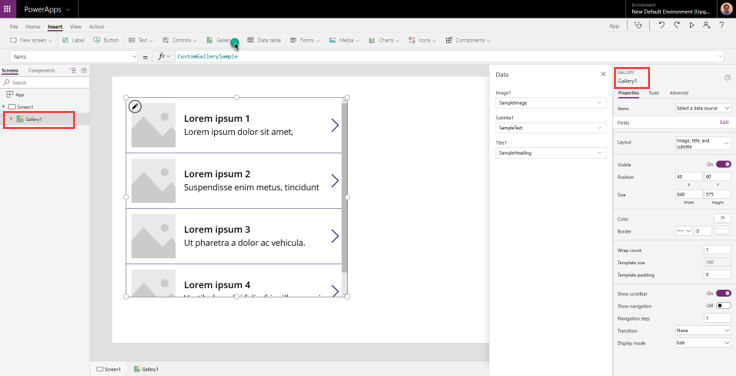
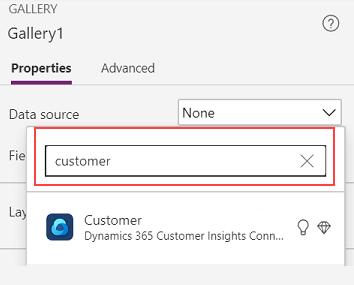
Select Customer as the data source for items.
Change the data panel on the right to select which field for the Customer table to show on the gallery.
If you want to show any field from the selected customer on the gallery, fill in the Text property of a label using {Name_of_the_gallery}.Selected.{property_name}
- For example: Gallery1.Selected.address1_city
To display the unified timeline for a customer, add a gallery element, and add the Items property using Filter('UnifiedActivity', CustomerId = {Customer_Id})
- For example: Filter('UnifiedActivity', CustomerId = Gallery1.Selected.CustomerId)