Host your custom event website in outbound marketing on Azure
Note
Dynamics 365 Marketing and Dynamics 365 Customer Insights are now Customer Insights - Journeys and Customer Insights - Data. For more information, see Dynamics 365 Customer Insights FAQs
New Customer Insights - Journeys customers receive real-time journeys features only. For more information, see Default real-time journeys installation.
Important
This article only applies to outbound marketing, which will be removed from the product on June 30, 2025. To avoid interruptions, transition to real-time journeys before this date. More information: Transition overview
This topic walks you through the process of hosting your custom event website on Azure. More information Build and host custom event website.
Prerequisites
- Download the source code to customize the provided demo website.
- Install Node.js version 10.x or higher.
- Download the Azure Storage Explorer
Step 1: Create an Azure storage account
To create an Azure storage account, follow the steps below:
Login into Azure portal and click on Sign in, if you don't have an Azure account, register for it.
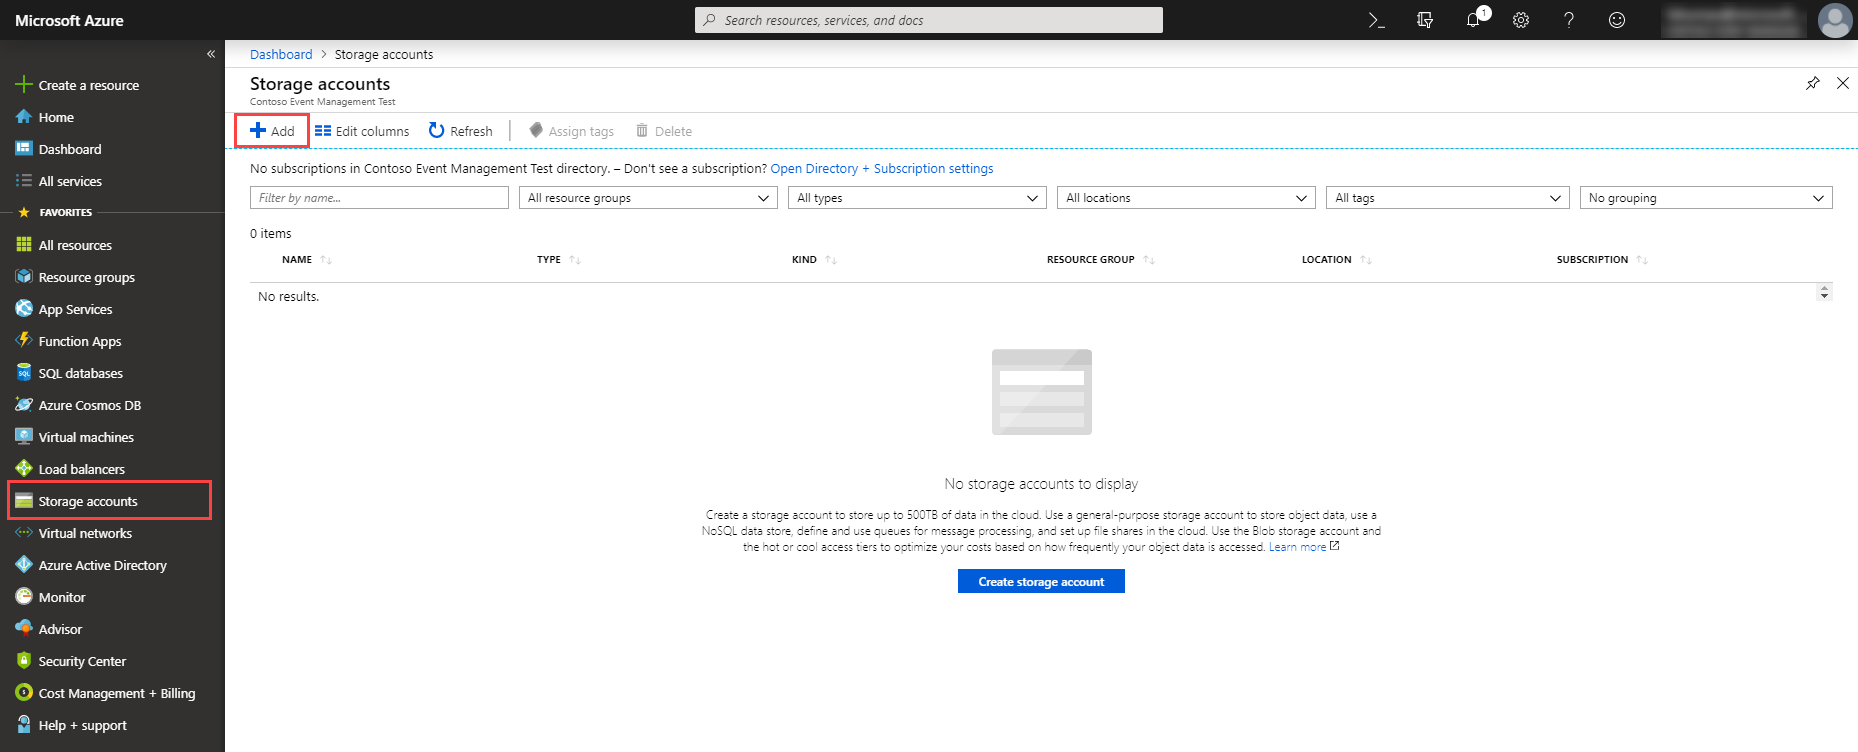
Click on Storage accounts and click on Add to create a new storage account.
In the Subscription and Resource group dropdown, select your subscription from the existing list of subscriptions. When you select an existing Subscription, the resource group field displays the available resource groups. If you don't have an existing one, create a new Resource group.
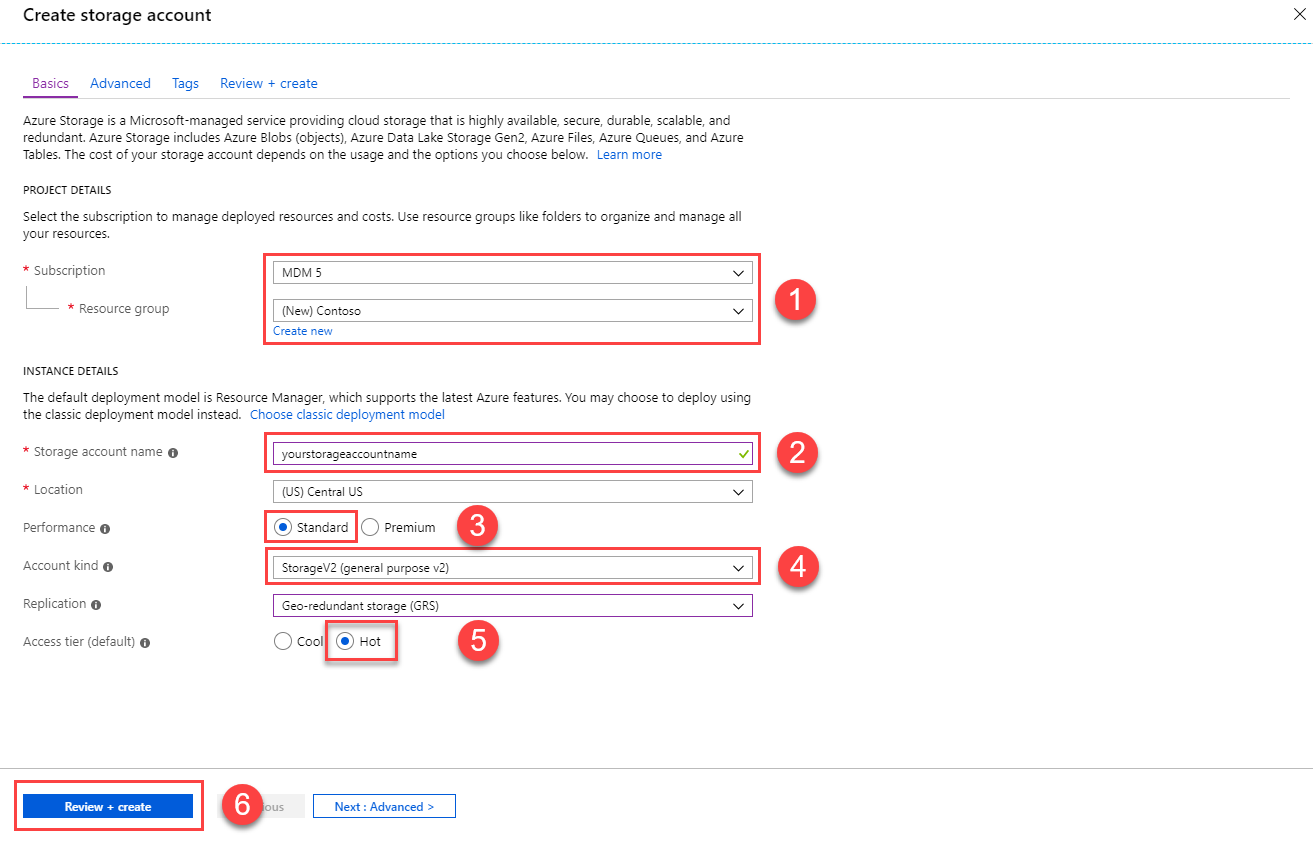
Enter the Storage account name and also select the Location.
Set the values as shown in the screenshot and click on Review + create
Note
You can modify all the settings that suit your needs.
Review your configuration and click on Save
Enable static website hosting
Select the newly created Storage account and click on Static website
Enable the Static website by flipping the switch and name the Index document name and Error document path as
index.html(must be lowercase)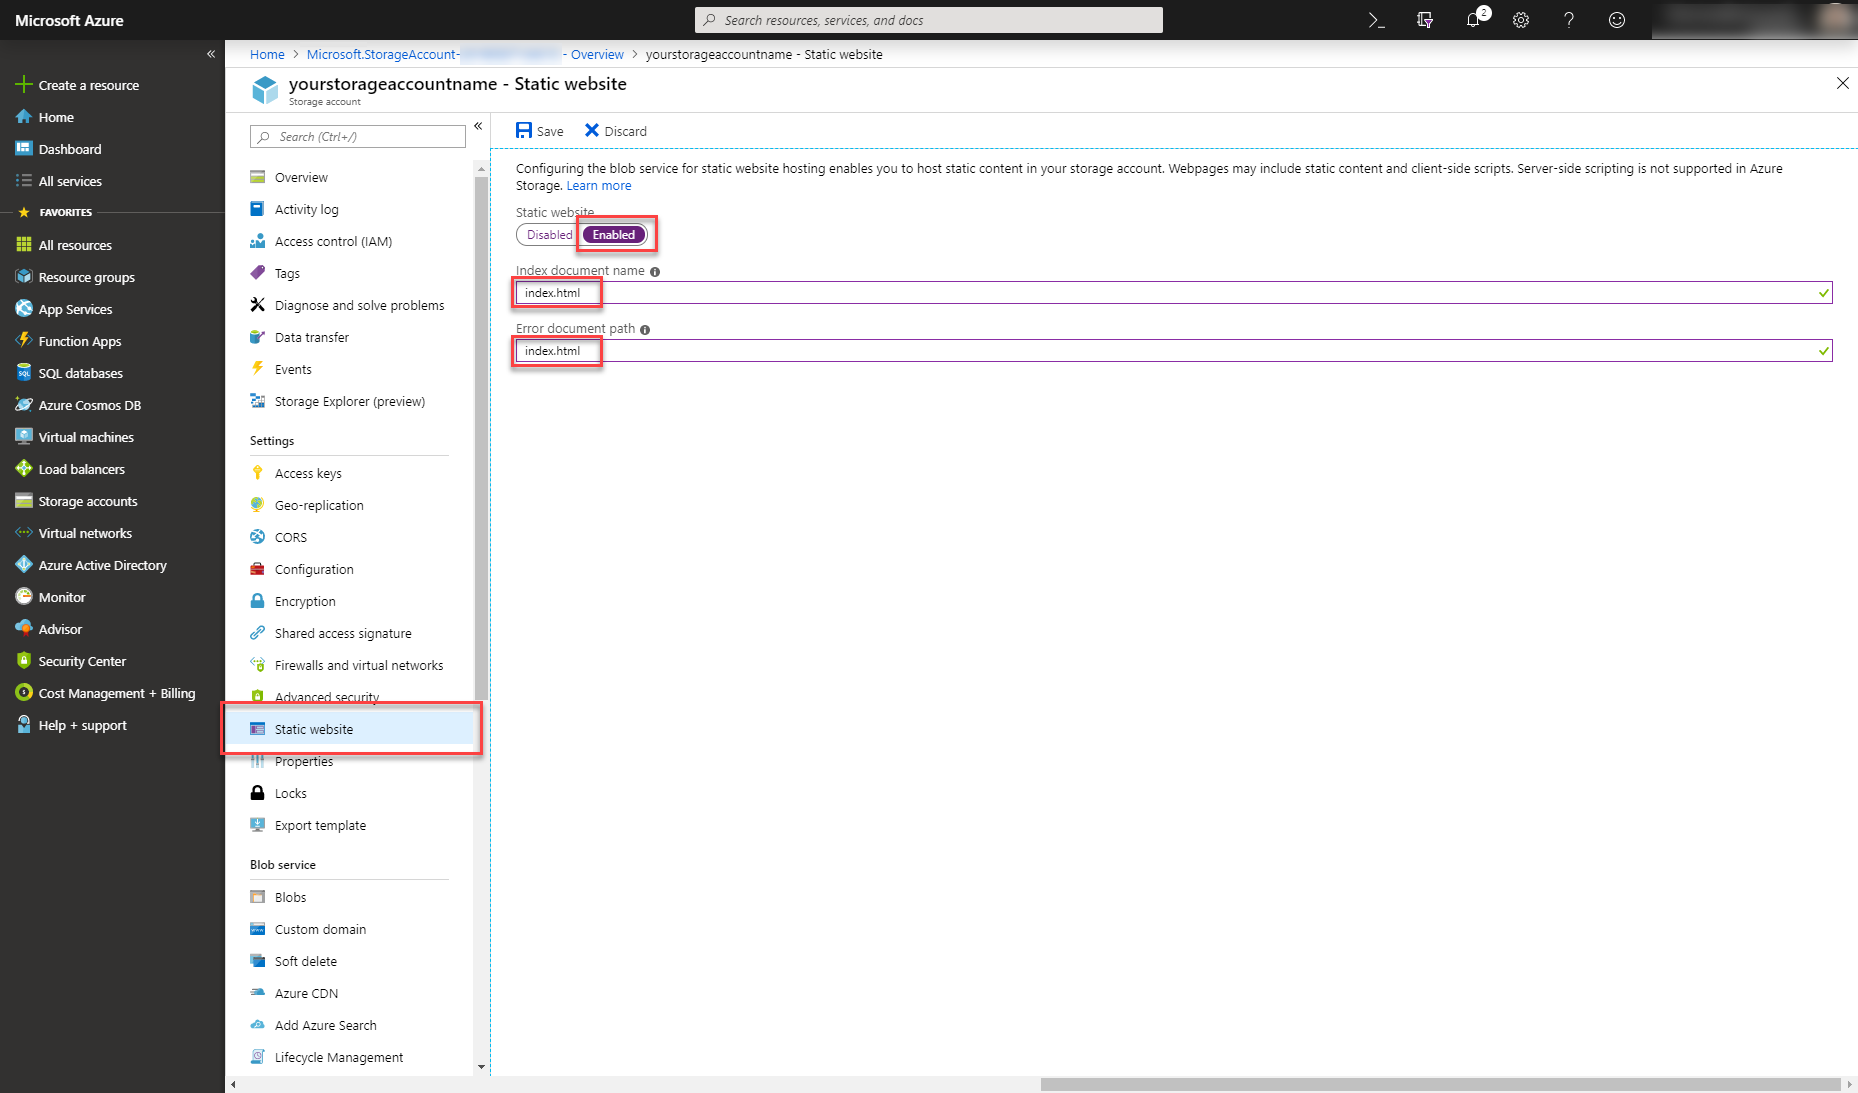
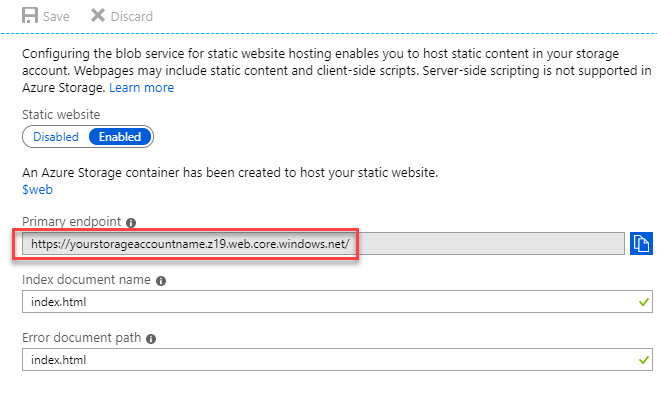
Click on Save. A new field Primary endpoint is shown. Copy the URL from the Primary endpoint field. This is the URL from which you reach your custom event website.
Step 2: Register your web application
To use event management public API, you need a web application token. The web application token is used to control API requests that are associated with your organization. More information: Register your web application.
Step 3: Create environment.ts file
- Open the source code with your favorite IDE (we recommend Visual Studio Code).
- Navigate to
src/environments/directory. - Create an empty
environment.tsfile (if it doesn't exist). - Open the file
environment.selfhosted.ts. This file contains all the configuration settings for your event website. - Enter the Endpoint field value from the web application record that you have created in the
apiEndpointfield. AppendEvtMgmt/api/v2.0/to theapiEndpointvalue. It should look like thishttps://orguniqueid.crm.dynamics.com/EvtMgmt/api/v2.0/ - Make sure to set the
useAadB2Cvalue to false. - Enter the generated Token field value from the web application record in the
emApplicationtokenfield and save the file. - Open a terminal in the root of your custom event website directory and run the command
ng build --prod --output-hashing none --configuration self-hosted - This builds the website. You can find the generated files in
dist\self-hostedfolder.
Step 4: Upload your custom event website
Open Microsoft Azure Storage Explorer
Sign in with your Azure account.
Select your Storage account
Select the $web blob container
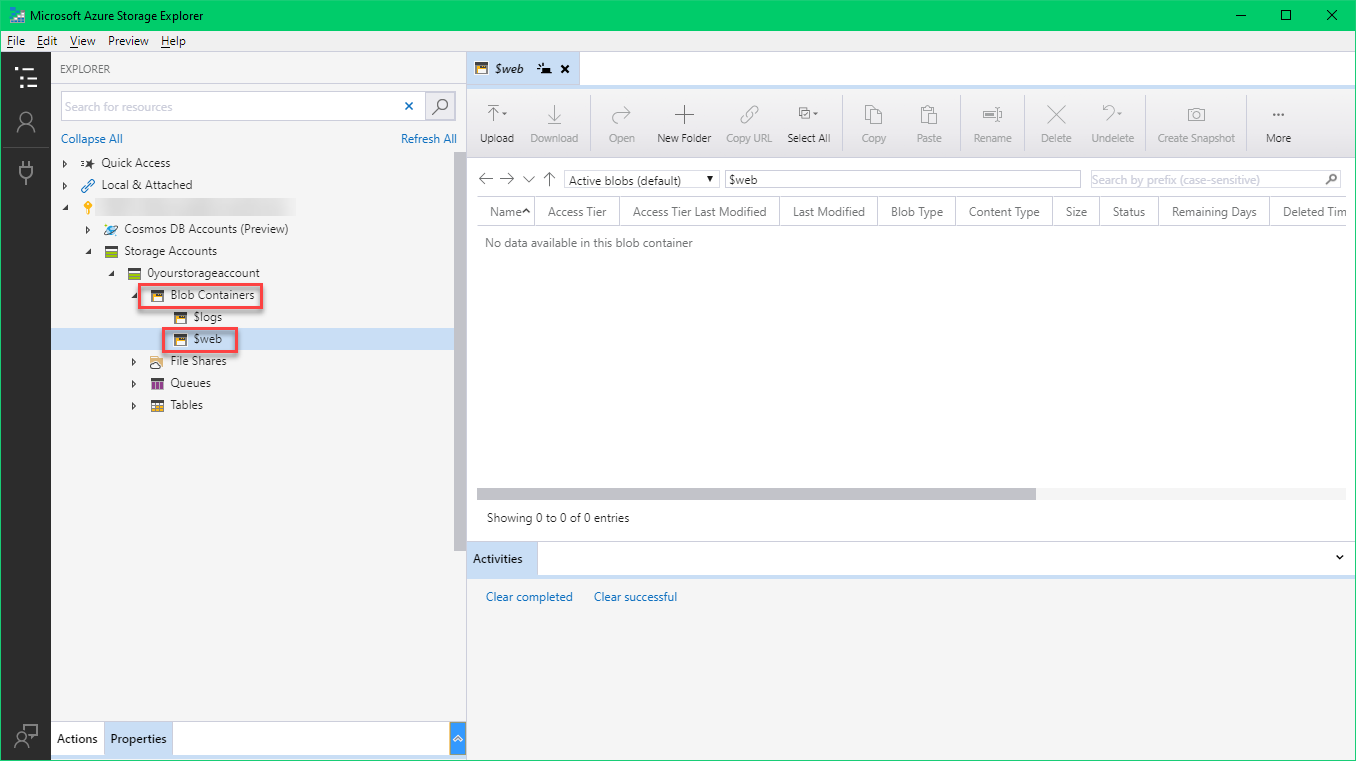
Upload all the files that you have generated before located in
dist/self-hostedfolder into the$webblob container.To see the custom event website in run time, copy the Origin field value from the web application record in Dynamics 365 Customer Insights - Journeys and open it in the browser.