Upgrade Dynamics 365 Server
This article doesn't apply to the Dynamics 365 Customer Engagement (on-premises), version 9.1 update. For information about new features in update 9.1, see What's new.
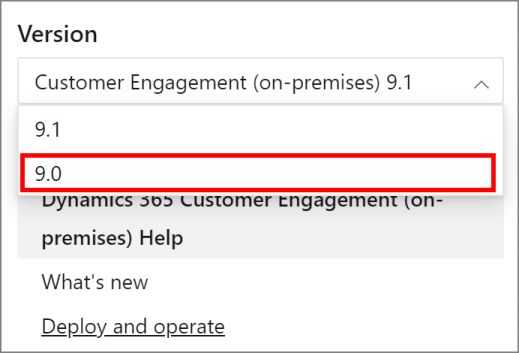
For information about this topic for Dynamics 365 Customer Engagement (on-premises), version 9.0, select the version located above the left navigation pane.
This section shows you how to run the actual in-place upgrade on Dynamics 365 Server with December 2016 Service Pack for Dynamics 365 (on-premises). If you encounter problems during the upgrade, see Troubleshooting installation and upgrade in this guide.
Caution
Following these steps may cause significant application downtime if issues occur during the upgrade. Instead of using an upgrade option that may affect the production deployment, we recommend that you migrate your deployment. More information:Microsoft Dynamics 365 Server upgrade options
Important
We strongly recommend that you back up your existing Microsoft Dynamics CRM data, including all reports and customizations, before you run Setup. In addition, we recommend that you implement the following backup strategy before you run Setup:
- Configure the existing deployment’s Microsoft Dynamics CRM databases by using a simple recovery model.
- Complete a full backup of all production configuration and organization databases and transaction logs.
More information: Backing Up the Microsoft Dynamics 365 System
Important
- Only Dynamics 365 Server with December 2016 Service Pack for Dynamics 365 (on-premises) or later can be upgraded. For upgrade information from previous versions of Dynamics 365 Server, see Upgrading from earlier versions of Microsoft Dynamics CRM Server.
- To upgrade an existing Dynamics 365 Server with December 2016 Service Pack for Dynamics 365 (on-premises) deployment, the user who is running Dynamics 365 Server, version 9.0 Setup must be a member of the Deployment Administrators group. Additionally, the user must have
db_ownerpermission on the existing Dynamics 365 Customer Engagement (on-premises) databases and havesysadminpermission on the SQL Server. For more information about how to add a member to the Deployment Administrators group, see thethe New-CrmDeploymentAdministratorWindows PowerShell command. More information: Set properties using Powershell cmdlets. Alternatively, you can use Deployment Manager. For more information about how to grant permission in SQL Server, see the SQL Server Management Studio Help.
Tasks to perform before the upgrade
We recommend that you apply the latest Microsoft Dynamics 365 On-Premise Cumulative Updates before you start the upgrade.
Meet all requirements as specified under Microsoft Dynamics 365 Server hardware requirements and Microsoft Dynamics 365 Server software requirements.
Log on to your domain as a user who has administrator-level permission.
SQL Server replication isn’t supported with Microsoft Dynamics CRM. If you run SQL Server replication, disable it.
Uninstall Dynamics 365 Reporting Extensions if it’s installed on the same computer where Dynamics 365 Server is installed. More information:Uninstall or repair Microsoft Dynamics 365 Reporting Extensions
To determine the location of the Dynamics 365 Customer Engagement (on-premises) installation files, see the Microsoft Dynamics 365, version 9.0 Readme.
Run the upgrade
In the folder where the Dynamics 365 Server files are located, go to the Server\amd64 folder, and then double-click SetupServer.exe.
On the Welcome to Microsoft Dynamics CRM Server Setup page, we recommend that you select Get updates for Microsoft Dynamics CRM to make sure that Setup has the most recent installation files. Select Next. After Setup is done checking for updates, select Next again.
Important
For the Get updates for Microsoft Dynamics CRM functionality to work you must:
- Have an Internet connection on the computer where Setup is running.
- Enable Microsoft Update for “other Microsoft products” on the Windows Server computer where Dynamics 365 Server Setup is running.
On the Product Key Information page, type your product key in the Product key boxes, and then select Next.
Note
If you purchased Dynamics 365 for Customer Enagement through a Microsoft Volume Licensing program, the license key is provided in the license.txt file, which is included in the Microsoft Dynamics CRM installation files.
On the License Agreement page, review the information and if you accept the license agreement, select I accept this license agreement, and then select I Accept.
If Setup detects that components are missing, the Install Required Components page appears.
If you have already installed the required components, this page won’t appear.
If you haven’t installed the required components listed, you can install them now. Select Install. When the components are installed, the status column changes from Not Installed to Installed, and you can select Next to continue.
Note
If you’re prompted to restart the computer, do so, and then start Setup again.
On the Upgrade to Microsoft Dynamics CRM page, you can select an organization to upgrade or leave the choice <None> so that no organizations will be upgraded during Setup. Before you select an organization, consider the following:
- Notice that any organization not upgraded will become disabled after the upgrade is complete. To upgrade organizations after Setup is complete, use the
Import-CrmOrganizationWindows PowerShell command. Alternatively, you can use Deployment Manager.
Click Next to upgrade Microsoft Dynamics CRM.
- Notice that any organization not upgraded will become disabled after the upgrade is complete. To upgrade organizations after Setup is complete, use the
On the Specify Service Accounts page, Setup will add the service accounts used for the Microsoft Dynamics CRM Server services. You can use the existing service accounts or specify new ones. For information about the permissions required to run these services see Minimum permissions required for Microsoft Dynamics 365 Setup and services.
If you want to use server-side synchronization and/or Dynamics 365 for Outlook for the deployment, leave this box blank. More information:Integrate your email system with Microsoft Dynamics 365
Otherwise, on the Specify E-mail Router Settings in the, Email router server name box, type the name of the computer where the Email Router will be installed. This computer will route Dynamics 365 Customer Engagement (on-premises) email messages. If you leave the box blank but decide later you want to use the Email Router, you must add the computer where the Email Router Service is running (part of the Asynchronous Service) when you use Network Service, or if you use a domain user account, the account to the PrivUserGroup security group.
Select Next.
On the Select Microsoft Update Preference page, select whether you want to use Microsoft Update for checking for updates for your Microsoft products, and select Next. We recommend that you use Microsoft Update to check for updates because this helps keep your computer up-to-date and secure. For more information about the legal terms and privacy with Microsoft Update licensing, see Windows Update FAQ.
The System Checks page appears. This page is a summary of all requirements and recommendations for a successful installation. Errors must be resolved before installation can continue. If no errors, or only warnings appear, you can continue with the installation. To do this, select Next.
The Service Disruption Warning page appears. This page lists all services that will be stopped or restarted during Setup. Verify the suitability of the services that will be stopped or restarted, and then select Next.
Review the Ready to Upgrade the Application page, and select Back to correct any errors. When you are ready to continue, select Upgrade.
When Setup completes successfully, the Microsoft Dynamics CRM Server Setup completed page appears. If the Reporting Server instance that you specified during this Setup points to the local computer where Dynamics 365 Server is installed, Setup provides an option to invoke Dynamics 365 Reporting Extensions Setup.
For a full server deployment running on the SQL Server Reporting Services computer, select the Launch Microsoft Dynamics 365 Reporting Extensions Setup check box to install Dynamics 365 Reporting Extensions. Select Finish.
Important
- After you upgrade, you must install the Dynamics 365 Reporting Extensions to create, run, and schedule reports in Dynamics 365 Customer Engagement (on-premises). For instructions, see Install Microsoft Dynamics 365 Reporting Extensions in this guide.
- You can’t install the Dynamics 365 Reporting Extensions before you install or upgrade Dynamics 365 Server.
- If you had Language Packs provisioned in your deployment, to continue to use multiple languages, in-place upgrade each language pack, and then provision them. More information:Upgrade and deploy a Language Pack
- Notice that Setup turns on HTTP compression on the server that’s running IIS where the web application is installed. If you use another method to compress HTTP communications, you may want to turn this feature off after Setup completes. To do this, start Internet Information Services (IIS) Manager, choose the website, double-click Compression, and then clear the compression check boxes.
See also
Feedback
Coming soon: Throughout 2024 we will be phasing out GitHub Issues as the feedback mechanism for content and replacing it with a new feedback system. For more information see: https://aka.ms/ContentUserFeedback.
Submit and view feedback for