Note
Access to this page requires authorization. You can try signing in or changing directories.
Access to this page requires authorization. You can try changing directories.
When a requirement is scheduled to a resource, the system creates a booking record. The schedule board displays bookings grouped by resources. The fields displayed in the schedule board booking are a Booking Template, which you can customize with fields from system entities.
Edit work order booking template
Each scheduling-enabled entity can have a different booking template. When a work order requirement is scheduled, the booking template shows the Bookable Resource Booking record's Name and Duration values.
The default value is the following code snippet:
<div>{SchedulableEntityDisplayName} - {name}<br />Duration: <strong class="bold">{duration}</strong></div>
To edit the HTML that controls the booking template:
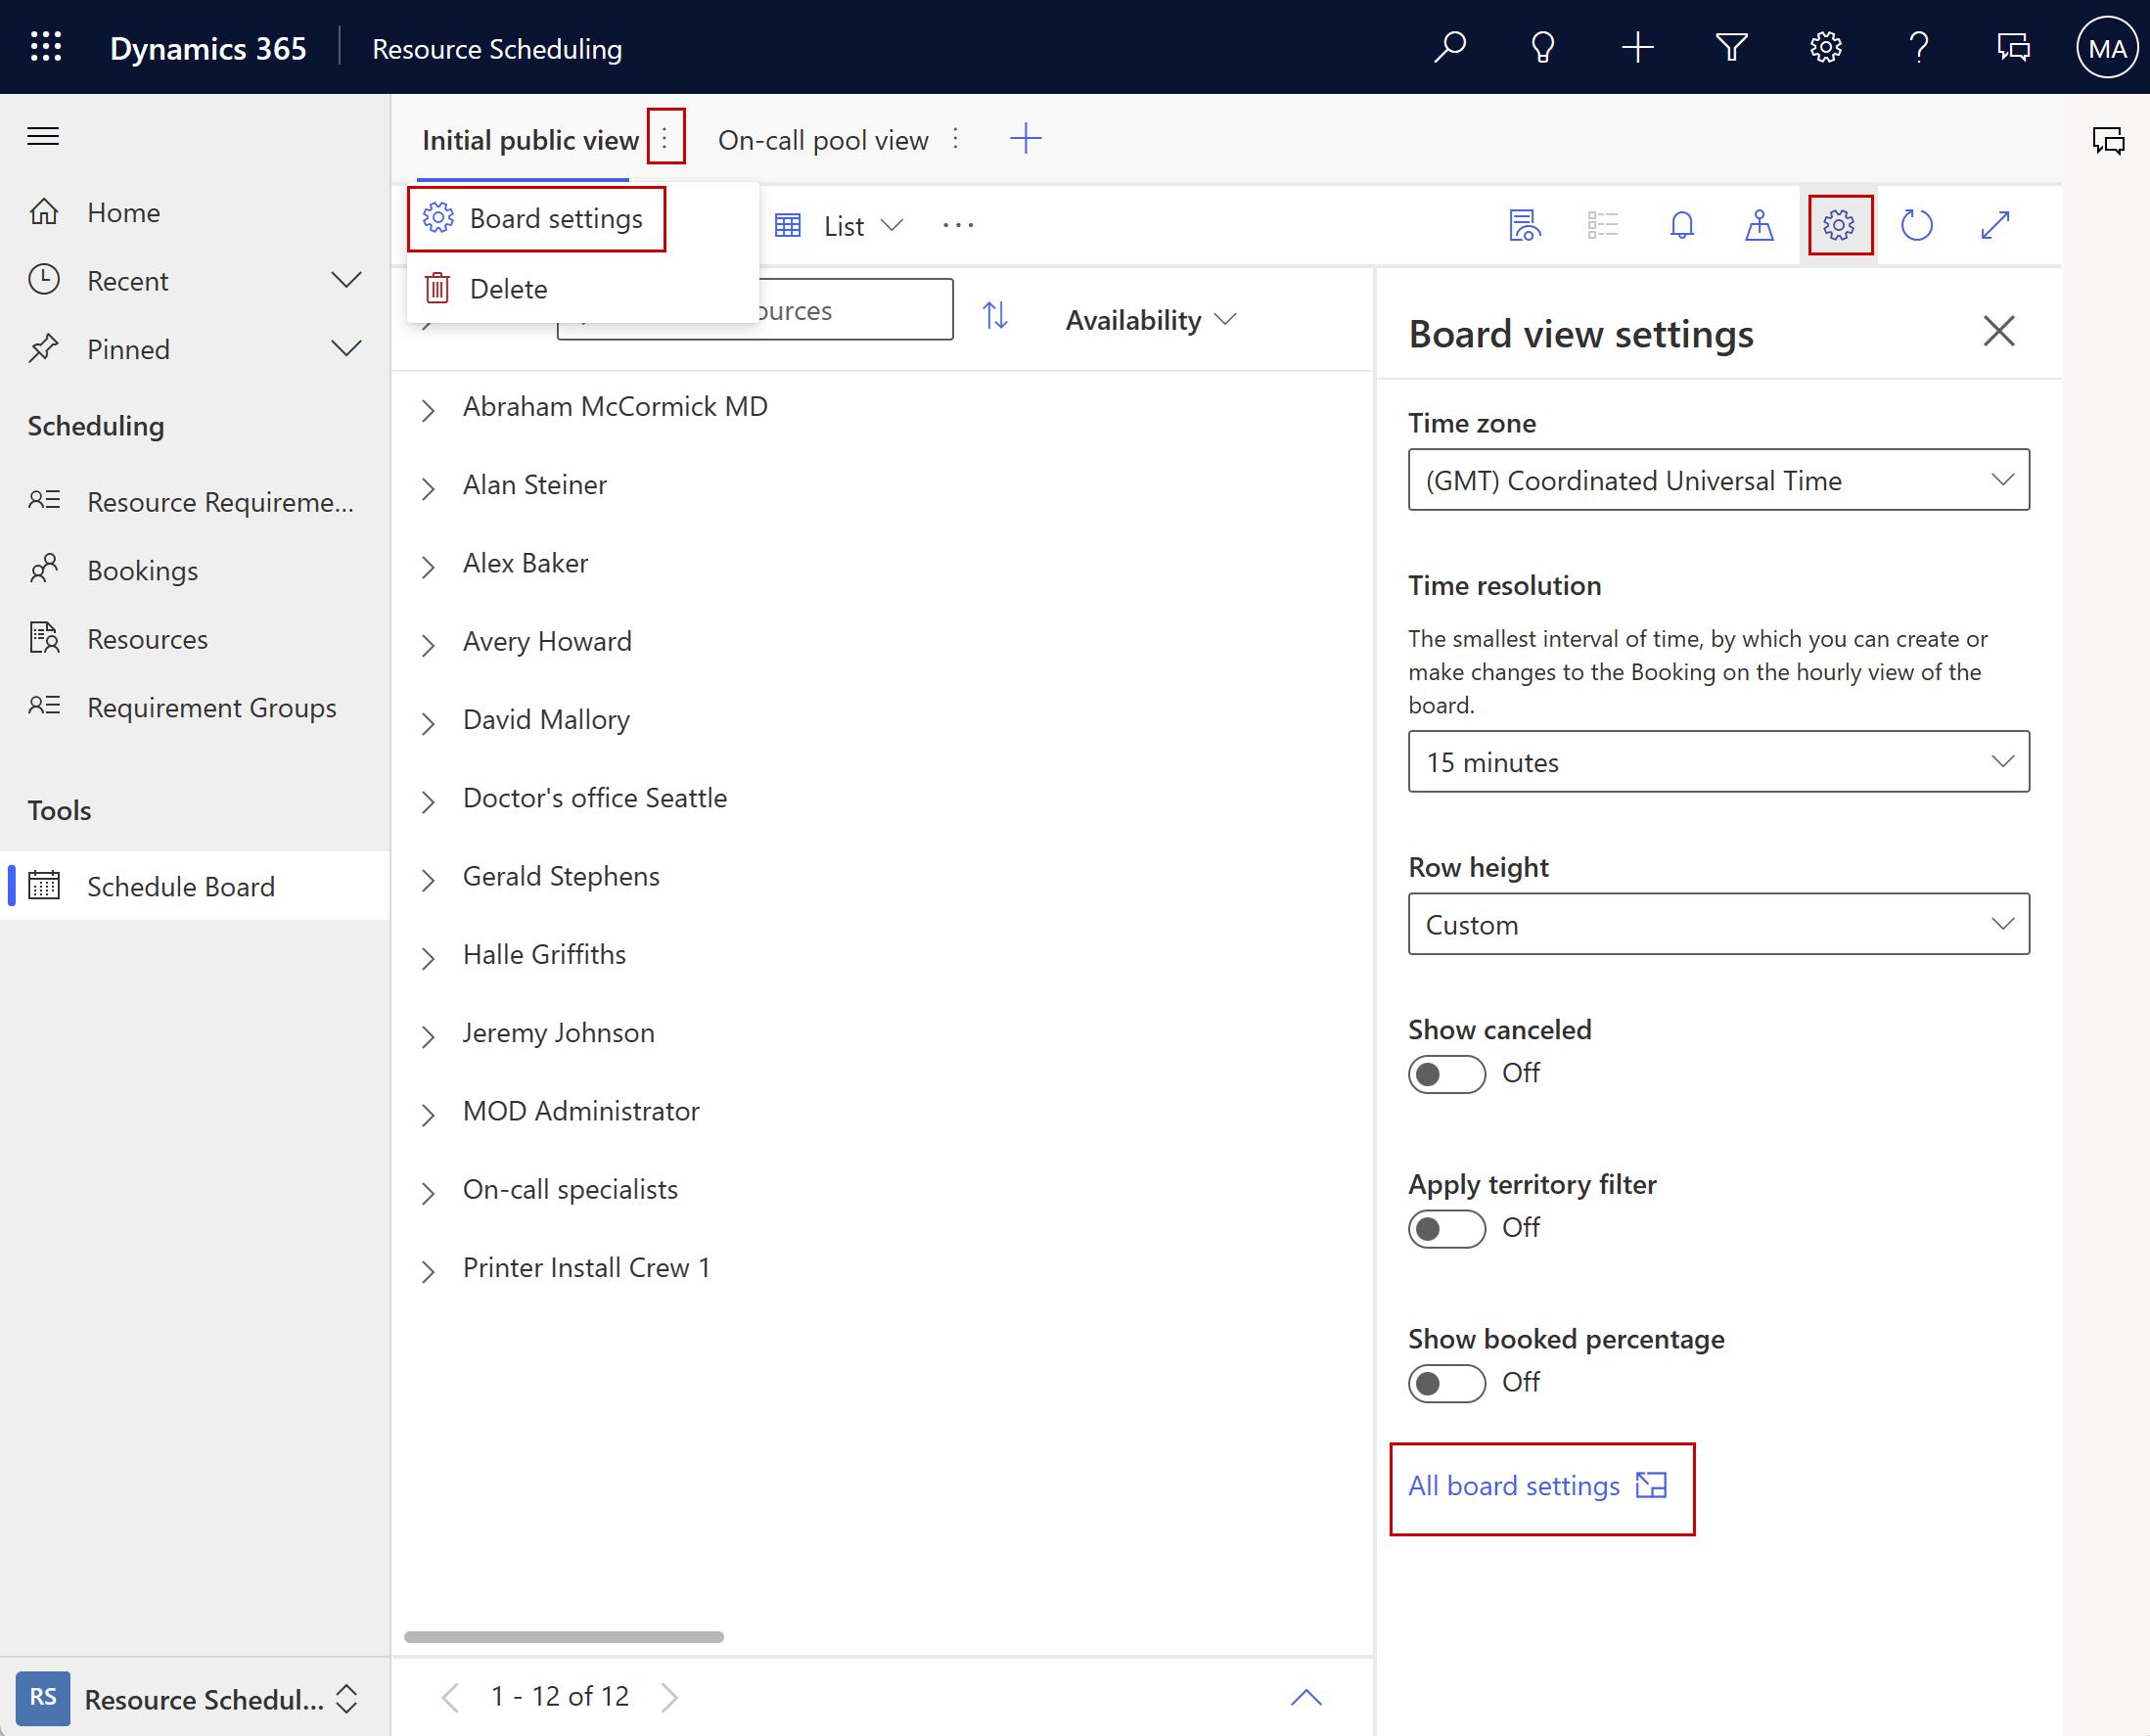
On the schedule board, open the schedule board settings.
- To open board settings for a specific tab, select the vertical ellipsis ⋮ next to the schedule board tab name and choose Board settings.
- To open board settings for all tabs, select Scheduler settings and then select All board settings.
Select Schedule Types and select the entity for which you want to change the booking template. For example, work order.
Set the Custom booking template to On.
Override the booking template by entering HTML and Cascading Style Sheets (CSS) that can reference fields from the Bookable Resource Booking entity and linked entities. JavaScript isn't supported in the booking template.
Test customized booking templates on multiple browsers and consider best practices for accessibility.
Tip
Use system entities only. Pulling values from custom entities isn't supported.
Fields from the Bookable Resource Booking entity can be referenced directly using the field name in curly brackets. Example: {duration}.
To display a field from a linked entity, find the name of the N:1 relationship and add a period (.) followed by the field name of the target entity. For example, the work order relationship path is msdyn_msdyn_workorder_bookableresourcebooking_WorkOrder and the primary incident type field is msdyn_primaryincidenttype. The field reference result is: {msdyn_msdyn_workorder_bookableresourcebooking_WorkOrder.msdyn_primaryincidenttype}. Add more relationship hops by connecting them with a period.
Custom templates only apply to tooltips on the schedule board's hourly view and doesn't affect daily, weekly, or monthly views.
Custom booking template example
This example shows a custom booking template for the work order entity. The following code snippet pulls values from the work order that relate to the booking.
<div style="line-height: 11px !important; width: 99%; overflow: hidden; display: block; text-overflow: ellipsis;">
    WO:
    <b>{msdyn_msdyn_workorder_bookableresourcebooking_WorkOrder.msdyn_name}</b><br/>
    Account: <b>{msdyn_msdyn_workorder_bookableresourcebooking_WorkOrder.msdyn_account_msdyn_workorder_ServiceAccount.name}</b><br/>
    Incident: <b>{msdyn_msdyn_workorder_bookableresourcebooking_WorkOrder.msdyn_primaryincidenttype}</b><br/>
    Duration: <b>{duration} minutes</b><br/>
</div>
Note
Referencing appointment attributes in the schedule board booking template isn't supported because appointment template data is dependent on having an associated booking.
To reference these attributes, ensure that appointments have bookings associated with them, and then disable the Include Appointments setting from the Scheduling Parameters. Disabling this setting hides all appointments that don't have a bookable resource booking linked to them on the schedule board.
Advanced booking template styling using CSS
You can add styles to the custom booking template with CSS. Go to Resource Scheduling and select the Settings area. Select Administration > Scheduling Parameters and set Disable Sanitizing HTML Templates to Yes to include CSS statements into the booking templates.
In this example, we extend the custom booking template example. Use CSS to add customer ratings and service icons based on conditional values in the account and work order records. A customization added a field new_customerrating on the account entity and propagates that field to the work order entity with an integer range from 1 to 10.
We want the booking template to visualize the customer rating with grey stars. To represent the actual customer rating, we also add five orange stars, but only show a percentage of these stars, corresponding to the 1-10 customer rating.
We also want our dispatcher to see whether a work order is a service call or another type of job. The custom field new_isservicecall on the work order entity, has two possible values: 0 or 1. Using the same approach as before, we first draw a gray wrench as background, then overlay an orange wrench and limit its size to 0% (new_isservicecall = 0) or 100% (new_isservicecall = 1).
Add the following HTML and CSS text to the Booking Template field in Schedule Board Tab Settings.
<div style="line-height: 11px !important; width: 99%; overflow: hidden; display: block; text-overflow: ellipsis;">
<div class="back-stars" style="color: #AAAAAA; position: relative; display:inline-block;">
    <i class="fa fa-star" aria-hidden="true"></i>
    <i class="fa fa-star" aria-hidden="true"></i>
    <i class="fa fa-star" aria-hidden="true"></i>
    <i class="fa fa-star" aria-hidden="true"></i>
    <i class="fa fa-star" aria-hidden="true"></i>
<div class="customerrating" style="width:{msdyn_msdyn_workorder_bookableresourcebooking_WorkOrder.msdyn_account_msdyn_workorder_ServiceAccount.new_customerrating}0%; color: #FFBC0B; position: absolute; top: 0; left:0; overflow: hidden; display:-webkit-box">
    <i class="fa fa-star" aria-hidden="true"></i>
    <i class="fa fa-star" aria-hidden="true"></i>
    <i class="fa fa-star" aria-hidden="true"></i>
    <i class="fa fa-star" aria-hidden="true"></i>
    <i class="fa fa-star" aria-hidden="true"></i>
</div>
</div>
<div class="repair-back" style="color: #AAAAAA; position: relative; display:inline-block; padding-left:10px; vertical-align:text-top;">
    <i class="fa fa-wrench" aria-hidden="true"></i>
<div class="repair" style="width:{msdyn_msdyn_workorder_bookableresourcebooking_WorkOrder.new_isservicecall}00%; color: #FFBC0B; position: absolute; top: 0; left:0; padding-left:10px; overflow: hidden; display:-webkit-box">
    <i class="fa fa-wrench" aria-hidden="true"></i>
</div>
</div>
<br/>
WO:
<b>{msdyn_msdyn_workorder_bookableresourcebooking_WorkOrder.msdyn_name}</b><br/>
Account: <b>{msdyn_msdyn_workorder_bookableresourcebooking_WorkOrder.msdyn_account_msdyn_workorder_ServiceAccount.name}</b><br/>
Incident: <b>{msdyn_msdyn_workorder_bookableresourcebooking_WorkOrder.msdyn_primaryincidenttype}</b><br/>
Duration: <b>{duration} minutes</b><br/>
</div>
The booking template on the schedule board now contains a visual representation of the customer rating and the type of job.