Note
Access to this page requires authorization. You can try signing in or changing directories.
Access to this page requires authorization. You can try changing directories.
Service-level agreements (SLAs) define service expectations such as arrival and resolution times. SLAs can be tracked using key performance indicators (KPIs), such as work order arrival time. In Field Service, SLAs help organizations ensure work orders get the right level of attention in a timely manner.
For example, a field service organization offers an SLA to their customers. They promise that field technicians will arrive within 4 hours from the time an emergency priority work order is created. The organization wants to display a warning status after 2 hours. For other examples, go to Implement service level agreements for work orders.
To use SLAs for work orders, first enable the SLA functionality for your environment. Then, define the SLAs and KPIs, and associate the SLAs to work orders.
Prerequisites
Knowledge of Dynamics 365 service-level agreements.
Enable SLA functionality for Field Service
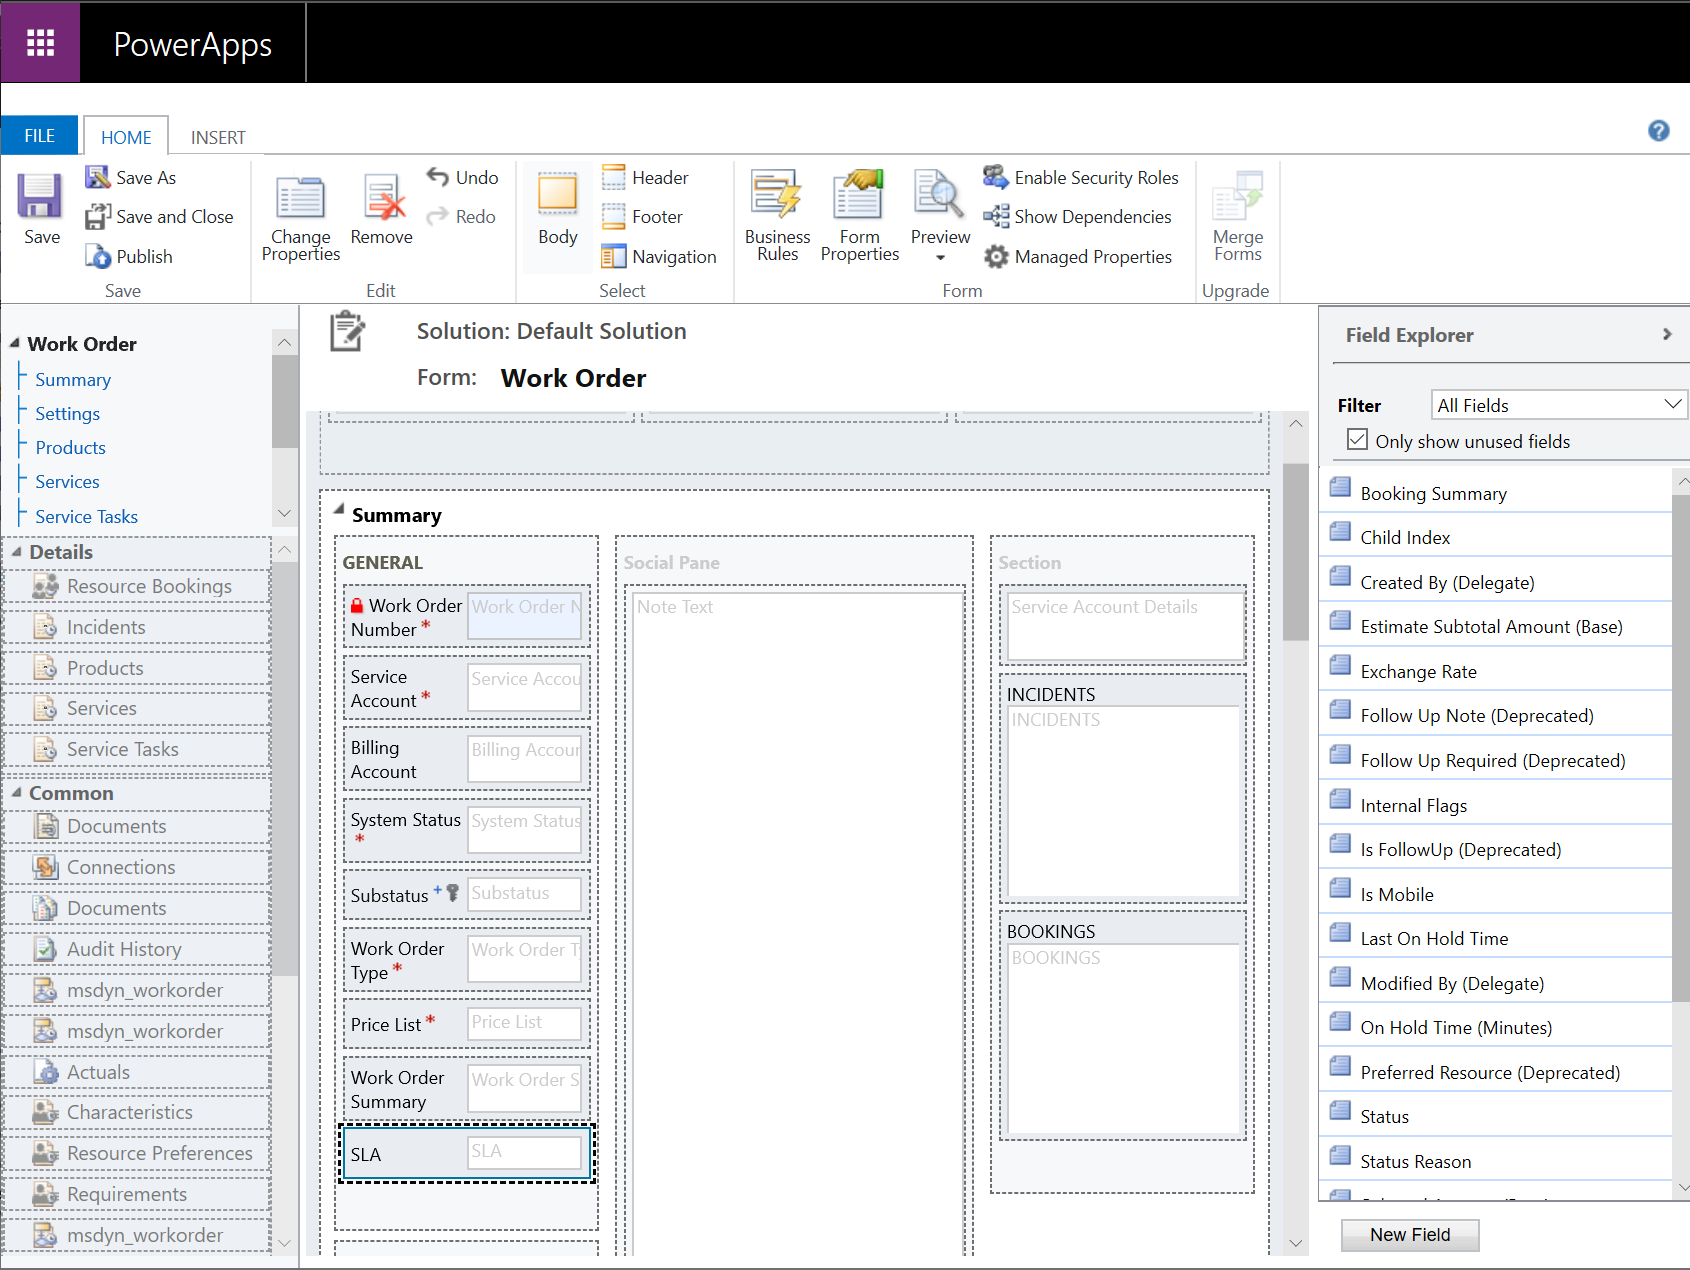
Turn on the SLA setting to enable SLA functionality and then add the SLA field to the work order form.
Sign in to Power Apps and select your environment.
Select Tables > All.
Search for and select Work Order. Then, select Properties.
Select Advanced options and select Setting up service level agreements.

Select Save. Then, select Publish.
Add the SLA field to the work order form
From the Work Order table in Power Apps, select Forms. Select the work order form that your organization uses.
Add the SLA field to the form. The SLA field is created when SLA functionality is enabled for the work order table.

Save and publish the form.
Create an SLA
From Field Service, change to the Power Platform Environment Settings app.
Under Business, select Service Management > Service level agreements.

Select New and enter the following information:
- Name: A descriptive name for the SLA.
- Primary entity: Work Order
- Description: The specific requirements for the SLA.
Select Save.
In the SLA Items section, select New SLA Item.
Enter the following information:
Name: Enter a unique name of this SLA item.
KPI: Select an existing SLA KPI or select New SLA KPI. For a new SLA KPI, enter the following information and then save:
- Name: Enter the name of the SLA KPI.
- Owner: The user creating the SLA is populated by default. You can specify a different owner.
- Entity Name: Select Work Order.
- KPI Field: Select the respective KPI field. For example, if you're creating an SLA KPI to define the time within which a technician must arrive, select Work Order Arrival Time KPI.
- Applicable From: Select a value based on which the warning and failure time are measured. For example, if you select Created On, the warning and failure start time for an SLA are calculated from the date and time when the work order was created.
Allow Pause and Resume (optional): Enable this option if you want the SLA to be paused during the time the record is on hold.
Allow Custom Time Calculation (optional): Enable this option and select the calculation you want to use to calculate the time.
Business Hours (optional): To assign business hours, select a value. The SLA is calculated based on the business hours and business closure that you define. Learn more: Create customer service schedule and define the work hours
In the Applicable When section, define the conditions for when the SLA can be applied for the work order. For example, when a work order has an emergency priority.
The SLA is triggered when the applicable when condition is met throughout. If the applicable when condition isn't met after an SLA is triggered, the SLA KPI instance gets canceled. We recommend that you don't use fields that are updated frequently because any change to the field value might lead to cancellation of the SLA item.
In the Success Conditions section, define the conditions that specify the success criteria of the SLA. For example, the technician arrives at the work order location.
In the Pause Configurations section that appears only when Allow Pause and Resume is enabled, do the following:
- Set the toggle to Yes for Override Criteria to pause the SLA item. This setting overrides the pause settings defined at the entity level, if any, in Service Configuration or at the SLA KPI level.
- Select Add to define the conditions for pausing the SLA item.
In the Warn and Fail Duration section, specify the values to trigger notifications when an SLA is missed. If you don't need Warning Duration, you can set it to null so that SLAs don't reach the Nearing noncompliance status.
Note
The failure and warning time is calculated after considering the business hours selected in the SLA record. If you don't set the business hours record (customer service schedule), the work hours are considered to be all day, every day.

Select Save. Define other SLA items if needed.
Save the SLA. Then, select Activate.
To set this SLA as the default, select Set As Default. You can have multiple service-level agreements active, but only one can be set as the default.
Schedule a work order to meet an SLA
Create a work order in Field Service and select the SLA. Then, save it. The Promised window fields populate on the work order according to the SLA, appropriate SLA item, and business hours of the SLA. Scheduling capabilities like the schedule assistant consider these fields. If the SLA uses the Work Order Resolution KPI, the Promised window fields don't populate.
