Create a work order to coordinate and schedule resources and activities
A work order in Dynamics 365 Field Service has information on what work needs to be done. Work orders are used to coordinate and schedule resources and activities. They can be used for different types of work, such as installations, repairs, or preventive maintenance.
A work order is often created from a case, an agreement, or an opportunity. It gets scheduled either manually, with the schedule assistant, or the Resource Scheduling Optimization add-in. Once the work is complete, it's reviewed and approved by a manager.
For more Field Service videos, go to this full video playlist.
Work order lifecycle
Work order creation: A work order is created, usually from a case or opportunity.
Schedule: The work order is scheduled.
Dispatch: The work order is dispatched.
Service: The work order is performed and details are updated.
Review/Approval: The work order is reviewed and approved by a supervisor.
Invoice and inventory adjustment: Inventory adjustments are made, and an invoice is generated for the corresponding account.
Create | Schedule | Dispatch | Service | Review | Invoice | |
---|---|---|---|---|---|---|
What happens | New work order is created. Assigned incident, product, services, skills, territory, etc. |
Work order schedule is created. Resources assigned to the work order. Date and time specified. |
Field agent notified of work order. Field agent may review and accept/decline the work order. |
Work order is carried out. Information about what is performed in the field is entered through the mobile app. |
Supervisor verifies that all the work was done properly, and that all information regarding the work order is correct. | Invoice is created based on products and services used. Inventory adjustments are made. Products converted into equipment (if applicable) |
Who performs the task | Agreement is automatically generated on a recurring basis. Case: By customer support. Opportunity: By sales/scheduling. Unplanned: By field agent or centralized scheduling. |
Dispatcher Field Agent Dispatcher with help of scheduling assistant Routing engine |
Notification, if set up, sent by system automatically to field agent, customer, and other parties. | Field agent | Field supervisor/manager, back-office accounting |
Automatically sent by system |
Work order status | Open - unscheduled | Open - scheduled | Open - scheduled | Open - scheduled, then open-completed | Open - completed then closed-posted | Closed-posted |
Work order schedule status | N/A | Scheduled | Scheduled | Scheduled Accepted/Declined Custom Status |
Completed | Completed |
Create a work order
You can create a work order quickly from the Get Started page and from the Work Order list.
From the Get Started page
As a Field Service administrator or system administrator in the Field Service app, go to the Get Started page.
Select Create in the Create your work orders section.
Fill in the basic information about the work order.
In the form, add as many tasks, products, and services as needed.
If you want to immediately schedule the work order, select Save & Book. Select Save & Close to only save the work order.
The Get Started work order create form doesn’t support switching forms. If added as a form to other parts of the app, switching to this form will leave you unable to switch back.
From the work order form and record list
In Field Service, change to the Service area.
In the Scheduling section, select Work Orders.
Select New.
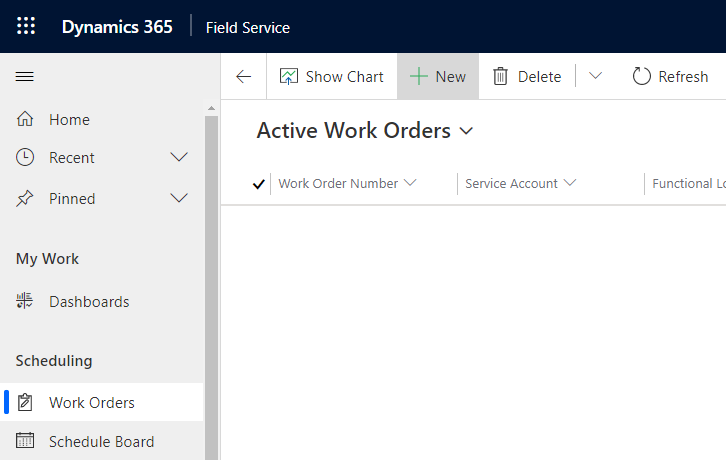
At a minimum, enter information in the following required fields.
- For Service Account, select an account from the list or create a new service account.
- For Work Order Type, select a work order type from the list or create a new work order type.
- For System Status, select Open-Unscheduled.
- For Price List, select a price list from list or create a new price list.
- Choose if the work order is Taxable or not. If the work order isn't taxable work order products and services aren't considered taxable either, regardless of the taxable setting on the product or service.
Provide optional information for the work order as applicable. Service tasks, products, or services are added later.
Select Save or Save and close.
Add service tasks, products, or services to the work order
When the work order has been created and saved, you can add any related tasks, products, or services to the work order.
Go to the Service Tasks section and select New Work Order Service Task. Fill in your information. Use the handy tooltips as a guide. For more information, go to Set up service task types.
Go to the Products or Services section and select New Work Order Product/Service. Fill in your information. Use the handy tooltips as a guide. For more information, go to Create a product or service.
Note
When you add a product, remember that if you want to reserve a product for the work order, set Allocated to Yes.
Consider using incident types to add more details and instructions to your work orders. Products, service tasks, and characteristics are added automatically when you create a work order from an incident. Otherwise, you can add them manually when you create a work order. For more information, go to Configure incident types.
Work order user default settings
Open work order subgrids as popups
Configure work order subentities to pop out as dialog boxes and edit them without having to leave the work order form. This configuration helps dispatchers keep the work order context. Administrators can enable the Work Order Subgrid Records Open as Popups setting in the settings area. For more information, go to Other settings.
Show simplified work order commands
Since Field Service version 8.8.47, the work order ribbon is simplified by default. It shows only the most relevant commands. An administrator can disable the Show Simplified Work Order Commands setting to show all commands. For more information, go to Work Order / Booking settings.
Check out the following video on simplified work order commands and more updates to work orders.
Feedback
Submit and view feedback for