Note
Access to this page requires authorization. You can try signing in or changing directories.
Access to this page requires authorization. You can try changing directories.
This article explains how a user in the System Administrator or Electronic Reporting Functional Consultant role can perform these tasks:
- Configure parameters for the Electronic reporting (ER) framework.
- Import ER configurations that are provided by Microsoft and used to generate free text invoices, based on a template in Microsoft Excel format.
- Create a custom (derived) version of a standard ER format configuration that is provided by Microsoft.
- Modify the custom ER format configuration so that it generates a free text invoice report that has a company logo image in the footer.
The procedures in this article can be completed in the USMF company. No coding is required. Before you begin, download and save the following file.
| Description | File name |
|---|---|
| Company logo image | Company logo.png |
Content
Configure the legal entity
- Go to Organization administration > Organizations > Legal entities.
- On the Legal entities page, on the Report company logo image FastTab, select Change.
- In the Select image file to upload dialog box, select Browse, and select the Company logo.png file that you downloaded earlier.
- Select Save, and then close the Legal entities page.
![]()
Configure the ER framework
As a user in the Electronic Reporting Functional Consultant role, you must configure the minimal set of ER parameters before you can start to use the ER framework to design a custom version of a standard ER format.
Configure ER parameters
Go to Organization administration > Workspaces > Electronic reporting.
On the Localization configurations page, in the Related links section, select Electronic reporting parameters.
On the Electronic reporting parameters page, on the General tab, set the Enable design mode option to Yes.
On the Attachments tab, set the following parameters:
- In the Configurations field, select the File type for the USMF company.
- In the Job archive, Temporary, Baseline, and Others fields, select the File type.
For more information about ER parameters, see Configure the ER framework.
Activate an ER configuration provider
Every ER configuration that is added is marked as owned by an ER configuration provider. The ER configuration provider that is activated in the Electronic reporting workspace is used for this purpose. Therefore, you must activate an ER configuration provider in the Electronic reporting workspace before you start to add or edit ER configurations.
Note
An ER configuration can be edited only by the configuration owner. Before an ER configuration can be edited, the appropriate ER configuration provider must be activated in the Electronic reporting workspace.
Review the list of ER configuration providers
- Go to Organization administration > Workspaces > Electronic reporting.
- On the Localization configurations page, in the Related links section, select Configuration providers.
- On the Configuration provider table page, each provider record has a unique name and URL. Review the contents of this page. If a record for Litware, Inc. (
https://www.litware.com) already exists, skip the next procedure, Add a new ER configuration provider.
Add a new ER configuration provider
- Go to Organization administration > Workspaces > Electronic reporting.
- On the Localization configurations page, in the Related links section, select Configuration providers.
- On the Configuration providers page, select New.
- In the Name field, enter Litware, Inc.
- In the Internet address field, enter
https://www.litware.com. - Select Save.
Activate the new ER configuration provider
- Go to Organization administration > Workspaces > Electronic reporting.
- On the Localization configurations page, in the Configuration providers section, select the Litware, Inc. tile, and then select Set active.
For more information about ER configuration providers, see Create configuration providers and mark them as active.
Import the standard ER format configurations
Import the standard ER configurations
To add the standard ER configurations to your current instance of Dynamics 365 Finance, you must import them from the ER repository that was configured for that instance.
- Go to Organization administration > Workspaces > Electronic reporting.
- On the Localization configurations page, in the Configuration providers section, select the Microsoft tile, and then select Repositories to view the list of repositories for the Microsoft provider.
- On the Configuration repositories page, select the repository of the Global type, and then select Open. If you're prompted for authorization to connect to Regulatory Configuration Service, follow the authorization instructions.
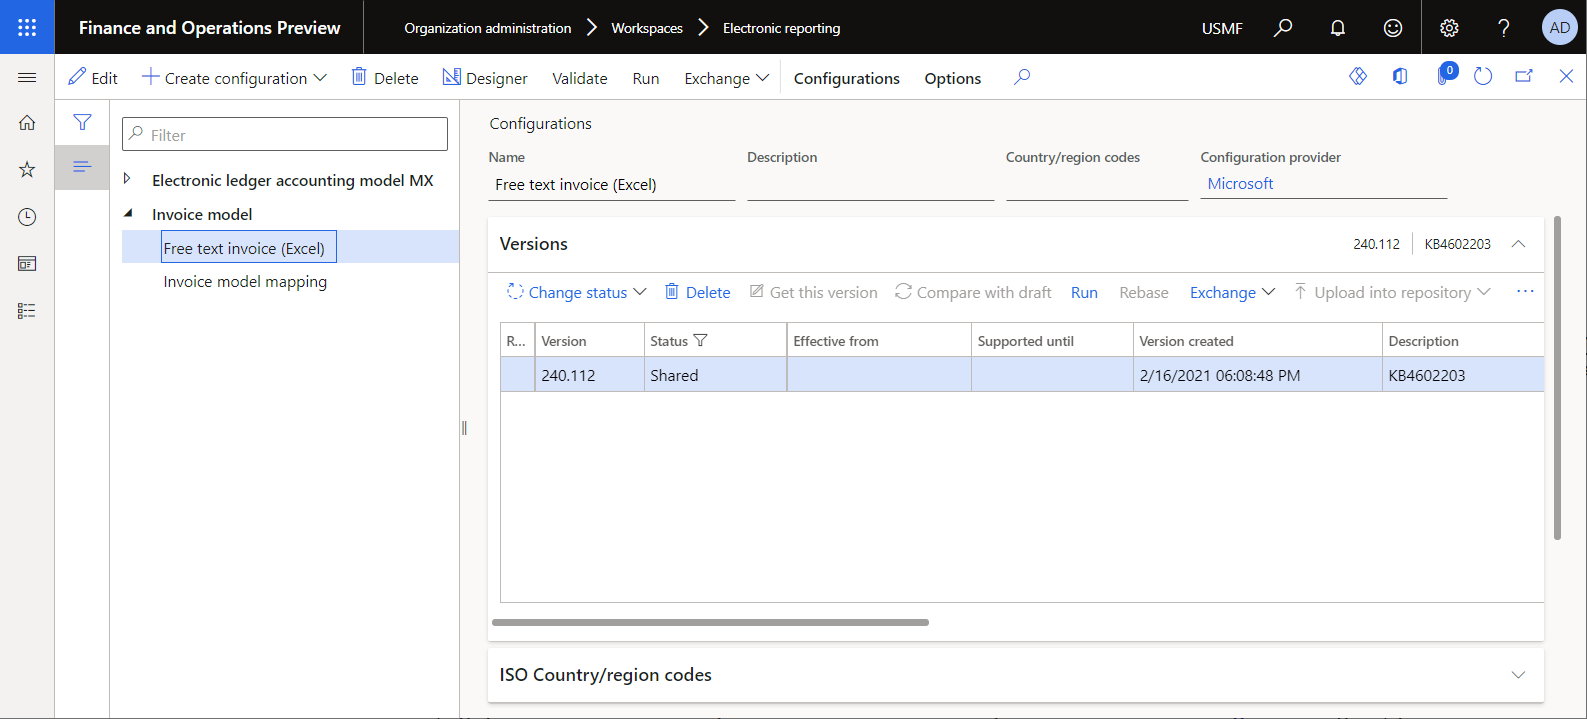
- On the Configuration repository page, in the configuration tree in the left pane, select the Free text invoice (Excel) format configuration.
- On the Versions FastTab, select the latest version (for example, 240.112) of the selected ER format configuration.
- Select Import to download the selected version from the Global repository to the current Finance instance.

Tip
If you have trouble accessing the Global repository, you can download configurations from Microsoft Dynamics Lifecycle Services (LCS) instead.
Review the imported ER configurations
Go to Organization administration > Workspaces > Electronic reporting.
On the Localization configurations page, in the Configurations section, select the Reporting configurations tile.
On the Configurations page, in the configuration tree in the left pane, expand Invoice model.
In addition to the selected Free text invoice (Excel) ER format, other required ER configurations were imported. Make sure that the following ER configurations are available in the configuration tree:
- Invoice model – This configuration contains the data model ER component that represents the data structure of the invoicing business domain.
- Invoice model mapping – This configuration contains the model mapping ER component that describes how the data model is filled in with application data at runtime.
- Free text invoice (Excel) – This configuration contains the format and format mapping ER components. The format component specifies the report layout, based on a template in Excel format. The format mapping component contains the model data source and specifies how this data source is used to fill in the report layout at runtime.
Print a free text invoice by using the standard ER format
Set up print management
- Go to Accounts receivable > Invoices > All free text invoices.
- On the Free text invoice page, select the FTI-00000002 invoice, and then, on the Action Pane, on the Invoice tab, in the Print management group, select Print management.
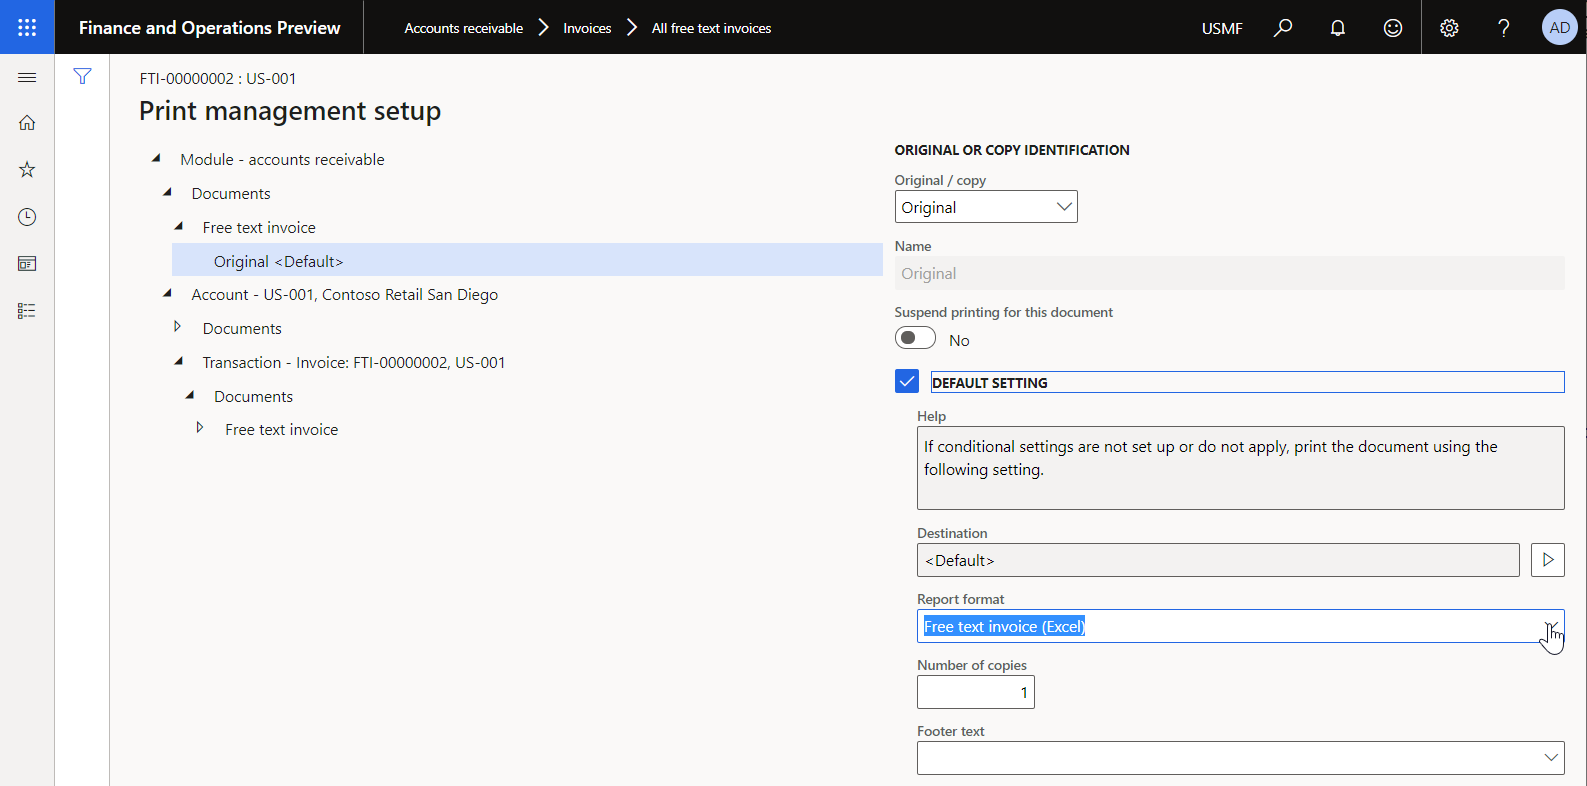
- On the Print management setup page, in the tree on the left, expand Module - accounts receivable > Documents > Free text invoice, and then select the Original <Default> item.
- In the Report format field, select Free text invoice (Excel).
- Select the Esc key to leave the Print management setup page and return to the Free text invoice page.
Print a free text invoice
- On the Free text invoice page, make sure that the FTI-00000002 invoice is still selected, and then, on the Action Pane, on the Invoice tab, in the Document group, select Print > Selected.
- Download the generated invoice in Excel format, and open it for preview.
- Notice that, in accordance with the structure of the Excel template for the provided ER format, the page footer of the generated invoice contains information about the current page number and the total number of pages in the report.

Customize the standard ER format
For the example in this section, you can use the ER configurations that are provided by Microsoft to generate a free text invoice in Excel format. However, you must add a customization to put a company logo image in the page footer of generated invoices.
In this case, as the representative of Litware, Inc., you must create (derive) a new ER format configuration that is based on the Microsoft-provided Free text invoice (Excel) configuration.
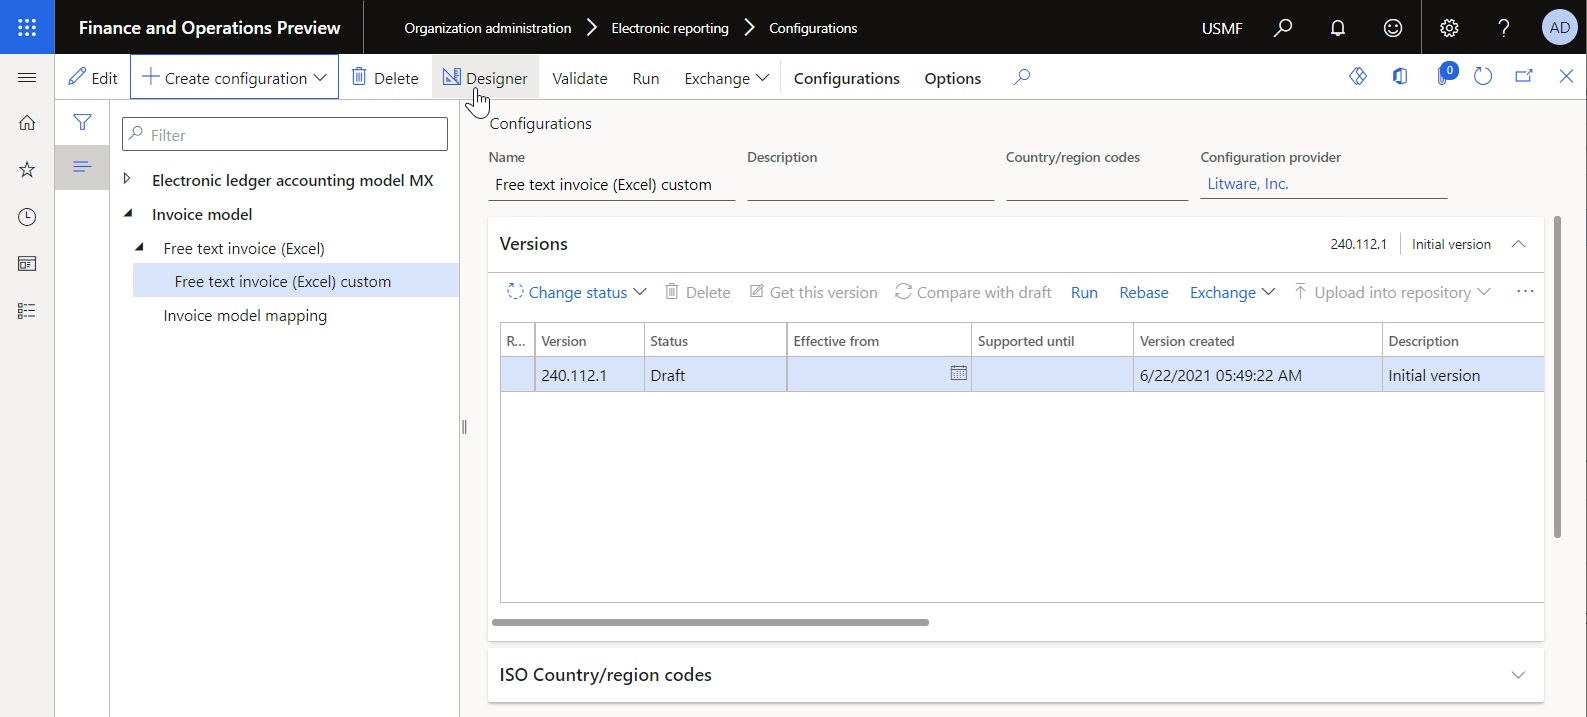
Create a custom format
- Go to Organization administration > Electronic reporting > Configurations.
- On the Configurations page, in the configuration tree in the left pane, expand Invoice model, and then select Free text invoice (Excel). Litware, Inc. will use the imported version (for example, 240.112) of this ER format configuration as the base for the custom version.
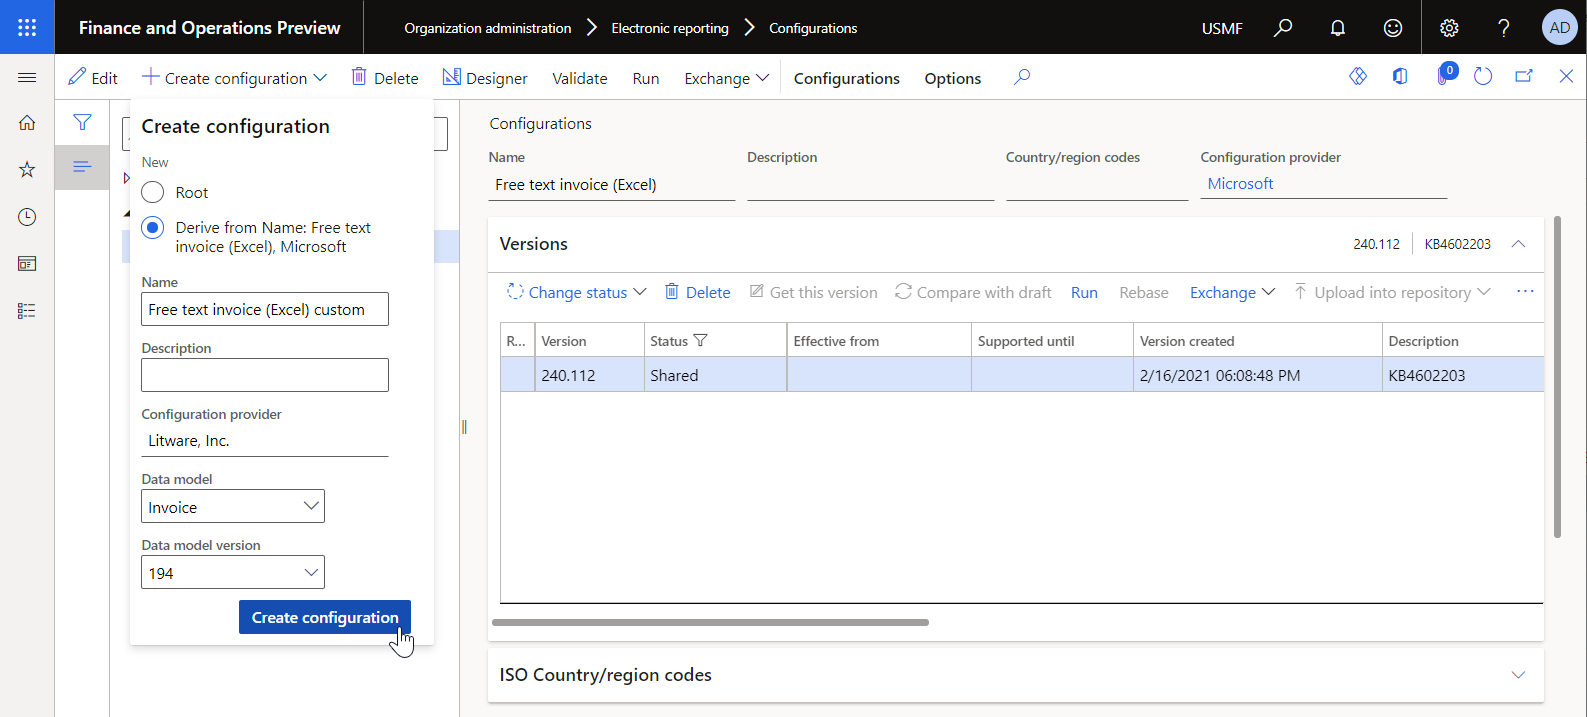
- Select Create configuration to open the drop-down dialog box. Use this dialog box to create a new configuration for a custom payment format.
- In the New field group, select the Derive from Name: Free text invoice (Excel), Microsoft option.
- In the Name field, enter Free text invoice (Excel) custom.
- Select Create configuration.
Version 240.112.1 of the Free text invoice (Excel) custom ER format configuration is created. This version has a status of Draft and can be edited. The current content of your custom ER format matches the content of the format that is provided by Microsoft.
Edit the custom format
Configure your custom format so that a company logo image is put in the footer on every page of the report.
Go to Organization administration > Electronic reporting > Configurations.
On the Configurations page, in the configuration tree in the left pane, expand Payment model, and then select Free text invoice (Excel) custom.
On the Versions FastTab, select version 240.112.1 of the selected configuration.
Select Designer.
On the Format designer page, select Show details to view more information about the format elements.
Expand and review the following elements:
- The Free text invoice element of the Excel type. This element is used to generate an invoice in Excel workbook format.
- The Free text invoice \ Invoice element of the Sheet type. This element is used to generate a worksheet of the generated Excel workbook.
- The Free text invoice \ Invoice \ Footer element of the Footer type. This element is used to fill in an invoice footer.
Select the Free text invoice \ Invoice \ Footer element.
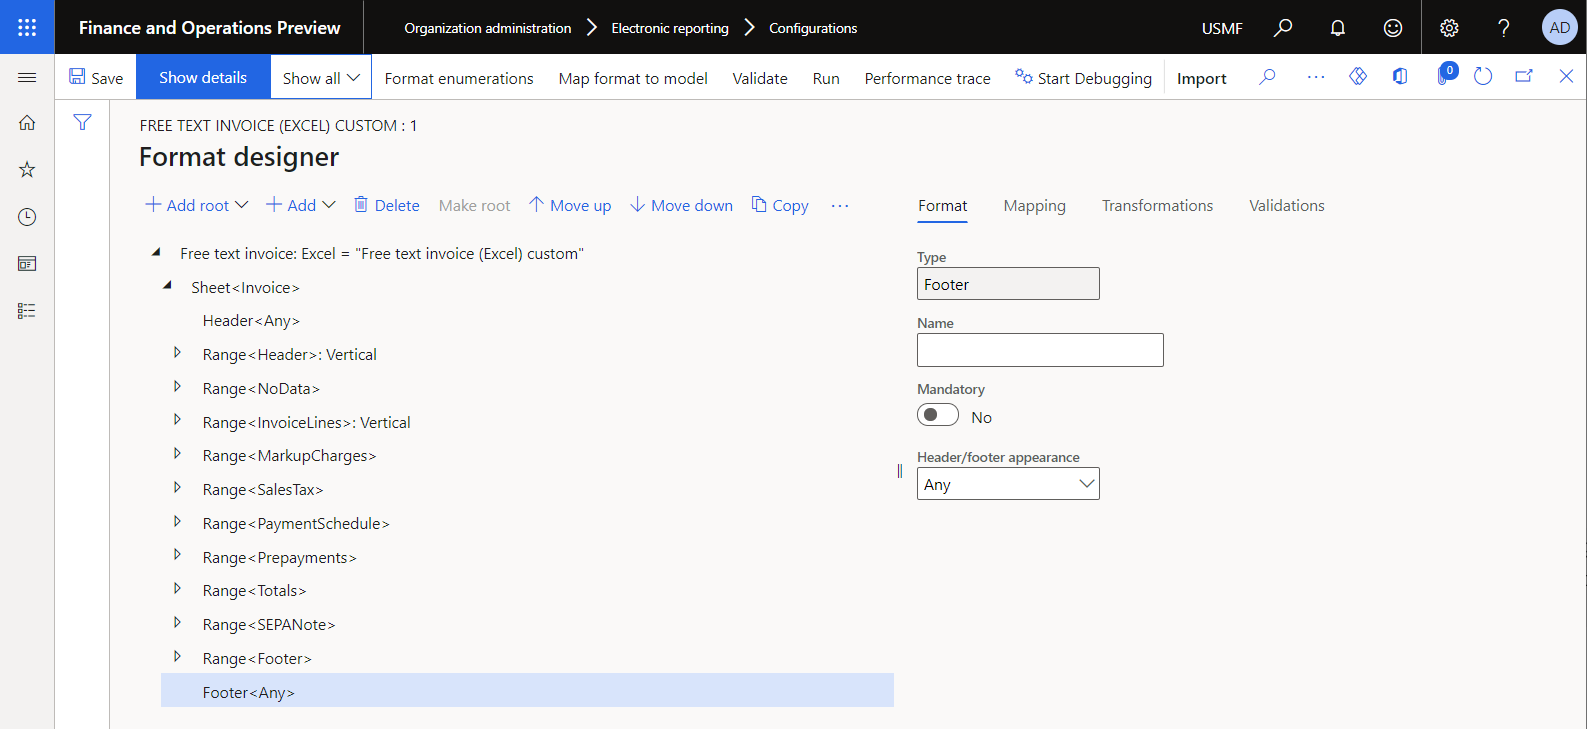
Note
Every page footer of a generated invoice contains information about the current page number and the total number of pages in the report. As you can see, the Free text invoice \ Invoice \ Footer element contains no child elements. Therefore, the Excel template that is being used is configured to show paging details in the center of every report's footer.
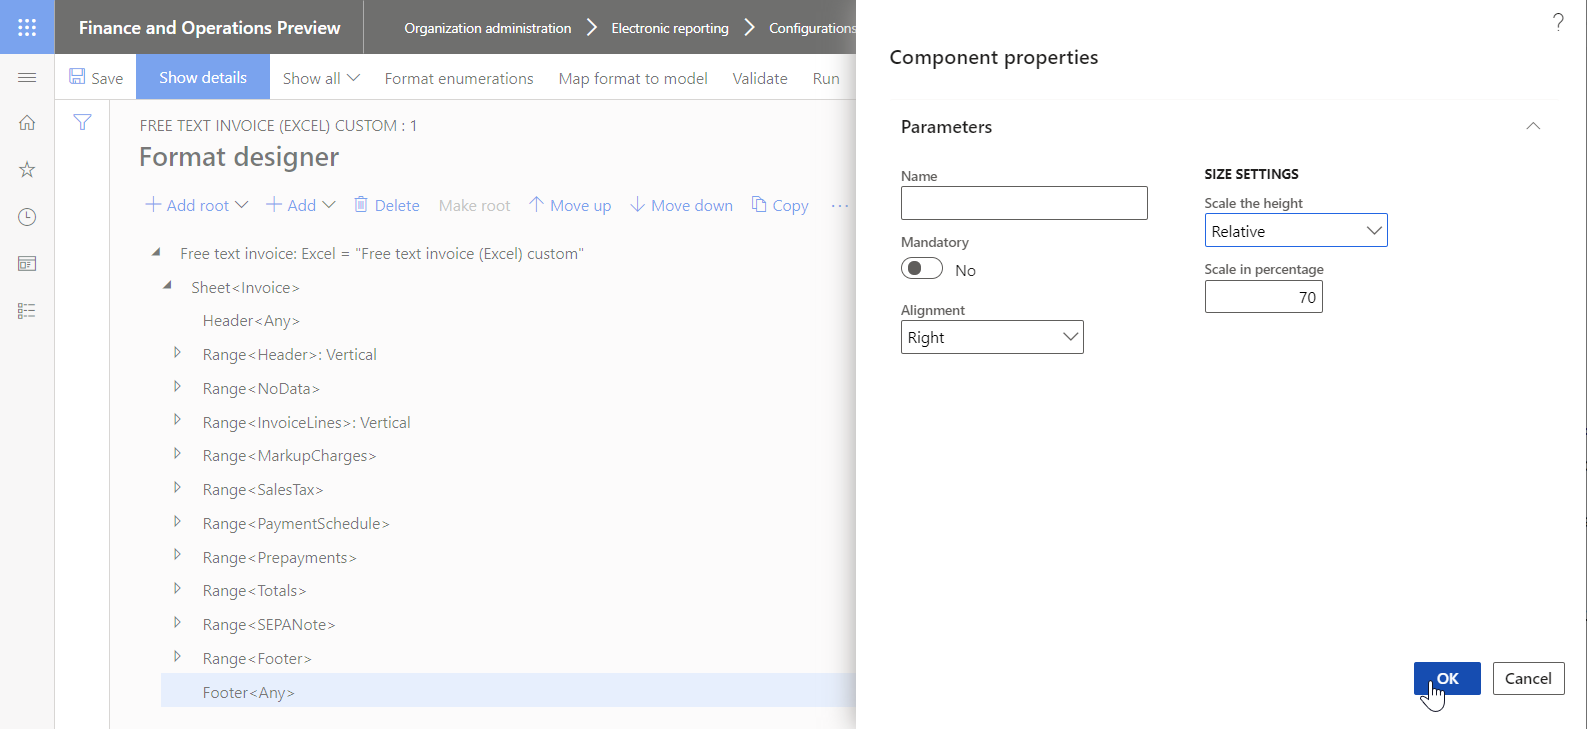
Select Add, and then select the Excel \ Picture type of the format element that you're adding:
In the Alignment field, select Right.
In the Scale the height field, select Relative.
In the Scale in percentage field, enter 70.
Select OK.
Note
The Excel \ Picture element is used to add a company logo image and align it on right side of the page footer.
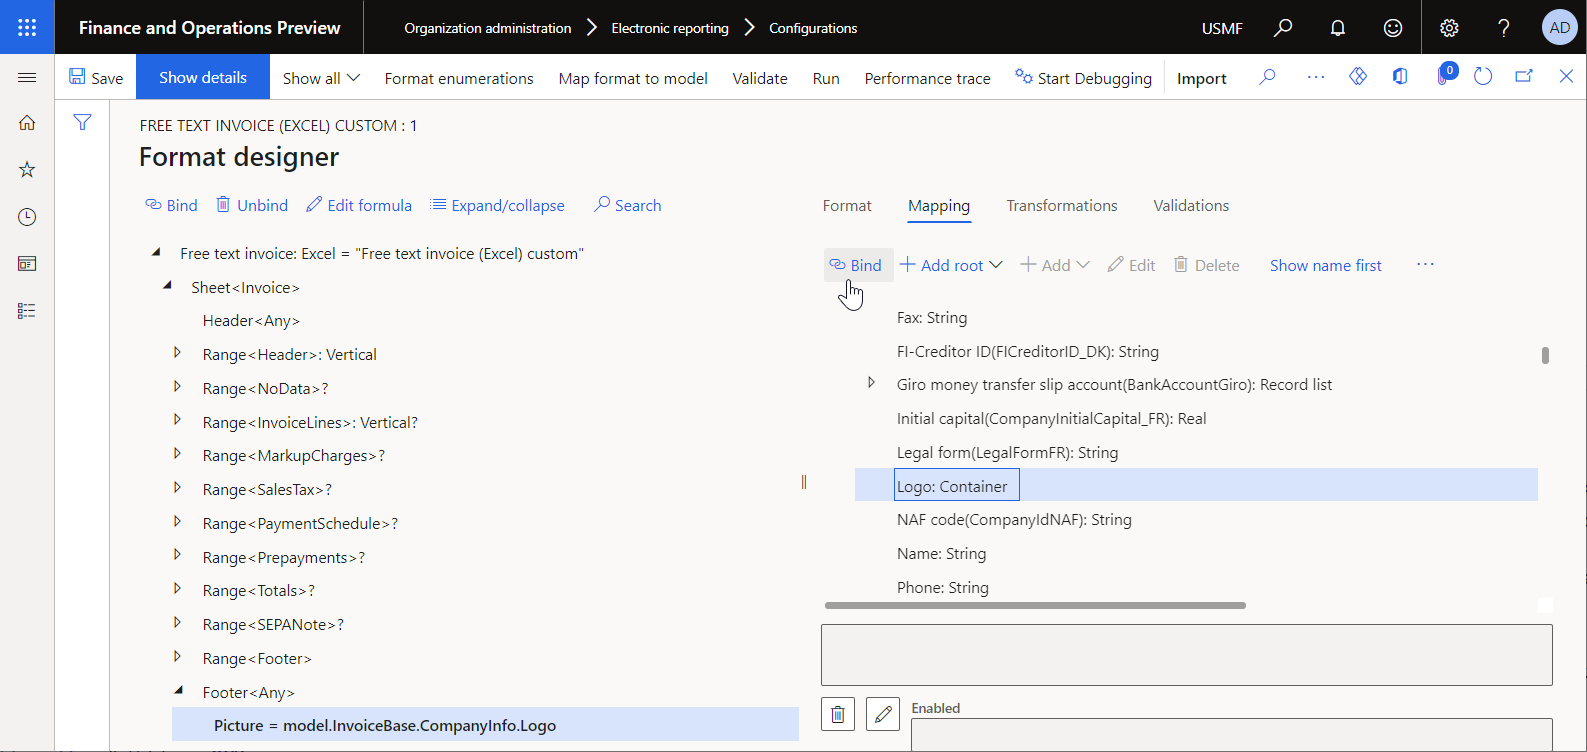
In the format structure tree on the left, select the Picture element that you just added, and then, on the Mapping tab, expand the model data source.
Expand model.Payment > model.InvoiceBase > model.InvoiceBase.CompanyInfo, and then select the model.InvoiceBase.CompanyInfo.Logo data source field. The data source field of the Container type exposes the company logo image as media content.
Select Bind. The Picture format element is now bound with the model.InvoiceBase.CompanyInfo.Logo data source field. Therefore, at runtime, a company logo image will be put in the footer of generated invoices.
Select Save, and then close the Designer page.
Mark the custom format as runnable
Because the first version of the custom format has been created and has a status of Draft, you can run the format for testing purposes. To run the report, process a vendor payment by using the payment method that refers to your custom ER format. By default, when you call an ER format from the application, only versions that have a status of Completed or Shared are considered. This behavior helps prevent ER formats that have unfinished designs from being used. However, for your test runs, you can force the application to use the version of your ER format that has a status of Draft. In this way, you can adjust the current format version if any modifications are required. For more information, see Applicability.
To use the draft version of an ER format, you must explicitly mark the ER format.
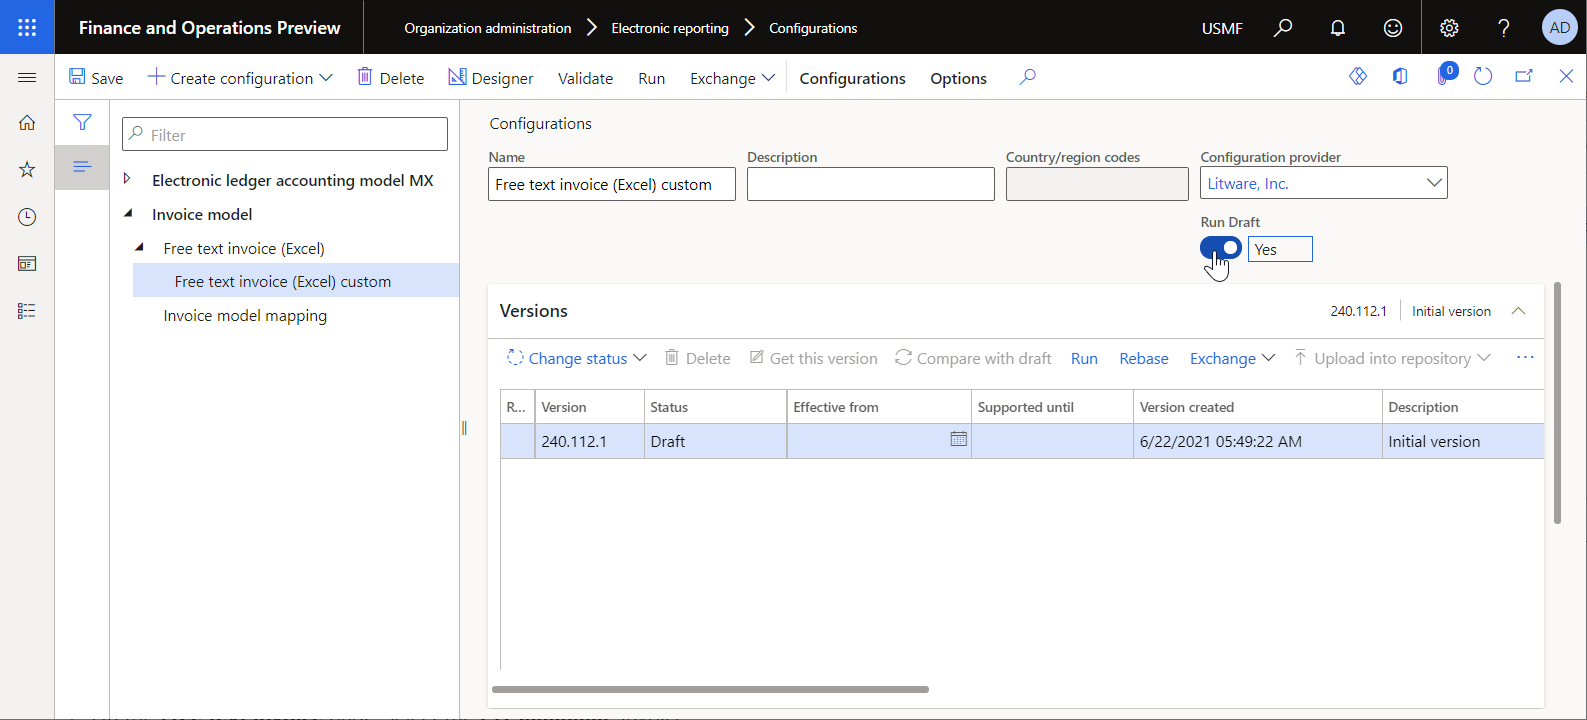
- Go to Organization administration > Electronic reporting > Configurations.
- On the Configurations page, on the Action Pane, on the Configurations tab, in the Advanced settings group, select User parameters.
- In the User parameters dialog box, set the Run settings option to Yes, and then select OK.
- Select Edit to make the current page editable, and then, in the configuration tree in the left pane, select Free text invoice (Excel) custom.
- Set the Run Draft option to Yes.
Print a free text invoice by using the custom ER format
Set up print management
- Go to Accounts receivable > Invoices > All free text invoices.
- On the Free text invoice page, select the FTI-00000002 invoice, and then, on the Action Pane, on the Invoice tab, in the Print management group, select Print management.
- On the Print management setup page, in the tree on the left, expand Module - accounts receivable > Documents > Free text invoice, and then select the Original <Default> item.
- In the Report format field, select Free text invoice (Excel) custom.
- Select Esc to leave the Print management setup page and return to the Free text invoice page.
Print a free text invoice
- On the Free text invoice page, make sure that the FTI-00000002 invoice is still selected, and then, on the Action Pane, on the Invoice tab, in the Document group, select Print > Selected.
- Download the generated invoice in Excel format, and open it for preview.
- Notice that, in accordance with the structure of the custom ER format, the page footer of the generated invoice contains a company logo image in addition to information about the report's paging.