Deploy to Azure Static Web Apps
You can deploy the Getting started kit for Intelligent appointments (Starter kit) to Azure Static Web Apps. The following architecture diagram provides an overview of the deployment:
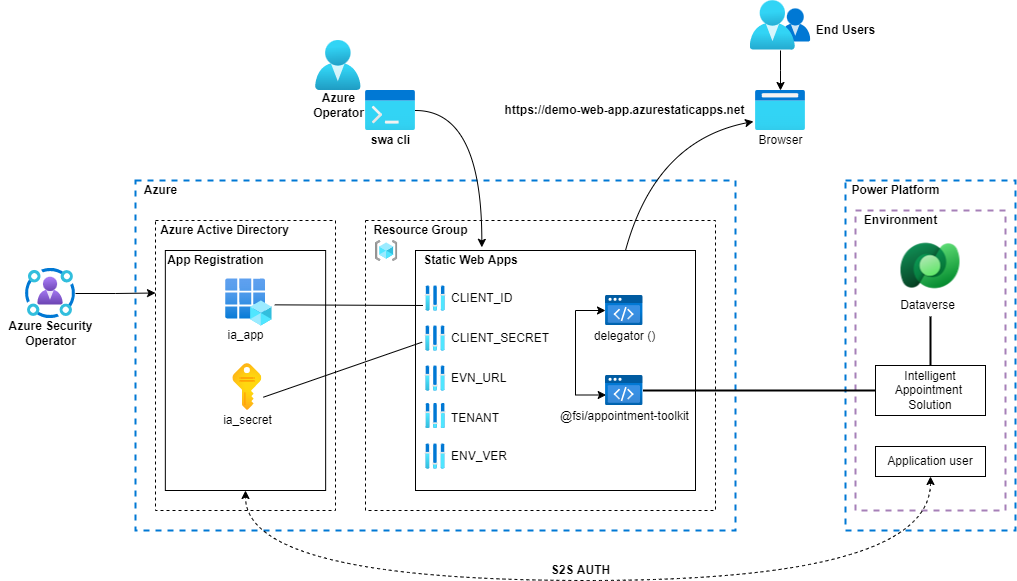
You need to perform the following tasks to deploy to Static Web Apps (SWA):
1. Register the application on the Azure portal
2. Create a Service-to-Service authentication with a Dataverse environment
3. Create an Azure resource group
4. Install the deployment prerequisites
5. Deploy the Getting started kit
1. Register the application on the Azure portal
To enable the Starter kit to authenticate the Intelligent appointments back-end service, you need to create an App registration on the Azure portal.
In the Azure portal, search for and select App registrations.
Select + New registration.
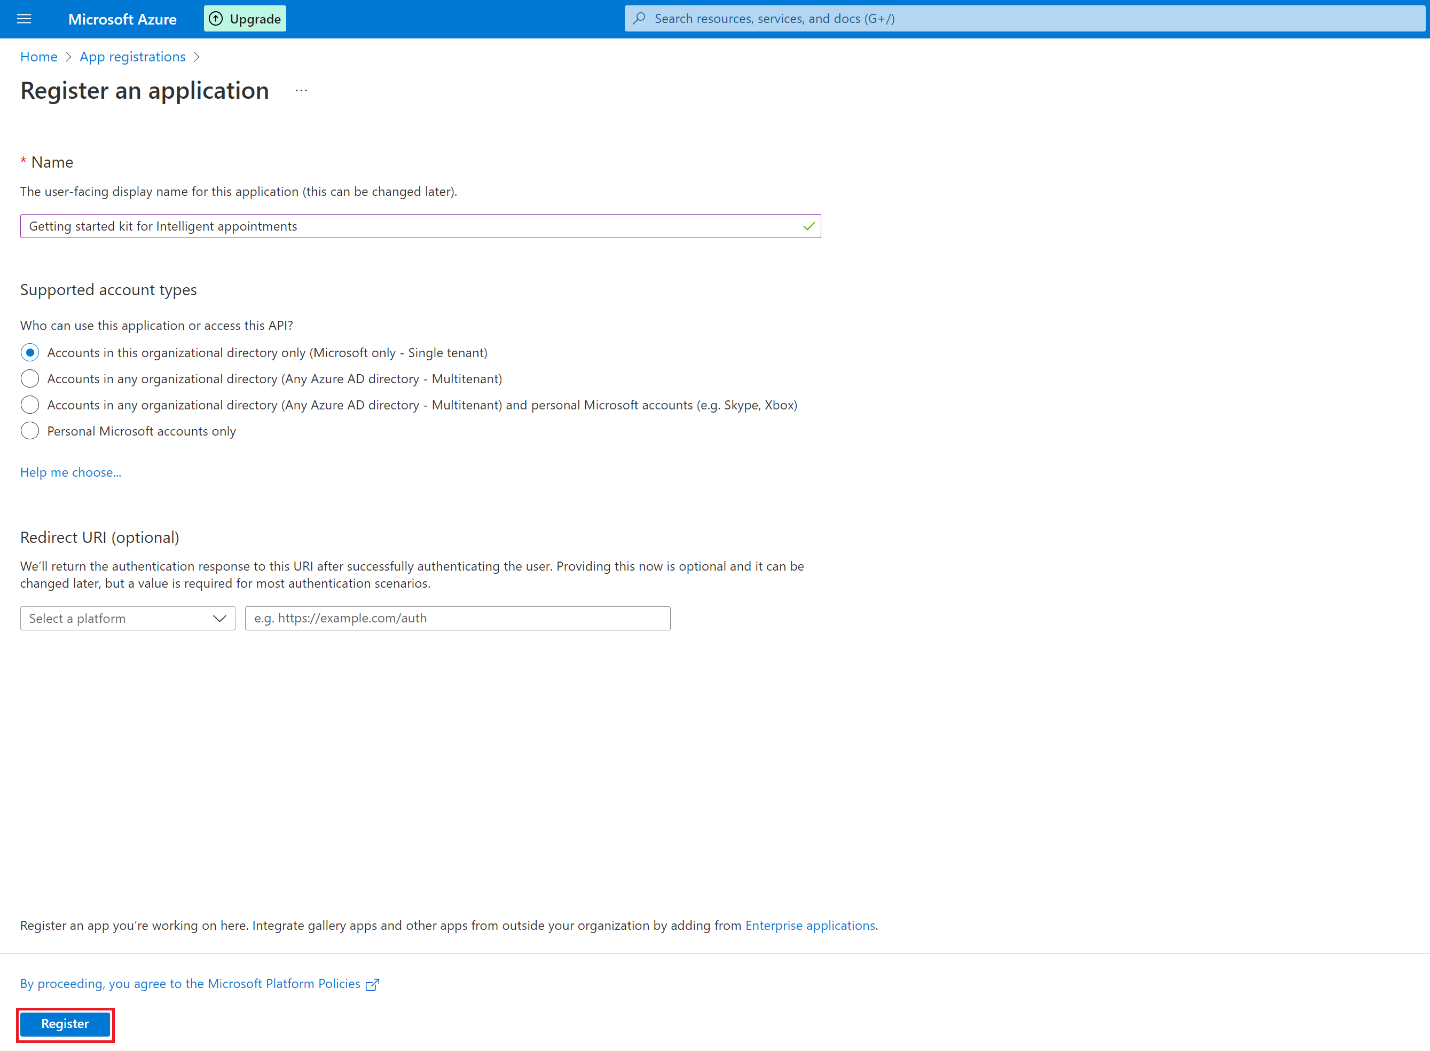
On the Register an Application page, enter a name for the application; for example, Getting started kit for Intelligent appointments, and then select Register.
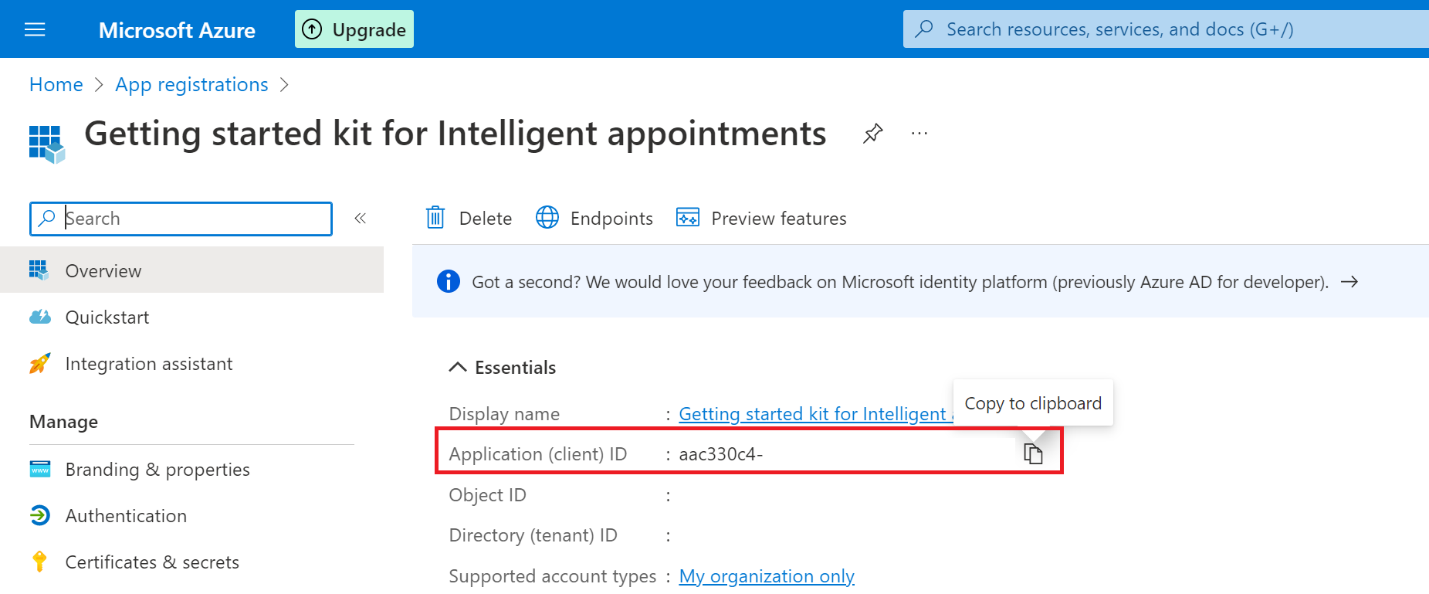
Copy the Application (client) ID value because you'll use it in a later step.
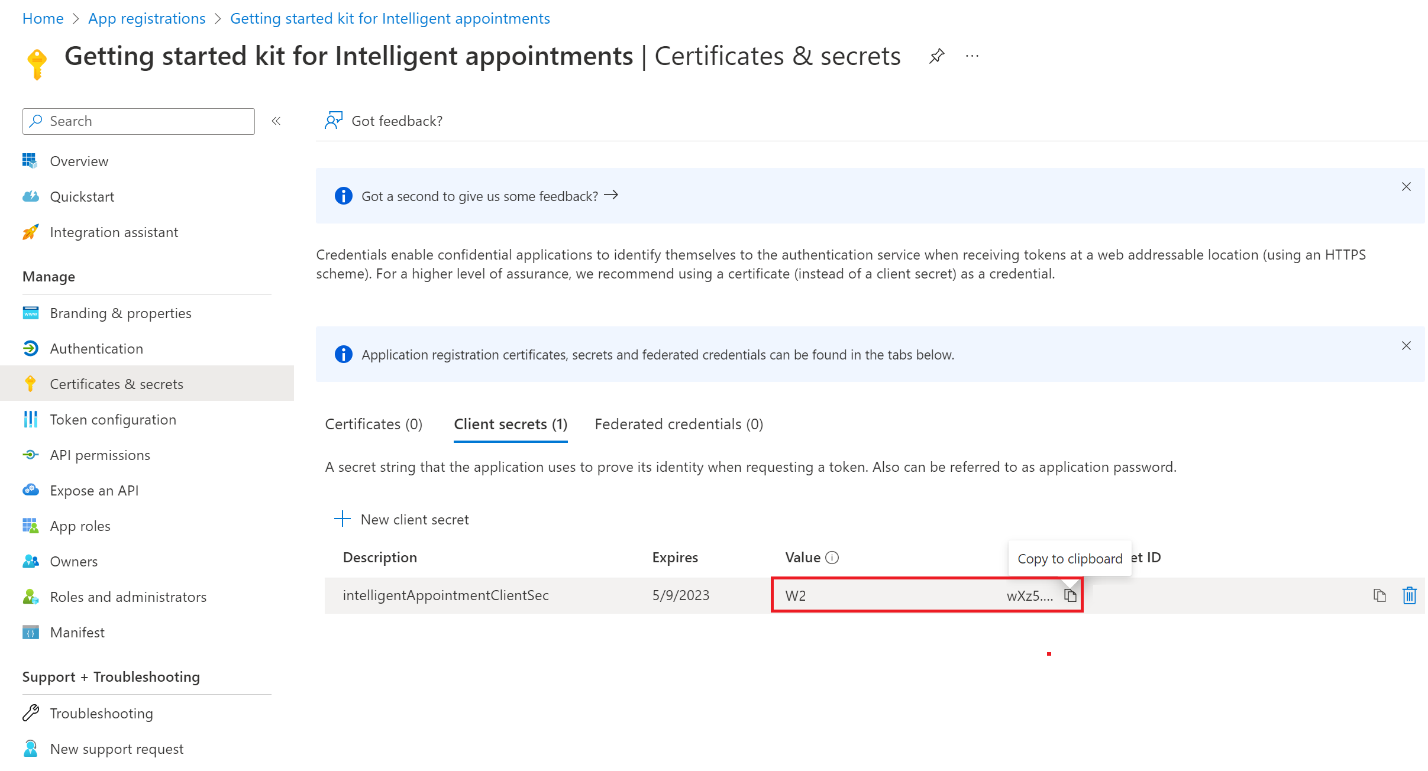
Inside your application, select Certificates & secrets on the left navigation pane.
Under Client secrets, select +New client secret.
Enter a description for the client secret; for example, intelligentAppointmentClientSec, and then select Add.
You should see the value of the generated client secret. Copy this value because you'll use it in a later step.
Important
The client secret value will not be visible if the page reloads. Therefore, if you did not copy the value when it was first generated, you must delete the existing client secret and generate a new one.
2. Create a Service-to-Service authentication with a Dataverse environment
You need to add the recently created application user to the Microsoft Cloud for Financial Services environment and set up the required security role to ensure that the Starter kit can authenticate it.
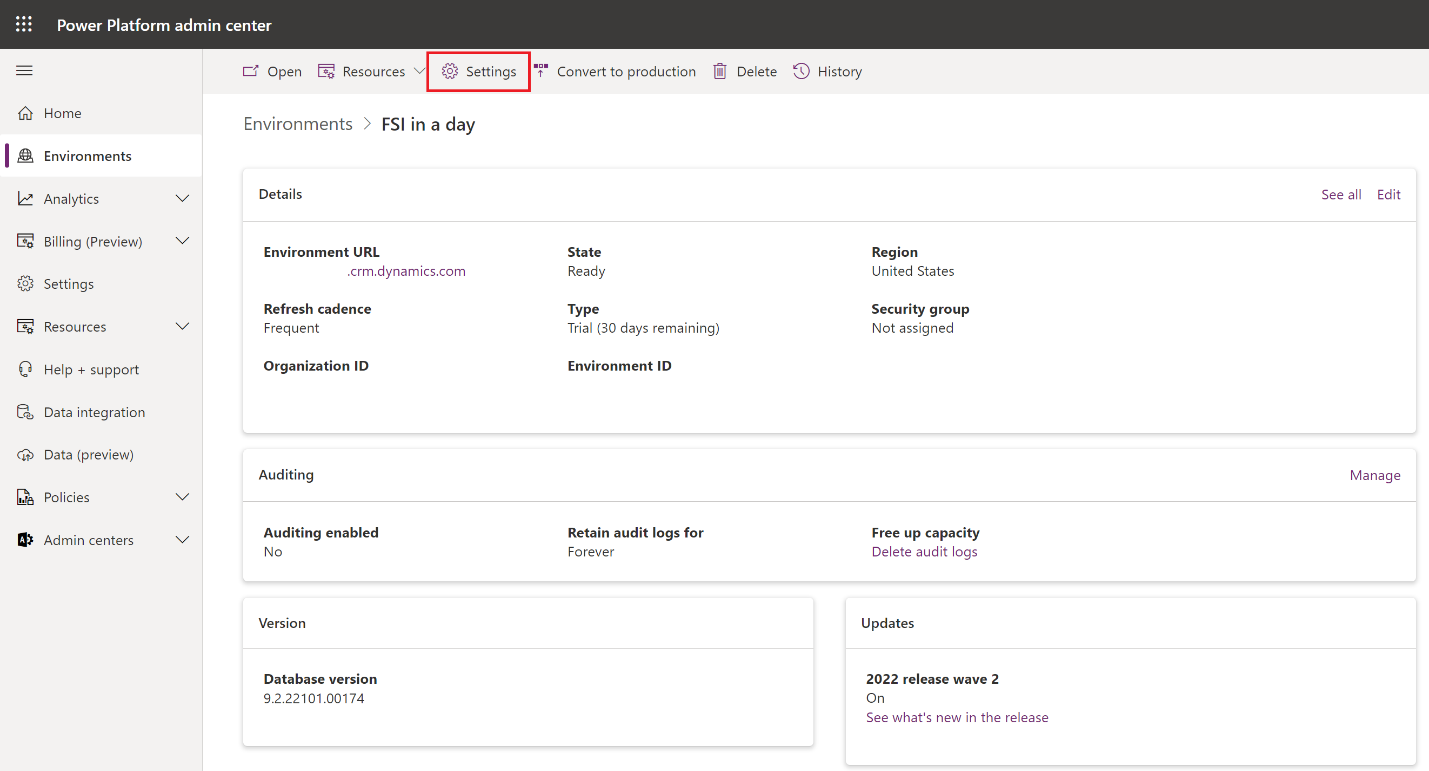
Sign in to the Power Platform admin center.
In the left navigation pane, select Environments, and then select your Microsoft Cloud for Financial Services environment to view its details.
Select the Settings for your environment.
Expand Users + Permissions, and then select Application users.
Select + New app user.
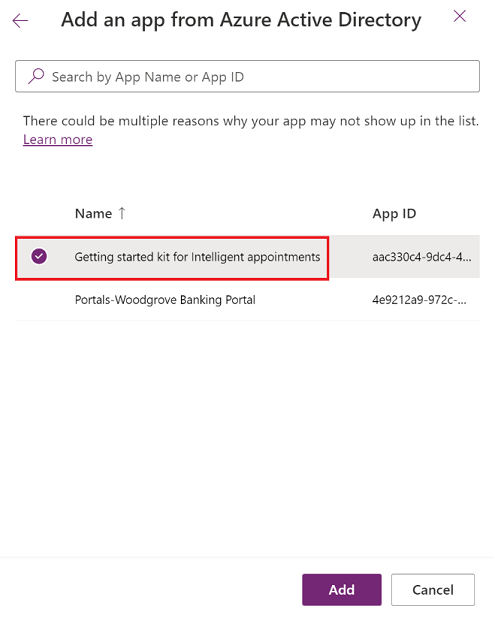
Select + Add an app.
Select the app user that you've already created, and then select Add.
Select your Business Unit and then select the pencil icon next to Security Roles.
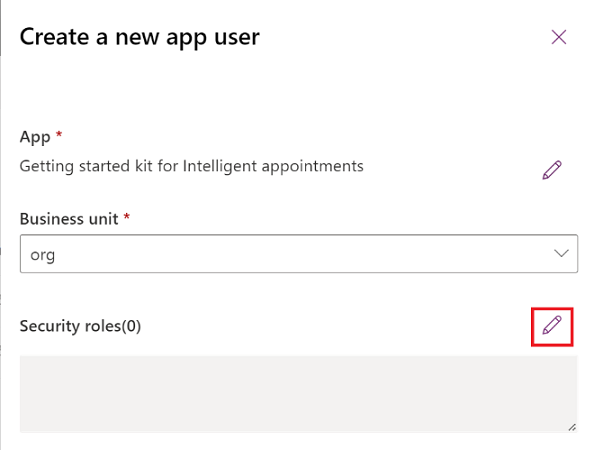
Define the required security roles.
Scroll down and select Scheduling API user, and then select Save.
3. Create an Azure resource group
After creating the S2S authentication, you need to create the required resource group to house your other Azure components.
Sign in to the Azure portal.
Search for and select Resource groups.
Select + Create to create a new resource group.

Under Basics, specify the following details:
Resource group: Provide a name, such as fsiIntelligentAppointments.
Region: Select the same region as the Dataverse environment.
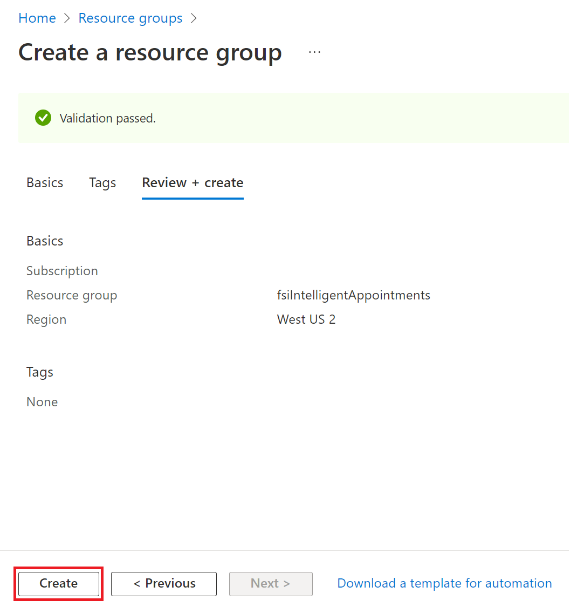
Select Review + Create to review the specified details.
Select Create to proceed with the creation of the resource group. Copy the Resource Group name because you'll use it in a later step.
Note
For more information on Azure resource groups, see Manage Azure Resource Manager resource groups by using the Azure portal.
4. Install the deployment prerequisites
Before proceeding with the deployment, ensure that all the prerequisite applications are installed on your computer.
Start Windows PowerShell as an administrator.
Run
node --versionto verify whether your Node.js version is 16.x or later.If you receive an error message or if the version is earlier than 16.x, download Node.js and install the required version of Node.js.
Run
az --versionto verify whether your Azure Command-Line Interface (CLI) version is 2.40.0 or later.If your receive an error message or if the version is earlier than 2.40.0, download and install the required version of Azure CLI based on your operating system.
Run
yarn --versionto check whether yarn is installed.If you receive an error message or if the version is earlier than 1.22.x, run
npm install -g yarn. This command installs yarn globally on your computer.Run
npm install -g @azure/static-web-apps-clito install the Azure Static Web Apps CLI.Go to the Azure portal. Search for and then select Microsoft Entra ID.
Under Overview, copy the Tenant ID because you'll use it in a later step.

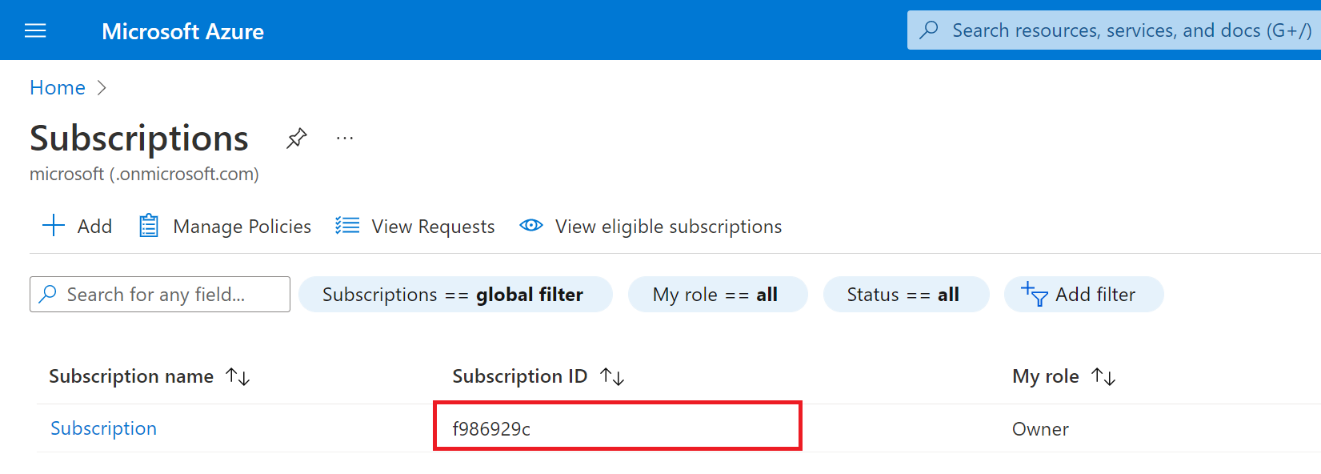
Search for and select Subscriptions. Copy the Subscription ID because you'll use it in a later step.
Sign in to the Power Platform admin center.
In the left navigation pane, select Environments, and then select your Microsoft Cloud for Financial Services environment to view its details.
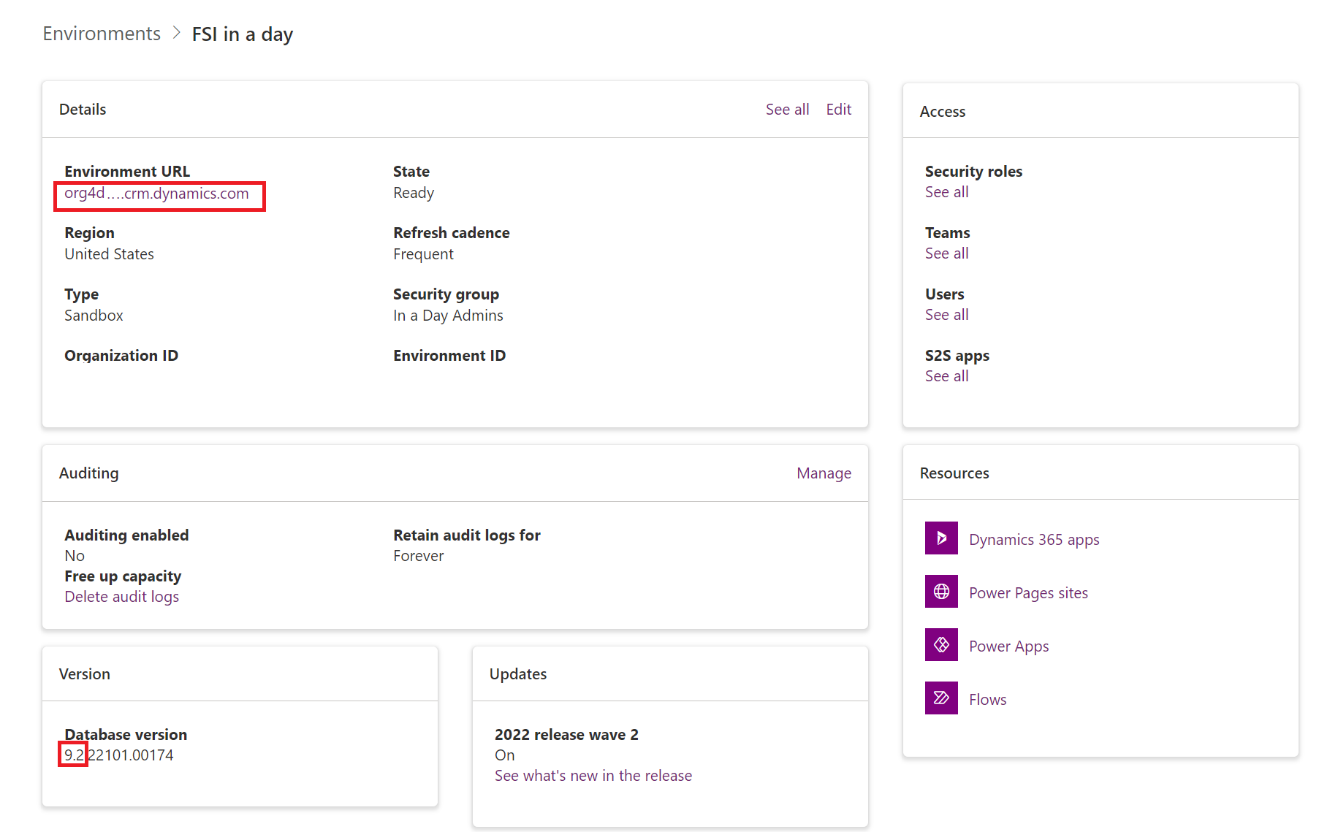
Copy the Environment URL and the Database version values because you'll use them in a later step.
Note
You can copy the Database version only until the first decimal place, as highlighted in the following screenshot:
5. Deploy the Getting started kit
You must first build the Starter kit on your computer, and then create an Azure Static Web App to deploy the Starter kit. You can use Windows PowerShell to perform the build and deployment, but use an editor such as Visual Studio Code to make any code-related changes.
To download the Starter kit that you'll build and deploy, go to Cloud-for-Financial-Services---samples, select Code and then select Download ZIP. Extract the ZIP file to a local folder.
Note Make sure to not use a synced OneDrive folder or other cloud storage services for the extracted files.
Start Windows PowerShell and navigate to the folder where you extracted the sample kit. For example,
Cloud-for-Financial-Services\-\--samples.Run
yarnto install all the packages required for the build.Navigate to the folder to build, that is
appointment-started-kit, and runyarn build.Navigate to the
demo-web-app folderand then build the SWA project using the following command:swa build --app-location . --output-location dist --api-location api --app-build-command "yarn build\" --api-build-command "npm run build --if-present"Use all the values that you copied in the previous steps to set up the variables for the subsequent steps in this procedure. You can use a text editor to list the variables and then copy them to PowerShell.
$tenantId = '9ed59fd7-xxxx-xxxx-xxxx-xxxxxxxxxxxx'
$subscriptionId = 'f986929c-xxxx-xxxx-xxxx-xxxxxxxxxxxx'
$resourceGroup = 'fsiIntelligentAppointments'
$clientId = '989e78c0- xxxx-xxxx-xxxx-xxxxxxxxxxxx'
$clientSecret = 'kHe\~xxxxxxxxxxxxxxxxxxxxxxxxxx'
$env_url = 'https://orgxxxxxxxx.crm.dynamics.com/'
$region = 'westus2\' (Use your environment's region)
$appName = 'IntelligentAppointments-Starter-kit'
$env_version = 'v9.2' (Use the version you copied earlier)
Sign in to your Azure account by using
az loginand select the right subscription by running theaz account set --subscription $subscriptionId. A web browser window opens for authentication.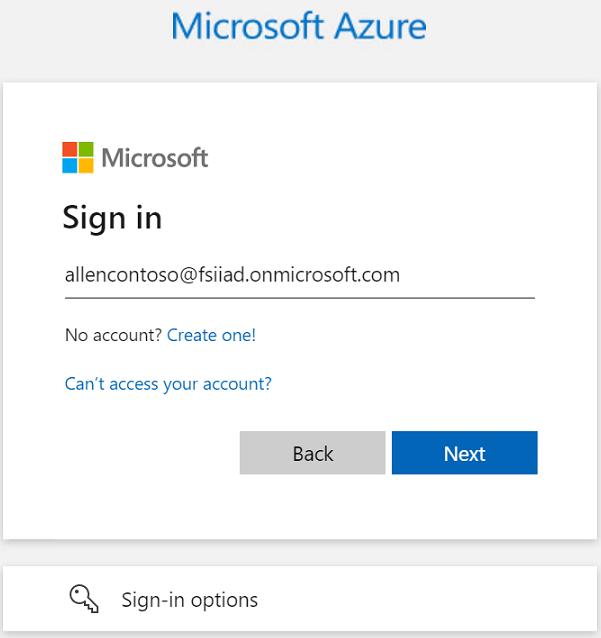
Create the Azure Static Web App as specified:
az staticwebapp create --name $appName --resource-group $resourceGroup --api-location api --output-location dist --location $regionSign in to the Azure Static Web App. A web browser window opens for authentication.
swa login --subscription-id $subscriptionId --resource-group $resourceGroup --tenant-id $tenantId --clear-credentialsRun the following command for the Azure Static Web App deployment key:
$deploymentKey = az staticwebapp secrets list --name \$appName --query "properties.apiKey"Deploy the Azure Static Web App:
swa deploy --deployment-token=$deploymentKey ./dist --api-location ./api --env production --app-name $appName --resource-group $resourceGroupAfter the deployment is complete, you should see a project deployed to
https://...azurestaticapps.net.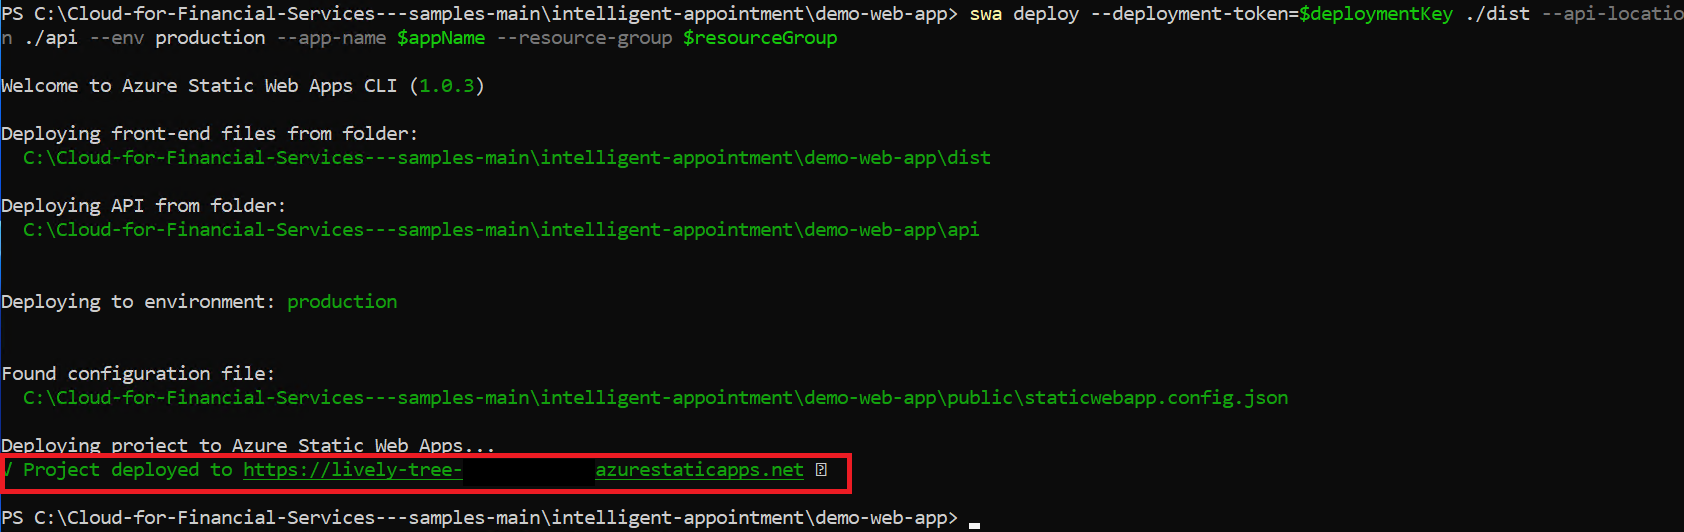
Set the environment variables for the Azure Static Web Apps configuration by using the variables that you already added to the script.
az staticwebapp appsettings set --name $appName --setting-names CLIENT_ID=$clientId CLIENT_SECRET=$clientSecret ENVIRONMENT_URL=$env_url TENANT=$tenantId ENVIRONMENT_VERSION=$env_version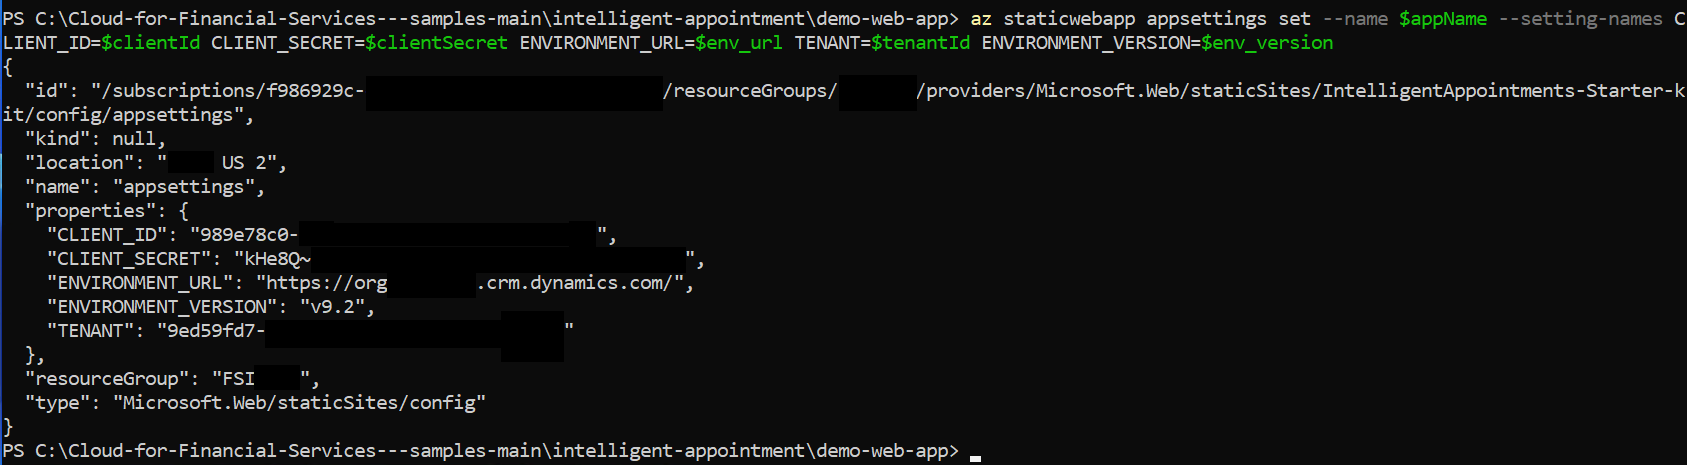
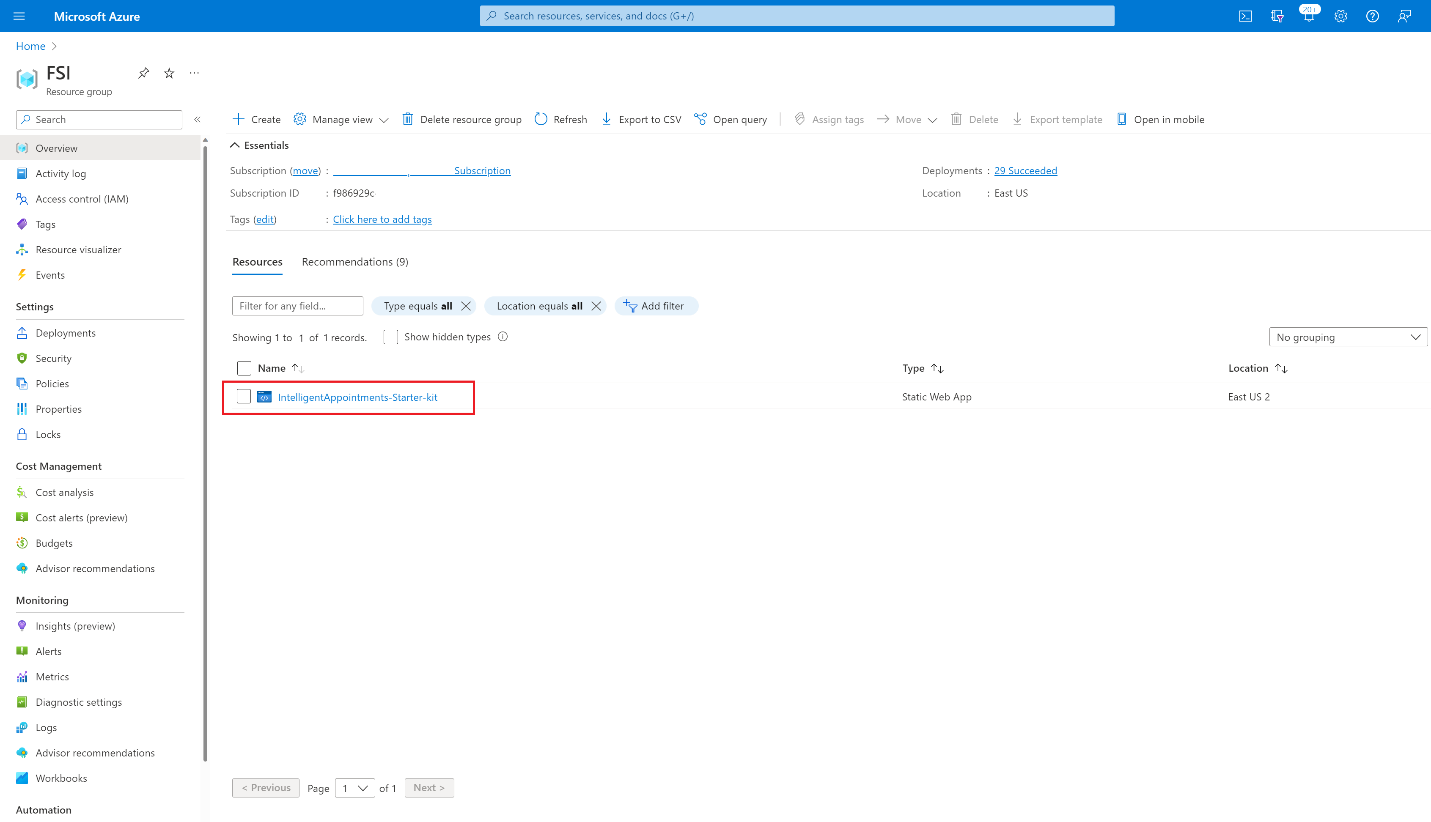
Open the Azure portal and select the resource group you created to view the newly deployed Static Web App. You can select the app to view its details.
You can select Configuration from the left navigation pane to verify whether all the variables are correctly set.
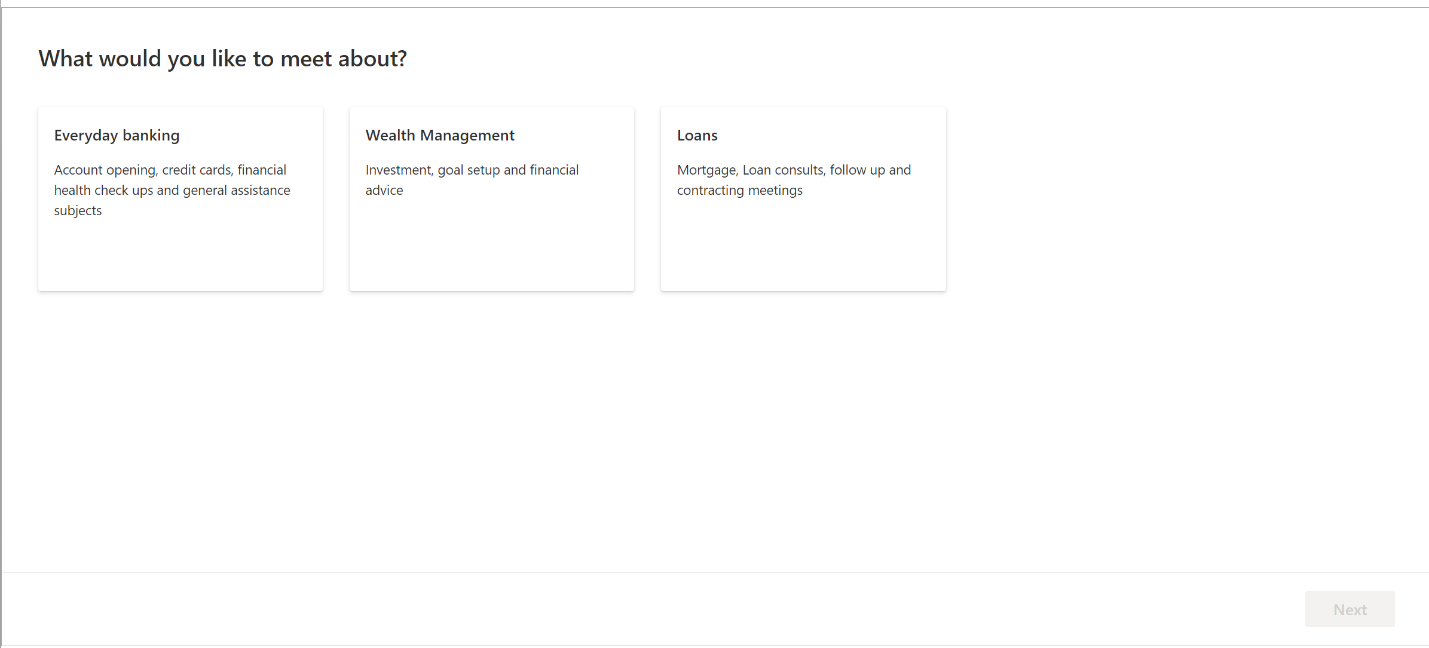
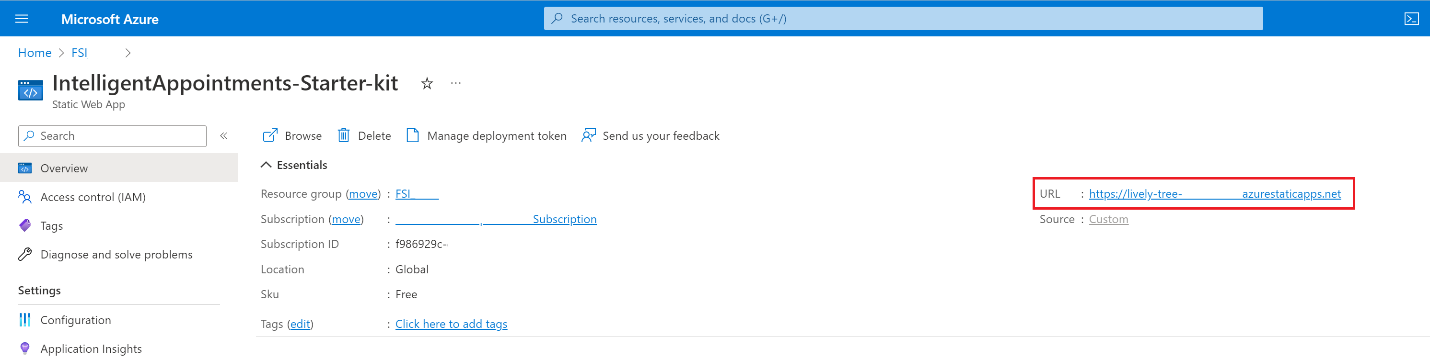
To open the Azure Static Web App and launch your Intelligent appointments self-service experience, select Overview on the left navigation pane, and then select URL.
The following screenshot shows the Intelligent appointments page when you launch the app: