Note
Access to this page requires authorization. You can try signing in or changing directories.
Access to this page requires authorization. You can try changing directories.
Applies to: Patient access
Patient access provides patients with access to their information and lets them schedule appointments. Microsoft Cloud for Healthcare offers ready-made templates to load into your portal.
Prerequisite: Set up a new customer self service portal
Before you deploy the patient access solution, you need to set up a new Customer Self Service Portal using the following steps:
Sign in to Microsoft Power Pages
Select the Dataverse environment where you'd like to create a site.
On the home page, select + Create a site.
On the template selection page, go to the Dynamics 365 section and select Customer Self Service Portal.
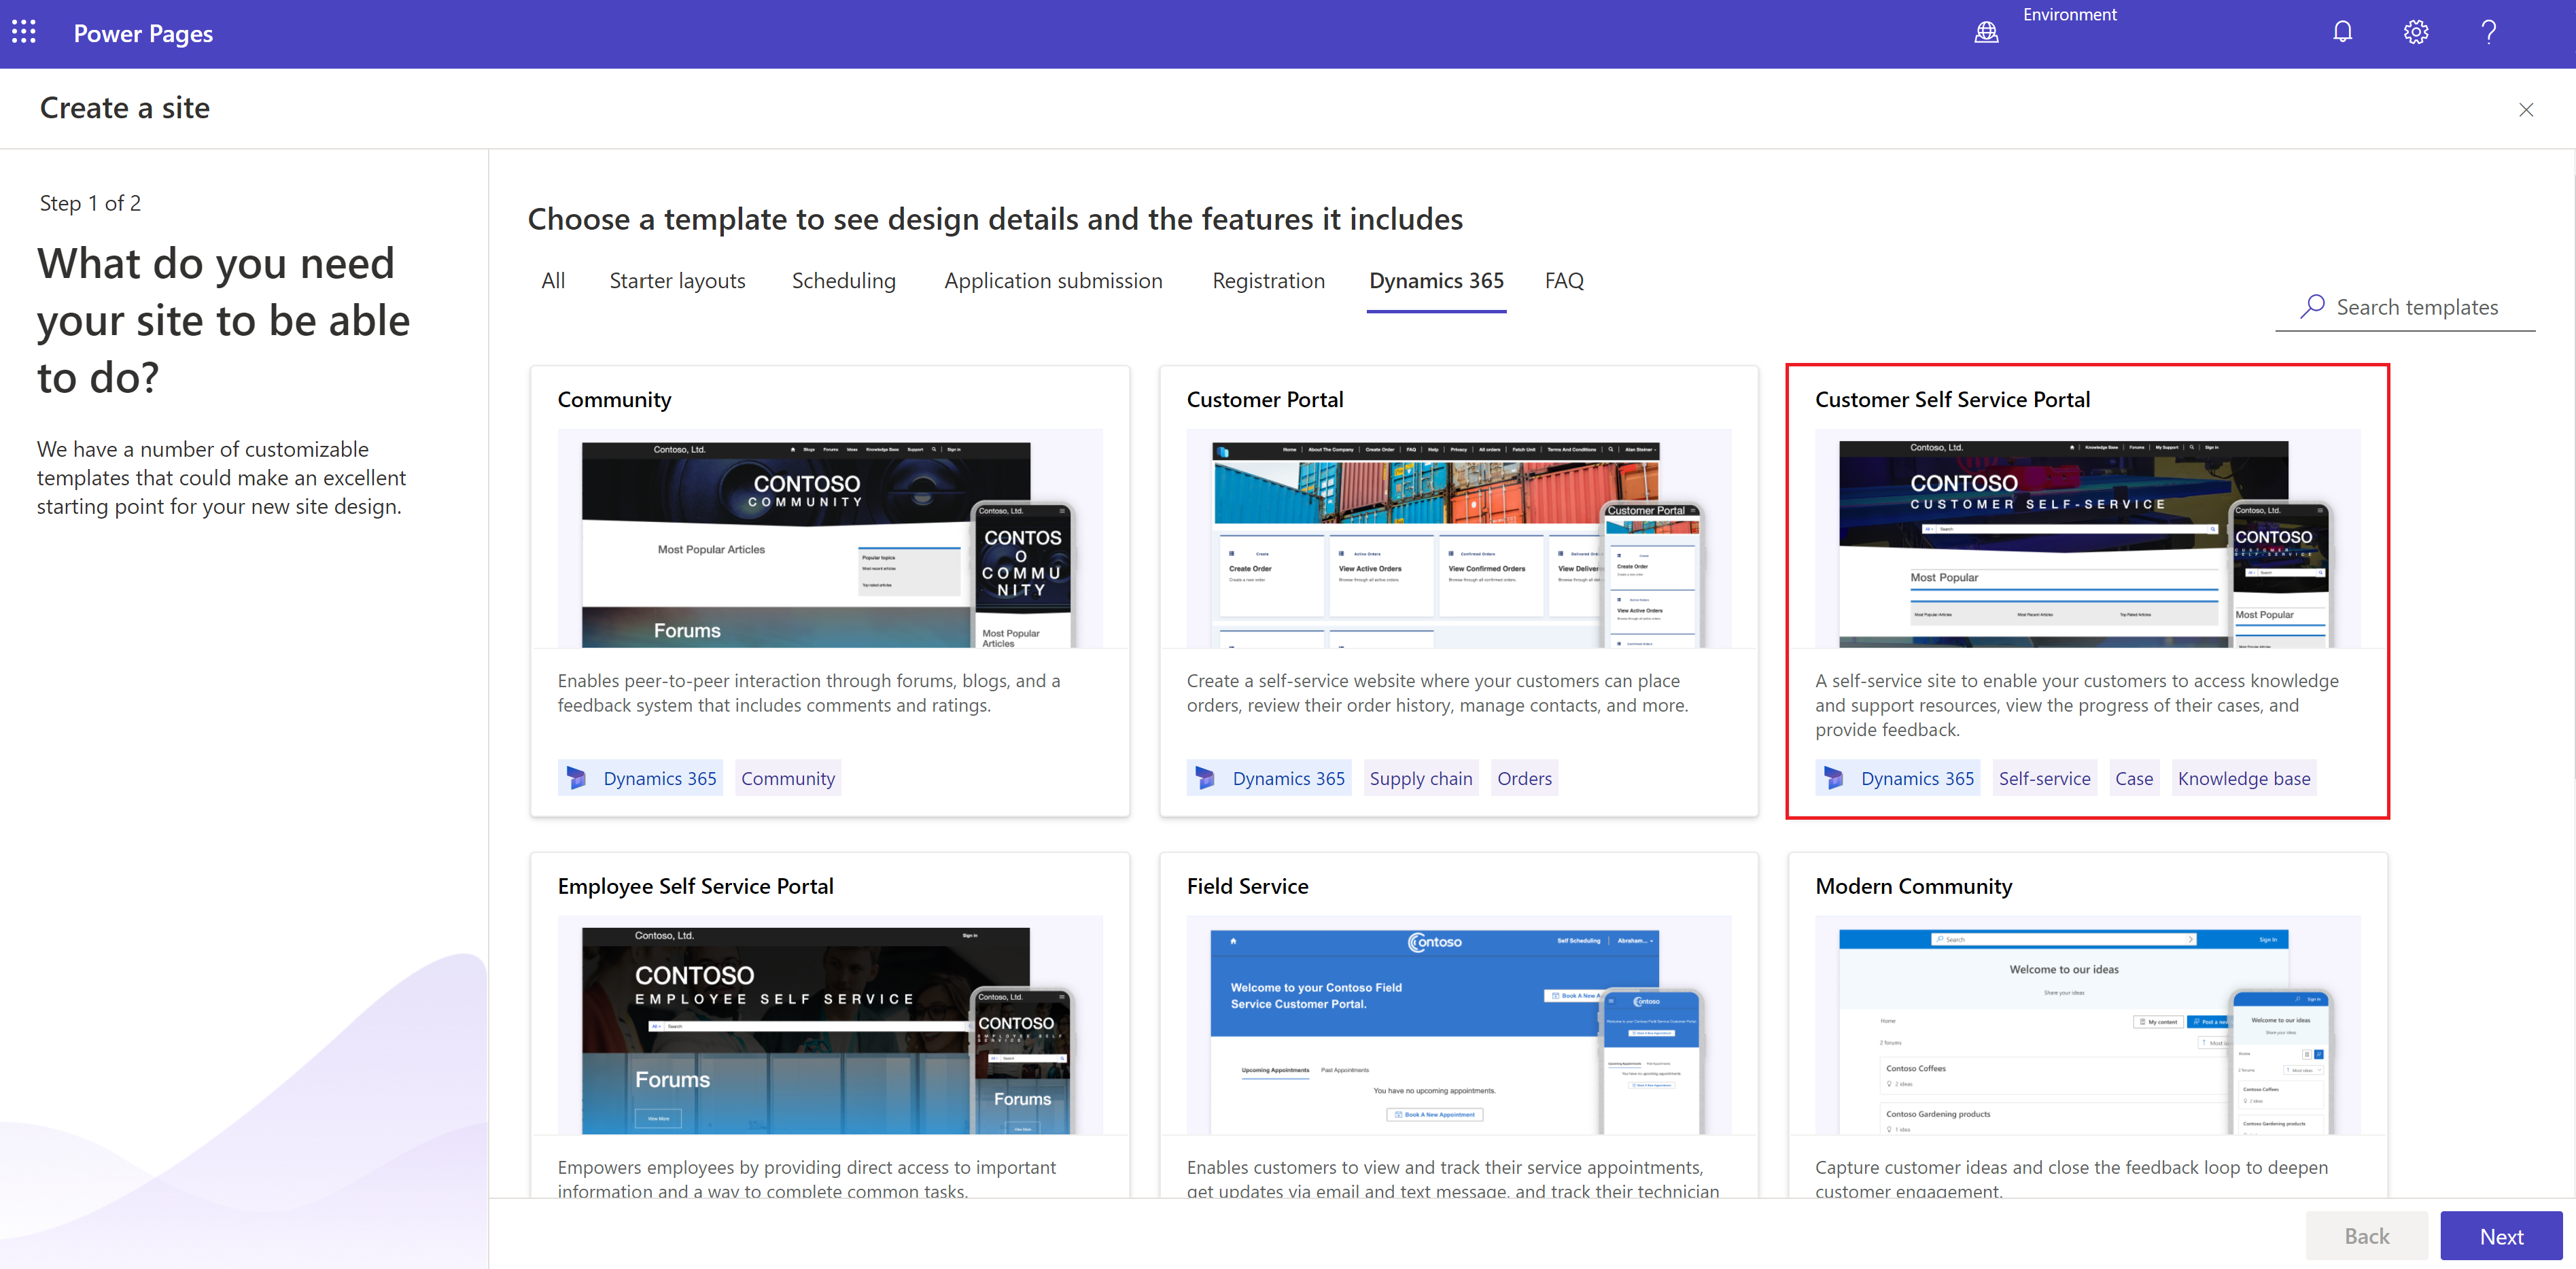
In the portal creation window, enter a name for the portal and an address for the website. Then, select a language from the dropdown list. After verifying the details, select Done.

For more information, see Customer self-service.
Post-deployment steps
You can use Power Pages Studio to create and customize your website.
Configure your portal
After the portal is provisioned, you need to update the website record to link it with the Microsoft Cloud for Healthcare Patient portal solution. To update the website record:
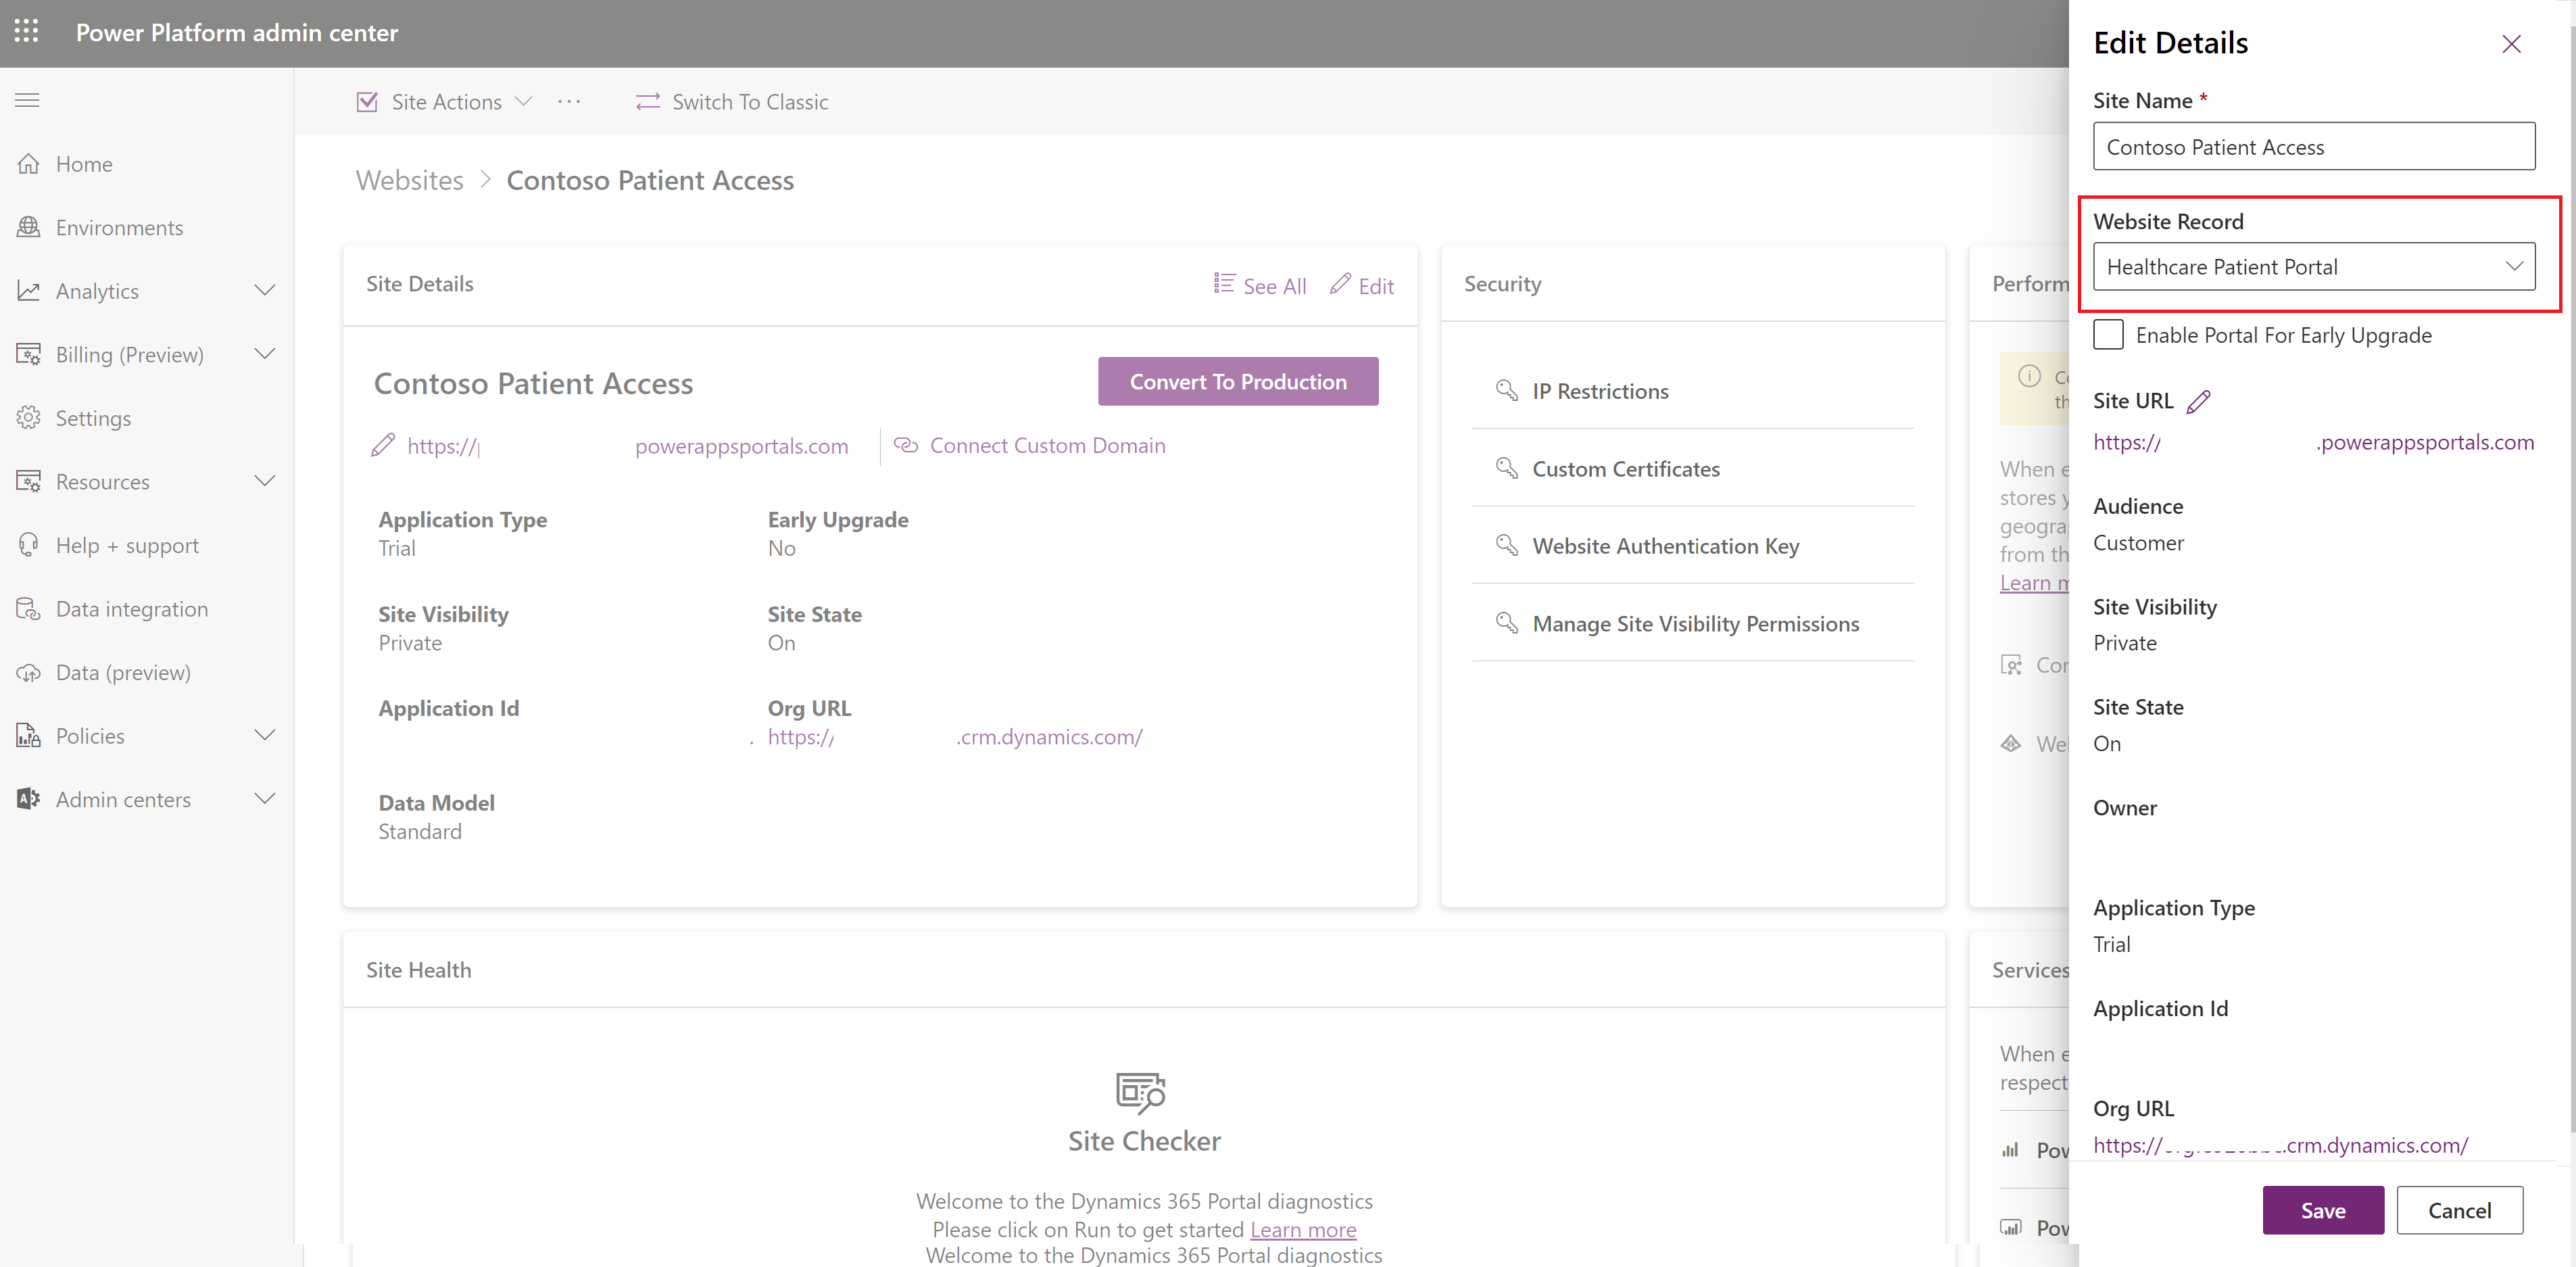
Open Power Pages admin center.
Select the website, select Site Details, and then select Edit.
On the edit details window, select the value Healthcare Patient Portal for the Website Record field, and then select Save.

After updating the website record, use the following steps to restart the portal and apply the customization:
Open Power Pages admin center.
Select Portal Actions, and then select Restart.
To learn more about how to align your patient portal with your company, go to Overview of themes in Power Pages.
Configure virtual visits
You can update the following values on the administrative settings page of the Healthcare administration app:
- The Patient access URL sent to patients in virtual appointment emails
- The email address used for scheduling instant virtual appointments

You also need to configure the consent text and consent header that patients see when joining a virtual appointment.

Important
If the consent text hasn't been configured, patients will see an error when joining virtual appointments.
You can update these values in the Content Snippets section on the Portal Management app. This app is automatically installed with the patient access portal.
- To configure the consent text and consent header for virtual appointments, update the Patient Portal - Appointment Virtual Schedule Consent Text and the Patient Portal - Appointment Virtual Schedule Consent Header content snippets.
- To configure the consent text and consent header for instant appointments, update the Patient Portal - Appointment Consent Text and Patient Portal - Appointment Join Consent Header content snippets.

Configure appointment confirmation emails
To configure appointment confirmation emails for appointments scheduled on Patient access portal or in Patient service center, you can update the Power Automate flow that sends these emails. This Power Automate flow is titled CF - Send email for appointment.
Known issues
When you set up appointment scheduling in patient access portal, you might see that the system variables aren't defined (NULL value) or are improperly defined. This anomaly can happen because of the following reasons:
Improper definitions for variable values: If the variable values aren't defined properly, users or admins need to update the msemr_VirtualVisitClientID, msemr_VirtualVisitSecret, and msemr_VirtualAppointmentSchedulerEmail environment variable values with tenant specific values.
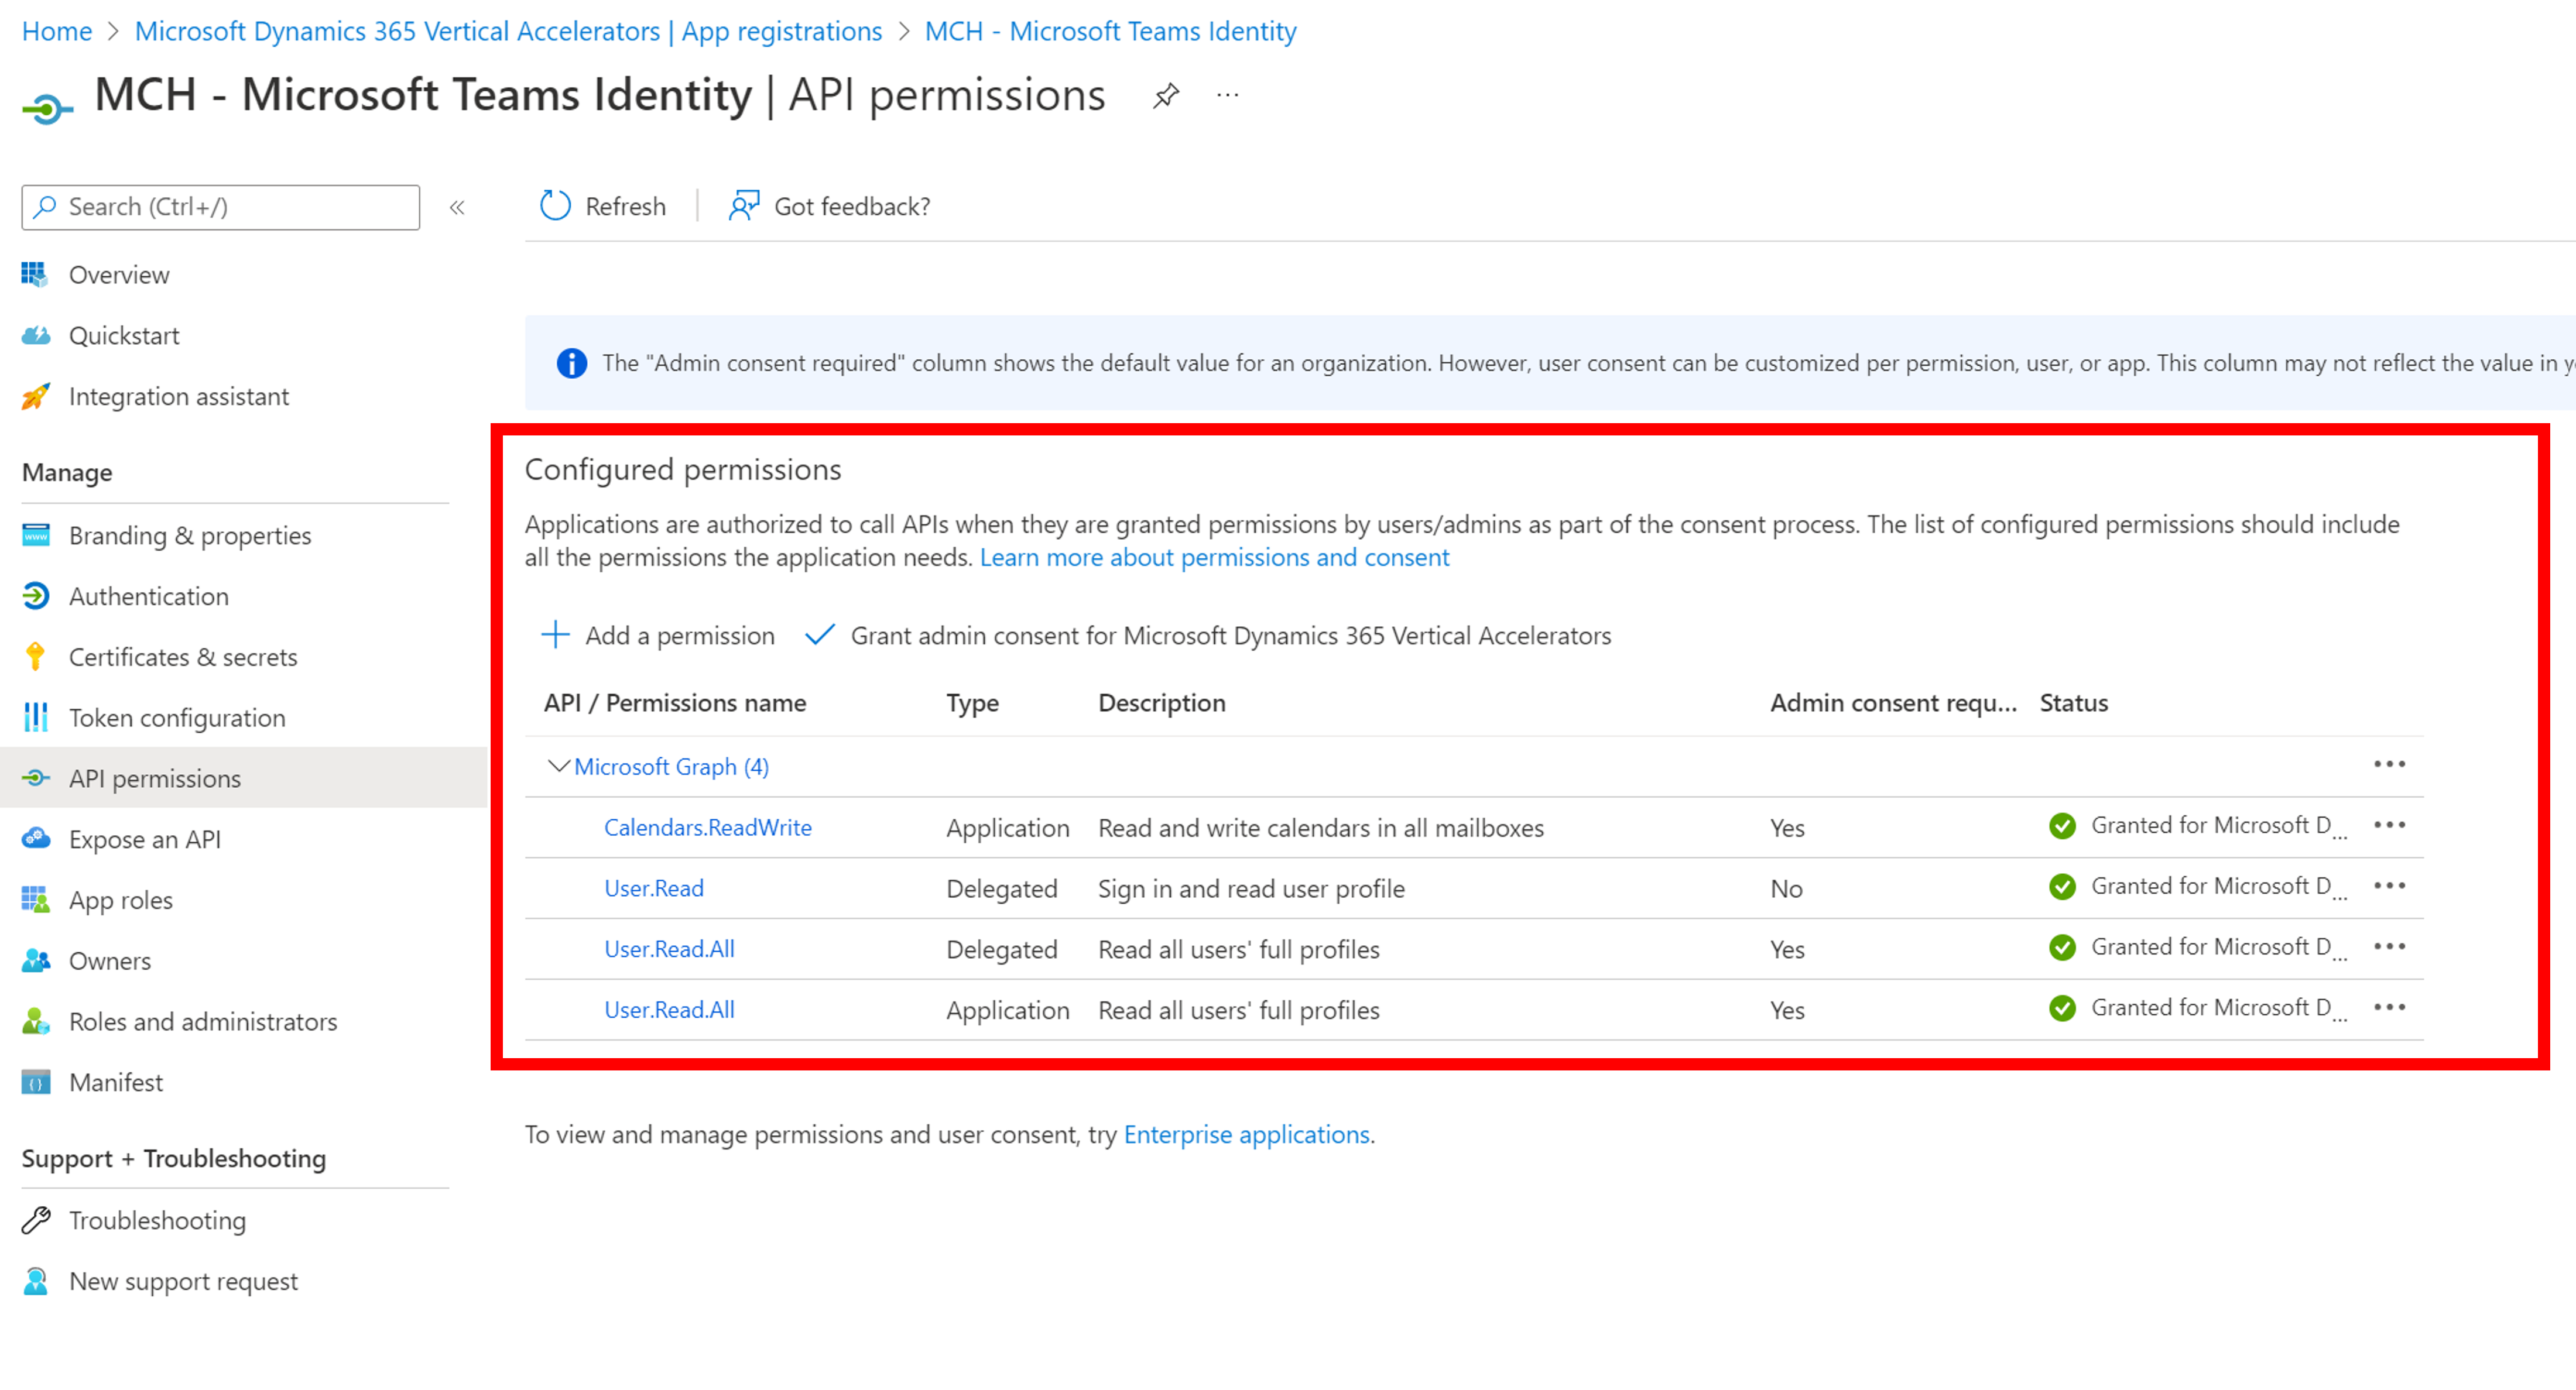
Incorrect API permissions for the application registration: Ensure you have configured the following settings and permissions for the application registration being used: