Manage contacts and organizations
Important
Fundraising and Engagement is being retired. Support for Fundraising and Engagement will end at 11:59 PM Pacific Time on December 31, 2026. For more information, go to What’s new in Fundraising and Engagement.
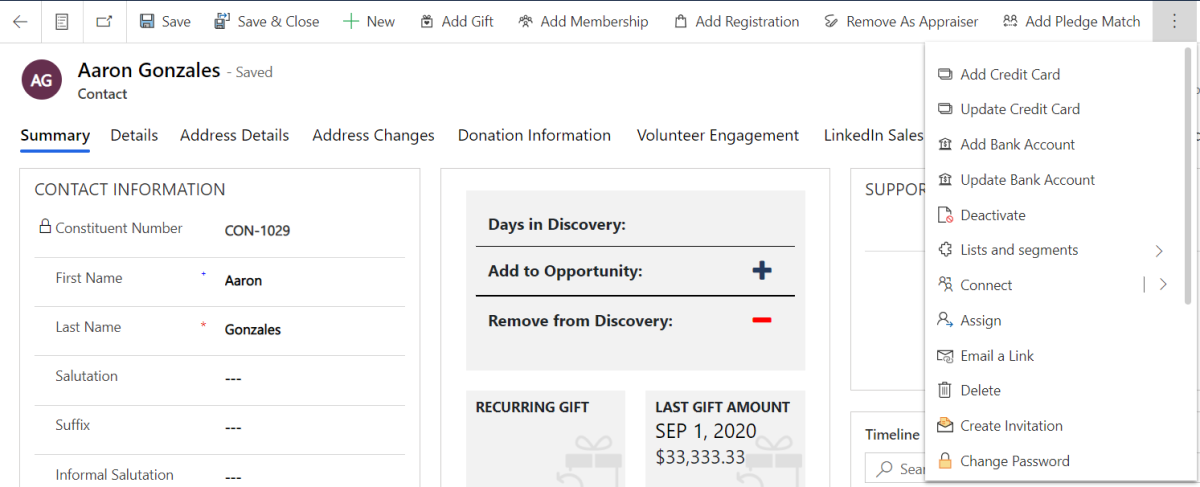
When you work with Contacts or Organizations records, the action pane offers the following management options:
- Add a gift
- Add a registration
- Add a pledge match
- Add a credit card
- Update a credit card
- Add a bank account
- Update a bank account
- Merge records
- Deactivate records
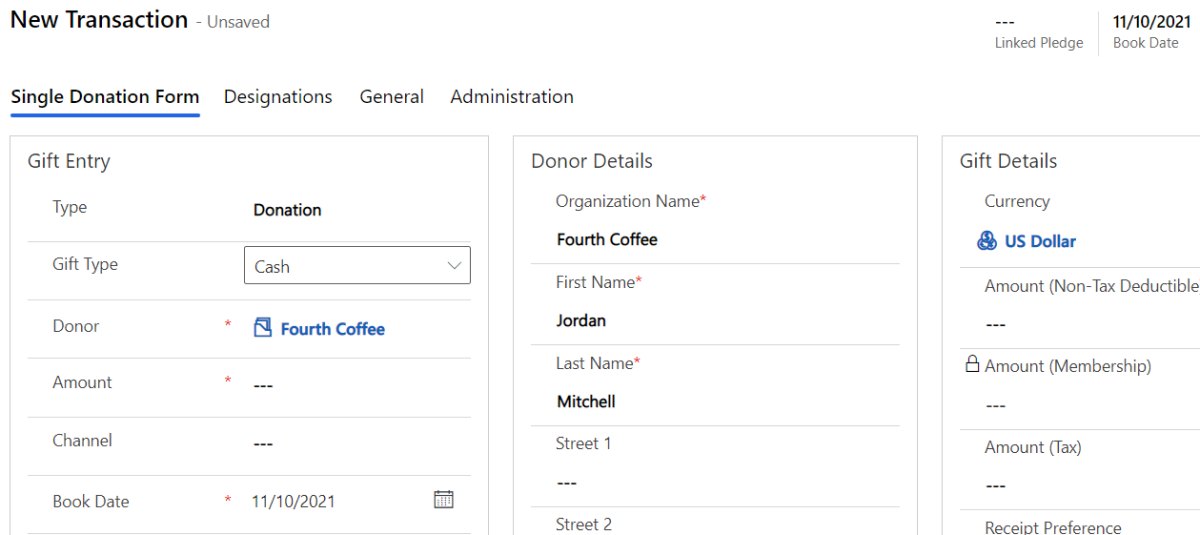
Add a gift
- Select Add Gift on the action pane.
- A new related transaction record opens and automatically fills in the contact or organization information.
Add a registration
Select Add registration on the action pane.
A new related event registration package opens and automatically fills in the contact or organization information.
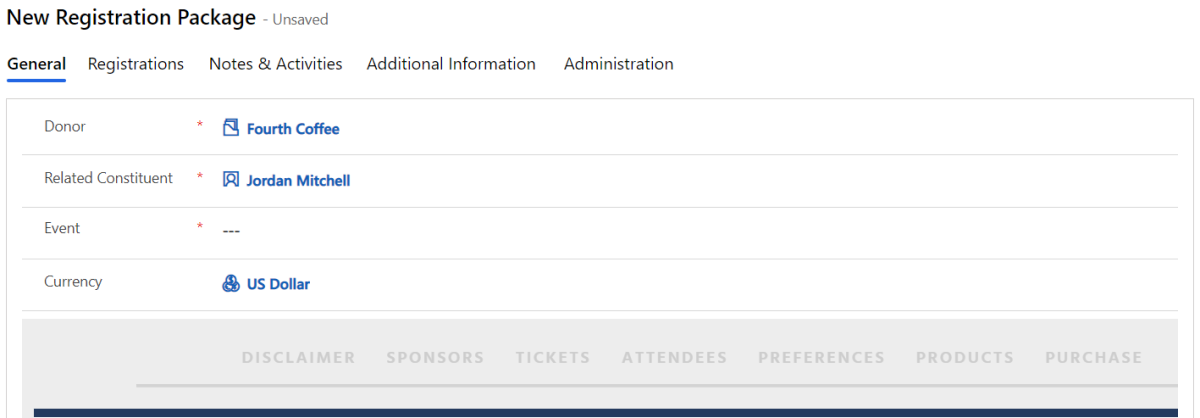
Select the Event. The process flow changes to reflect the event's event setup record.
For help with completing the registration, go to Register a donor.
Add a pledge match
Select Add Pledge Match to configure rules to create a pledge automatically when you receive a corresponding gift. You can associate the rule with a contact or an organization account.
The pledge match form opens for you to create a Pledge Match record, also called a pledge match rule.
Complete the mandatory fields: When Donation is Applied To, Apply the Pledge To, and Percentage.
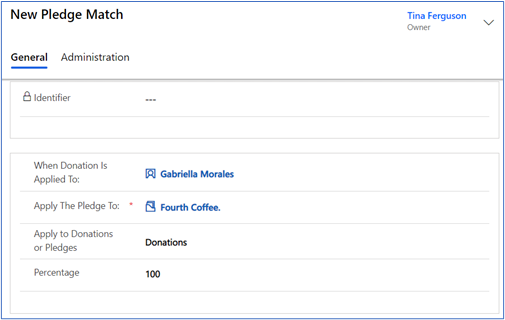
Review or set the following fields in the pledge match form:
Field Description Identifier A read-only field that names the pledge match rule. When Donation is Applied To Specify a contact or organization that can make a donor commitment, which triggers the creation of the donor commitment against the contact or organization named in the Apply the Pledge To field. Apply the Pledge To Select a contact or organization responsible for the donor commitment. Apply to Donations or Pledges Specify whether the functionality invokes when the type is Donations, Pledges, or Both. Percentage Set the percentage of the donor commitment created based on the transaction or donor commitment that triggered it. When you finish editing the Pledge Match record, select Save & Close.
To view the new Pledge Match record:
Open the record shown in the When Donation is Applied To field.
On the Related menu, select Pledge Matches (Donation From).
Select the link under Identifier.

Add a credit card
Select Add Credit Card to add a new credit card record to a contact or organization.
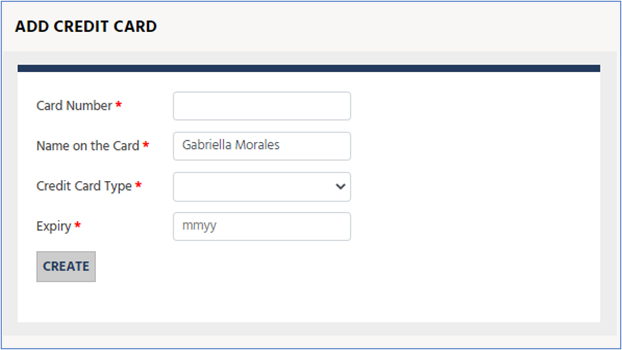
Complete the fields marked with a red asterisk (*):
Field Description Card Number Credit card number used during the payment process. Name on the Card The organization or contact name on the credit card. Credit Card Type A drop-down list of available credit card providers. Expiry The expiry date of the credit card in the format of MMYY. Select Create. The solution confirms that you've successfully created the credit card record.

You can use credit cards saved to a contact or organization account while creating credit/debit gift transactions. Credit cards are referenced in the Payment Method field of the transaction.
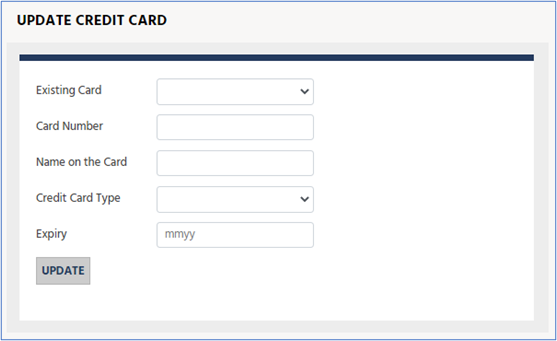
Update a credit card
Select Update Credit Card to update an existing credit card record for the contact or organization.
Complete all the fields, including the full credit card number.
Select Update.
Add a bank account
Select Add Bank Account to create a bank account record for the contact or organization.
In the new record, complete the fields marked by a red asterisk (*):

Field Description Bank Name Bank name associated with account. A/C Number Stored account number entered during payment process. Routing Number In the United States, a nine-digit code that identifies the financial institution. At the bottom of a check, there are three groups of numbers. The first group is the routing number, the second is the account number, and the third is the check number. Name The organization or contact/constituent that owns the bank account. Account Type The type of bank account, either Checking or Saving. Select Create. The solution indicates if the bank account has been created successfully.

You can use Bank Account records from a contact/organization account record when you create recurring type payment schedules. Reference the Automated Clearing House (ACH) Network as the payment method.
Update a bank account
Select Update Bank Account to update an existing bank account record associated to a contact or organization.
Edit the required fields, and then select Update.

Merge records
You might need to combine two records, either because there's a duplicate record or two organizations joined due to a merger or acquisition.
In the navigation pane, select Contacts or Organizations.
Using the checkboxes to the left of the record names, select the two records to merge. Both records must be of the same type. For example, you can merge a contact with another contact, but you can't merge a contact with an organization.
After you select the two records, select Merge.

In the dialog box, both records appear side by side.
- Master Record: The record to keep. You choose which details to keep from the current record and which details to bring over from the secondary record.
- Secondary Record: The record to delete. You merge selected details into the main record.
Using the radio buttons, select the information you would like to keep on the newly merged record.

Note
Fundraising and Engagement does exactly what you tell it to do through the radio buttons. For example, if you keep the street address of the secondary record (101 Times Square) and the city, state and Zip code from the master record (Beverly Hills, CA 90210), the newly merged record will have an incorrect address; the city, state, and Zip code (New York, NY 10036) from the secondary address will not merge unless selected.
Deactivate records
When a record is no longer needed, there are two options for the record: Deactivate and Delete. We strongly recommended that you use only Deactivate to ensure a proper audit trail. Delete is a permanent action and can't be undone. Also note that the delete process can cascade the deletion to child records.
Deactivate a record
Deactivating a record marks it as inactive, and the record isn't included in any reports or calculations. You can reactivate a record if needed by going into inactive accounts.
With the record open, select Deactivate on the action pane.

A dialog box asks you to confirm the action. Select Deactivate.

Delete a record
Deleting a record permanently removes it from the database. Any data tied directly to the record is removed as well.
Note
You can't undo deleting a record.
With the record open, select Delete on the action pane.
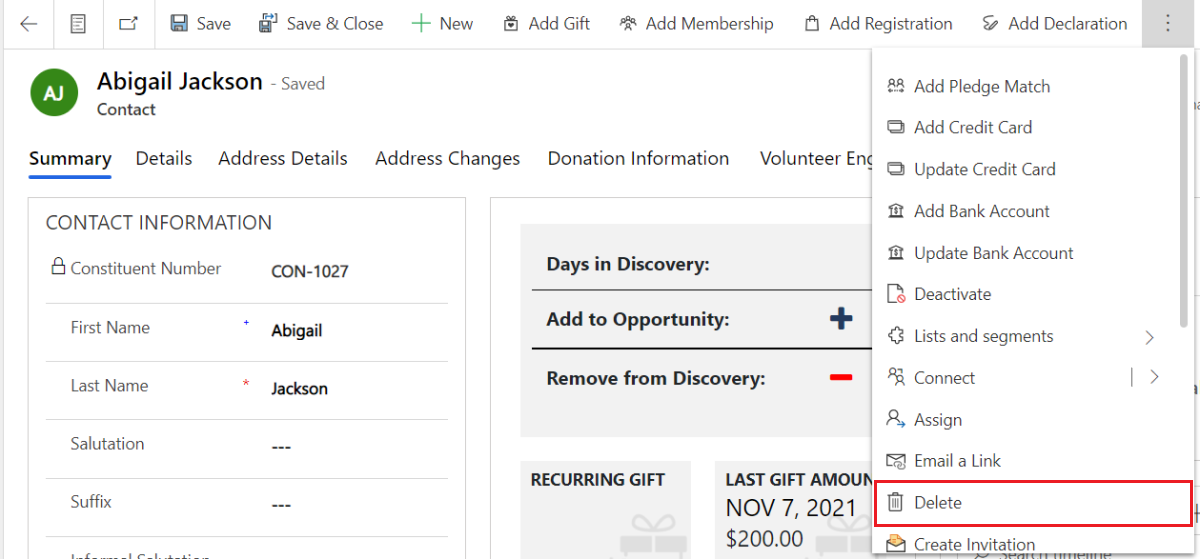
A dialog box asks you to confirm the action. Select Delete.

The Deactivate and Delete commands also appears on the action pane when you open a view of Contacts or Organizations but don't open a specific record.
- In the navigation pane, under Relationships select Contacts or Organizations.
- In the view that opens, select the checkbox to the left of the constituent's name.
- Select Deactivate or Delete on the action pane.

See also
Relationships overview
Contacts in Fundraising and Engagement
Organizations in Fundraising and Engagement
Gifts overview
Fundraising and Engagement Event Registration Packages