Note
Access to this page requires authorization. You can try signing in or changing directories.
Access to this page requires authorization. You can try changing directories.
You can replicate Dynamics 365 Customer Insights - Journeys configurations and data across environments using the standard tools provided for Dynamics 365. Common scenarios where this is useful include:
- Move validated journeys, emails, and other content from a sandbox to a production environment.
- Set up a demo with sample data on a trial or sandbox.
The process works as follows:
- Download the Configuration Migration tool for Dynamics 365 if you don't already have it.
- Make sure your source and destination environments are running the same version of Customer Insights - Journeys.
- Use the Configuration Migration tool to generate a database schema based on your source environment.
- Export data from the source environment using the Configuration Migration tool and the schema.
- Import the exported zip bundle to the destination environment using the Configuration Migration tool.
Prerequisites for the export and import process
Complete the following prerequisites before transferring data and configurations between environments:
Make sure no records are in a "live" state. The Configuration Migration tool doesn't transfer entities that are in a "live" state, so the import to the destination environment is partial.
Note
The Configuration Migration tool includes options to exclude or filter live records. The exclude functionality removes the Status field, exporting all entities regardless of status. The filter functionality limits the entities that are exported. Contact technical support for assistance with these features.
Ensure that the source and destination environments run the same version of Customer Insights - Journeys and use an identical database schema (at least for the data you're transferring).
Capabilities and limitations of the export/import process
The following notes apply when you use export/import to move data from one Customer Insights - Journeys environment to another:
- If you import (or reimport) a record that already exists on the destination environment, that record ends with a status of "draft" on the destination environment. Matching records aren’t duplicated.
- Interaction data isn’t exported or transferred to a new environment. It will never be included in the export file.
- If you export from a language not present on the destination environment, that language is added to the destination environment.
- After a Customer Insights - Journeys journey is migrated, restored, or copied, its state changes from Live to Stopped. To restart a migrated, restored, or copied journey, first duplicate the journey and then execute it.
- Triggers aren’t migrated when moving data between environments. You can, however, migrate triggers using Power Platform solutions. For more information, see Move triggers between environments (ALM process for triggers).
- Any events in the old environment must be re-created in the new environment.
Download the Configuration Migration tool
The Configuration Migration tool helps you extract your data and configuration details from one environment and then import them to another. To get the tool, follow the instructions in Download tools from NuGet.
Make sure your source and destination run the same version of Customer Insights - Journeys
Your source and destination environments must both be running identical versions of Customer Insights - Journeys. Use the following procedure to check the version on each environment. If they don't match, update one or both to the most recent version as described in Keep Customer Insights - Journeys up to date.
To find your Customer Insights - Journeys version number:
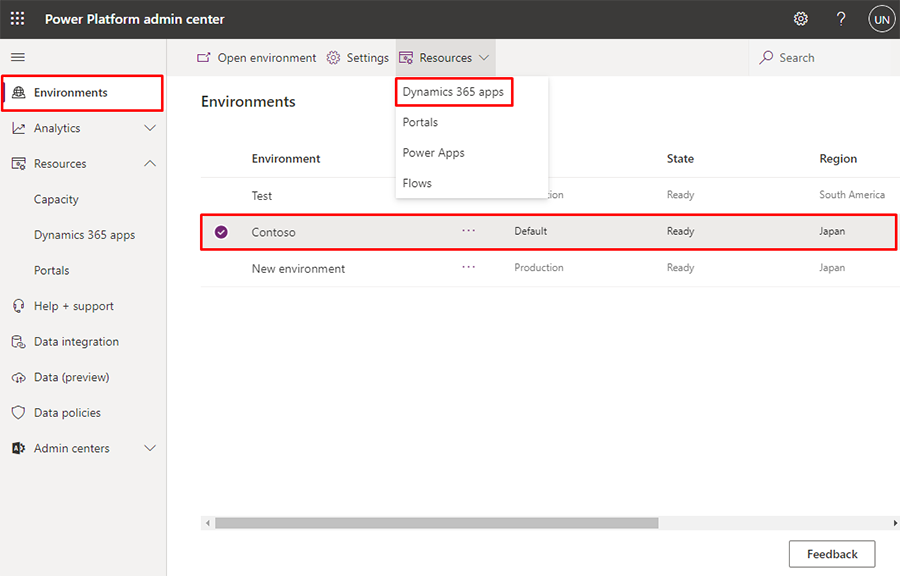
Go to the installation management area and select Environments.
If you have more than one Dynamics 365 environment, each is listed here. Select the environment where Customer Insights - Journeys is installed and you plan to export data.
Select the Resources dropdown in the top ribbon, and then select Dynamics 365 apps.
A list of solutions installed on your selected environment is shown. Select the solution called Dynamics 365 Customer Insights - Journeys Application, and then select Details in the top ribbon.
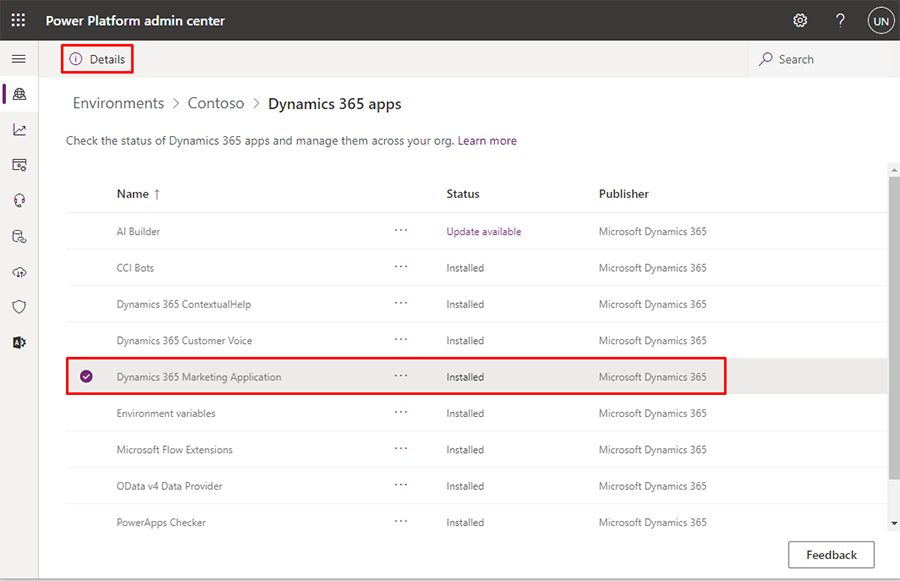
A pane appears on the right side of the page titled Dynamics 365 Customer Insights - Journeys Application Details. Verify the value shown in the Version column.
Generate a database schema for your source environment
The Configuration Migration tool requires a database schema each time it exports or imports data. The tool itself can generate the required schema for you. The generated schema specifies the database structure of your source environment, including all customizations. The database on your destination environment must use an identical schema for all transferred data.
To generate the required schema:
Open the folder where you installed the tools.
Run the DataMigrationUtility.exe file.
In the utility, select Create schema and sign in to your source environment.
Follow the instructions provided in Create a schema to export configuration data to generate the schema. Be sure to include all of the solutions, entities, and fields for which you want to transfer data. Make sure all dependencies are included.
Tip
These links and notes might help you generate the schema you need:
- You can use the metadata browser tool to explore and understand your database structure. For details on how to install and use it, see the Dynamics 365 Customer Insights - Journeys entity reference.
- While you're creating your schema with the Configuration Migration tool, check for relationships used by any selected entity by selecting the Show the relationships for the selected entity check box. This can help keep you from leaving out any dependencies.
- After creating your schema with the Configuration Migration tool, select Tools > Validate Schema from the menu bar. This checks for any dependencies for all your selected entities, and can also help point out other common issues.
Export data from your source environment
To export data from your source environment:
Open the folder where you installed the tools.
Find and run the DataMigrationUtility.exe file.
The tool launches. Select Export data and then Continue.

Set the Deployment type to Microsoft 365 and then select Login.

Follow the instructions on your screen to sign in using the username and password for the tenant where your source environment is running.
If multiple environments are available on the tenant you signed in to, choose your source environment and select Login. (Skip this step if only one environment is available.)

After signing in, choose a schema and export file name.

Make the following settings:
- Schema file: Select the ellipsis button to open a file browser, and then navigate to and select the schema file that you generated for your source environment.
- Save to data file: Select the ellipsis button to open a file browser, and then navigate to the folder where you want to save the exported data, together with a file name.
Select Export data. The tool tracks the export progress and creates a zip file with the schema and your data when finished.

Select Exit to close the export page after the export is complete.
Import data to your destination environment
To import data to your destination environment:
If the Configuration Migration tool isn't running, open the folder where you installed the tools.
Run the DataMigrationUtility.exe file.
Select Import data and then Continue.

Set the Deployment type to Microsoft 365 and then select Login.
Follow the on-screen instructions to sign in with the username and password for the tenant hosting your destination environment.
If multiple environments are available on the tenant you signed in to, choose your destination environment and select Login. (Skip this step if only one environment is available.)

On successful sign in, you're asked to choose a file to import. Select the ellipsis button next to the Zip file field to open a file browser, and then navigate to the folder where you saved the export zip file from your source environment. This file includes both the data and schema used for export.

Important
As mentioned previously, your source and destination environments must use exactly the same schema for the data being transferred, so they must be running identical versions of Customer Insights - Journeys, and all relevant schema customizations must be identical on both environments. If the schemas don't match, you get an error and the import fails.
Select Import data. The tool tracks the import progress.

After the import finishes, select Exit to close the page.