Note
Access to this page requires authorization. You can try signing in or changing directories.
Access to this page requires authorization. You can try changing directories.
Important
- This is a production-ready preview feature.
- Production-ready previews are subject to supplemental terms of use.
Applies To: Project Operations Integrated with ERP, Project Operations Core.
The Time Entry Agent is available as a production-ready preview in Microsoft Dynamics 365 Project Operations environments that have version 4.140.0.239 or later.
Before team members can use the feature to log their time entries, an administrator must complete the following steps to enable it in one or more Project Operations environments.
- Optional but recommended: Create the organization's agent user.
- Activate the Power Automate flows that the agent requires. (These flows enable the agent to complete some actions on behalf of team members.)
- Enable the feature flag.
- Publish the agent from Microsoft Copilot Studio to users in the organization.
The following sections explain each step in detail.
Create an agent user for your organization
Although this step is optional, we recommend that you create a dedicated agent user to configure and enable agents in your organization. If your organization already has a dedicated user that has an administrator role assigned to it and is used for similar purposes, you can skip this section and move on to the Activate Power Automate flows that the agent requires section.
If you decide to complete this step, it's required only once for your organization. The agent user can then be used to enable the Time Entry Agent in multiple environments.
To create a dedicated agent user, sign in to the Power Platform admin center, and follow the steps in Create users.
Ensure that all the following required licenses are assigned to the new agent user:
- Power Automate Free – This license is required so that the agent can view and enable the set of Power Automate flows that it requires.
- Microsoft Teams Enterprise – This license is required because the Power Automate flows send alerts to team members via Microsoft Teams.
- Office 365 E5 license – This license is required primarily for Outlook calendar access.
Assign a required role to the agent user
The new Time and Approval agent role gives the agent user the rights that it needs to enable and publish the Time Entry Agent.
To assign this role to the agent user, follow these steps:
- In the Power Platform admin center, to select the desired environment, use the environment switcher in the upper right.
- In the Access section, under Users, select See all.
- Select the agent user that you want to assign the role to, and then select Manage roles.
- In the dialog, select the checkbox next to Time and Approval agent, and then select Save.
Important
This procedure is required only if you created a new agent user to enable the Time Entry Agent. It isn't required if you're using an existing administrator user instead of an agent user.
This procedure must be repeated for every new environment where the Time Entry Agent has to be enabled.
The agent user now has the privileges that it needs to sign in to Power Automate and enable the required flows in the next step of the process.
Activate Power Automate flows that the agent requires
The Time Entry Agent can perform various actions, such as creating time entries and sending alerts to team members. Each action requires one or more Power Automate flows.
This step of the process must be repeated for each environment where the agent is being enabled.
To view and activate the flows, follow these steps:
Sign in to Power Automate by using the credentials of the dedicated agent user or administrator user.
To select the desired environment, use the environment switcher.
In the left pane, select Solutions.
Select the Project Service agent solution to view more details about it.
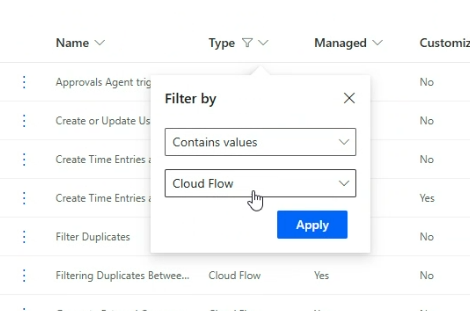
In the Objects pane, select Cloud flows. Alternatively, in the All view, apply a filter to the Type column so that the grid shows only objects where the Type field contains the value Cloud Flow.
Activation steps for each flow
There are 13 Power Automate flows (cloud flows). They must be activated in the following order:
"Create or Update User Configuration for Time Entry..."
"Get Time Entries"
"Filter Duplicates"
"Import from Sources and Filter"
(This flow is a parent of flow 3, "Filter Duplicates.")
"Import from Grid and Filter"
(This flow is a parent of flow 3, "Filter Duplicates.")
"DayWise Adaptive Card Switcher" (This flow was introduced in version 4.143.0.222 of Project Operations and must be activated by admins if they have previously enabled the Time Entry Agent)
"Send Summary and Daywise Adaptive Card"
"Create Time Entries and Notify"
(This flow is a parent of flow 7, "Send Summary and Daywise Adaptive Card.")
"Time agent Periodic Import Child"
"Time agent Periodic Import"
(This flow is a parent of flow 9, "Time agent Periodic Import Child.")
"Generate External Comments"
"Send Missing Time Entries Alert"
"Generate External Comments and Send Missing Time Entries Alert"
(This flow is a parent of flow 11, "Generate External Comments," and flow 12, "Send Missing Time Entries Alert.")
You must complete this procedure steps for each flow before you move on to the next flow.
Select the flow to open it, and then select Edit. A new tab appears and shows the details of the selected flow.
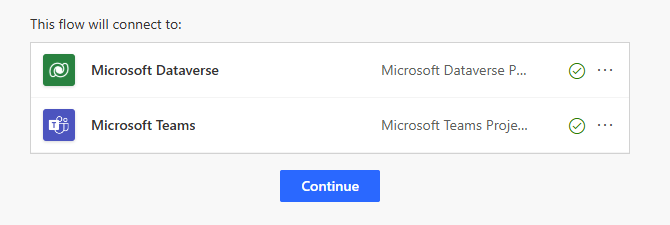
Any connection reference that is marked in red requires authentication. To authenticate it, follow these steps:
- If the option in the upper right is set to New Designer, switch it to Old Designer. If you're prompted to save the flow before you switch designer, you can select Switch without saving.
- Select Fix connection for the connection reference, and then sign in by using the credentials of the agent user or administrator user.
A green check mark indicates that the connection reference is authenticated.
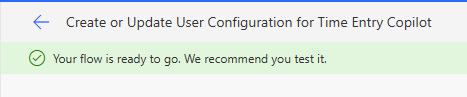
After every connection reference is authenticated, select Save to save the flow. A message informs you that the flow is now ready.
Use the left arrow button to return to the flow details.
Select Turn on to activate the flow.

Wait a few seconds, until the label of the button is changed to Turn off. This change indicates that the flow is activated.

Close the current tab to return to the tab that shows the cloud flows in the Project Service agent solution.
Repeat steps 1 through 7 for the next flow in the previous list.
Important
It's essential that you activate the flows in the correct order. Don't try to activate a later flow until the previous one is activated, as indicated by the change of the button's label from Turn on to Turn off.
After you complete the procedure for all 12 flows, the agent user or administrator user can move on to the next step of the process, where the feature flag is enabled.
Enable the agent feature from Project Operations
To enable the feature in a Project Operations environment, follow these steps:
- Sign in to Project Operations as an administrator.
- Ensure that you're using Project Operations version 4.140.0.X or later.
- In the left pane, change the area to Settings.
- In the General section, select Parameters.
- A list of organization units should appear. Double-tap (or double-click) the Organization Units row for the columns that aren't links.
- On the Project Parameters page, in the Feature Control field, select "Enable Time and Expense agent (Production Ready Preview)".
- Select OK.
The feature can be disabled at any time after it's enabled.
Publish the agent from Copilot Studio
After you activate all the Power Automate flows and enable the feature flag, the last step for an administrator is to publish the agent to users in your organization from Copilot Studio.
Important
Before you begin this step, ensure that all the required flows are in the ON state (activated). If any flow isn't activated, the Time Entry Agent might not work as expected. If the "Create or Update User Configuration for Time Entry..." flow isn't activated, the agent can't even be published.
To publish the agent, follow these steps:
Sign in to Power Apps.
To select the desired environment, use the environment switcher in the upper right.
In the left pane, select Agents. (If Agents isn't visible in the left pane, select More, and then select Agents in the pop-up window.)
Under All, select Time Entry Agent. A new tab for the agent appears in Copilot Studio.
To ensure that the correct environment is selected, use the environment switcher in the upper right.
If a "Consent confirmation" message appears in the Test your agent pane on the right, select Confirm.
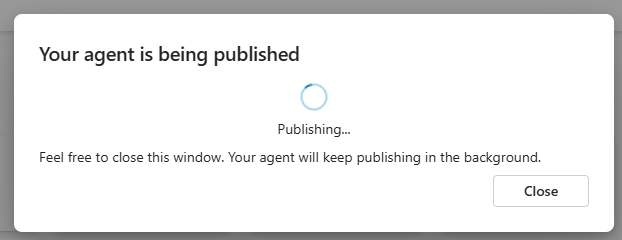
Select Publish to publish the agent. If a message informs you about potential risks, review the potential risks, and then select Publish.
Make the Teams app available to users (optional)
Note
As of the 4.143.0.222 release of Project Operations, making the Teams app available to users is optional because users can directly enable the agent and set their preferences from the Time Entry grid.
After the agent is published, follow these steps to make it available to users as a Teams app.
On the Channels tab of the agent, select Teams + Microsoft 365.
In the dialog that appears, clear the Make agent available in Microsoft 365 Copilot checkbox, and then select Add channel. At the top of the page, you receive a confirmation message that states, "The channel was added."
To make the agent available to users (team members) as a Teams app, select Availability Options.
Follow one of these steps, depending on the audience that should have access to the agent:
- To share the app with a selected group of users, select Copy link in the Get a link section. In this way, you can share the link with a dedicated set of test users before you broadcast it to the rest of the organization.
- To make the app available to a broader audience, select Show to everyone in my org in the Show in the store section.
A global administrator's approval is required before the agent can be shared with users in the organization as a Teams app. Select Submit for admin approval.
Grant approval as a global administrator
This step is only required when choosing to enable the Teams app for end users. Proceed to the next section if you want to complete setup without the Teams app.
- Sign in to the Teams admin center by using global administrator credentials.
- Go to Teams apps > Manage apps
- In the All apps section, search for "Time Entry." The app is shown as having Blocked or Submitted status.
- Select Publish.
- Go Teams apps > Setup policies.
- Select Global (org-wide default), and then select Add apps.
- Search for "Time Entry," add the Time Entry Agent (Preview) app, and then select Save.
Important
In some cases, administrator approval for the Teams app might take up to 12 hours. Therefore, we recommend that you wait at least that long before you notify team members that they can access the agent through Teams.
Next steps
After you complete all the steps that are described in this article, team members in your organization can view and use the Time Agent in the form of a Teams app. Learn how team members can start to use the agent in Start using the Time Entry Agent as a team member.