Note
Access to this page requires authorization. You can try signing in or changing directories.
Access to this page requires authorization. You can try changing directories.
Make it easier for sales agents to find products and services in a product catalog by creating a product family and classifying similar products.
Note
Product families are only supported for Sales Enterprise and Sales Premium.
What is a product family?
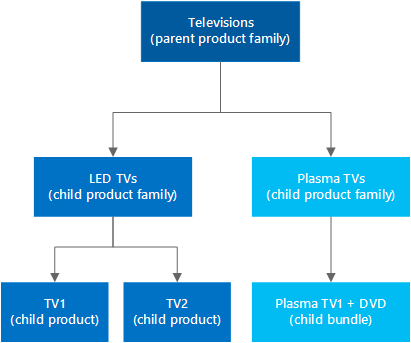
A product family lets you group and categorize products, making it easier for you to manage them.
With product families, you can:
- Categorize your products in whichever way is most meaningful to your organization.
- Create child products and product bundles within a product family. (Product bundles allow you to sell multiple items together.)
- Create as many levels of product families as you want by creating a family within a family.

Note
The product family that you use for creating a product, bundle, or another product family becomes the parent family.
Create a product family (Sales Hub)
Make sure that you have one of the following security roles or equivalent permissions: System Administrator, System Customizer, Sales Manager, Vice President of Sales, Vice President of Marketing, or CEO-Business Manager.
Select the site map
 , then select App Settings.
Under Product catalog, select Families and Products.
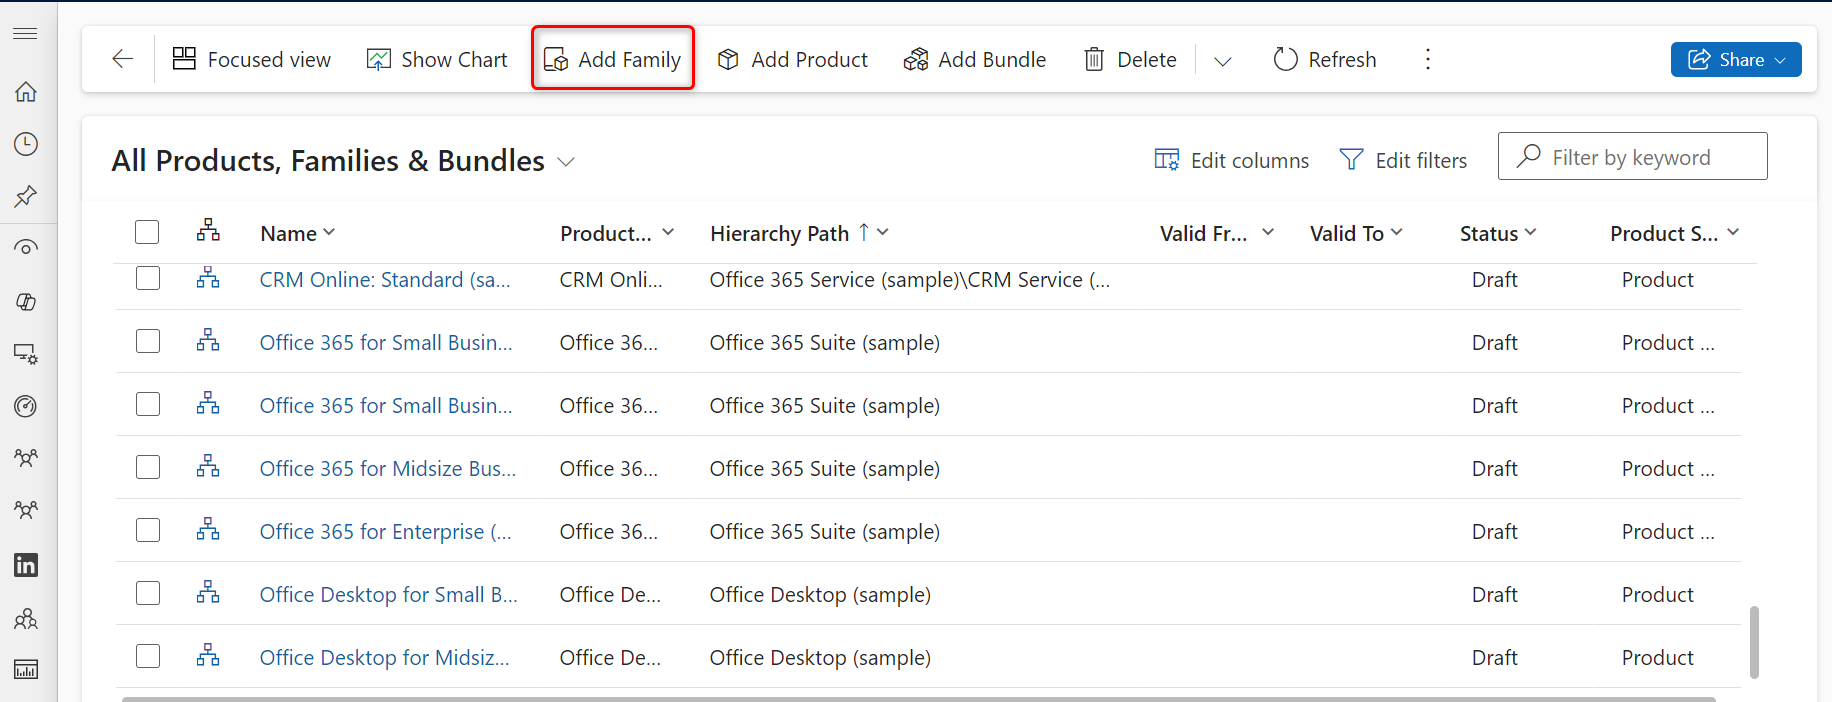
To create a family, on the command bar, select Add Family.
-OR-
To create a child product family under an existing family, select the family, and select Add Family. The selected family becomes the parent family of the new family you're creating.

Fill in your information. Use the handy tooltips as a guide.
Note
The Valid From and Valid To fields define the duration that a product is valid for. There's no business logic associated with these fields except that the Valid To date must be later than the Valid From date. If required, you can implement your own business logic in these fields with a workflow, plug-in, or by using the Dynamics 365 Customer Engagement Web Services. For example, you could run a scheduled job to automatically retire last season's products using the date selected in the Valid To field.
Select Save.
In the list of products, families, and bundles, open the family that you just created.
On the Product Properties tab, select the Add New Property button, and add the required properties. More information: Use properties to describe a product
Typical next steps
 Use properties to describe a product
 Classify products and bundles into product families
Can't find the feature in your app?
There are a few possibilities:
- You don't have the necessary license to use this feature. Check out the comparison table and the licensing guide to see which features are available with your license.
- You don't have the necessary security role to use this feature.
- To configure or setup a feature, you need to have the Administration and customization roles
- To use sales-related features, you need to have the Primary sales roles
- Some tasks require specific Functional roles.
- Your administrator hasn't turned on the feature.
- Your organization is using a custom app. Check with your administrator for exact steps. The steps described in this article are specific to the out-of-the-box Sales Hub and Sales Professional apps.
Related information
Set up a product catalog
Clone a product
Change the parent of a product (reparenting)
Set up a product catalog
Clone a product
Change the parent of a product (reparenting)