Note
Access to this page requires authorization. You can try signing in or changing directories.
Access to this page requires authorization. You can try changing directories.
[This article is prerelease documentation and is subject to change.]
This integration lets your sellers make and receive Twilio Flex calls from Dynamics 365 and get real-time transcriptions during the call and AI-generated call insights after the call.
Important
- This is a preview feature.
- Preview features aren’t meant for production use and might have restricted functionality. These features are subject to supplemental terms of use, and are available before an official release so that customers can get early access and provide feedback.
Prerequisites
A Twilio account
A Twilio Flex account – see this link for more info on how to set up a Flex account
A Microsoft Dynamics 365 Sales environment with the Sales Premium or Sales Enterprise license, along with system administrator privileges
Conversation Intelligence installed and set up – Learn more
Dynamics 365 Channel Integration Framework 1.0 installed. Learn more
A local Node JS environment set up
The create-flex-plugin application
Step 1: Configure Twilio Flex as a channel provider
In Dynamics 365 Channel Integration Framework, create a channel provider for Twilio Flex. See the screenshot below as an example:

Enter the following values::
Channel URL: https://flex.twilio.com/agent-desktop
Enable Outbound Communication: Yes
API Version: 1.0
Channel order: 1
Trusted Domain: https://flex.twilio.com/
Select Unified Interface Apps for the Channel: Sales Hub (or any other app you would like the integration to be enabled for)
Select the security roles for the channel: Add the roles that would be using Twilio Flex. For example, Salesperson, Sales Manager,and so on.To embed Twilio Flex as an iframe inside Dynamics 365, add the Dynamics 365 org URL to the Allowed URLs list. For more information, see this article.
Step 2: Install the SIPREC connector and route the calls to Dynamics 365
Install the SIPREC connector add-on.
Open the Twilio admin center settings and configure it to fork the media to Dynamics 365 recorder as illustrated in the following screenshot:
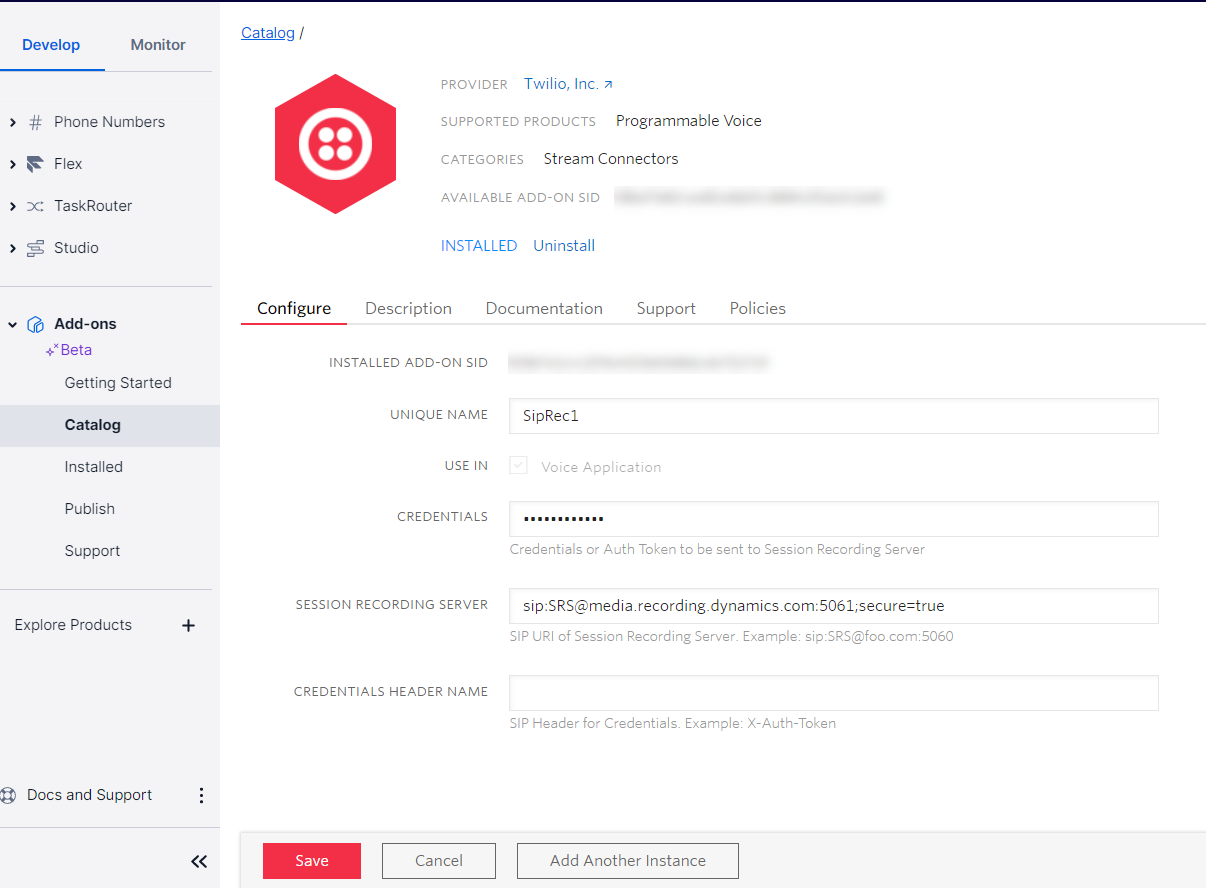
The following fields are important to note:
Unique name: Specify a name and note it down. You'll have to use it in the next steps
Session Recording Server: Specify the Dynamics 365 media recording server URL. For a list of recorders and regions supported, see Recorder endpoints and regions supported.
If you would like to fork the media to the closest recorder, use the following URL: sip:SRS@media.recording.dynamics.com:5061;secure=true
Credentials fields can remain empty. The authentication is done with certificate on the TLS setup between Twilio and Dynamics.
Step 3: Configure call flow to fork the media to Dynamics 365
Navigate to the Studio Flows section in the Console and select Voice IVR flow.
On the right side, under Voice section in the widget library, add the Fork Stream widget:
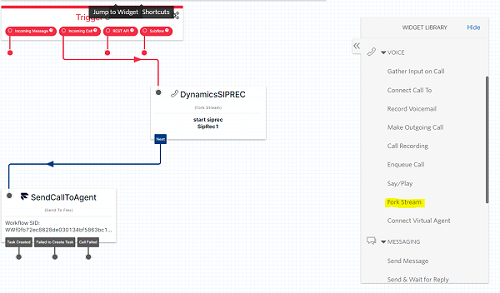
Now, configure the widget to fork the stream using the SIPREC connector you defined earlier:
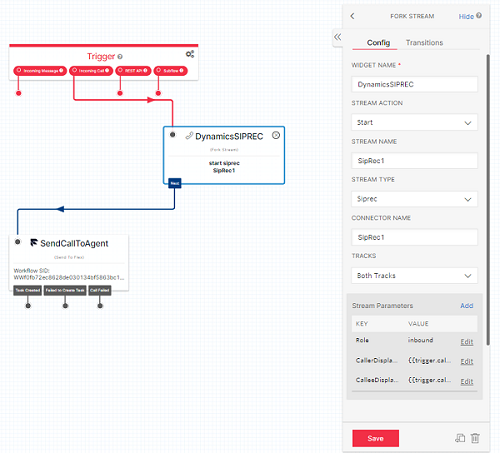
Enter the following values:
-Stream Action: Start
- Stream Type: Siprec
- Connector Name: The name that you gave to the SIPREC connector. In our example, it's SipRec1.
- Tracks: Both Tracks
- Stream parameters:
Role: inbound (In our example, we are going to record incoming calls)
CallerDisplayName: {{trigger.call.From}}
CalleeDisplayName: {{trigger.call.To}}
In the Transitions tab, configure the Fork Stream to be before the call is sent to the agent:
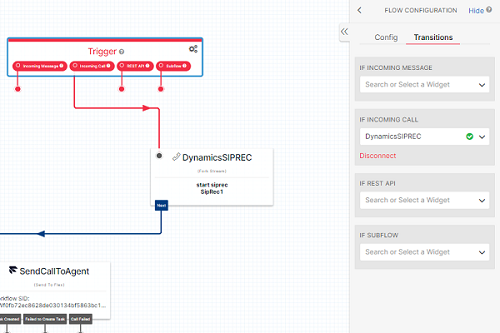
Save the flow and publish.
Step 4: Configure a Twilio phone number
You need to point a Twilio phone number to your newly created Studio Flow.
Select a number that you own – or buy a new number – from the Twilio Phone Numbers console.
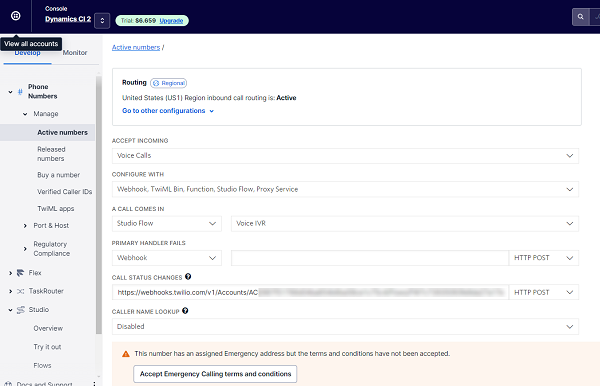
Open the phone number by selecting it, then scroll down to the Voice section on the page.
Select the flow that you had defined earlier in the Call Comes In fields as illustrated in the following screenshot:
Step 5: Configure Dynamics 365 for the integration
Let's set up Twilio as a call provider and configure a recording policy to define who can record calls, and other information used for conversation insights.
In the Sales Hub app, go to the Change area and select Sales Insights settings.
Select Conversation Intelligence.
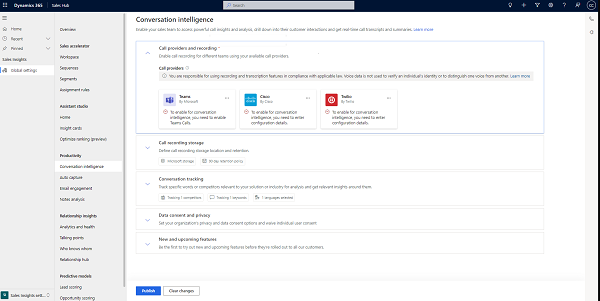
Select Twilio in the Call providers section and specify the Twilio account SID.
Save the changes.
Configure a recording policy using the Twilio call provider.
Select Create a recording policy and configure the policy. Learn more.
Select Create and then publish the settings.
Step 6: Prepare Flex plugin to integrate the real-time experience
Flex is a React project and customizations that you make to the UI are created as plugin components.
Preparing a Node environment and setting up an empty Flex plugin are outside the scope of this documentation. Refer to Twilio's documentation for a step-by-step tutorial on creating your first Flex plugin.
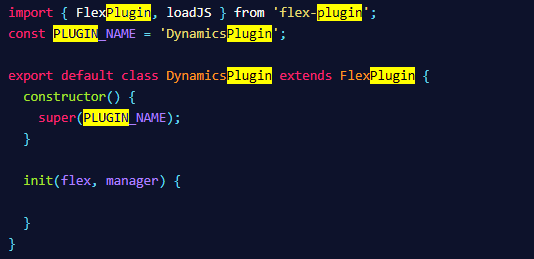
Create a fresh plugin that is ready for you to add your customization code for Dynamics.
At this point, your plugin JS file will look like this:
Add the Microsoft CIF Client library to your plugin. The client library must be loaded asynchronously when Flex launches, so add the following code to the Flex init function.
import React from 'react';
import \* as Flex from '@twilio/flex-ui';
import { FlexPlugin } from '@twilio/flex-plugin';
import reducers, { namespace } from './states';
const PLUGIN\_NAME = 'SamplePlugin';
export interface CallStartedEvent {
  callId: string;
  startTime: Date;
  isIncomingCall: boolean;
  contactNumber: string;
  contactName: string;
}

export interface CallEndedEvent {
  callId: string;
  callDurationInSeconds: number;
  callTerminationReason: string; // \['success', 'error'\]
  callEndTime: Date;
  isCallStarted: boolean;
}

export default class SamplePlugin extends FlexPlugin {
  constructor() {
    super(PLUGIN\_NAME);
  }
  /\*\*
   \* This code is run when your plugin is being started
   \* Use this to modify any UI components or attach to the actions framework
   \*
   \* @param flex { typeof Flex }
   \* @param manager { Flex.Manager }
   \*/
  async init(flex: typeof Flex, manager: Flex.Manager): Promise<void> {
    this.registerReducers(manager);
    this.loadCIF();
    flex.Actions.addListener('afterAcceptTask', (payload) => {
      const callStartedEvent : CallStartedEvent = {
        callId: payload.task.\_task.attributes.call\_sid,
        startTime: new Date(),
        isIncomingCall: true,
        contactName: payload.task.\_task.attributes.caller,
        contactNumber: payload.task.\_task.attributes.caller
      };
      // @ts-ignore
      Microsoft.CIFramework.raiseEvent('WIDGET\_CALL\_STARTED', callStartedEvent);
    });

    flex.Actions.addListener('afterCompleteTask', (payload) => {
      // @ts-ignore
      Microsoft.CIFramework.raiseEvent('WIDGET\_CALL\_ENDED', {
        callId: payload.task.\_task.attributes.call\_sid,
        callTerminationReason: 'success',
        callEndTime: new Date(),
        isCallStarted: true
      });
      const callEndedEvent : CallEndedEvent = {
        callId: payload.task.\_task.attributes.call\_sid,
        callEndTime: new Date(),
        callTerminationReason: 'success',
        isCallStarted: true
      };


      // @ts-ignore
      Microsoft.CIFramework.raiseEvent('WIDGET\_CALL\_ENDED', callEndedEvent);
    });

    const options: Flex.ContentFragmentProps = { sortOrder: -1 };
    flex.AgentDesktopView.Panel1.Content.add(<div key="SamplePlugin-component" >Hello Partner!</div>, options);
  }

  loadCIF = () => {
    const script = document.createElement("script");
    script.src = \`${window.location.ancestorOrigins\[0\]}/webresources/Widget/msdyn\_ciLibrary.js\`;
    script.setAttribute('data-crmurl', window.location.ancestorOrigins\[0\]);
    script.setAttribute('data-cifid', 'CIFMainLibrary');
    document.body.appendChild(script);
  }

  /\*\*

   \* Registers the plugin reducers
   \*
   \* @param manager { Flex.Manager }
   \*/
  private registerReducers(manager: Flex.Manager) {
    if (!manager.store.addReducer) {
      // eslint-disable-next-line
      console.error(\`You need FlexUI > 1.9.0 to use built-in redux; you are currently on ${Flex.VERSION}\`);
      return;
    }
    manager.store.addReducer(namespace, reducers);
  }
}
Publish the plugin.
We now have a Flex plugin that is ready for us to test!
Step 7: Test Dynamics 365 conversation intelligence and Flex integration
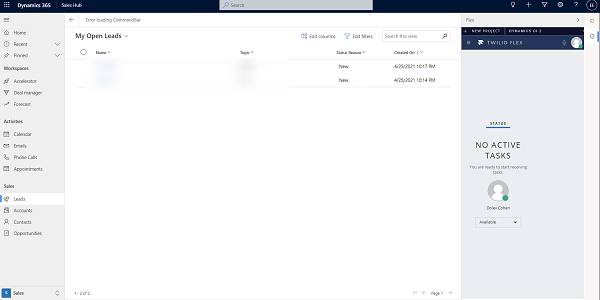
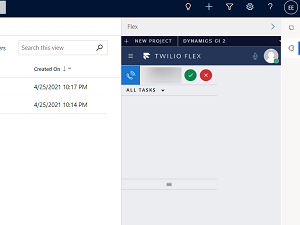
Log into the Sales Hub app, select the Call icon. You'll see Twilio Flex embedded in the right pane.
Make sure you've set your status as Available in Twilio and place a call to the Twilio Phone Number that you set up in the Step 4: Configure a Twilio phone number.
Once you answer the call and start recording, navigate to the Transcript tab to view real-time transcription and then view call insights in the Call Summary page after the call ends.