Note
Access to this page requires authorization. You can try signing in or changing directories.
Access to this page requires authorization. You can try changing directories.
Applies to:  Workforce tenants (learn more)
You can use an allowlist or a blocklist to allow or block invitations to B2B collaboration users from specific organizations. For example, if you want to block personal email address domains, you can set up a blocklist that contains domains like Gmail.com and Outlook.com. Or, if your business has a partnership with other businesses like Contoso.com, Fabrikam.com, and Litware.com, and you want to restrict invitations to only these organizations, you can add Contoso.com, Fabrikam.com, and Litware.com to your allowlist.
This article discusses two ways to configure an allow or blocklist for B2B collaboration:
- In the portal by configuring collaboration restrictions in your organization's External collaboration settings
Important considerations
- You can create either an allowlist or a blocklist. You can't set up both types of lists. By default, whatever domains aren't in the allowlist are on the blocklist, and vice versa.
- You can create only one policy per organization. You can update the policy to include more domains, or you can delete the policy to create a new one.
- The number of domains you can add to an allowlist or blocklist is limited only by the size of the policy. This limit applies to the number of characters, so you can have a greater number of shorter domains or fewer longer domains. The maximum size of the entire policy is 25 KB (25,000 characters), which includes the allowlist or blocklist and any other parameters configured for other features.
- This list works independently from OneDrive and SharePoint Online allow/block lists. If you want to restrict individual file sharing in SharePoint Online, you need to set up an allow or blocklist for OneDrive and SharePoint Online. For more information, see Restrict sharing of SharePoint and OneDrive content by domain.
- The list doesn't apply to external users who already redeemed the invitation. The list will be enforced after the list is set up. If a user invitation is in a pending state, and you set a policy that blocks their domain, the user's attempt to redeem the invitation fails.
- Both allow/block list and cross-tenant access settings are checked at the time of invitation.
Set the allow or blocklist policy in the portal
By default, the Allow invitations to be sent to any domain (most inclusive) setting is enabled. In this case, you can invite B2B users from any organization.
Important
Microsoft recommends that you use roles with the fewest permissions. This practice helps improve security for your organization. Global Administrator is a highly privileged role that should be limited to emergency scenarios or when you can't use an existing role.
Add a blocklist
This is the most typical scenario, where your organization wants to work with almost any organization, but wants to prevent users from specific domains to be invited as B2B users.
To add a blocklist:
Sign in to the Microsoft Entra admin center as a Global Administrator.
Browse to Entra ID > External Identities > External collaboration settings.
Under Collaboration restrictions, select Deny invitations to the specified domains.
Under Target domains, enter the name of one of the domains that you want to block. For multiple domains, enter each domain on a new line. For example:
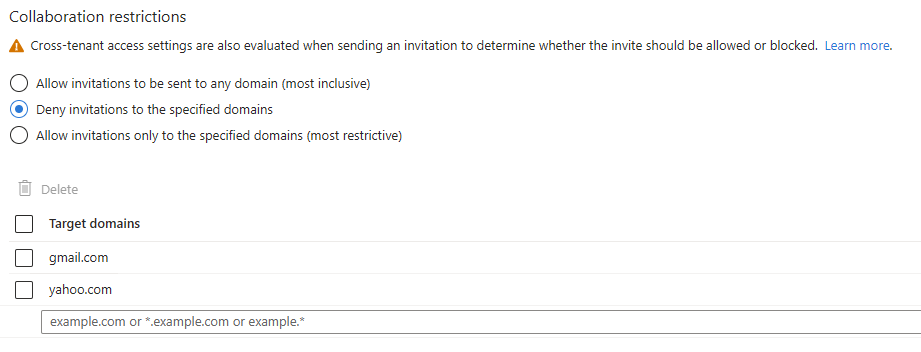
When you're done, select Save.
After you set the policy, if you try to invite a user from a blocked domain, you receive a message saying that the domain of the user is currently blocked by your invitation policy.
Add an allowlist
With this more restrictive configuration, you can set specific domains in the allowlist and restrict invitations to any other organizations or domains that aren't mentioned.
If you want to use an allowlist, make sure that you spend time to fully evaluate what your business needs are. If you make this policy too restrictive, your users can choose to send documents over email, or find other non-IT sanctioned ways of collaborating.
To add an allowlist:
Sign in to the Microsoft Entra admin center as a Global Administrator.
Browse to Entra ID > External Identities > External collaboration settings.
Under Collaboration restrictions, select Allow invitations only to the specified domains (most restrictive).
Under Target domains, enter the name of one of the domains that you want to allow. For multiple domains, enter each domain on a new line. For example:
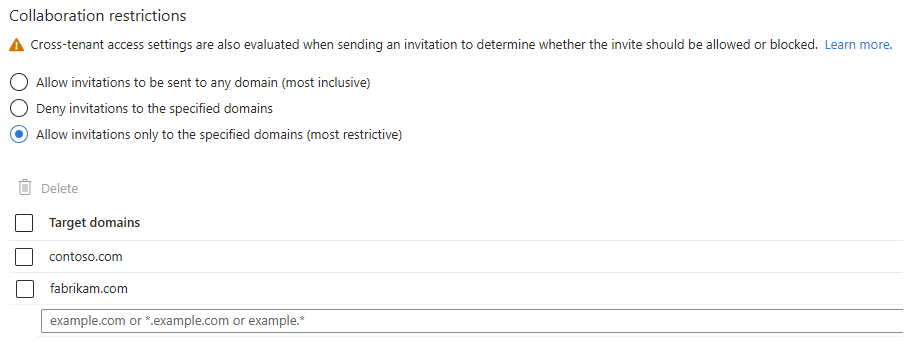
When you're done, select Save.
After you set the policy, if you try to invite a user from a domain that's not on the allowlist, you receive a message saying that the domain of the user is currently blocked by your invitation policy.
Switch from allowlist to blocklist and vice versa
Switching from one policy to another discards the existing policy configuration. Make sure to back up details of your configuration before you perform the switch.