Add multifactor authentication (MFA) to an app
Applies to:  Workforce tenants
  External tenants (learn more)
Multifactor authentication (MFA) adds a layer of security to your applications by requiring users to provide a second method for verifying their identity during sign-up or sign-in. External tenants support two methods for authentication as a second factor:
- Email one-time passcode: After the user signs in with their email and password, they are prompted for a passcode that is sent to their email. To allow the use of email one-time passcodes for MFA, set your local account authentication method to Email with password. If you choose Email with one-time passcode, customers who use this method for primary sign-in won't be able to use it for MFA secondary verification.
- SMS-based authentication: While SMS isn't an option for first factor authentication, it's available as a second factor for MFA. Users who sign in with email and password, email and one-time passcode, or social identities like Google or Facebook, are prompted for second verification using SMS. Our SMS MFA includes automatic fraud checks. If we suspect fraud, we'll ask the user to complete a CAPTCHA to confirm they're not a robot before sending the SMS code for verification. SMS is an add-on feature. Your tenant must be linked to an active, valid subscription. Learn more
This article describes how to enforce MFA for your customers by creating a Microsoft Entra Conditional Access policy and adding MFA to your sign-up and sign-in user flow.
Tip

To try out this feature, go to the Woodgrove Groceries demo and start the “Multi-factor authentication” use case.
Prerequisites
- A Microsoft Entra external tenant.
- A sign-up and sign-in user flow.
- An app that's registered in your external tenant and added to the sign-up and sign-in user flow.
- An account with at least the Security Administrator role to configure Conditional Access policies and MFA.
- SMS is an add-on feature and requires a linked subscription. If your subscription expires or is cancelled, end users will no longer be able to authenticate using SMS, which could block them from signing in depending on your MFA policy.
Create a Conditional Access policy
Create a Conditional Access policy in your external tenant that prompts users for MFA when they sign up or sign in to your app. (For more information, see Common Conditional Access policy: Require MFA for all users).
Sign in to the Microsoft Entra admin center as at least a Security Administrator.
If you have access to multiple tenants, use the Settings icon
 in the top menu to switch to your external tenant from the Directories + subscriptions menu.
Browse to Protection > Conditional Access > Policies, and then select New policy.
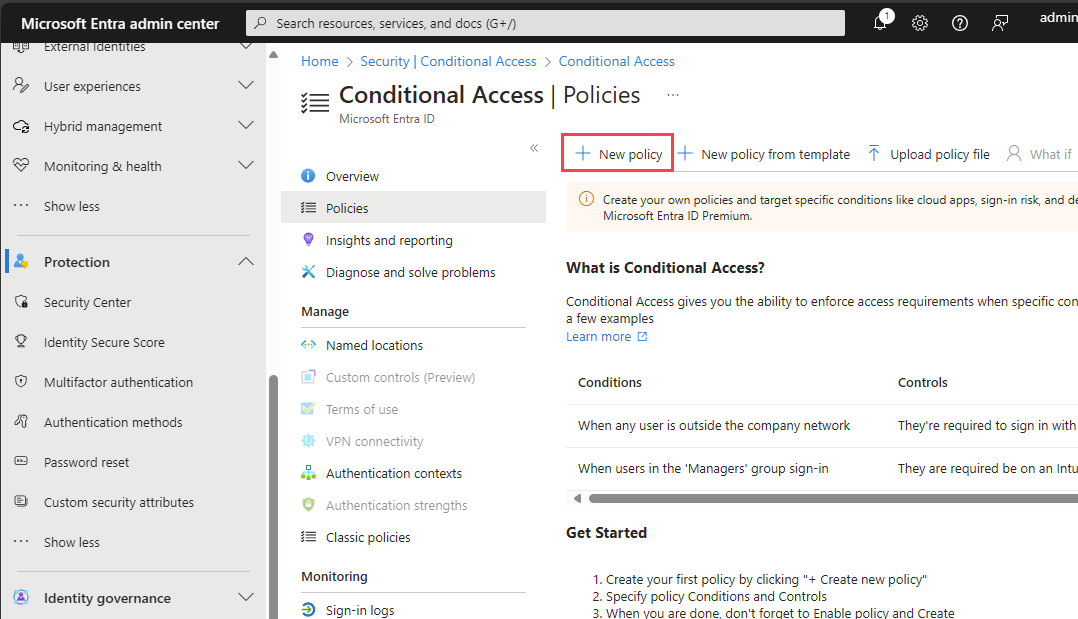
Give your policy a name. We recommend that organizations create a meaningful standard for the names of their policies.
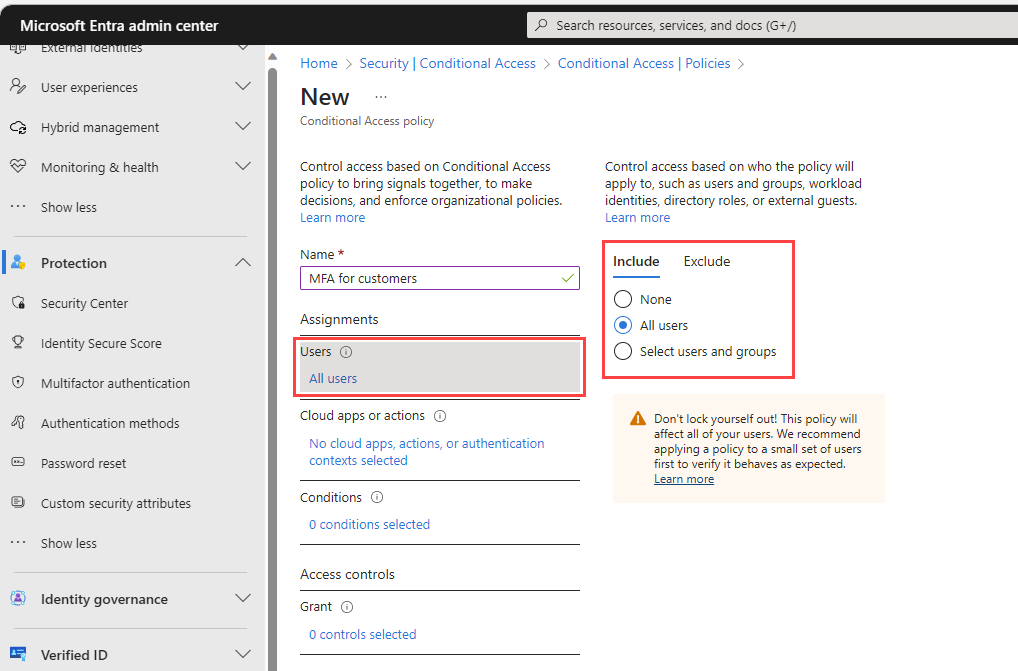
Under Assignments, select the link under Users.
a. On the Include tab, select All users.
b. On the Exclude tab, select Users and groups and choose your organization's emergency access or break-glass accounts. Then choose Select.
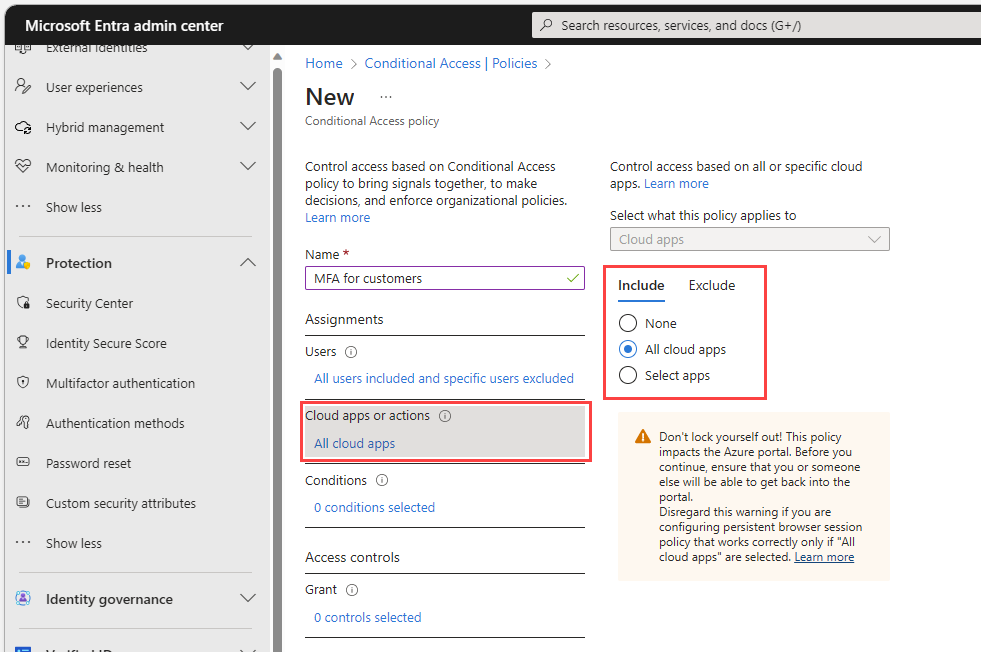
Select the link under Target resources.
a. On the Include tab, choose one of the following options:
Choose All cloud apps.
Choose Select apps and select the link under Select. Find your app, select it, and then choose Select.
b. On the Exclude tab, select any applications that don't require multifactor authentication.
Under Access controls select the link under Grant. Select Grant access, select Require multifactor authentication, and then choose Select.
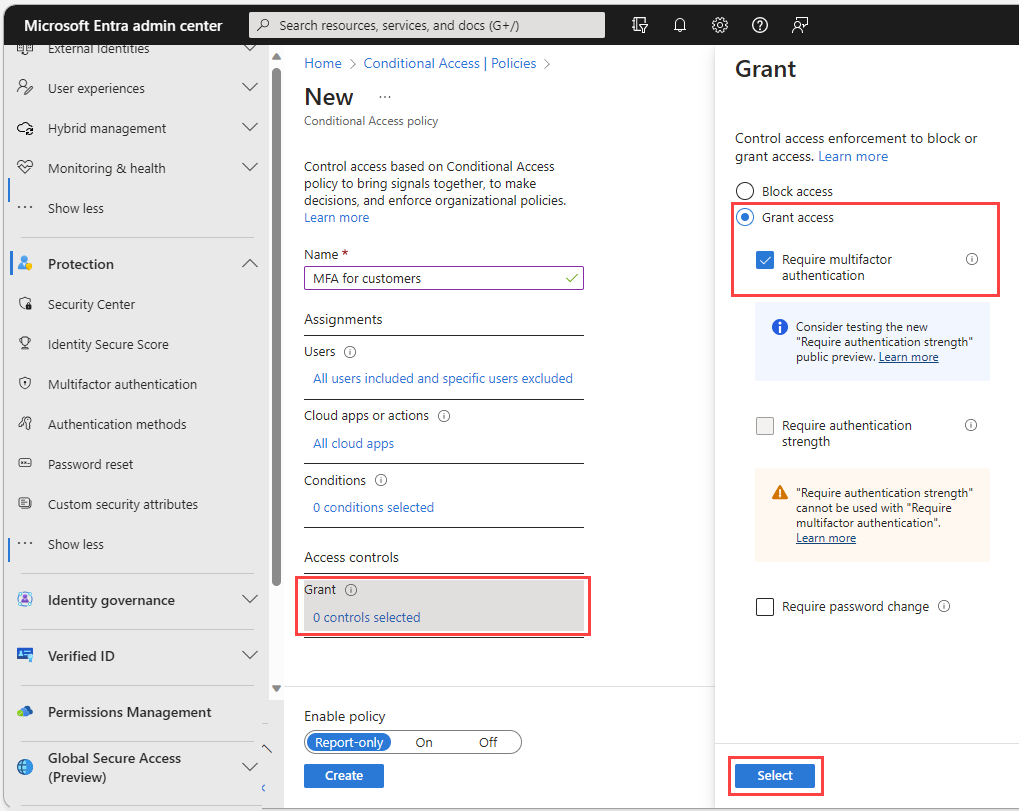
Confirm your settings and set Enable policy to On.
Select Create to create to enable your policy.


Enable email one-time passcode as an MFA method
Enable the email one-time passcode authentication method in your external tenant for all users.
Sign in to the Microsoft Entra admin center as at least a Security Administrator.
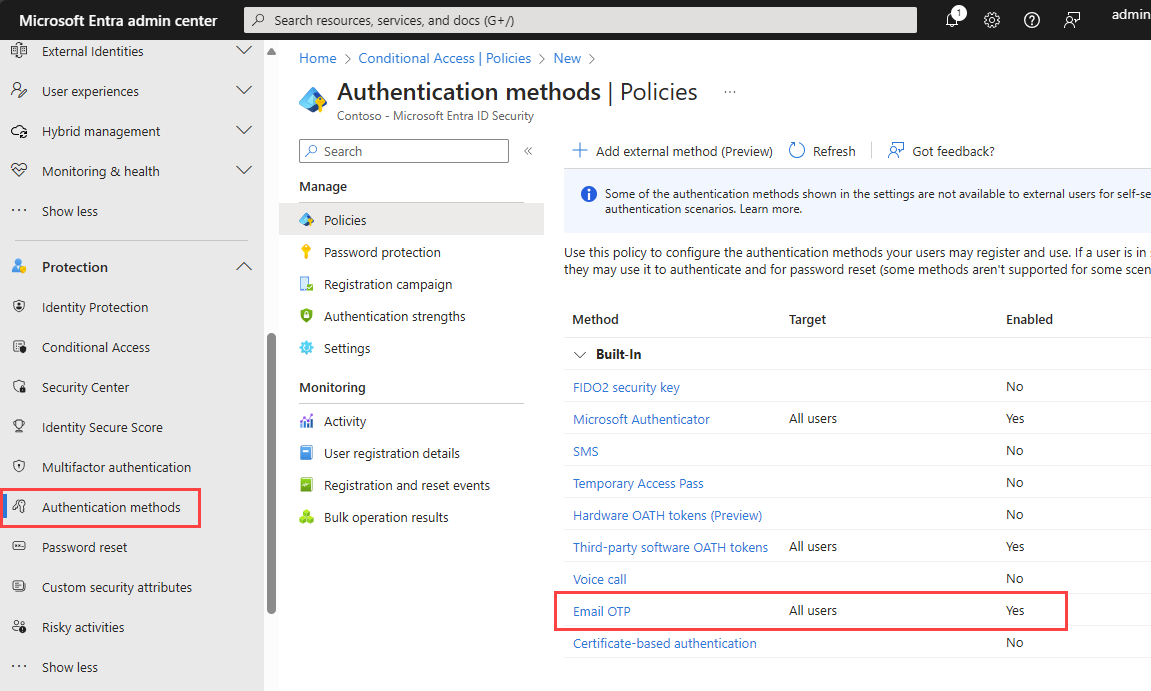
Browse to Protection > Authentication methods.
In the Method list, select Email OTP.
Under Enable and Target, turn the Enable toggle on.
Under Include, next to Target, select All users.

Select Save.


Enable SMS as an MFA method
Enable the SMS authentication method in your external tenant for all users.
Sign in to the Microsoft Entra admin center as at least a Security Administrator.
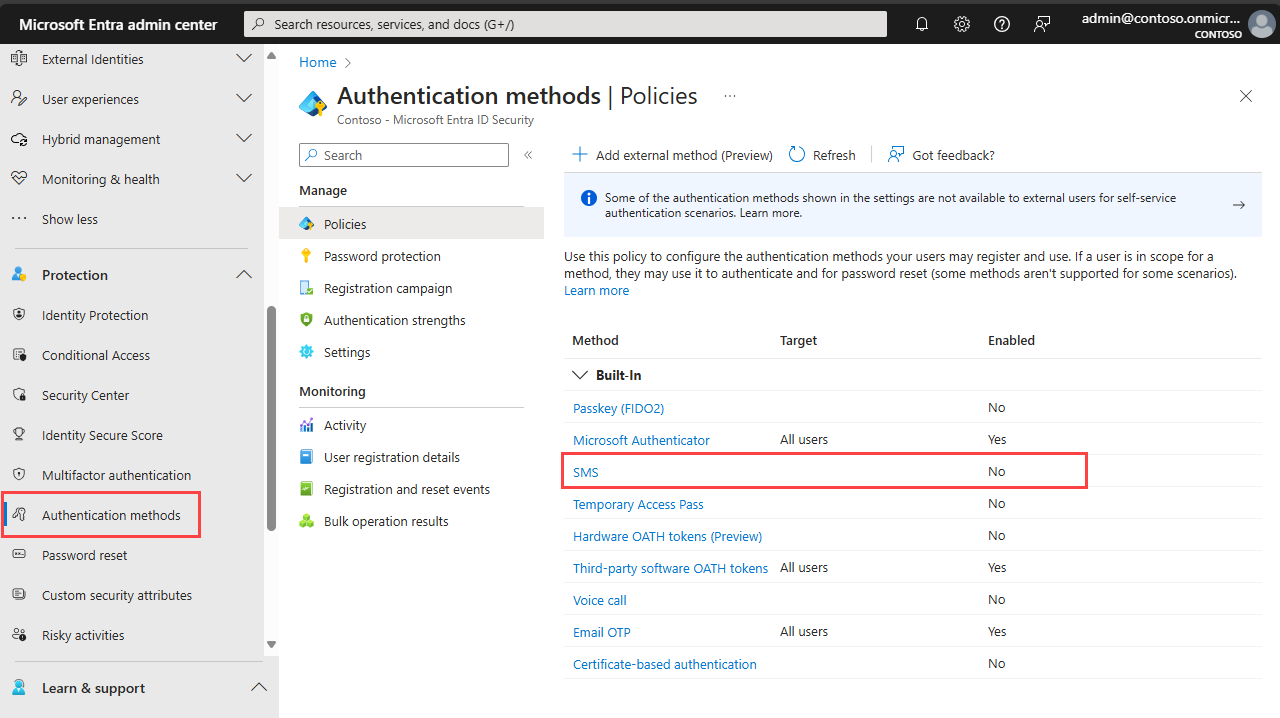
Browse to Protection > Authentication methods.
In the Method list, select SMS.
Under Enable and Target, turn the Enable toggle on.
Under Include, next to Target, select All users.
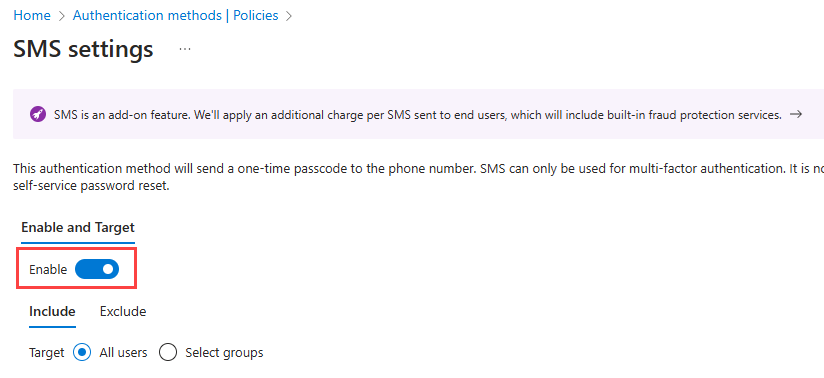
Select Save.


Test the sign-in
In a private browser, open your application and select Sign-in. You should be prompted for another authentication method.