Note
Access to this page requires authorization. You can try signing in or changing directories.
Access to this page requires authorization. You can try changing directories.
If you're tunneling your Microsoft traffic through the Global Secure Access service, you can assign remote networks to the traffic forwarding profile. Your end users can access Microsoft resources by connecting to the service from a remote network, such as a branch office location.
There are multiple ways to assign a remote network to the traffic forwarding profile:
- When you create or manage a remote network in the Microsoft Entra admin center
- When you enable or manage the traffic forwarding profile in the Microsoft Entra admin center
- Using the Microsoft Graph API
Prerequisites
To assign a remote network to a traffic forwarding profile to, you must have:
- A Global Secure Access Administrator role in Microsoft Entra ID.
- The product requires licensing. For details, see the licensing section of What is Global Secure Access. If needed, you can purchase licenses or get trial licenses.
Known limitations
For detailed information about known issues and limitations, see Known limitations for Global Secure Access.
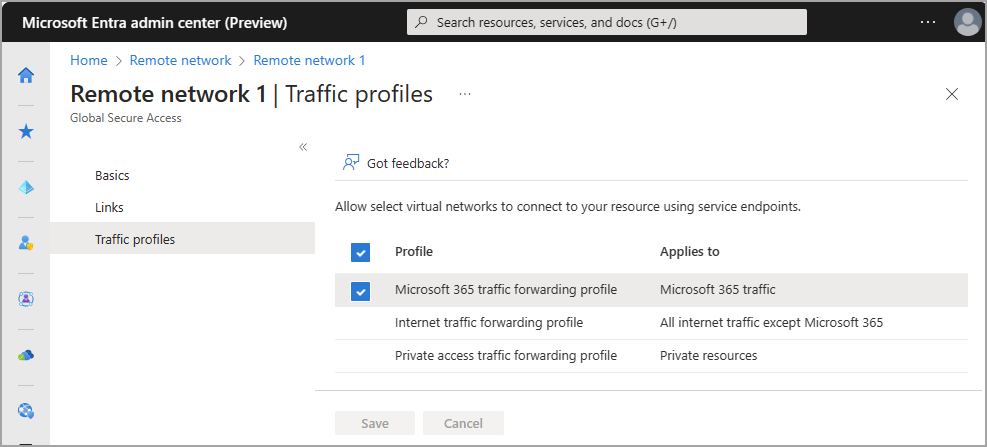
Assign the Microsoft traffic profile to a remote network
- Sign in to the Microsoft Entra admin center as a Global Secure Access Administrator.
- Browse to Global Secure Access > Connect > Remote networks.
- Select a remote network.
- Select Traffic profiles.
- Select (or unselect) the checkbox for Microsoft traffic forwarding profile.
- Select Save.
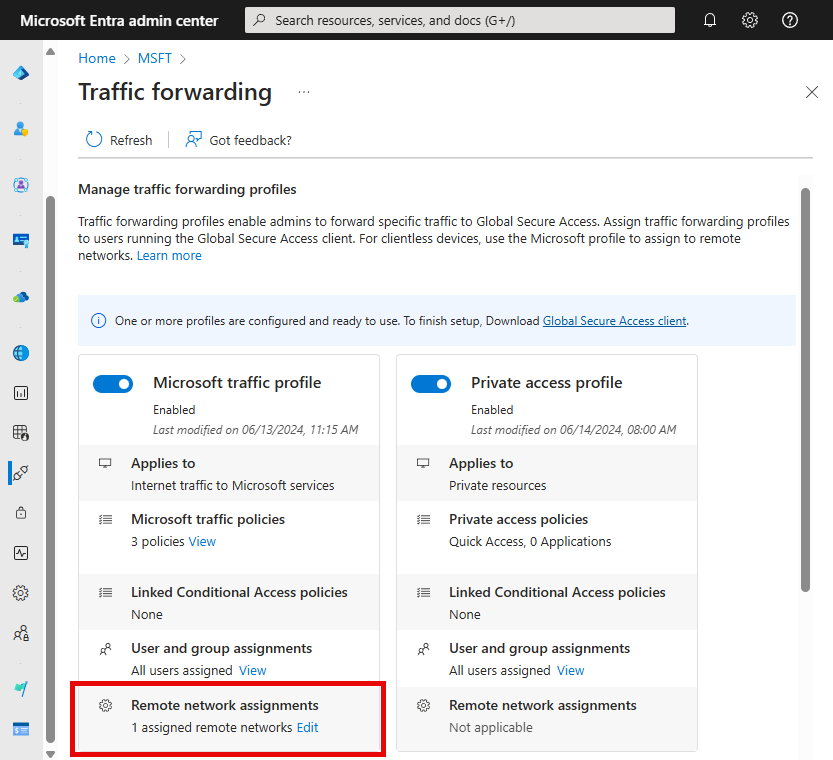
Assign a remote network to the Microsoft traffic forwarding profile
- Browse to Global Secure Access > Connect > Traffic forwarding.
- Select Add/edit assignments for Microsoft traffic profile.
Assign a traffic profile to a remote network using the Microsoft Graph API
Associating a traffic profile to your remote network using the Microsoft Graph API is two-step process. First, you need to get the traffic forwarding profile ID. This ID is unique for all tenants. With the traffic forwarding profile ID, you can assign the traffic forwarding profile with your remote network.
A traffic forwarding profile can be assigned using Microsoft Graph on the /beta endpoint.
- Open a web browser and navigate to Graph Explorer at https://aka.ms/ge.
- Select GET as the HTTP method from the dropdown.
- Select the API version to beta.
- Enter the query.
GET https://graph.microsoft.com/beta/networkaccess/forwardingprofiles - Select Run query.
- Find the ID of the desired traffic forwarding profile.
- Select PATCH as the HTTP method from the dropdown.
- Enter the query.
PATCH https://graph.microsoft.com/beta/networkaccess/branches/d2b05c5-1e2e-4f1d-ba5a-1a678382ef16/forwardingProfiles { "@odata.context": "#$delta", "value": [{ "ID": "00aa00aa-bb11-cc22-dd33-44ee44ee44ee" }] } - Select Run query to update the branch.