Note
Access to this page requires authorization. You can try signing in or changing directories.
Access to this page requires authorization. You can try changing directories.
Important
The Explicit Forward Proxy feature is currently in preview. This information relates to a prerelease product that might be substantially modified before release. Microsoft makes no warranties, expressed or implied, with respect to the information provided here.
Global Secure Access (GSA) Explicit Forward Proxy (EFP) automatically generates a Proxy Automatic Configuration (PAC) file that routes traffic through the service with recommended settings. If you need more control over proxy routing decisions, you can host your own custom PAC files.
Custom PAC files allow you to:
- Exclude specific hosts or IP ranges from Explicit Forward Proxy traffic acquisition.
- Route traffic to different proxies based on URL patterns or destination hosts for coexistence with your existing proxy solutions.
- Implement proxy logic relevant to your organization.
Prerequisites
- A Global Secure Access license. For more information about licensing, see Global Secure Access licensing.
- An administrator account with the Global Secure Access Administrator role.
- Explicit Forward Proxy enabled and configured in your tenant.
Create a custom PAC file
Sign in to the Microsoft Entra Admin Center as at least a Global Secure Access Administrator.
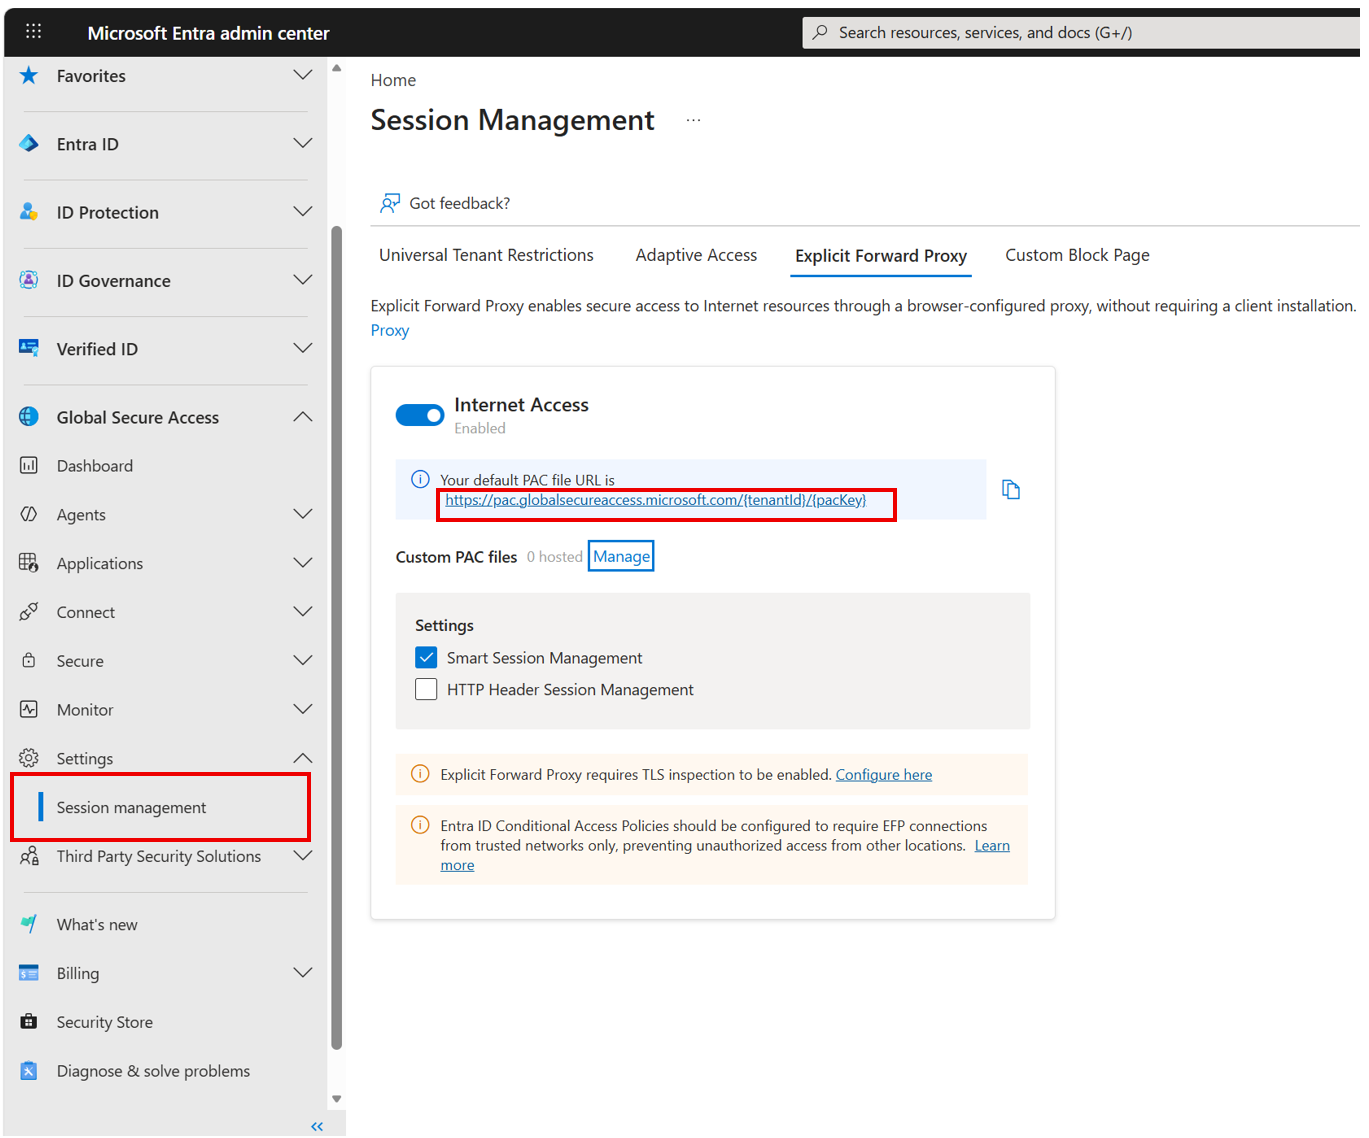
Browse to Global Secure Access > Connect > Session Management.
Select the Explicit Forward Proxy tab.
In the Internet Access section, select the link to download the default PAC file for your tenant.
Open the downloaded PAC file in a text editor.
Delete lines that start with "var tenantId" and "var efpEndpoint".
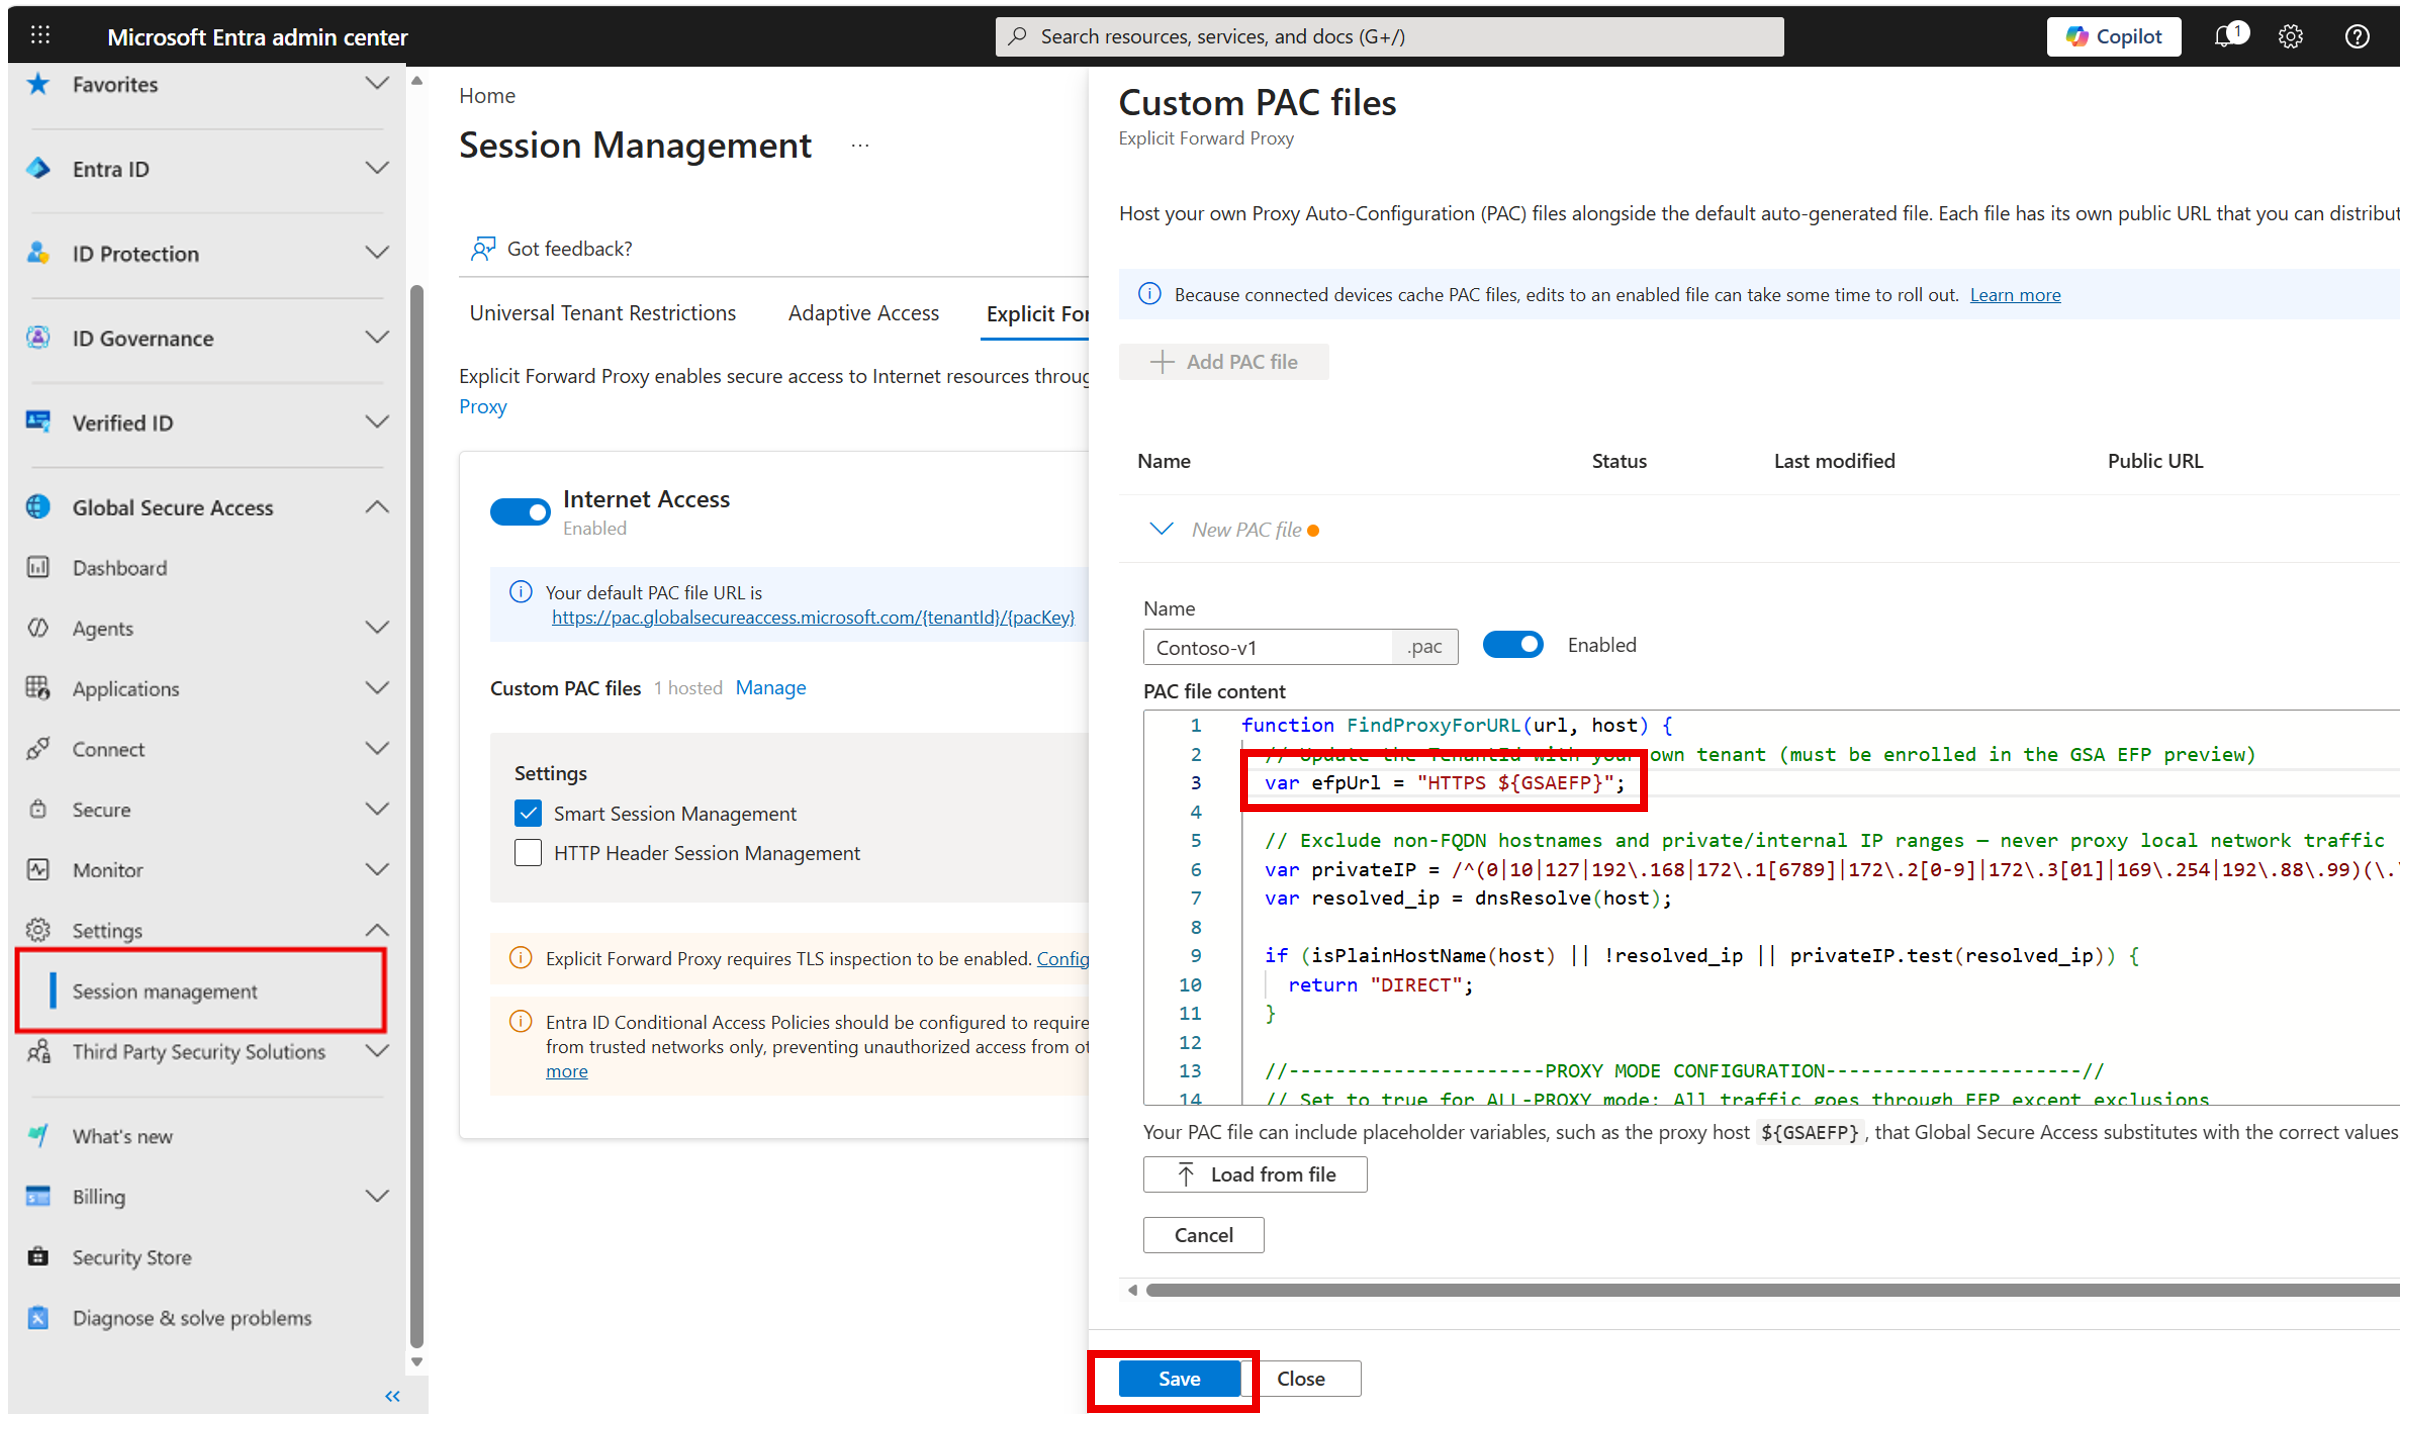
Update the line that starts with "var efpURL" to the following code:
var efpURL = "HTTPS ${GSAEFPP}";Make your modifications to implement your custom PAC file logic. Always use the ${GSAEFP} variable when you reference the EFP proxy endpoint.
Save the PAC file with a *.pac extension.
Next to Custom PAC files, select Manage.
Select + Add PAC file.
Enter a unique Name for the PAC file. The
.pacextension is appended automatically.Select Load from file. In the file picker dialog box, find the custom PAC file you modified and select it.
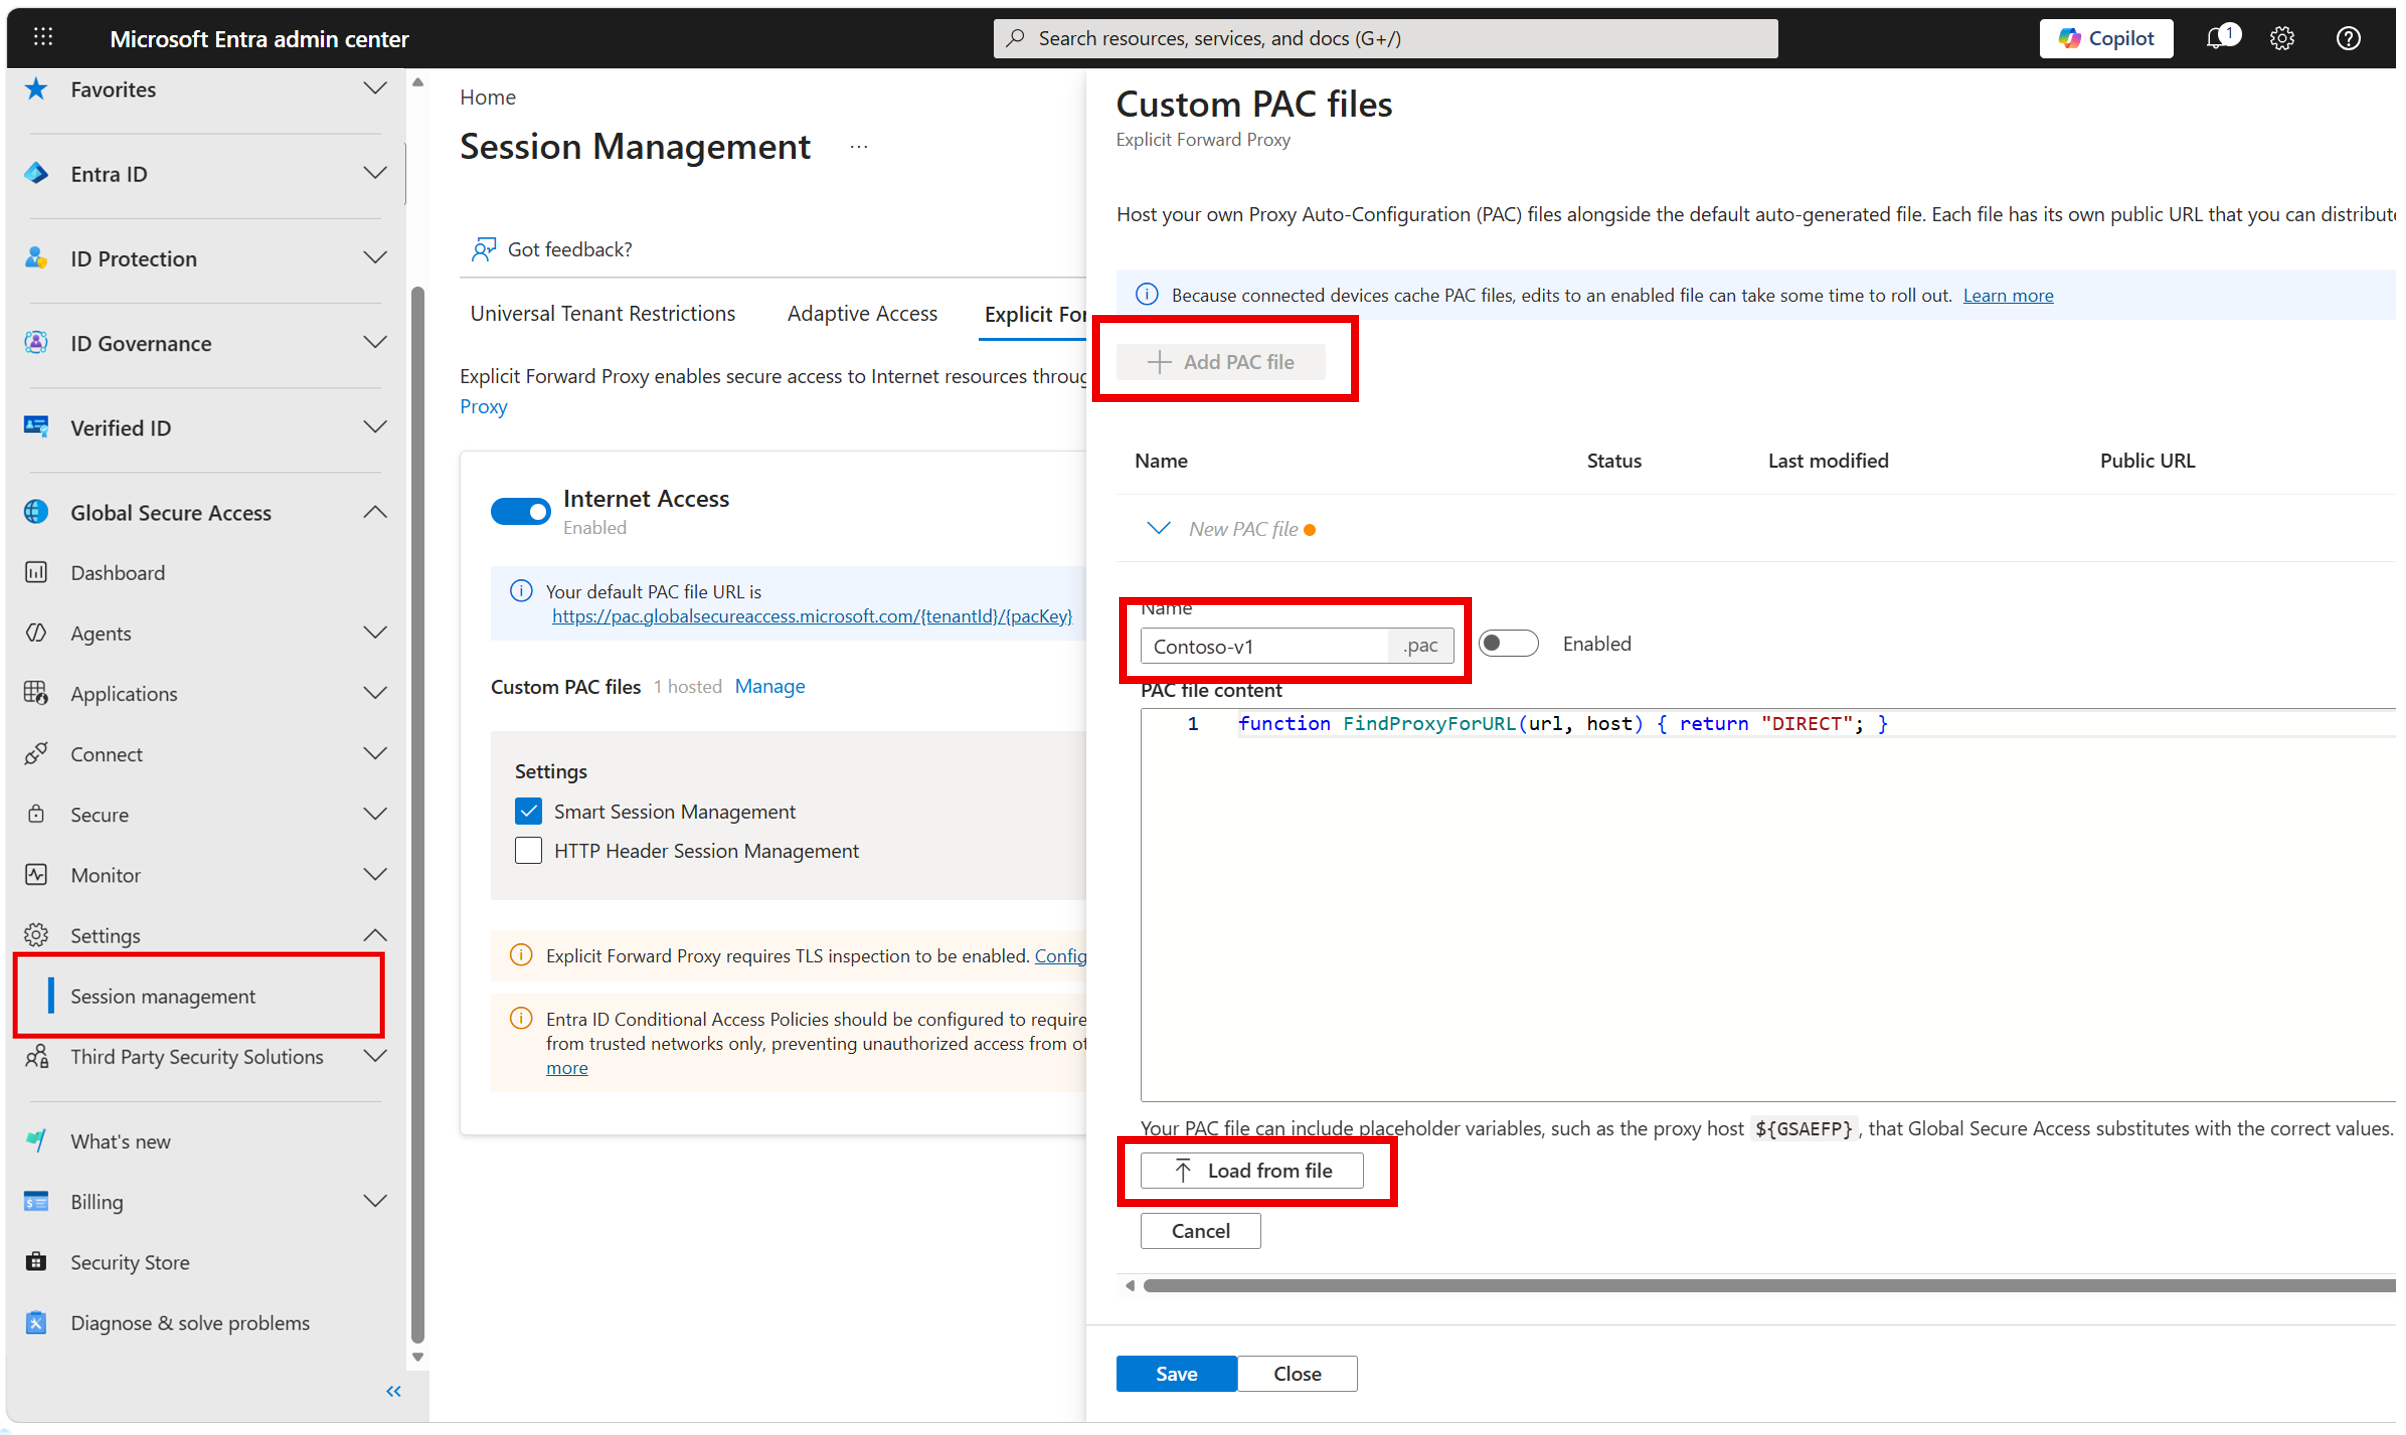
Set the Enabled toggle to On when you're ready to make the file available to devices.
Select Save.
Edit a custom PAC file
- In the Custom PAC files panel, select the PAC file you want to edit.
- Make your changes in the editor.
- Select Save.
Important
Connected devices cache PAC files. Edits to an enabled file can take some time to roll out to all devices using the file.
Enable or disable a custom PAC file
You can enable or disable a custom PAC file without deleting it:
- In the Custom PAC files panel, select the PAC file.
- Toggle the Enabled switch on or off.
- Select Save.
When a PAC file is disabled, users with browsers that are configured with the URL of that PAC could experience issues with accessing resources. Ensure that browser PAC file settings are reconfigured before you disable existing PAC files.
PAC file placeholder variables
Global Secure Access provides placeholder variables that are substituted with the correct values when the PAC file is served to devices. Variable values are replaced contextually at the time when the browser requests the PAC file.
| Variable | Description |
|---|---|
${GSAEFP} |
The Explicit Forward Proxy hostname for your tenant. To route traffic through GSA EFP, use this variable in PROXY or HTTPS return statements. |
Considerations and limitations
- Caching: Connected devices cache PAC files. When you edit an enabled PAC file, changes might take time to propagate to all devices.
- Maximum PAC file size: you can upload files that are up to 950 KB in size. Larger PAC files take longer to load and we recommend that you avoid exceeding 250 KB for each PAC file.
- Maximum number of PAC files: you can have up to 20 PAC files hosted in your tenant.